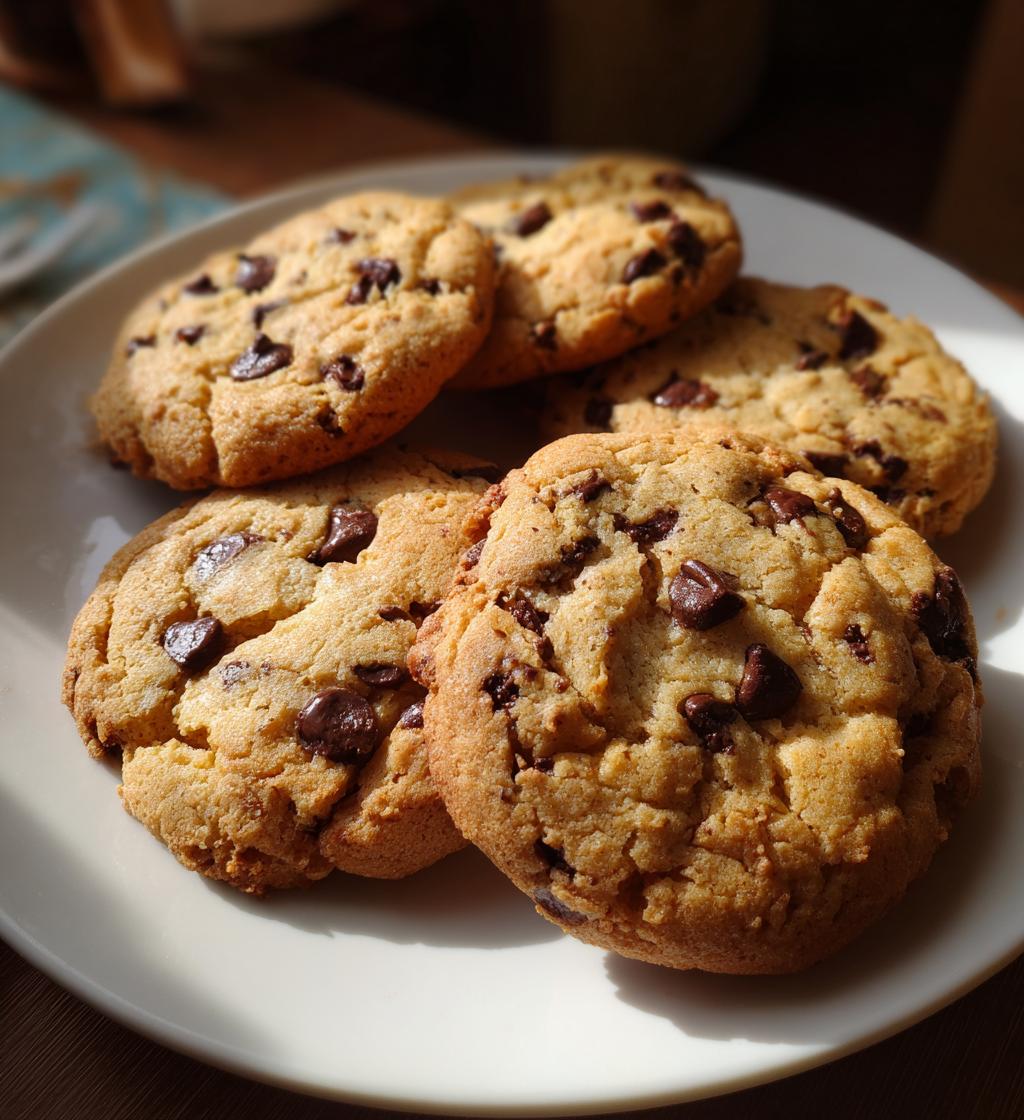
Ah, chocolate chip cookies! Is there anything better? I can’t help but feel a wave of joy wash over me every time I bake a batch. The smell of cookies baking in the oven is like a warm hug for your senses, and the moment you pull them out, golden and slightly gooey, it’s pure magic. What I absolutely adore about these chocolate chip cookies is not just their mouthwatering taste but their aesthetic appeal. With soft, melty chocolate chips peeking through a perfectly baked, golden-brown exterior, they’re practically a work of art!
Whether you’re baking for a cozy night in or a gathering with friends, these cookies bring comfort and joy. Trust me, the first bite is a delightful explosion of sweet, buttery goodness that makes all the effort worthwhile. Plus, they’re super easy to whip up, making them the perfect go-to recipe for any occasion. I love how they can be enjoyed warm right out of the oven or stored for later—if they last that long! So, let’s dive into this delicious adventure together and create some stunning chocolate chip cookies that not only taste amazing but look incredible too!
Ingredients List
- 2 1/4 cups all-purpose flour
- 1/2 teaspoon baking soda
- 1 cup unsalted butter, softened
- 1/2 cup granulated sugar
- 1 cup packed brown sugar
- 1 teaspoon salt
- 2 teaspoons vanilla extract
- 2 large eggs
- 2 cups semi-sweet chocolate chips
How to Prepare Chocolate Chip Cookies Aesthetic
Preheat and Mix
First things first, you’ve got to preheat your oven to 350°F (175°C). This step is crucial because it ensures your cookies bake evenly from the moment you place them in. While that oven is warming up, grab a mixing bowl and whisk together your dry ingredients: the all-purpose flour and baking soda. I like to do this for about 2 minutes to make sure everything’s well combined. This simple step helps avoid any lumps and ensures a smooth batter later on.
Creaming the Mixture
Now, let’s get to the heart of cookie-making: creaming the butter and sugars! In a separate large bowl, add your softened unsalted butter, granulated sugar, brown sugar, and salt. Using a hand mixer or a sturdy wooden spoon, beat this mixture until it’s light and fluffy—about 2 to 3 minutes. You want that lovely, creamy texture that looks almost like whipped honey. This is where the magic happens; it creates air pockets that give your cookies that perfect melt-in-your-mouth quality!
Combining Ingredients
Once your butter and sugars are all creamed together beautifully, it’s time to add the eggs and vanilla extract. Crack those two large eggs right in and pour in the vanilla. Mix them in until just combined; you don’t want to overdo it here. Next, gradually add the flour mixture to the wet ingredients. I usually do this in three parts, mixing gently after each addition until you can barely see the flour. This keeps the dough light and fluffy—just how we want it!
Forming and Baking Cookies
Now for the fun part—forming those cookies! Using a tablespoon, scoop rounded portions of dough and drop them onto your baking sheets lined with parchment paper. Make sure to leave enough space between each scoop; they’ll spread a bit while baking. Bake them in the preheated oven for about 10 to 12 minutes. You’ll know they’re ready when the edges turn a lovely golden brown but the centers still look a little soft. Trust me, they’ll firm up as they cool!
Cooling and Storing
Once they’re out of the oven, let your cookies cool on the baking sheets for about 5 minutes. This waiting period is essential; it allows them to set just right. After that, gently transfer them to wire racks to cool completely. If you can resist, let them cool for a bit longer—the flavors deepen as they sit. For storage, keep your cookies in an airtight container at room temperature. They’ll stay fresh for several days, though I doubt they’ll last that long once your family catches a whiff of them!
Why You’ll Love This Recipe
- Quick and Easy: You can whip up a batch of these chocolate chip cookies in under 30 minutes! Perfect for when you need a sweet treat in a hurry.
- Visually Appealing: With their golden edges and melty chocolate chips, these cookies not only taste incredible but also look absolutely stunning on any dessert platter.
- Delicious Flavor: Each bite is a wonderful blend of buttery goodness and rich chocolate, creating a mouthwatering experience that’s hard to resist.
- Customizable: You can easily tweak this recipe by adding nuts, different types of chocolate, or even a sprinkle of sea salt for that extra flavor kick.
- Perfect for Any Occasion: Whether it’s a casual get-together, a cozy night in, or just a treat for yourself, these cookies fit any occasion beautifully.
Tips for Success
Creating the perfect chocolate chip cookies aesthetic is all about the little details, and I’ve got some tried-and-true tips to ensure your cookies turn out just right every time!
Watch Your Dough Consistency
The texture of your cookie dough is crucial! You want it to be soft but not too sticky. If it feels a bit too wet after adding the flour, don’t hesitate to sprinkle in a tiny bit more flour—just a tablespoon at a time. This will help you achieve that lovely dough that holds its shape while baking!
Experiment with Baking Time
Every oven is a little different, so keep an eye on your cookies as they bake. If you prefer a chewier cookie, pull them out right around the 10-minute mark. For a crispier version, let them go a minute or two longer, but watch those edges! They should be golden brown while the center remains soft and slightly underbaked. The residual heat will finish them off perfectly.
Chill Your Dough for Extra Flavor
If you’ve got the time, try chilling your dough for at least 30 minutes before baking. This step allows the flavors to meld beautifully and helps prevent spreading, giving you thicker, more aesthetically pleasing cookies. Plus, it makes the chocolate chips pop more visually after baking!
Mix Up Your Chocolate Choices
While semi-sweet chocolate chips are a classic, don’t be afraid to mix it up! Try swapping in some dark chocolate chips for a rich, bold flavor, or add white chocolate chips for a fun contrast. You can also toss in some chopped nuts or toffee bits for added crunch and flavor variations that make each batch unique!
Consider Your Toppings
For that extra aesthetic appeal, sprinkle a pinch of sea salt on top of your cookies right before baking. It creates a beautiful contrast with the sweetness and enhances the overall flavor. You can even drizzle a little melted chocolate on top after they cool for a stunning presentation that’s sure to impress!
By keeping these tips in mind, you’ll be well on your way to baking chocolate chip cookies that not only taste amazing but look incredibly inviting too. Happy baking!
Variations
One of the best things about chocolate chip cookies is how versatile they are! You can easily customize this recipe to suit your taste or to keep things fresh and exciting. Here are some delicious variations to consider:
Different Types of Chocolate Chips
While semi-sweet chocolate chips are a classic, why not mix it up? Try using dark chocolate chips for a rich and indulgent flavor. If you’re feeling adventurous, go for milk chocolate chips for a sweeter experience. You can even combine different types of chocolate—like semi-sweet and white chocolate—for a beautiful contrast that’s not just tasty but visually stunning!
Add Some Nuts
Nuts can add a lovely crunch and depth of flavor to your cookies. Chopped walnuts or pecans are fantastic options that pair beautifully with chocolate. Just be sure to toast them lightly before adding them to the dough for an extra boost of flavor. If you’re a fan of almond flavor, try adding sliced almonds for a delightful twist!
Incorporate Spices
Spices can elevate your chocolate chip cookies to a whole new level. Consider mixing in a pinch of cinnamon or nutmeg for warmth and depth. If you’re feeling festive, a dash of pumpkin spice can really make your cookies shine during the fall season. Just remember, a little goes a long way!
Try Different Extracts
Vanilla is a classic, but why not experiment with other extracts? Almond extract adds a lovely nutty flavor that complements the chocolate beautifully. Coconut extract can give your cookies a tropical twist, or even a splash of orange extract for a refreshing, zesty touch!
Make Them Gluten-Free
If you’re looking to make these cookies gluten-free, simply swap the all-purpose flour for a 1:1 gluten-free baking blend. Just check the label to ensure it contains xanthan gum, which helps with texture. You won’t miss the gluten one bit!
With these variations, you can create chocolate chip cookies that not only taste amazing but also cater to your cravings or dietary needs. So go ahead, get creative, and make these cookies your own! Happy baking!
Nutritional Information
When it comes to chocolate chip cookies, it’s always good to have a rough idea of what you’re indulging in, right? Here’s an estimated nutritional breakdown for one cookie, based on standard ingredient usage:
- Calories: 150
- Fat: 7g
- Saturated Fat: 4g
- Unsaturated Fat: 2g
- Trans Fat: 0g
- Cholesterol: 20mg
- Sodium: 100mg
- Carbohydrates: 20g
- Fiber: 1g
- Sugar: 10g
- Protein: 2g
Keep in mind that these values can vary based on the specific brands and measurements of ingredients you use. But hey, a cookie now and then is all about enjoyment, right? So, indulge a little, and savor every bite!
FAQ Section
Q1: How should I store my chocolate chip cookies to keep them fresh?
To maintain that delightful softness, store your cookies in an airtight container at room temperature. You can also add a slice of bread to the container; it helps keep the cookies moist! Just remember to enjoy them within a week—though I doubt they’ll last that long!
Q2: Can I substitute the all-purpose flour for a gluten-free option?
Absolutely! Just swap the all-purpose flour with a 1:1 gluten-free baking blend. Make sure it has xanthan gum in it to help with the texture. You won’t miss the gluten, I promise!
Q3: What can I use instead of unsalted butter?
If you find yourself out of unsalted butter, you can use salted butter but reduce the added salt in the recipe by about half. Alternatively, coconut oil or a vegan butter substitute works well too, though the flavor may be slightly different.
Q4: My cookies are turning out too flat. What am I doing wrong?
Flat cookies often result from melted butter or not enough flour in the dough. Make sure your butter is softened but not melted, and if your dough seems too wet, add a tablespoon of flour at a time until you reach the right consistency. Chilling the dough for at least 30 minutes can also help them hold their shape better!
Q5: Can I freeze the cookie dough for later use?
Yes! Freezing cookie dough is a fantastic idea. Just scoop out the dough into balls and place them on a baking sheet to freeze for about an hour. Once frozen, transfer them to a zip-top bag. When you’re ready to bake, there’s no need to thaw—just add a couple of extra minutes to the baking time. Fresh cookies anytime you want!
chocolate chip cookies aesthetic: 7 Tips for Baking Perfection
- Total Time: 27 minutes
- Yield: 24 cookies 1x
- Diet: Vegetarian
Description
Delicious chocolate chip cookies with an aesthetic appeal.
Ingredients
- 2 1/4 cups all-purpose flour
- 1/2 teaspoon baking soda
- 1 cup unsalted butter, softened
- 1/2 cup granulated sugar
- 1 cup packed brown sugar
- 1 teaspoon salt
- 2 teaspoons vanilla extract
- 2 large eggs
- 2 cups semi-sweet chocolate chips
Instructions
- Preheat oven to 350°F (175°C).
- Whisk together flour and baking soda in a bowl.
- In another bowl, cream butter, granulated sugar, brown sugar, and salt.
- Add vanilla and eggs to the butter mixture, mixing well.
- Gradually mix in the flour mixture.
- Fold in chocolate chips.
- Drop rounded tablespoons of dough onto baking sheets.
- Bake for 10-12 minutes until edges are golden.
- Cool on baking sheets for 5 minutes, then transfer to wire racks.
Notes
- Store cookies in an airtight container.
- For a crispier cookie, bake a minute longer.
- Use different types of chocolate chips for variety.
- Prep Time: 15 minutes
- Cook Time: 12 minutes
- Category: Dessert
- Method: Baking
- Cuisine: American
Nutrition
- Serving Size: 1 cookie
- Calories: 150
- Sugar: 10g
- Sodium: 100mg
- Fat: 7g
- Saturated Fat: 4g
- Unsaturated Fat: 2g
- Trans Fat: 0g
- Carbohydrates: 20g
- Fiber: 1g
- Protein: 2g
- Cholesterol: 20mg
Keywords: chocolate chip cookies aesthetic