
Ah, the holiday season! It’s that magical time of year when the air is filled with the scent of pine, and our hearts are bursting with joy. Nothing brings a smile quite like the delight of giving and receiving homemade gifts, especially when they’re as colorful and cheerful as *christmas candy gifts*. I absolutely love making these sweet treats to share with family and friends. They’re not just candies; they’re little morsels of love wrapped in festive colors that say, “I care!”
Imagine the excitement as you pour the bright red and green mixtures into molds, watching them transform into beautiful shapes. The best part? These candies are perfect for all ages, and everyone loves a sweet surprise during the holiday festivities. Whether you’re tucking them into gift bags, adorning your holiday table, or simply enjoying them yourself, they’re sure to spread joy and sweetness all around. Get ready to embrace the spirit of giving with these delightful homemade treats!
Ingredients List
To create these delightful *christmas candy gifts*, you’ll need just a few simple ingredients. Here’s what you’ll need:
- 2 cups granulated sugar
- 1/2 cup light corn syrup
- 1/2 cup water
- 1/2 teaspoon salt
- 1 teaspoon vanilla extract
- Red and green food coloring
- Assorted candy molds
These ingredients come together to create a sweet, colorful treat that’s perfect for sharing. Trust me, the combination of sugar and corn syrup is what gives these candies that delightful crunch! And don’t forget to grab some festive molds to make your candies as visually appealing as they are tasty!
How to Prepare Instructions
Now, let’s get into the fun part—making these delightful *christmas candy gifts*! Follow these simple steps, and you’ll be on your way to creating candy that’s as festive as it is delicious.
Step 1: Combine Ingredients
Start by grabbing a medium saucepan. You’ll want to combine 2 cups of granulated sugar, 1/2 cup of light corn syrup, 1/2 cup of water, and 1/2 teaspoon of salt. Stir everything together gently until it’s well mixed. This is your base, and it’s super important to get this step just right!
Step 2: Boil the Mixture
Next, place your saucepan over medium heat. You’ll want to bring the mixture to a boil. Keep stirring until the sugar is completely dissolved—this is key! Once it’s dissolved, stop stirring and let it boil without interruption. This helps it reach the right consistency for candy. Just keep an eye on it!
Step 3: Hard Crack Stage
Now, here comes the important part: monitoring the temperature! You need to boil the mixture until it reaches 300°F, which is known as the hard crack stage. This is crucial because it determines the candy’s texture. If you don’t have a candy thermometer, you can do the “cold water test.” Just drop a little bit of the mixture into a glass of cold water; if it forms hard, brittle threads, you’re ready to go!
Step 4: Add Flavor
Once you hit that magical temperature, carefully remove the saucepan from the heat. This is where the magic happens! Stir in 1 teaspoon of vanilla extract. The aroma will be heavenly, trust me! Just be careful, as the mixture will be extremely hot. Stir until it’s well incorporated.
Step 5: Add Color
Now, let’s bring some festive cheer into your candy! Divide the mixture into two bowls. In one bowl, add a few drops of red food coloring, and in the other, go for green. Mix each bowl until the colors are vibrant and beautiful. You’ll love watching the colors come to life!
Step 6: Molding the Candy
Time to pour the colored mixtures into your candy molds! I highly recommend using silicone molds; they make it so easy to pop the candies out once they’re set. Carefully pour your red and green mixtures into the molds, filling them up but not overflowing. It’s like creating little edible masterpieces!
Step 7: Cooling and Packaging
Once you’ve filled the molds, let the candies cool completely. This usually takes about 30 minutes, but I suggest checking if they’re firm to the touch. When they’re ready, gently remove them from the molds. They’ll pop out easily if you used silicone! Now, package them in decorative bags or boxes, and don’t forget to tie them up with some festive ribbons. They’re perfect for gifting or displaying on your holiday table!
Why You’ll Love This Recipe
Let me tell you, making these *christmas candy gifts* is a total game changer during the holiday season! First off, the preparation is super quick—just about 30 minutes from start to finish. You won’t believe how easy it is to whip up a batch of these colorful treats! The steps are straightforward, so even if you’re not a seasoned candy maker, you’ll find this recipe so approachable.
The flavors? Oh wow, they’re simply delightful! The sweet crunch of the candy combined with that hint of vanilla is just heavenly. And let’s not forget the festive colors! They’re not just candy; they’re little bursts of joy that light up any holiday gathering.
These candies are absolutely perfect for gifting too. Imagine the smiles on your friends’ and family’s faces when they receive a beautifully packaged bag of homemade candy. It adds such a personal touch that store-bought treats just can’t compete with! Plus, making them is a fun holiday activity you can enjoy with kids or friends, creating cherished memories while stirring up sweetness in the kitchen. Trust me, once you try this recipe, it’ll become a holiday tradition you look forward to every year!
Tips for Success
Ready to become a candy-making pro? Here are my top tips to ensure your *christmas candy gifts* turn out perfectly every time!
Monitor the Temperature Closely
This is the golden rule of candy making! Make sure you keep a close eye on your thermometer (or use the cold water test). If the mixture goes even slightly over 300°F, it can become too hard, and you’ll miss that delightful crunch. On the flip side, if it doesn’t reach that temperature, your candies could end up too soft!
Use Silicone Molds for Easy Removal
I can’t recommend silicone molds enough! They’re a total game changer. Not only do they come in all sorts of festive shapes, but they also allow for easy removal once the candy has cooled. No more wrestling with hard plastic molds! Just gently flex the silicone, and your beautiful candies will pop right out.
Get Creative with Colors and Shapes
Feel free to get creative! Try mixing colors for a marbled effect or using seasonal molds like stars, trees, or snowflakes. It’s all about making your candies as fun and festive as possible. Trust me, the kids will love helping out with this part!
Keep Your Workspace Clean
Candy making can get a bit sticky, so keep a damp cloth handy to wipe up any spills right away. This not only keeps your workspace tidy but also prevents any accidents—especially when you’re working with hot sugar mixtures!
Package with Love
When it comes to gifting these sweet treats, presentation matters! Use colorful bags or decorative boxes, and tie them up with festive ribbons. A little handwritten note can make it even more special. Your loved ones will appreciate the extra touch!
With these tips in your back pocket, you’re all set to create some amazing *christmas candy gifts*. Enjoy the process, and happy candy making!
Storage & Reheating Instructions
Now that you’ve made your delightful *christmas candy gifts*, you’ll want to make sure they stay fresh and delicious! The best way to store your leftover candy is in a cool, dry place. I like to use an airtight container to keep them safe from moisture and air, which can cause them to get sticky or lose their crunch.
If you’re planning to enjoy your candies over a few weeks, they should hold up just fine at room temperature. Just be sure to keep them away from direct sunlight or heat sources. If you want to extend their shelf life even more, you can pop them into the fridge! Just know that they might lose a bit of that delightful crunch once cooled.
And if you find yourself with a surplus of these sweet treats, consider freezing them! Place the candies in a freezer-safe bag or container, separating layers with parchment paper to prevent sticking. They can last for up to three months in the freezer. When you’re ready to enjoy them, just pull out what you need and let them come to room temperature before indulging. Easy peasy!
With proper storage, your *christmas candy gifts* will stay just as festive and tasty as the day you made them. Happy snacking!
Nutritional Information
When indulging in these delightful *christmas candy gifts*, it’s always nice to know what you’re enjoying! Here’s an estimate of the typical nutritional values per serving, which is about one piece of candy:
- Calories: 100
- Fat: 0g
- Protein: 0g
- Carbohydrates: 25g
- Sugar: 20g
- Sodium: 10mg
- Fiber: 0g
- Cholesterol: 0mg
These values are estimates, so keep in mind that actual nutritional content can vary based on specific ingredients and portion sizes. But one thing’s for sure—these candies are a fun treat to enjoy during the holidays!
FAQ Section
Got questions about making these delightful *christmas candy gifts*? I’ve got you covered! Here are some common queries and my answers to help you whip up the perfect batch.
Can I substitute light corn syrup with something else?
Absolutely! If you don’t have light corn syrup on hand, you can use golden syrup as a substitute. It will give a slightly different flavor but still works well. Another option is to make your own corn syrup using sugar and water if you’re feeling adventurous!
What if I don’t have a candy thermometer?
No worries at all! If you don’t have a candy thermometer, you can use the cold water test instead. Just drop a small amount of the boiling mixture into a glass of cold water. If it forms hard, brittle threads, you’ve reached the hard crack stage!
Can I add different flavors to the candy?
Of course! While vanilla is a classic choice, you can get creative with flavors. Try adding peppermint extract for a festive twist, or even almond extract for something unique. Just be careful not to overdo it—start with 1/2 teaspoon and adjust to your taste!
What about using different colors?
Definitely! Feel free to mix it up with different food coloring. You could try blue and silver for a winter wonderland theme, or all red for a classic holiday look. The options are endless, and it’s a fun way to personalize your candies!
How long do these candies last?
When stored properly in an airtight container in a cool, dry place, these *christmas candy gifts* can last for about two weeks at room temperature. If you want to keep them longer, pop them in the fridge or even the freezer, as I mentioned earlier!
Can I make these candies in advance?
Yes, you can! Making them a few days ahead of time is a great way to save stress during the holiday rush. Just be sure to store them properly, and they’ll still be fresh and delicious when you’re ready to gift them!
If you have any more questions or need further tips, don’t hesitate to reach out. Happy candy making!
Print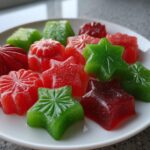
Delight in 7 Festive Christmas Candy Gifts to Cherish
- Total Time: 30 minutes
- Yield: Approximately 20 pieces 1x
- Diet: Vegetarian
Description
Delicious and festive candy gifts for Christmas.
Ingredients
- 2 cups granulated sugar
- 1/2 cup light corn syrup
- 1/2 cup water
- 1/2 teaspoon salt
- 1 teaspoon vanilla extract
- Red and green food coloring
- Assorted candy molds
Instructions
- Combine sugar, corn syrup, water, and salt in a saucepan.
- Bring to a boil over medium heat, stirring until sugar dissolves.
- Stop stirring and let it boil until it reaches 300°F (hard crack stage).
- Remove from heat and stir in vanilla extract.
- Divide the mixture into two bowls and add food coloring to each.
- Pour the colored mixtures into candy molds.
- Let them cool completely before removing from molds.
- Package in decorative bags or boxes for gifting.
Notes
- Store in a cool, dry place.
- Use silicone molds for easy removal.
- Wrap gifts with festive ribbons for presentation.
- Prep Time: 15 minutes
- Cook Time: 15 minutes
- Category: Candy
- Method: Stovetop
- Cuisine: American
Nutrition
- Serving Size: 1 piece
- Calories: 100
- Sugar: 20g
- Sodium: 10mg
- Fat: 0g
- Saturated Fat: 0g
- Unsaturated Fat: 0g
- Trans Fat: 0g
- Carbohydrates: 25g
- Fiber: 0g
- Protein: 0g
- Cholesterol: 0mg
Keywords: christmas candy gifts, holiday treats, homemade candy