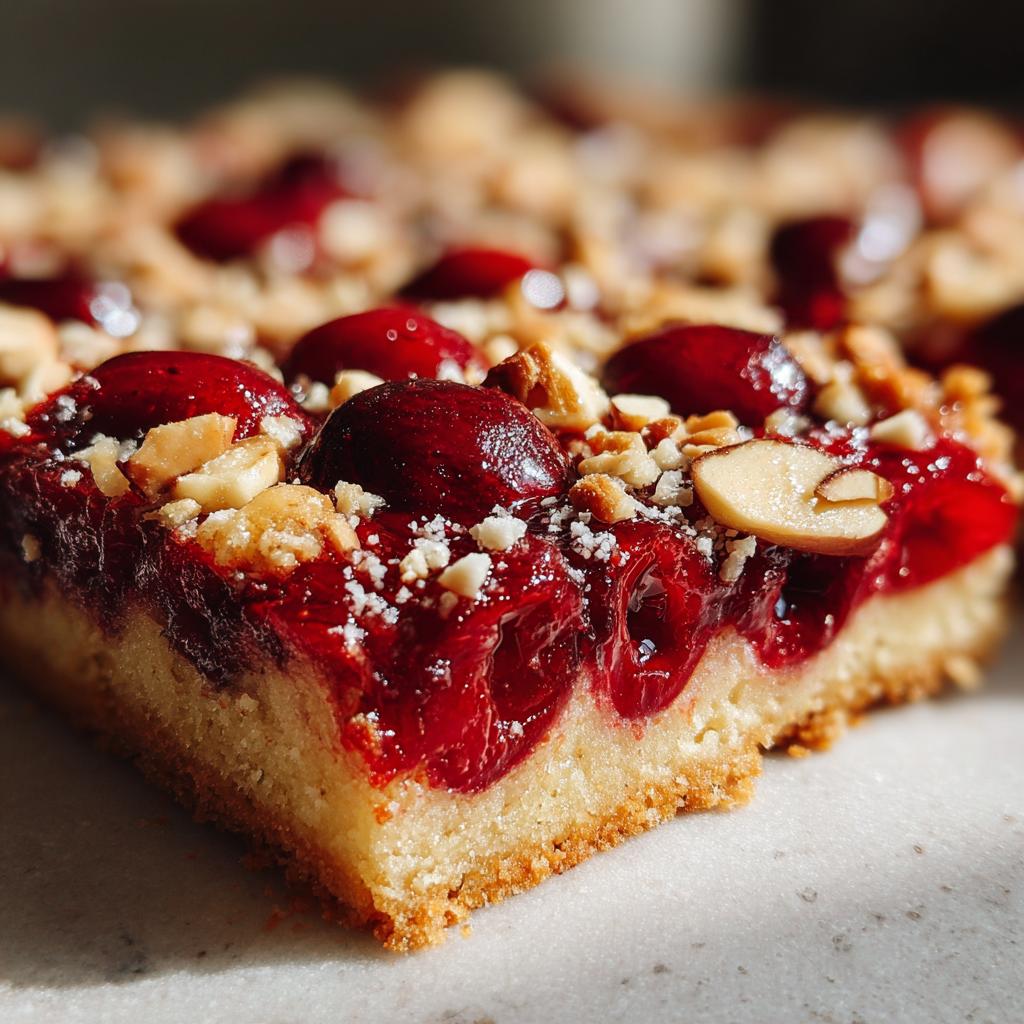
There’s something magical about the holiday season that just calls for baking, don’t you think? I can still remember the first time I made these Christmas cherry bars with my mom. The kitchen filled with the warm, buttery scent of the crust baking away, and my heart swelled with excitement as I watched the cherry preserves bubble just a little beneath the surface. It’s like our family’s tradition wrapped up in each delicious bite! The way that rich, buttery crust cradles the sweet cherry filling is simply divine. Whenever we make these bars, we can’t help but feel the holiday spirit come to life. They’re perfect for sharing at festive gatherings or even just enjoying at home while cozied up with a cup of cocoa. Trust me, once you take a bite, you’ll understand why they’ve become a cherished holiday favorite in our household. So grab your apron and let’s get baking!
Ingredients for Christmas Cherry Bars
Gathering the right ingredients is the first step to making these delightful Christmas cherry bars! Here’s what you’ll need:
- 1 cup all-purpose flour: This is the base of your buttery crust, providing the perfect texture.
- 1/2 cup unsalted butter, softened: Make sure it’s soft enough to cream easily with the sugar, giving your crust that delicious richness.
- 1/4 cup granulated sugar: This adds just the right amount of sweetness to balance the tart cherry preserves.
- 1/2 cup cherry preserves: Look for a good-quality brand, or even better, homemade if you have some on hand! It’s the star of the show.
- 1/4 teaspoon almond extract: This adds a lovely depth of flavor that makes the cherries sing!
- 1/2 cup chopped nuts (optional): I love adding walnuts or pecans for a bit of crunch, but feel free to skip them if you prefer a nut-free version.
Having everything prepped and ready to go makes the baking process so much smoother, so take a moment to measure out all your ingredients before you start mixing!
How to Prepare Christmas Cherry Bars
Now that we have all our ingredients ready, let’s dive into the fun part—baking these delicious Christmas cherry bars! Follow these steps, and you’ll have a batch of sweet, buttery goodness in no time.
Step 1: Preheat the Oven
First things first, you’ll want to preheat your oven to 350°F (175°C). Preheating is super important because it ensures your bars bake evenly and develop that lovely golden color. Don’t skip this step!
Step 2: Prepare the Crust
In a mixing bowl, combine the flour, softened butter, and granulated sugar. Use your hands or a fork to mix it all together until it resembles coarse crumbs. You’re aiming for a texture that holds together when you squeeze it but still has some crumbly bits. Once it looks just right, take half of this mixture and press it firmly into a greased baking dish. Make sure to cover the bottom evenly, creating a solid base for the cherry filling.
Step 3: Add Cherry Filling
Now comes the fun part! Carefully spread the cherry preserves over your crust, making sure to cover it evenly. This layer is the heart of the bars, so you want to ensure it’s nice and balanced. A spatula works wonders for smoothing it out!
Step 4: Prepare the Topping
Take the remaining crust mixture and mix in the almond extract and chopped nuts (if you’re using them). Stir until everything is well combined. You want to see those little nut pieces speckled throughout the mixture. This topping is going to add a delightful crunch!
Step 5: Sprinkle and Bake
Now, sprinkle the nut mixture generously over the cherry layer, making sure to cover it all. Pop the baking dish in the oven and let it bake for about 25-30 minutes. You’ll know it’s done when the top is golden brown and your kitchen smells heavenly!
Step 6: Cooling and Cutting
Once they’re out of the oven, let the bars cool in the pan for at least 10-15 minutes. This is crucial! Cooling helps them set up properly, so they hold together when you cut them into squares. Trust me, you don’t want to rush this step!
Tips for Success
When it comes to making the best Christmas cherry bars, a few handy tips can help you avoid common pitfalls and ensure your bars turn out perfectly every time!
- Don’t skip the preheating: It’s tempting to rush, but preheating your oven is essential for even baking. Trust me, a properly heated oven makes all the difference!
- Measure your flour correctly: Spoon the flour into your measuring cup and level it off with a knife. Too much flour can lead to a dry crust, and we don’t want that!
- Use good-quality cherry preserves: This is the star of your bars, so choose a brand that you love or use homemade if you have it. The flavor really shines through!
- Let them cool completely: Resist the urge to cut into those bars too soon! Cooling allows them to firm up, ensuring clean cuts and perfect squares.
- Experiment with toppings: If you’re feeling adventurous, try adding different nuts or even a drizzle of chocolate on top for a festive twist!
With these tips in hand, you’ll be well on your way to creating deliciously memorable Christmas cherry bars that everyone will adore!
FAQ Section
How do I store Christmas cherry bars?
Storing your Christmas cherry bars properly is key to keeping them fresh and delicious! Once they’ve completely cooled, place them in an airtight container. If you stack them, I recommend putting a layer of parchment paper between the bars to prevent them from sticking together. They can be kept at room temperature for up to 5 days, or you can store them in the refrigerator for a week if you prefer a chilled treat. Just make sure to let them come to room temperature before serving for the best flavor!
Can I substitute the cherry preserves?
Absolutely! While cherry preserves are delightful, you can easily swap them out for other fruit preserves like raspberry, strawberry, or even apricot. Keep in mind that each preserves will bring its own unique flavor and sweetness, so you might want to adjust the sugar slightly depending on how sweet your substitute is. If you’re feeling adventurous, you could even create a mixed fruit layer for a fun twist!
How long do Christmas cherry bars last?
These Christmas cherry bars are best enjoyed fresh, but they can last up to a week if stored properly! When kept in an airtight container at room temperature, they generally stay good for about 5 days. If you want to prolong their life, refrigerate them, but be sure to let them warm up a bit before serving as the texture is best when they’re not cold. If you have any leftovers, you can also freeze them for up to a month! Just wrap them tightly in plastic wrap and then in foil before placing them in the freezer. When you’re ready to enjoy, thaw them in the fridge overnight, and they’ll be good as new!
Nutritional Information
When indulging in these delicious Christmas cherry bars, it’s always nice to know what you’re enjoying! Here’s the estimated nutritional information per serving (1 bar):
- Calories: 150
- Sugar: 10g
- Sodium: 50mg
- Fat: 7g
- Saturated Fat: 4g
- Unsaturated Fat: 2g
- Trans Fat: 0g
- Carbohydrates: 20g
- Fiber: 1g
- Protein: 2g
- Cholesterol: 15mg
Keep in mind that these values are estimates and can vary based on specific ingredients used and portion sizes. Enjoy the festive flavors while treating yourself to a delightful dessert that brings joy to your holiday celebrations!
Why You’ll Love This Recipe
Making these Christmas cherry bars is a delight that brings the whole family together! Here’s why you’ll absolutely love this recipe:
- Easy to Prepare: With just a handful of simple ingredients, these bars come together quickly, making them perfect for busy holiday baking.
- Festive Appeal: The vibrant cherry filling and golden crust add a cheerful touch to any holiday spread, making them a visual treat!
- Deliciously Sweet: The combination of buttery crust and sweet cherry preserves creates a mouthwatering flavor that everyone will adore.
- Perfect for Sharing: These bars are ideal for holiday gatherings, potlucks, or even as a thoughtful homemade gift for friends and family.
Once you try them, I guarantee they’ll become a staple in your holiday traditions!
Serving Suggestions
These Christmas cherry bars are a delightful treat on their own, but serving them with a few complementary flavors can elevate the experience even more! I love pairing them with a dollop of freshly whipped cream or a scoop of vanilla ice cream for a delicious contrast to the sweet cherry filling. You could also serve them alongside a warm cup of spiced chai or hot cocoa, which perfectly complements the festive spirit of the bars. If you’re feeling adventurous, drizzle a bit of chocolate sauce over the top for an extra touch of decadence. Trust me, your guests will be raving about this sweet combination!
Print
Christmas Cherry Bars: 5 Steps to Holiday Bliss
- Total Time: 45 minutes
- Yield: 12 bars 1x
- Diet: Vegetarian
Description
Delicious Christmas cherry bars with a buttery crust and sweet cherry filling.
Ingredients
- 1 cup all-purpose flour
- 1/2 cup unsalted butter, softened
- 1/4 cup granulated sugar
- 1/2 cup cherry preserves
- 1/4 teaspoon almond extract
- 1/2 cup chopped nuts (optional)
Instructions
- Preheat your oven to 350°F (175°C).
- In a bowl, mix flour, butter, and sugar until crumbly.
- Press half of the mixture into a greased baking dish.
- Spread cherry preserves over the crust.
- Mix almond extract and nuts into the remaining crust mixture.
- Sprinkle the nut mixture over the cherry layer.
- Bake for 25-30 minutes until golden brown.
- Cool before cutting into squares.
Notes
- Store in an airtight container.
- Best served fresh but can be kept for up to a week.
- Prep Time: 15 minutes
- Cook Time: 30 minutes
- Category: Dessert
- Method: Baking
- Cuisine: American
Nutrition
- Serving Size: 1 bar
- Calories: 150
- Sugar: 10g
- Sodium: 50mg
- Fat: 7g
- Saturated Fat: 4g
- Unsaturated Fat: 2g
- Trans Fat: 0g
- Carbohydrates: 20g
- Fiber: 1g
- Protein: 2g
- Cholesterol: 15mg
Keywords: christmas cherry bars, dessert, holiday treats