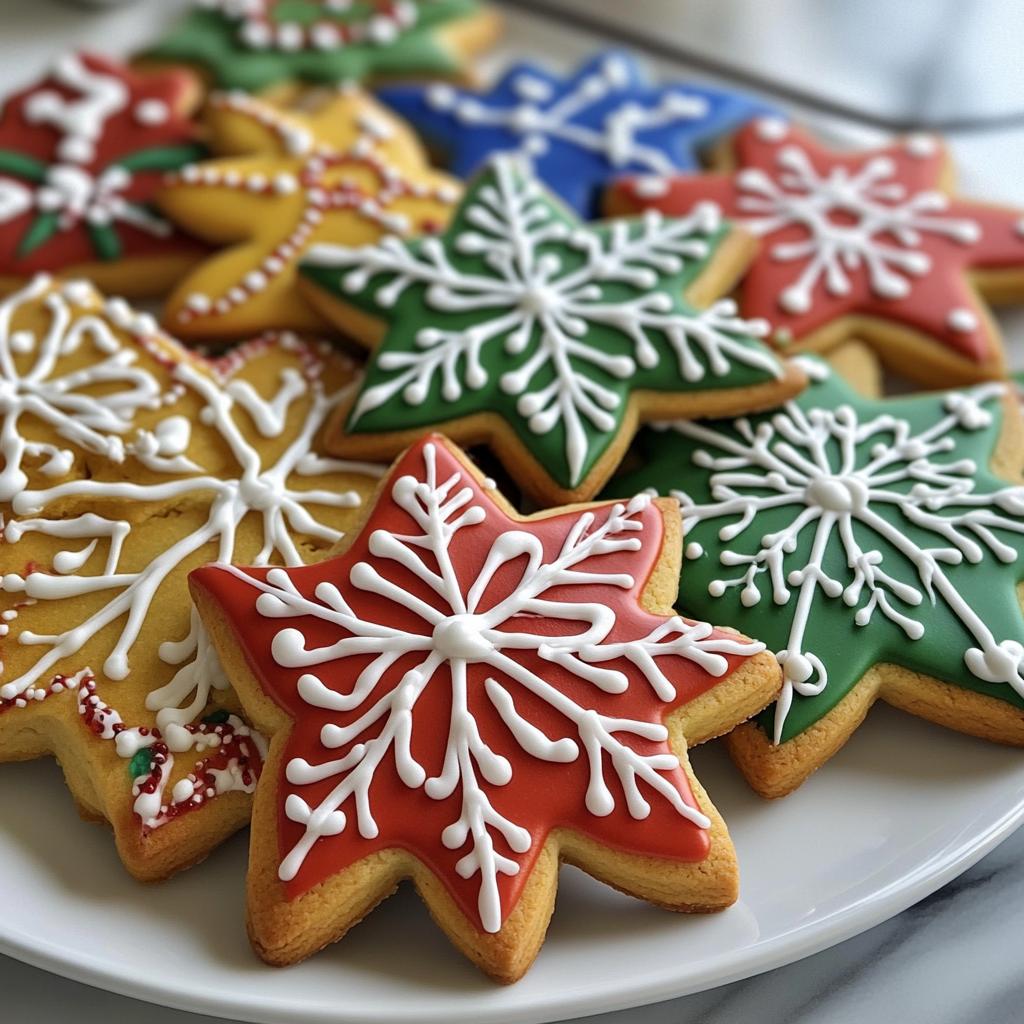
Ah, Christmas cookies! The mere thought of them brings back a flood of joyful memories. I remember the first time I made my own batch with royal icing. It was a chilly December afternoon, and the scent of warm spices filled the house as I rolled out the dough. My family gathered around, each of us excitedly decorating our cookies with vibrant colors and whimsical designs. There’s something magical about transforming simple ingredients into adorable treats that spread joy during the holiday season.
The beauty of these Christmas cookies lies not only in their delightful taste but also in the endless possibilities for decoration. Royal icing adds that perfect glossy finish, making each cookie look like a little work of art! Whether you’re crafting snowflakes or festive trees, these cookies are sure to become a cherished tradition in your home. Trust me, once you start baking and decorating, you won’t want to stop!
Ingredients List
To create these delightful Christmas cookies with royal icing, you’ll need a few essential ingredients. Here’s what you’ll gather:
- 2 cups all-purpose flour – This is the base of your cookie dough, giving it structure and that perfect crumb.
- 1/2 teaspoon baking powder – This little leavening agent helps your cookies rise just right, ensuring they’re soft and tender.
- 1/4 teaspoon salt – A pinch of salt enhances all the sweet flavors and balances the dough.
- 1/2 cup unsalted butter, softened – Make sure it’s at room temperature for easy creaming with sugar, which adds richness.
- 1 cup granulated sugar – This sweetener gives the cookies their delightful sweetness and helps create a lovely texture.
- 1 large egg – This binds everything together and adds moisture to the cookies.
- 1 teaspoon vanilla extract – A splash of vanilla adds a warm, comforting flavor that’s essential for holiday baking.
For the royal icing, you’ll need:
- 3 cups powdered sugar – This sweet sugar creates the perfect smooth and glossy finish for decorating.
- 2 tablespoons meringue powder – This stabilizes the icing, ensuring it holds its shape and dries nicely.
- 1/4 cup water – This helps achieve the right consistency for your royal icing, so it’s easy to work with.
- Food coloring (optional) – Have fun adding color to your icing for festive designs!
Gather these ingredients, and you’ll be ready to create a batch of cookies that are not only delicious but also a joy to decorate!
How to Prepare Christmas Cookies Royal Icing
Preparing the Cookie Dough
Let’s get started with the cookie dough! Begin by mixing the dry ingredients. In a bowl, whisk together 2 cups of all-purpose flour, 1/2 teaspoon baking powder, and 1/4 teaspoon salt. This is where the magic begins!
In another bowl, cream together 1/2 cup of softened unsalted butter and 1 cup of granulated sugar until it’s light and fluffy. I usually do this for about 2-3 minutes. Once it looks like whipped silk, add in 1 large egg and 1 teaspoon vanilla extract. Mix until everything is combined.
Now, gently stir in the flour mixture. I like to add it a little at a time to avoid flour clouds in the kitchen! Just mix until there are no dry spots left, but don’t overdo it. You want your dough to be smooth and ready to roll!
Rolling and Cutting Cookies
Now comes the fun part! Flour your surface and roll out the dough to about 1/4 inch thick. I find this thickness is perfect for cookies that hold their shape but aren’t too thick to bite into. If the dough gets sticky, just sprinkle a little more flour on it.
To cut out your cookies, use your favorite cookie cutters! I love to use festive shapes like stars, trees, and snowflakes. Don’t forget to dip the cutter in flour to prevent sticking. Once you’ve cut out your shapes, carefully transfer them to a baking sheet lined with parchment paper. I usually leave a little space between each cookie to give them room to spread!
Baking the Cookies
Preheat your oven to 350°F (175°C) so it’s nice and hot when your cookies are ready to go in. Bake the cookies for 8-10 minutes, or until the edges are just lightly golden. Keep an eye on them because every oven is a bit different!
To check for doneness, gently press the edge of a cookie with a finger; it should feel set. Once they’re done, let them cool on the baking sheet for a few minutes before transferring them to a wire rack. They need to be completely cool before you start decorating—this is key!
Making the Royal Icing
While your cookies cool, let’s whip up some royal icing! In a mixing bowl, combine 3 cups of powdered sugar, 2 tablespoons of meringue powder, and 1/4 cup of water. Mix on low speed until everything is combined, then increase to medium speed for about 4-5 minutes until the icing is glossy and holds stiff peaks. You want it to be thick enough to hold its shape but still spreadable.
If you want to add colors, separate the icing into different bowls and mix in drops of food coloring until you achieve the shades you love. Just remember, a little goes a long way!
Decorating the Cookies
Now for the grand finale—decorating! Use a piping bag to outline your cookies with royal icing. If you’re feeling adventurous, you can also flood the cookies by filling in the outlined areas with more icing. Just make sure to gently shake the cookie to help it spread evenly.
For intricate designs, you can use smaller piping tips, and don’t hesitate to mix colors for fun effects! Allow the icing to dry completely—this usually takes a few hours. Trust me, patience is key when it comes to royal icing. Once dry, your cookies will be ready to dazzle everyone!
Tips for Success
Making Christmas cookies with royal icing can be a delightful experience, but there are a few tips that can help you achieve cookie perfection every time! Here are my tried-and-true secrets to ensure your baking adventure goes smoothly:
- Chill the dough: After mixing your cookie dough, I recommend chilling it for at least 30 minutes. This helps the cookies maintain their shape during baking and makes rolling out easier!
- Don’t skip the parchment paper: Lining your baking sheet with parchment paper prevents sticking and makes clean-up a breeze. Plus, it helps your cookies bake evenly.
- Use the right consistency for royal icing: When mixing your royal icing, remember that you want it to be thick enough to hold its shape but smooth enough to spread easily. If it’s too runny, add a bit more powdered sugar; if it’s too thick, a drop of water will help!
- Practice piping techniques: If you’re new to decorating with royal icing, don’t worry! Practice on a piece of parchment paper first. It’s a great way to get a feel for how much pressure to apply while piping.
- Work in batches: If you’re decorating a lot of cookies, consider working in batches. Start with outlining all your cookies, then move on to flooding them. This method helps you stay organized and makes the process feel less overwhelming.
- Be patient with drying: Allow your icing to dry completely before stacking your cookies or placing them in containers. This can take several hours, so plan ahead to avoid smudging those beautiful designs!
With these tips in your back pocket, you’ll be well on your way to creating stunning Christmas cookies that not only taste amazing but also look like they belong in a bakery window!
Nutritional Information
When it comes to enjoying these Christmas cookies decorated with royal icing, it’s good to know what you’re indulging in! Keep in mind that nutritional values can vary based on the specific brands and ingredients you choose, so consider this a general guideline:
- Serving Size: 1 cookie
- Calories: 150
- Total Fat: 6g
- Saturated Fat: 4g
- Cholesterol: 15mg
- Sodium: 50mg
- Total Carbohydrates: 22g
- Dietary Fiber: 0g
- Total Sugars: 12g
- Protein: 2g
Enjoy these festive treats in moderation, and remember that baking is all about joy and celebration. These cookies are perfect for sharing with loved ones or savoring as a special holiday treat!
FAQ Section
Q1. Can I use different flavors for my Christmas cookies?
Absolutely! While vanilla is a classic, feel free to experiment with other extracts like almond, peppermint, or even orange zest. Just remember, a little flavor goes a long way!
Q2. How can I achieve the perfect consistency for royal icing?
The ideal royal icing should be thick enough to hold its shape but still smooth enough to spread easily. If your icing is too runny, add more powdered sugar; if it’s too thick, a few drops of water will help you get it just right!
Q3. Can I make the cookie dough ahead of time?
Yes, you can! Wrap the dough tightly in plastic wrap and refrigerate it for up to 3 days or freeze it for up to a month. When you’re ready to bake, just let it thaw in the fridge overnight before rolling it out.
Q4. How do I store decorated cookies?
Once your cookies are decorated and the icing has dried completely, store them in an airtight container at room temperature. They’ll stay fresh for about a week, but I doubt they’ll last that long with all the holiday cheer around!
Q5. What’s the best way to transport cookies if I’m giving them as gifts?
To keep your cookies safe during transport, layer them between sheets of parchment paper in a sturdy container. This way, you’ll avoid any smudging or breakage, and they’ll arrive looking as lovely as when you decorated them!
Why You’ll Love This Recipe
- Easy Preparation: With simple ingredients and straightforward steps, you’ll find making these Christmas cookies a breeze, even if you’re a beginner!
- Festive Appeal: The vibrant royal icing transforms ordinary cookies into stunning decorations that will impress friends and family during the holiday season.
- Delicious Flavor: These cookies are not only beautiful but also delicious, with a perfect balance of sweetness that makes them hard to resist.
- Endless Creativity: The possibilities for decorating are endless! You can experiment with different shapes, colors, and designs, making each batch unique.
- Perfect for Sharing: These cookies make fantastic gifts or treats for gatherings, spreading holiday cheer wherever they go!
- Tradition in the Making: Baking and decorating these cookies can become a cherished holiday tradition for you and your loved ones, creating memories year after year.
Storage & Reheating Instructions
Once you’ve made your delicious Christmas cookies with royal icing, you’ll want to keep them fresh for as long as possible! Here’s how to store those festive treats:
- Storing Decorated Cookies: Once the royal icing has dried completely, place your cookies in an airtight container. I recommend layering them with sheets of parchment paper to prevent sticking and keep designs intact. They’ll stay fresh at room temperature for about a week, but trust me, they’ll probably be gone before then!
- Storing Undecorated Cookies: If you plan to decorate them later, you can store the undecorated cookies in an airtight container as well. Just make sure they’ve cooled completely before sealing them up. They can last for up to two weeks.
- Freezing Cookies: If you want to save some for later, you can freeze both decorated and undecorated cookies! Wrap them tightly in plastic wrap and place them in a freezer-safe container. They can be frozen for up to three months. When you’re ready to enjoy them, let them thaw at room temperature for a few hours.
As for reheating, I generally recommend against it for decorated cookies, as the icing can become a bit messy. However, if you must, pop them in a preheated oven at 300°F (150°C) for just a couple of minutes to warm them up without melting the icing. For undecorated cookies, you can reheat them the same way, and they’ll taste just as delightful as the day you baked them!
Print
Christmas Cookies Royal Icing: 7 Tips for Festive Success
- Total Time: 40 minutes
- Yield: 24 cookies 1x
- Diet: Vegetarian
Description
Delicious Christmas cookies decorated with royal icing.
Ingredients
- 2 cups all-purpose flour
- 1/2 teaspoon baking powder
- 1/4 teaspoon salt
- 1/2 cup unsalted butter, softened
- 1 cup granulated sugar
- 1 large egg
- 1 teaspoon vanilla extract
- 3 cups powdered sugar
- 2 tablespoons meringue powder
- 1/4 cup water
- Food coloring (optional)
Instructions
- Preheat oven to 350°F (175°C).
- In a bowl, mix flour, baking powder, and salt.
- In another bowl, cream butter and sugar together.
- Add egg and vanilla to the creamed mixture.
- Gradually stir in the dry ingredients.
- Roll out the dough and cut into shapes.
- Bake for 8-10 minutes or until edges are lightly golden.
- Let cookies cool completely.
- In a bowl, mix powdered sugar, meringue powder, and water to make royal icing.
- Decorate cooled cookies with royal icing.
Notes
- Store decorated cookies in an airtight container.
- Use a piping bag for detailed icing work.
- Allow icing to dry completely before stacking cookies.
- Prep Time: 30 minutes
- Cook Time: 10 minutes
- Category: Dessert
- Method: Baking
- Cuisine: American
Nutrition
- Serving Size: 1 cookie
- Calories: 150
- Sugar: 12g
- Sodium: 50mg
- Fat: 6g
- Saturated Fat: 4g
- Unsaturated Fat: 1g
- Trans Fat: 0g
- Carbohydrates: 22g
- Fiber: 0g
- Protein: 2g
- Cholesterol: 15mg
Keywords: christmas cookies royal icing