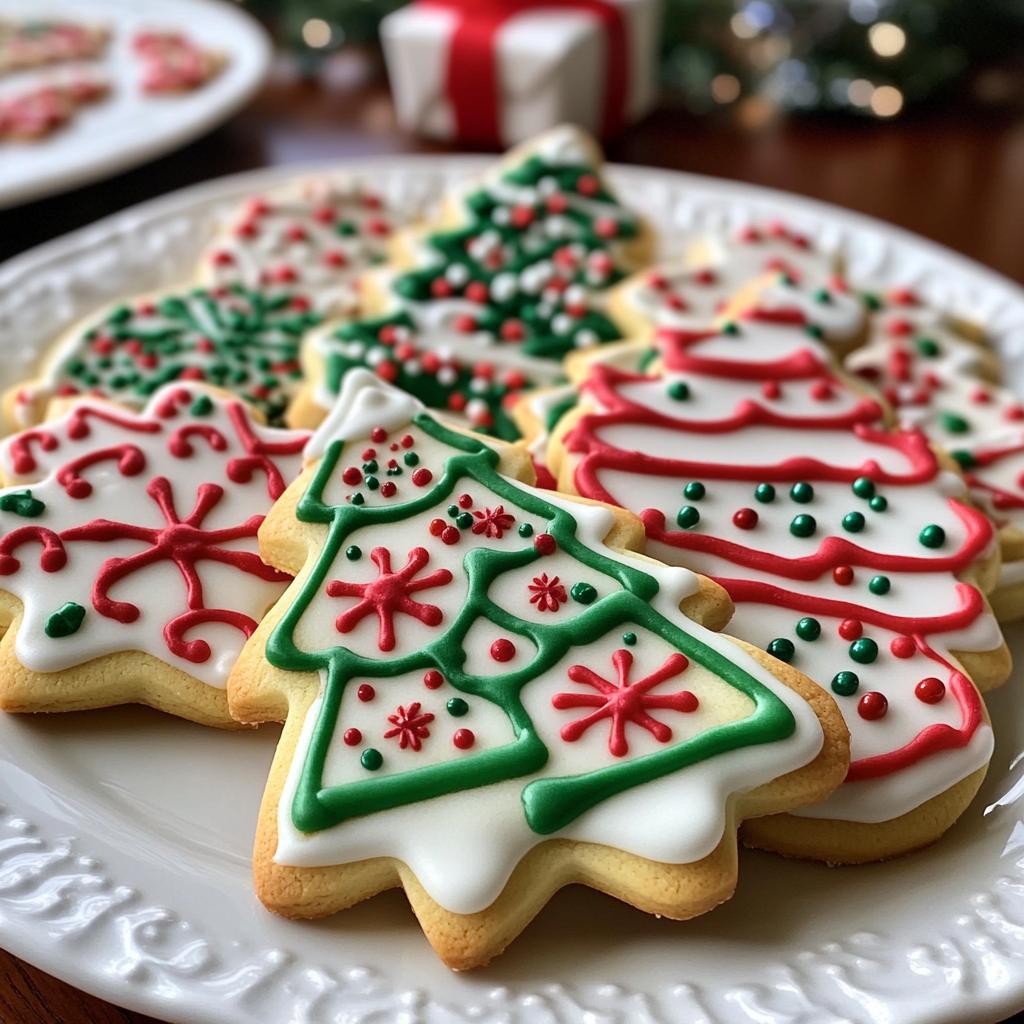
Oh, the joy of making Christmas decorated cookies! The moment you roll out that dough, the air fills with the sweet aroma of butter and sugar, and you can just feel the holiday spirit wrapping around you like a cozy blanket. For me, baking these cookies is a cherished family tradition that brings everyone together. I remember gathering around the kitchen table with my siblings and parents, each of us armed with our favorite cookie cutters, icing bags, and a sprinkle of creativity. We’d laugh, share stories, and compete over who could make the most festive designs. Decorating these cookies is where the real magic happens! From snowflakes to Christmas trees, every cookie tells a story and adds a personal touch to our holiday celebrations. Trust me, there’s nothing quite like the joy of seeing your loved ones light up when they bite into a delicious, beautifully decorated cookie. You’ve got to try this recipe!
Ingredients for Christmas Decorated Cookies
Gathering the right ingredients is the first step in creating these delightful Christmas decorated cookies. Here’s what you’ll need:
- 2 cups all-purpose flour: This is the base of your cookie dough, giving it structure and texture.
- 1/2 cup unsalted butter, softened: Make sure it’s at room temperature so it creams nicely with the sugar, adding that rich buttery flavor.
- 1 cup granulated sugar: This sweetener not only adds sweetness but also contributes to the cookie’s delightful chewiness.
- 1 large egg: The egg acts as a binder, helping to hold everything together while adding moisture.
- 1 teaspoon vanilla extract: A splash of vanilla brings warmth and depth to the cookies’ flavor.
- 1/2 teaspoon baking powder: This leavening agent gives the cookies a little lift, ensuring they’re not too dense.
- 1/2 teaspoon salt: A little pinch brings out the sweetness and balances the flavors perfectly.
- Decorating icing: This is where the fun begins! Use your favorite icing recipe or store-bought to create beautiful designs.
- Colored sprinkles: These add a festive touch and make your cookies sparkle and shine!
Having everything prepped and ready to go makes the baking process smooth and enjoyable. So, gather your ingredients, and let’s get started on these festive treats!
How to Prepare Christmas Decorated Cookies
Now that you’ve got your ingredients ready, let’s dive into the delightful process of making these Christmas decorated cookies! It’s easier than you might think, and I promise it’s going to be so much fun.
- Preheat your oven: First things first, preheat your oven to 350°F (175°C). This step is super important because you want those cookies to bake evenly and perfectly.
- Cream the butter and sugar: In a large mixing bowl, cream together the softened butter and granulated sugar. You can use a hand mixer or a wooden spoon. Mix until the mixture is light and fluffy, which usually takes about 2-3 minutes. Trust me, this step adds air to the dough, making your cookies deliciously soft!
- Add the wet ingredients: Next, crack in that large egg and pour in the vanilla extract. Mix well until everything is fully combined. You should see a smooth, creamy mixture.
- Combine the dry ingredients: In a separate bowl, whisk together the all-purpose flour, baking powder, and salt. This ensures the baking powder is evenly distributed, which is key for fluffy cookies.
- Mix it all together: Gradually add the dry ingredients to the wet mixture. I like to do this in three batches, mixing just until combined after each addition. Be careful not to overmix! You want a soft dough, not a tough one.
- Shape the cookies: Now it’s time to roll the dough! Scoop out tablespoon-sized balls of dough and place them on a baking sheet lined with parchment paper, leaving enough space between each ball to allow for spreading.
- Bake: Pop the baking sheet in the oven and bake for 10-12 minutes, or until the edges are lightly golden. Your kitchen will smell heavenly!
- Cool before decorating: Once baked, let the cookies cool on the baking sheet for about 5 minutes before transferring them to a wire rack. This cooling time is crucial because it allows the cookies to firm up and become easy to handle.
And there you have it! Follow these steps, and you’ll have a batch of delicious cookies ready for decorating. The real fun begins when you unleash your creativity with icing and sprinkles!
Nutritional Information
Now, let’s talk about the nutritional values of these scrumptious Christmas decorated cookies! Keep in mind that these values are estimates and can vary based on the specific ingredients you use. Each cookie roughly contains:
- Calories: 150
- Fat: 7g
- Saturated Fat: 4g
- Trans Fat: 0g
- Cholesterol: 20mg
- Sodium: 50mg
- Carbohydrates: 20g
- Fiber: 0g
- Sugar: 10g
- Protein: 2g
These cookies are a delightful treat that brings joy to the holiday season, and while they’re not exactly health food, it’s Christmas! Enjoy them in moderation and share the love with family and friends!
Why You’ll Love This Recipe
This Christmas decorated cookies recipe isn’t just about baking; it’s about creating memories! Here are a few reasons why you’ll adore making these festive treats:
- Quick Preparation: With just 20 minutes of prep time, you can whip up a batch in no time, leaving plenty of moments for decorating.
- Festive Appearance: The vibrant colors of icing and sprinkles make these cookies a show-stopper on any holiday dessert table.
- Delicious Taste: Buttery, sweet, and perfectly chewy, each bite is a delightful reminder of holiday cheer.
- Fun for Everyone: Decorating is a blast! Involve the kids, and let everyone express their creativity.
Trust me, these cookies will become a beloved part of your holiday traditions!
Tips for Success
To ensure your Christmas decorated cookies turn out perfectly every time, here are some tried-and-true tips that I swear by:
- Chill the dough: If you find the dough a bit too sticky to handle, don’t fret! Simply wrap it in plastic wrap and pop it in the fridge for about 30 minutes. Chilling helps the cookies keep their shape while baking and makes them easier to roll.
- Use a piping bag for icing: For neat and beautiful designs, I love using a piping bag to decorate with icing. If you don’t have one, a simple zip-top bag with a corner snipped off works just as well!
- Experiment with colors: Don’t be shy about food coloring! Mixing colors can create stunning effects. Try layering different colors of icing or using edible glitter for that extra sparkle.
- Let the icing set: After decorating, allow the cookies to sit for a bit so the icing can harden. This makes them easier to stack and store later.
With these tips, you’ll be a cookie decorating pro in no time, and your holiday treats will look as good as they taste!
Serving Suggestions
These Christmas decorated cookies are not just a treat on their own; they shine even brighter when paired with your favorite holiday beverages! Imagine a cozy evening enjoying these cookies with a steaming cup of hot cocoa, topped with whipped cream and a sprinkle of cocoa powder. Or, for a more festive twist, serve them alongside a spiced chai latte; the warm spices beautifully complement the cookies’ sweetness.
If you’re hosting a holiday gathering, set up a delightful cookie platter with these beauties alongside some freshly brewed coffee or mulled wine. Your guests will adore the festive vibes, and trust me, the combination is simply irresistible!
Storage & Reheating Instructions
To keep your Christmas decorated cookies fresh and tasty, store them in an airtight container. This will help maintain their softness and prevent them from drying out. I like to layer parchment paper between the cookies to keep them from sticking together. You can also freeze them if you want to save some for later; just make sure they’re completely cooled before wrapping them tightly in plastic wrap and placing them in a freezer-safe bag.
If you need to reheat them, simply pop them in the microwave for about 10-15 seconds. This will warm them up and bring back that fresh-baked taste!
FAQ Section
Got questions about making these delightful Christmas decorated cookies? Don’t worry; I’ve got you covered! Here are some common queries I often hear:
- Can I use gluten-free flour? Absolutely! Just swap out the all-purpose flour for a gluten-free blend that measures 1:1. I’ve had great results with this, and everyone can enjoy the cookies!
- How long can I store these cookies? If stored properly in an airtight container, these cookies can last up to a week at room temperature. You can also freeze them for up to three months!
- What can I use instead of butter? If you need a dairy-free option, coconut oil or a vegan butter substitute works well! Just ensure it’s softened for easy mixing.
- Can I add other decorations? Of course! Feel free to get creative with toppings like chocolate chips, nuts, or edible glitter. The more, the merrier!
- What’s the best way to store the icing? Store any leftover icing in an airtight container in the fridge. Just give it a good stir before using it again!
With these answers, you’ll be all set to make the best Christmas decorated cookies ever!
Print
Christmas Decorated Cookies: 7 Joyful Family Moments
- Total Time: 32 minutes
- Yield: 24 cookies 1x
- Diet: Vegetarian
Description
Delicious cookies decorated for Christmas.
Ingredients
- 2 cups all-purpose flour
- 1/2 cup unsalted butter, softened
- 1 cup granulated sugar
- 1 large egg
- 1 teaspoon vanilla extract
- 1/2 teaspoon baking powder
- 1/2 teaspoon salt
- Decorating icing
- Colored sprinkles
Instructions
- Preheat oven to 350°F (175°C).
- In a bowl, cream together butter and sugar.
- Add egg and vanilla, mix well.
- In another bowl, combine flour, baking powder, and salt.
- Gradually add dry ingredients to the wet mixture.
- Roll dough into balls and place on a baking sheet.
- Bake for 10-12 minutes until edges are golden.
- Let cool before decorating with icing and sprinkles.
Notes
- Chill dough for easier handling.
- Use food coloring for icing.
- Store cookies in an airtight container.
- Prep Time: 20 minutes
- Cook Time: 12 minutes
- Category: Dessert
- Method: Baking
- Cuisine: American
Nutrition
- Serving Size: 1 cookie
- Calories: 150
- Sugar: 10g
- Sodium: 50mg
- Fat: 7g
- Saturated Fat: 4g
- Unsaturated Fat: 2g
- Trans Fat: 0g
- Carbohydrates: 20g
- Fiber: 0g
- Protein: 2g
- Cholesterol: 20mg
Keywords: christmas decorated cookies