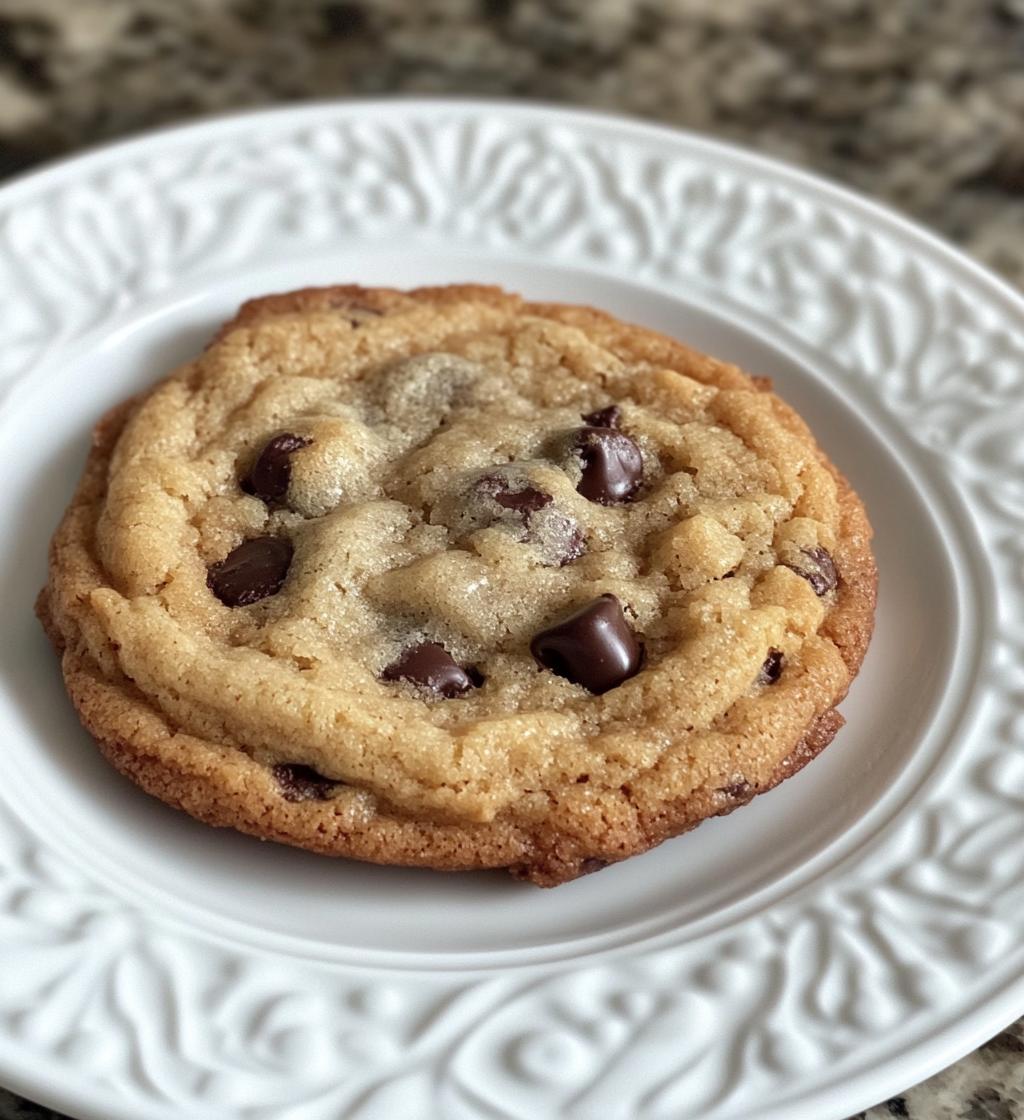
Oh my gosh, is there anything better than the smell of classic chewy chocolate chip cookies baking in the oven? I swear, just thinking about that warm, buttery aroma takes me right back to my grandma’s kitchen. She’d always let me sneak a pinch of dough (don’t worry, we used pasteurized eggs!) while the first batch baked to golden perfection. This recipe is my tried-and-true version of that childhood favorite – simple enough for weeknight baking but special enough for celebrations. After testing dozens of variations over the years, I’ve nailed down the exact combination of ingredients and techniques that guarantees that perfect chewy center with just the right crisp edges every single time.
Ingredients for Classic Chewy Chocolate Chip Cookies
Okay, let’s talk ingredients – because using the right stuff makes ALL the difference with these cookies. I know it’s tempting to eyeball measurements or grab whatever’s in the pantry, but trust me, following this list exactly gives you that perfect chewy texture we’re after. Here’s what you’ll need:
- 2 1/4 cups all-purpose flour – spooned and leveled, please! Packing your flour leads to dense cookies, and nobody wants that.
- 1 teaspoon baking soda – make sure yours is fresh (test it with vinegar if it’s been open awhile)
- 1 teaspoon salt – I prefer fine sea salt for even distribution
- 1 cup (2 sticks) unsalted butter, softened – this is crucial! Leave it out for 30-60 minutes until it gives slightly when pressed
- 3/4 cup granulated sugar – just your regular white sugar here
- 3/4 cup packed brown sugar – really press it into the measuring cup for that perfect moisture
- 2 large eggs – room temperature blends better with the butter
- 2 teaspoons pure vanilla extract – splurge on the good stuff, it’s worth it
- 2 cups semisweet chocolate chips – I use the standard 12oz bag, but measure if you’re unsure
A quick pro tip from my many kitchen disasters – measure your flour correctly! I used to scoop straight from the bag and ended up with hockey pucks instead of cookies. Now I gently spoon flour into my measuring cup and level it off with a knife. Makes all the difference in getting that perfect chewy texture we love!
How to Make Classic Chewy Chocolate Chip Cookies
Alright, let’s get baking! I promise this process is easier than you think, but there are a few key steps that’ll make or break your cookies. Follow along closely – I’ve learned these tricks through years of trial and (lots of) error!
Step 1: Prep the Dough
First things first – preheat that oven to 375°F (190°C). While it’s heating up, whisk together your flour, baking soda, and salt in a medium bowl. Set this aside – we’ll come back to it in a minute.
Now for the fun part! Grab your softened butter and both sugars. Cream them together in a large bowl until light and fluffy – about 2-3 minutes with a hand mixer or stand mixer. Don’t skimp on this step! Those tiny air pockets we’re creating here are what give our cookies that perfect texture. Add eggs one at a time, mixing well after each, then stir in the vanilla.
Here’s where things get delicate – gradually add your dry ingredients to the wet mixture. I usually do it in 3 batches, mixing just until combined each time. Overmixing at this stage leads to tough cookies, and we want tender and chewy! Finally, fold in those glorious chocolate chips by hand. The dough should be thick but scoopable.
Step 2: Bake to Perfection
Line your baking sheets with parchment paper (trust me, cleanup is SO much easier). Drop rounded tablespoons of dough about 2 inches apart – these babies spread! I use my trusty cookie scoop for uniform size, but a regular spoon works too.
Bake for 9-11 minutes until the edges are golden brown but the centers still look slightly underdone. This is KEY for chewy cookies! They’ll continue cooking on the sheet for a minute after you pull them out. If you wait until they look fully baked in the oven, you’ll end up with crispy cookies instead of our desired chewy texture.
Step 3: Cooling and Storage
Let the cookies cool on the baking sheet for exactly 2 minutes – this helps them set without overcooking. Then transfer them to wire racks to cool completely. The wait is torture, I know! But letting them cool properly prevents soggy bottoms.
Store cooled cookies in an airtight container at room temperature for up to 5 days (if they last that long!). For longer storage, you can freeze the baked cookies for up to 3 months, or freeze the dough balls to bake fresh whenever a cookie craving strikes. Just add 1-2 minutes to the baking time if baking from frozen.
Why You’ll Love These Classic Chewy Chocolate Chip Cookies
Listen, I know there are about a million chocolate chip cookie recipes out there, but these? These are special. Here’s why they’ve become my go-to recipe for every occasion (and sometimes just because it’s Tuesday):
- That perfect chewy texture – crisp edges giving way to a soft, slightly bendy center that stays moist for days
- Pantry staple ingredients – no fancy extracts or hard-to-find flours, just simple stuff you probably already have
- Family-friendly baking – my kids can practically make these on their own (and love helping measure ingredients)
- Foolproof method – no chilling required, so you’re less than 30 minutes away from warm cookies
- Customizable – swap in different chips or add nuts without messing up the perfect base recipe
- Nostalgia in every bite – they taste just like the cookies grandma used to make, only better (don’t tell her I said that!)
The best part? One batch makes enough to share… if you’re feeling generous. I won’t judge if you “accidentally” eat three straight from the cooling rack – I’ve been there!
Tips for the Best Classic Chewy Chocolate Chip Cookies
After burning through more cookie sheets than I’d like to admit, I’ve learned a few secrets that take these cookies from good to “oh-my-gosh-give-me-the-whole-batch” amazing. These are my can’t-skip tips that’ll save you from the mistakes I made the hard way!
Butter temperature is EVERYTHING: I can’t stress this enough – your butter needs to be properly softened, not melted or straight-from-the-fridge cold. Leave it out until it yields slightly when pressed but still holds its shape. Too soft? Your cookies will spread into pancakes. Too firm? They won’t cream properly with the sugar. I set mine out about an hour before baking – the perfect sweet spot.
Underbake for ultimate chewiness: Those extra 2 minutes in the oven might seem tempting, but resist! Pull the cookies when the edges are golden but the centers still look slightly underdone. They’ll continue cooking on the hot baking sheet, resulting in that perfect soft center with crisp edges. I call it the “golden rule” – if they look done in the oven, they’re overdone on your plate.
Measure flour like a pro: Here’s where I went wrong for years. Instead of scooping flour directly from the bag (which packs it down), gently spoon it into your measuring cup and level it off with a knife. Too much flour = dry, cakey cookies. Too little = flat, greasy messes. This one simple change made all the difference in my baking!
Bonus tricks from my cookie diary:
- Let your eggs come to room temperature – they incorporate better into the butter mixture
- Use pure vanilla extract, not imitation – that artificial taste comes through in baked goods
- Rotate your baking sheets halfway through for even browning (oven hotspots are sneaky!)
- For extra chew, replace 1/4 cup of white sugar with additional brown sugar
- Bake one test cookie first to check your oven’s temperature – better to adjust early!
Trust me, once you nail these techniques, you’ll be turning out bakery-quality cookies that’ll have everyone begging for your recipe. My neighbor still doesn’t believe they’re homemade!
Ingredient Substitutions
Okay, let’s talk swaps! While I’m obsessed with the original recipe exactly as written (seriously, it’s perfect), I know sometimes you gotta work with what’s in the pantry. Here are my tested-and-approved substitutions that’ll still give you delicious cookies – though I’ll be honest, some will change the texture slightly.
Chocolate Variations
Those semisweet chips are classic for a reason, but feel free to mix it up:
- Dark chocolate chips – My favorite fancy upgrade! Use the same amount for a richer, less sweet cookie. Just know they might spread slightly less.
- Milk chocolate chips – Kid-approved but sweeter. Reduce white sugar by 2 tablespoons if using these.
- Chopped chocolate bars – Gives those gorgeous chocolate puddles. Use bittersweet for best results.
- White chocolate chips – Pair with macadamia nuts for a decadent twist (add 1/2 cup chopped nuts).
Flour Alternatives
Need to tweak the flour? Here’s what works:
- Gluten-free 1:1 flour – Works surprisingly well! Bob’s Red Mill is my go-to. Cookies might spread a tad more.
- Whole wheat flour – Replace up to half the flour for nuttier flavor. Expect denser cookies – not bad, just different.
- Bread flour – Want extra chew? Swap all-purpose for bread flour. They’ll be slightly thicker too.
Sugar Swaps
Ran out of brown sugar? Been there:
- Coconut sugar – Works cup-for-cup but makes cookies darker and slightly less sweet.
- All brown sugar – Skip white sugar entirely for ultra-chewy cookies (they’ll spread more).
- Maple syrup – Replace brown sugar with 1/2 cup syrup + reduce other liquids by 2 tbsp. Softer texture.
A quick warning – artificial sweeteners just don’t work here. They don’t caramelize like real sugar, so you’ll end up with weird texture and pale cookies. Learned that one the hard way!
The golden rule? Stick to one substitution at a time unless you’re feeling adventurous. Too many changes at once and you’re basically inventing a new recipe (which hey, could be fun!). But if you want those classic chewy chocolate chip cookies, the original ingredient list really is your best bet.
Nutritional Information
Now, I know you’re not counting calories when you’re reaching for these warm, gooey cookies – I certainly never do! But if you’re curious (or need to justify eating three in one sitting like I sometimes do), here’s the basic nutritional breakdown per cookie. Just remember – these are estimates and will vary slightly depending on your exact ingredients and how big you make your cookies!
- Calories: 110
- Fat: 6g (3.5g saturated)
- Carbohydrates: 14g
- Sugar: 8g
- Protein: 1g
- Sodium: 85mg
A little insider tip – if you want to lighten them up just a smidge without sacrificing texture, you can reduce the chocolate chips to 1.5 cups and still get plenty in every bite. But honestly? Life’s too short not to go for the full two cups in my opinion. Everything in moderation… including moderation, right?
Disclaimer: Nutritional values are estimates calculated using standard ingredients. Actual values may vary based on specific brands, measuring methods, and cookie size. If you’re tracking macros closely, I recommend entering your exact ingredients into a nutrition calculator.
Common Questions About Classic Chewy Chocolate Chip Cookies
I’ve gotten so many questions about these cookies over the years – and trust me, I’ve asked them all myself at some point too! Here are the answers to the most common cookie conundrums that’ll help you bake like a pro:
“Can I freeze the cookie dough?”
Absolutely! In fact, I always keep a batch of dough balls in my freezer for emergency cookie cravings. Just scoop the dough onto a parchment-lined baking sheet, freeze until solid (about 2 hours), then transfer to a freezer bag. They’ll keep for up to 3 months this way. When you’re ready to bake, no need to thaw – just add 1-2 extra minutes to the baking time. The cookies might spread slightly less, but they’ll still taste amazing!
“Why did my cookies come out flat?”
Oh honey, I feel your pain – flat cookies were my nemesis for years! Usually it’s one of three culprits:
- Butter too soft or melted: If your butter was warm or you microwaved it to soften, the cookies will spread too much. Next time, let it soften naturally at room temp.
- Old baking soda: Check the expiration date! If it doesn’t fizz when you mix it with vinegar, toss it.
- Not enough flour: Remember my spoon-and-level method? Too little flour means not enough structure.
Try chilling the dough for 30 minutes before baking next time – that often fixes spreading issues!
“How do I make them extra chewy?”
My secret weapon? Replace 1/4 cup of the white sugar with extra brown sugar. The molasses in brown sugar creates that perfect chew! Also, underbake them slightly (like I keep harping on about) and store them with a slice of bread in the container – the cookies absorb moisture from the bread and stay soft for days.
“Can I make these without a mixer?”
You bet! I actually made these for years with just a wooden spoon and some elbow grease. Creaming the butter and sugar takes about 5 minutes by hand instead of 2-3 with a mixer, but the results are just as good. Just make sure your butter is properly softened first – it makes hand-mixing much easier.
“Why do my cookies taste bitter?”
This usually means the baking soda wasn’t fully incorporated or you used too much. Always whisk it thoroughly with the flour first. And measure carefully – baking soda is powerful stuff! If you accidentally used baking powder instead, that could cause off flavors too.
Got more questions? Drop them in the comments – I love troubleshooting cookie disasters (and trust me, I’ve had plenty of my own to learn from!).
Try This Recipe and Share Your Results in the Comments!
Alright, cookie lovers – now it’s your turn! I want to see your beautiful batches of classic chewy chocolate chip cookies. Did they come out perfectly golden with that irresistible soft center? Maybe you tried one of the fun variations? Or perhaps you discovered a genius tweak of your own? Drop a comment below and tell me all about your baking adventure!
And hey – no judgment if your first attempt wasn’t perfect. My early batches were anything but Instagram-worthy (let’s just say I had a few “cookie pancakes” before getting it right). The beauty of this recipe is how forgiving it is – even the not-so-pretty ones still taste amazing!
Tag me on social if you share photos – nothing makes me happier than seeing people enjoy these cookies as much as I do. Now get baking, and don’t forget that most important step: eating at least one cookie while it’s still warm from the oven (strictly for quality control, of course). Happy baking!
Print
Classic Chewy Chocolate Chip Cookies: 5 Secrets to Perfect Texture
- Total Time: 25 minutes
- Yield: 48 cookies 1x
- Diet: Vegetarian
Description
Make classic chewy chocolate chip cookies with this simple recipe.
Ingredients
- 2 1/4 cups all-purpose flour
- 1 tsp baking soda
- 1 tsp salt
- 1 cup unsalted butter, softened
- 3/4 cup granulated sugar
- 3/4 cup packed brown sugar
- 2 large eggs
- 2 tsp vanilla extract
- 2 cups semisweet chocolate chips
Instructions
- Preheat oven to 375°F (190°C).
- Mix flour, baking soda, and salt in a bowl.
- Cream butter and sugars until smooth.
- Beat in eggs one at a time, then add vanilla.
- Gradually blend in dry ingredients.
- Stir in chocolate chips.
- Drop dough by rounded tablespoons onto baking sheets.
- Bake for 9-11 minutes or until golden.
- Cool on wire racks.
Notes
- Use room-temperature butter for best results.
- Do not overbake for chewy cookies.
- Store in an airtight container.
- Prep Time: 15 minutes
- Cook Time: 10 minutes
- Category: Dessert
- Method: Baking
- Cuisine: American
Nutrition
- Serving Size: 1 cookie
- Calories: 110
- Sugar: 8g
- Sodium: 85mg
- Fat: 6g
- Saturated Fat: 3.5g
- Unsaturated Fat: 2g
- Trans Fat: 0g
- Carbohydrates: 14g
- Fiber: 0.5g
- Protein: 1g
- Cholesterol: 15mg
Keywords: chocolate chip cookies, chewy cookies, homemade cookies