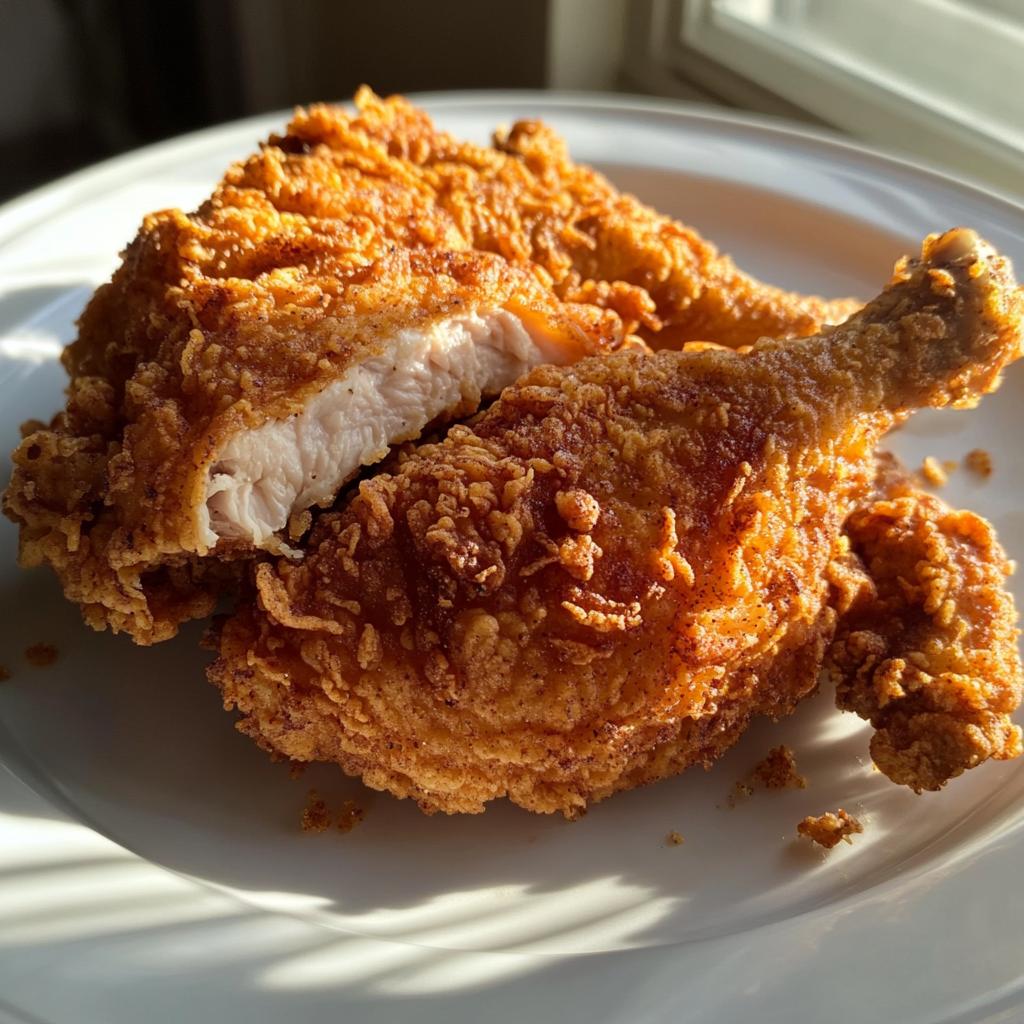
There’s nothing quite like biting into a piece of perfectly crispy classic fried chicken – that golden crust giving way to juicy, tender meat inside. I’ve been making this recipe for years, ever since my grandma showed me her foolproof method for getting that irresistible crunch every single time. The secret? A good long soak in buttermilk and a simple, well-seasoned flour coating that sticks like magic. This isn’t fussy restaurant-style fried chicken – it’s the real deal, the kind that makes your kitchen smell like Sunday supper at grandma’s house. Trust me, once you try this method, you’ll never go back to takeout again!
Why You’ll Love This Classic Fried Chicken
Oh, where do I even start? This fried chicken recipe has been my go-to for every backyard BBQ, picnic, and “I-need-comfort-food-now” moment. Here’s why it’ll become yours too:
- That CRUNCH: The buttermilk marinade plus double-dredging creates the most satisfying crispy crust you’ve ever tasted – no soggy chicken here!
- Foolproof flavor: Just six pantry-staple spices create magic together (who knew paprika could be so transformative?).
- Juicy inside: The buttermilk works overnight to tenderize, so even breast pieces stay moist.
- Crowd-pleaser: I’ve served this to picky kids and foodie friends alike – empty plates every time.
- Better than takeout: Seriously, once you taste homemade, those fast-food buckets just won’t hit the same.
Pro tip: Make extra. Leftovers (if you have any) make killer chicken sandwiches the next day!
Ingredients for Classic Fried Chicken
Alright, let’s gather our lineup of simple ingredients – no fancy stuff here, just good old-fashioned flavors that work every time. Here’s what you’ll need to make the crispiest, juiciest classic fried chicken:
- 1 whole chicken (about 3-4 pounds), cut into 8 pieces (or buy pre-cut if you’re short on time)
- 2 cups buttermilk – this is your secret weapon for tender chicken (full-fat works best!)
- 2 cups all-purpose flour – the foundation of that perfect crispy crust
- 1 tablespoon salt – I use kosher for even seasoning
- 1 tablespoon black pepper – freshly ground if you can
- 1 tablespoon paprika – gives that gorgeous golden color
- 1 teaspoon garlic powder – because everything’s better with garlic
- 1 teaspoon onion powder – adds depth without the crunch
- Vegetable oil for frying – about 2 inches deep in your pan (I use peanut or canola)
See? Nothing complicated – just a handful of ingredients you probably already have in your pantry. Now let’s make some magic happen!
Equipment You’ll Need
No fancy gadgets required here – just a few trusty kitchen tools to make perfect fried chicken every time. Here’s what I always grab:
- Heavy skillet or Dutch oven (my cast iron works best) or a deep fryer if you have one
- Candy/oil thermometer – absolutely crucial for that perfect 175°C fry temp
- Large mixing bowls – one for buttermilk soak, one for flour coating
- Tongs – keeps your hands clean while flipping those golden pieces
- Wire rack or paper towels – for draining excess oil
That’s it! Five simple tools and you’re ready to fry up some crispy magic.
How to Make Classic Fried Chicken
Okay friends, it’s showtime! After years of perfecting this recipe (and a few early disasters I won’t mention), I’ve broken it down into foolproof steps anyone can follow. Just take it slow, pay attention to the details, and you’ll have golden, crispy chicken that’ll make you feel like a pro.
Step 1: Marinate the Chicken
This is where the magic starts! Place all your chicken pieces in a large bowl and pour that buttermilk right over them. Really get in there with your hands to make sure every piece is coated – thighs, wings, even those little drumsticks. Cover it up and let it hang out in the fridge for at least 4 hours, but overnight is even better. That buttermilk’s going to work its tenderizing wonders while you sleep!
Step 2: Prepare the Coating
While your chicken’s getting happy in its buttermilk bath, let’s make the coating. In a big bowl, whisk together the flour and all those gorgeous spices until they’re completely combined. Here’s my secret: I like to transfer half to another bowl so I can do a double coat. When you’re ready to fry, take each piece from the buttermilk, let the excess drip off, then coat it in flour. Dip it back in the buttermilk and give it one more flour coating for EXTRA crunch. Trust me, it makes all the difference!
Step 3: Fry to Perfection
Now the fun part! Heat your oil to exactly 175°C – this is crucial (too cold = greasy chicken, too hot = burnt outside/raw inside). Carefully add 3-4 pieces at a time – don’t crowd the pan! Each piece needs its personal space to get crispy. Fry for about 12-15 minutes, turning occasionally, until they’re that perfect golden brown. Use your thermometer to check that the thickest piece hits 74°C inside. As they come out, let them rest on a wire rack or paper towels for about 5 minutes before serving. That little wait makes the crust even crispier – I promise it’s worth it!
Pro tip: Keep finished pieces warm in a 120°C oven while you fry the rest. And whatever you do, resist eating them straight from the oil – that hot oil burns are no joke!
Tips for the Best Classic Fried Chicken
After frying more chickens than I can count, I’ve picked up some golden rules that take your fried chicken from good to “oh-my-goodness” amazing:
- Temperature is everything: That candy thermometer isn’t just for show – keep that oil steady at 175°C. I prop mine against the pan’s side so I can monitor constantly.
- Dry before you fry: After the final flour coating, let pieces sit 5 minutes. This helps the coating stick better during frying.
- Fry dark meat first: Thighs and drums take longer than breasts – start them a couple minutes earlier for even cooking.
- The magic rest: Let fried chicken sit 5-10 minutes before serving. The crust gets crispier as it cools slightly.
- Reheat like new: For leftovers, skip the microwave – a quick 10 minutes in a 200°C oven revives the crunch perfectly.
Remember – good fried chicken isn’t rushed. Take your time and enjoy the process!
Ingredient Substitutions & Notes
No buttermilk? No problem! Here’s how to tweak this recipe when your pantry’s looking a little bare:
- Buttermilk swap: Mix 2 cups milk with 2 tablespoons lemon juice or vinegar and let it sit 5 minutes. Or use plain yogurt thinned with a splash of milk.
- Gluten-free option: Swap the flour for a 1:1 gluten-free blend – just add 1/2 teaspoon xanthan gum if your mix doesn’t include it.
- Spice variations: Out of paprika? Try smoked paprika for depth, or cayenne for heat (just use half the amount at first!).
- Oil alternatives: Peanut, canola, or vegetable oil all work great – just avoid olive oil (its smoke point is too low).
And here’s my golden rule: whatever substitutions you make, don’t skip the marinating step – that’s where the magic happens!
Serving Suggestions for Classic Fried Chicken
Oh honey, this crispy chicken deserves the perfect supporting cast! Here’s how I love to serve it up:
- Creamy mashed potatoes – that golden crust begs to be dragged through fluffy, buttery spuds
- Tangy coleslaw – the cool crunch cuts through the richness perfectly
- Buttery cornbread – for soaking up every last delicious crumb
- Simple green salad – when you want to pretend you’re being healthy
Sunday dinner just got upgraded!
Storage & Reheating Instructions
Here’s how to keep that crispy goodness going strong for days! Store leftover chicken in an airtight container in the fridge for up to 3 days. When you’re ready for round two, skip the microwave (unless you like soggy crust) – instead, pop it on a baking sheet in a 200°C oven for 10-15 minutes until heated through and recrisped. Perfect for next-day chicken sandwiches too!
Classic Fried Chicken FAQ
Over the years, I’ve gotten every fried chicken question imaginable – here are the ones I hear most often with my tried-and-true answers:
Can I make this in an air fryer?
Absolutely! For air fryer fried chicken, follow all the same steps but cook at 200°C for about 20-25 minutes, flipping halfway. You’ll need to spray the pieces with oil to help them crisp up. It won’t be quite as crispy as deep-fried, but it’s a great lighter option!
How do I avoid greasy chicken?
The two golden rules: 1) Keep your oil at exactly 175°C (use that thermometer!) and 2) Don’t overcrowd the pan. When you add too many pieces at once, the oil temperature drops and the chicken absorbs oil instead of frying properly.
Why is my coating falling off?
This usually happens if you don’t let the flour-coated pieces rest before frying. After the final coating, let them sit 5 minutes – this helps the coating stick better. Also, make sure to shake off excess buttermilk before coating!
Can I skip the buttermilk marinade?
You can, but you’ll miss out on that signature tenderness! If you’re in a pinch, soak the chicken in regular milk with 2 tablespoons lemon juice for at least 30 minutes. It won’t be quite as good, but it’ll help.
How do I know when it’s done?
The safest way is to use a meat thermometer – chicken should reach 74°C internally. If you don’t have one, cut into the thickest piece – the juices should run clear with no pink meat.
Nutritional Information
Here’s the skinny on your crispy chicken (per serving): about 320 calories, 25g protein, and that irresistible crunch we all love! Remember – these are estimates and may vary slightly based on your specific ingredients and brands. Now go enjoy every guilt-free bite!
Now it’s your turn! Whip up this classic fried chicken and tag me in your crispy creations – I can’t wait to see how yours turns out!
Print
3 Secrets to Perfect Classic Fried Chicken Every Time
- Total Time: 4 hours 30 minutes
- Yield: 4 servings 1x
- Diet: Low Lactose
Description
A simple and delicious crispy fried chicken recipe perfect for any meal.
Ingredients
- 1 whole chicken, cut into pieces
- 2 cups buttermilk
- 2 cups all-purpose flour
- 1 tbsp salt
- 1 tbsp black pepper
- 1 tbsp paprika
- 1 tsp garlic powder
- 1 tsp onion powder
- Vegetable oil for frying
Instructions
- Marinate chicken in buttermilk for at least 4 hours or overnight.
- Mix flour, salt, pepper, paprika, garlic powder, and onion powder in a bowl.
- Drain chicken from buttermilk and coat in the flour mixture.
- Heat oil in a deep fryer or large skillet to 175°C.
- Fry chicken in batches for 12-15 minutes until golden brown and cooked through.
- Drain on paper towels and serve hot.
Notes
- For extra crispy chicken, double coat with flour after first dip in buttermilk.
- Use a thermometer to check oil temperature for best results.
- Let chicken rest for 5 minutes before serving.
- Prep Time: 4 hours
- Cook Time: 30 minutes
- Category: Main Dish
- Method: Frying
- Cuisine: American
Nutrition
- Serving Size: 1 piece
- Calories: 320
- Sugar: 1g
- Sodium: 450mg
- Fat: 18g
- Saturated Fat: 5g
- Unsaturated Fat: 10g
- Trans Fat: 0g
- Carbohydrates: 20g
- Fiber: 1g
- Protein: 25g
- Cholesterol: 80mg
Keywords: fried chicken, crispy chicken, classic recipe, comfort food