Let me tell you about my latest obsession – crispy air fryer chickpeas that taste like little flavor bombs! I stumbled on this trick when I needed a quick, healthy snack that wouldn’t leave me feeling guilty. Now I make them at least twice a week. The magic happens when chickpeas get that perfect crunch in the air fryer – way better than oven-baked versions I’ve tried. My kids go crazy for them too, which is a miracle because they usually turn their noses up at anything remotely healthy. The best part? You probably have all the ingredients in your pantry right now. Fifteen minutes in the air fryer transforms humble chickpeas into something magical – golden, crispy, and packed with protein. Trust me, once you try these, you’ll never look at a can of chickpeas the same way again.
Why You’ll Love These Air Fryer Chickpeas
These crispy little gems have become my go-to snack for so many reasons:
- That irresistible crunch – They get perfectly crisp on the outside while staying slightly tender inside (no sad, chewy chickpeas here!)
- Ready in 20 minutes flat – From pantry to snack bowl faster than you can say “takeout”
- Crazy versatile – Toss them on salads, eat by the handful, or use as croutons – they do it all
- Guilt-free munching – Packed with protein and fiber to keep you full, without any of the junk
Seriously, I keep a batch in my fridge at all times now – they’re that good!
Ingredients for Air Fryer Chickpeas
Here’s what you’ll need to make these addictive crispy chickpeas – I bet you’ve got most of this already in your kitchen:
- 1 can (15 oz) chickpeas – drained and rinsed (those canned chickpeas are lifesavers!)
- 1 tbsp olive oil – just enough to coat them without making them greasy
- 1/2 tsp salt – I use kosher salt, but any kind works
- 1/2 tsp garlic powder – trust me, this makes all the difference
- 1/2 tsp paprika – for that beautiful golden color and subtle smokiness
Quick tip: If you’re out of olive oil, avocado oil works great too. And feel free to play with the spices – sometimes I add a pinch of cumin or chili powder when I’m feeling adventurous!
How to Make Air Fryer Chickpeas
Making crispy chickpeas in the air fryer is so easy, you’ll wonder why you ever bothered with the oven. Here’s my foolproof method that gives perfect results every single time:
Step 1: Prep the Chickpeas
First things first – dry those chickpeas like your crunch depends on it (because it does!). I spread them out on a clean kitchen towel and gently roll them around to absorb all the moisture. Don’t skip this step – wet chickpeas steam instead of crisp up in the air fryer. Sometimes I’ll even let them air dry for 10 minutes while I preheat the air fryer. A little patience here makes all the difference!
Step 2: Seasoning
Now for the fun part – flavor town! I toss the dried chickpeas in a bowl with olive oil first, making sure every single one gets coated (this helps the spices stick). Then I sprinkle on my salt, garlic powder and paprika. Pro tip: I use my hands to mix everything – you get better coverage than with a spoon. The chickpeas should look like they’re wearing little spice jackets – not drowning in seasoning, but definitely well-dressed!
Step 3: Air Frying
Here’s where the magic happens. I preheat my air fryer to 390°F (200°C) – yes, preheating matters! Then I spread the chickpeas in a single layer (no overcrowding or they won’t crisp evenly). I set the timer for 15 minutes total, but here’s the key: every 5 minutes, I give the basket a good shake. This prevents sticking and ensures all sides get golden and crispy. When they’re done, they’ll be lightly browned and make a hollow sound when tapped. Let them cool for 5 minutes – they’ll crisp up even more as they sit. Then try not to eat the whole batch in one sitting (I never succeed at this part)!
Tips for Perfect Air Fryer Chickpeas
After burning through (literally!) more batches of chickpeas than I’d like to admit, I’ve learned all the tricks for getting them just right every time. Here are my hard-earned lessons:
Don’t crowd the basket! I learned this the hard way – if you pile them in, they’ll steam instead of crisp. Give them some breathing room in a single layer. If your air fryer’s small, just work in batches. It’s worth the extra few minutes.
Shake, shake, shake! That mid-cooking shake isn’t just for fun – it’s crucial for even browning. I set a timer for every 5 minutes religiously. If you skip this, you’ll end up with some burnt and some soggy chickpeas (not the tasty contrast we’re going for!).
Taste as you go for perfect crunch. At about 12 minutes, I always pull one out to test. Want them extra crispy? Add another 3-5 minutes. Every air fryer runs a bit different, so trust your instincts over the clock.
Let them cool completely before judging the texture. They crisp up more as they sit – I promise! I used to panic when they weren’t crunchy right out of the air fryer, but 5-10 minutes of cooling makes all the difference.
One last tip – if any chickpeas look suspiciously wrinkled before cooking, pluck them out. Those tend to burn first and can make the whole batch taste bitter. Learned that one the smoky way!
Variations for Air Fryer Chickpeas
Once you’ve mastered the basic recipe, the flavor possibilities are endless! Here are my favorite twists that keep things exciting:
Spicy Kick: Toss your chickpeas with 1/4 tsp cayenne pepper along with the other spices. For extra heat, add a pinch of red pepper flakes after cooking – they stick to the oil-coated chickpeas beautifully. My husband calls these “firecrackers” because they’ve got serious pop!
Cheesy Goodness: Right after air frying, while the chickpeas are still hot, shower them with 2 tbsp grated Parmesan cheese. The residual heat makes it melt slightly and cling perfectly. Sometimes I add a teaspoon of nutritional yeast too for extra umami flavor.
Sweet & Smoky: Swap the paprika for smoked paprika and add 1/2 tsp brown sugar with the spices. The sugar caramelizes slightly during cooking, creating these amazing sweet-savory bites that disappear fast at parties. Pro tip: add the sugar halfway through cooking to prevent burning.
The best part? You can mix and match these ideas – I’ve done spicy Parmesan chickpeas that were downright addictive. Really, once you get the technique down, your spice cabinet is the only limit!
Serving Suggestions
Oh, the places these crispy chickpeas will go! I’ve tossed them into just about everything in my kitchen – here are my absolute favorite ways to serve them:
Dip’s best friend: They’re incredible with hummus (chickpeas on chickpeas – meta, I know!). The crunch against the creamy dip is pure texture heaven. They also make a great stand-in for pita chips with tzatziki or baba ganoush.
Salad game changer: I sprinkle them on everything from Greek salads to roasted veggie bowls. They add that perfect crunch where you’d normally use croutons – try them on a kale Caesar and thank me later. My kids actually eat their greens when there are “crunchy beans” involved!
Soup topper supreme: Instead of crackers or bread, float a handful of these on tomato soup or butternut squash soup. The contrast between the hot soup and crispy chickpeas is unreal. Sometimes I’ll even do half chickpeas, half grated Parmesan for extra indulgence.
Snack mix upgrade: Mix them with nuts, pretzels, and a few chocolate chips for the ultimate sweet-salty-crunchy trail mix. I keep little bags of this in my purse for emergency snack attacks – way better than vending machine junk!
Honestly? Half the time I don’t even make it to the serving stage – I’m snacking on them straight from the air fryer basket like some kind of crispy chickpea gremlin. No judgment if you do the same!
Storage and Reheating
Now, here’s the thing about these crispy chickpeas – they rarely last long enough to store at my house! But when I do manage to save some (usually by hiding them in the back of the fridge), here’s how I keep them tasting fresh:
Airtight is everything: I toss any leftovers (ha! as if!) into a glass jar or container with a tight-fitting lid. Plastic bags work in a pinch, but they don’t keep them quite as crispy. They’ll stay delicious for about 3 days this way – if you can resist eating them that long!
The magic trick for reviving them: If they lose their crunch (which happens to the best of us), just pop them back in the air fryer at 350°F for 2-3 minutes. It’s like hitting the reset button! No need to add more oil – they’ll crisp right back up. I’ve tried microwaving them, but trust me, it’s not worth it. They just get chewy and sad.
One last tip – if you’re making a big batch for later, wait to add any extra spices (like that Parmesan we talked about) until after reheating. That way everything stays fresh and flavorful. Now go forth and snack responsibly (or not – I won’t tell)!
Air Fryer Chickpeas Nutrition
Here’s the best part about this snack – it’s actually good for you! One serving of these crispy chickpeas gives you that perfect combo of protein, fiber, and healthy fats to keep you full between meals. Here’s the nutritional breakdown for a half-cup serving (though let’s be real, I usually eat at least double that!):
| Calories: | 120 |
| Fat: | 5g (0.5g saturated, 4g unsaturated) |
| Carbohydrates: | 15g |
| Fiber: | 4g |
| Protein: | 5g |
| Sodium: | 300mg |
| Sugar: | 2g |
Quick note: These numbers can vary slightly depending on your exact ingredients. Using less oil? The fat content drops. Adding cheese? Obviously that changes things (but oh so deliciously!). The great thing is you can tweak this recipe to fit your dietary needs without sacrificing flavor. I’ve made low-sodium versions for my dad by cutting the salt in half, and they’re still crazy tasty!
Compared to store-bought crunchy snacks, these are total nutrition rockstars. You get actual protein and fiber instead of empty carbs – and no weird preservatives or mystery ingredients. Just simple, wholesome goodness that happens to be ridiculously addictive. Now that’s what I call a win-win snack!
FAQs About Air Fryer Chickpeas
After making countless batches of these crispy chickpeas (and fielding questions from just as many curious friends!), I’ve got answers to all the common hiccups you might run into. Here’s the real deal on making perfect air fryer chickpeas every time:
Can I use dried chickpeas instead of canned?
Absolutely! Soak 1/2 cup dried chickpeas overnight, then boil until tender (about 45 minutes). Dry them extra well before air frying – I pat them twice just to be safe. They’ll need about 5 extra minutes in the air fryer compared to canned. The texture comes out slightly heartier, which I actually prefer sometimes!
Why aren’t my chickpeas getting crispy?
Nine times out of ten, it’s one of three things: 1) Not drying them enough before cooking (wet chickpeas steam instead of crisp), 2) Overcrowding the air fryer basket (give them space!), or 3) Not shaking during cooking (that even browning is crucial). Try my towel-drying method and shaking routine – it’s foolproof!
Can I make these without oil?
Technically yes, but they won’t get as crispy or golden. The oil helps conduct heat and makes the spices stick. If you’re avoiding oil, try spraying lightly with cooking spray – it uses less but still helps. Without any fat, they tend to dry out rather than crisp up properly.
How do I prevent them from popping in the air fryer?
Ah, the infamous chickpea fireworks! Some popping is normal (that’s just steam escaping), but to minimize it: 1) Make sure they’re completely dry, 2) Don’t go above 400°F, and 3) Give the basket an extra shake at the 3-minute mark. If a few still pop, no worries – those extra-crispy ones are my snack tax!
Can I double this recipe?
You can, but don’t double the batch in the air fryer – cook in two separate batches instead. Overloading causes uneven cooking. I usually make back-to-back batches if I need more – the second round cooks faster since the air fryer’s already hot. Just keep the seasoned chickpeas covered while waiting their turn!
Share Your Results
Okay, confession time – I want to hear all about your crispy chickpea adventures! Did yours turn out perfectly golden? Maybe you discovered an amazing new spice combo? Or perhaps you had a hilarious kitchen mishap (we’ve all been there!)? Drop me a comment below – I read every single one and love swapping tips with fellow crunchy-chickpea enthusiasts.
And hey, if you snapped a photo of your masterpiece (or even your “learning experience” batch), tag me on Instagram @[yourhandle]. Nothing makes me happier than seeing your creations! I might even feature your version in my stories – extra points if you got creative with the seasonings or serving ideas.
Most importantly – did these hit the spot for you? A quick star rating helps other snack-seekers find this recipe too. Now go enjoy those crispy little flavor bombs – you’ve earned it!
Print
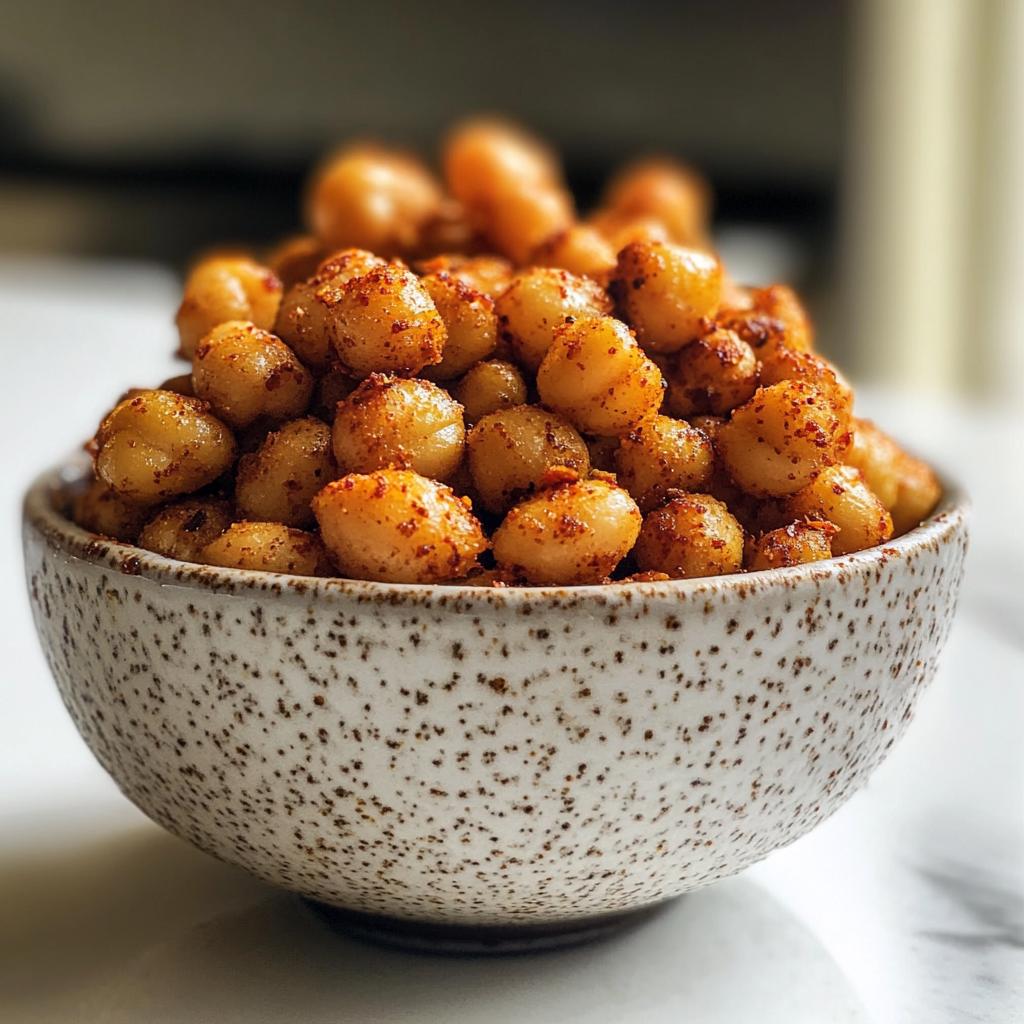
Crispy Air Fryer Chickpeas – Irresistible 15-Minute Snack
- Total Time: 20 mins
- Yield: 2 cups 1x
- Diet: Vegan
Description
Crispy air fryer chickpeas make a healthy and tasty snack.
Ingredients
- 1 can (15 oz) chickpeas, drained and rinsed
- 1 tbsp olive oil
- 1/2 tsp salt
- 1/2 tsp garlic powder
- 1/2 tsp paprika
Instructions
- Preheat air fryer to 390°F (200°C).
- Pat chickpeas dry with a paper towel.
- Toss chickpeas with olive oil, salt, garlic powder, and paprika.
- Spread chickpeas in a single layer in the air fryer basket.
- Cook for 12-15 minutes, shaking the basket every 5 minutes.
- Let cool before serving.
Notes
- Store leftovers in an airtight container for up to 3 days.
- Adjust seasonings to your taste.
- Prep Time: 5 mins
- Cook Time: 15 mins
- Category: Snack
- Method: Air Fry
- Cuisine: Mediterranean
Nutrition
- Serving Size: 1/2 cup
- Calories: 120
- Sugar: 2g
- Sodium: 300mg
- Fat: 5g
- Saturated Fat: 0.5g
- Unsaturated Fat: 4g
- Trans Fat: 0g
- Carbohydrates: 15g
- Fiber: 4g
- Protein: 5g
- Cholesterol: 0mg
Keywords: air fryer chickpeas, crispy chickpeas, healthy snack