Nothing beats the sound of chicken sizzling in hot oil, that magical moment when the crust turns golden and the smell fills your whole kitchen. My love for fried chicken started in my grandma’s tiny apartment kitchen, where she’d fry up batches on Sunday afternoons using her cast-iron skillet. The neighbors would knock on the door before the chicken was even done! That perfect balance of crispy outside and juicy inside? That’s what we’re after here. This recipe keeps it simple but gets you restaurant-quality results every time. Trust me, once you try homemade fried chicken, you’ll never go back to the drive-thru.
Why You’ll Love This Fried Chicken
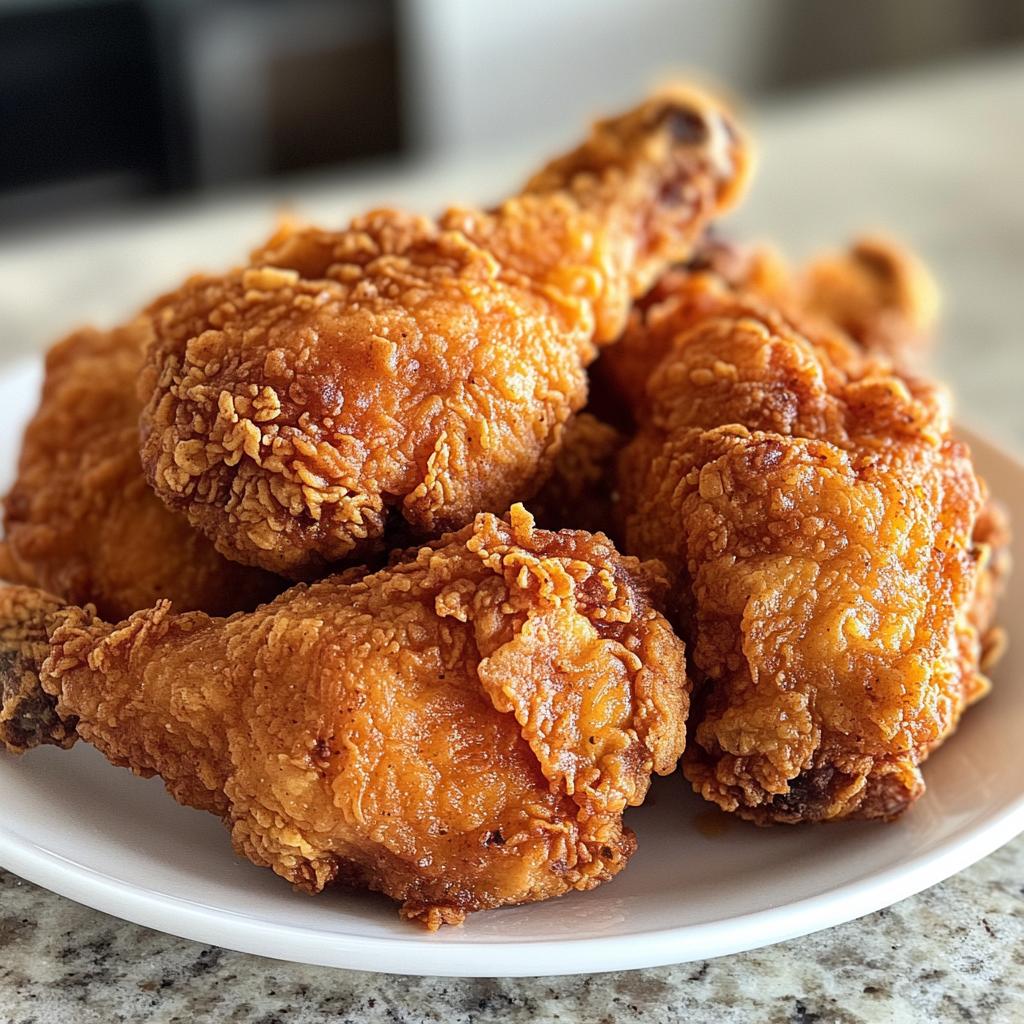
This fried chicken recipe hits all the right notes – crispy, juicy, and packed with flavor without any fuss. Here’s what makes it special:
- That perfect crunch: The flour coating fries up golden and shatteringly crisp
- Juicy every time: The buttermilk soak keeps the meat tender even if you accidentally overcook it (we’ve all been there!)
- Simple pantry staples: No fancy ingredients – just flour, spices, and chicken
- Better than takeout: Freshly fried beats soggy delivery chicken any day
Seriously, once you taste homemade fried chicken still warm from the oil, you’ll understand why this recipe never gets old in our house.
Fried Chicken Ingredients
Here’s everything you’ll need to make the crispiest, juiciest fried chicken of your life. I’ve grouped them so you can set up your frying station like a pro:
For the Chicken
- 4 chicken pieces (legs, thighs, or breasts with skin-on – about 3 lbs total)
Dry Ingredients
- 1 cup all-purpose flour (pack it lightly into the measuring cup)
- 1 teaspoon salt (I use kosher – if using table salt, reduce to ¾ tsp)
- 1 teaspoon black pepper (freshly ground if possible)
- 1 teaspoon paprika (smoked paprika adds amazing depth)
- 1 teaspoon garlic powder (not garlic salt!)
Wet Ingredients
- 1 large egg (room temperature blends better)
- 1 cup buttermilk (shake the carton well before measuring)
For Frying
- Vegetable oil (enough to fill your pan 1½ inches deep – about 4 cups)
Ingredient Notes & Substitutions
Don’t stress if you’re missing something – here are my tested swaps:
- No buttermilk? Make your own by mixing 1 cup milk with 1 tablespoon lemon juice or vinegar. Let it sit 5 minutes before using.
- Gluten-free? Swap the all-purpose flour with a 1:1 gluten-free blend or almond flour (though the crust won’t get as crispy).
- Out of eggs? You can skip it – just use 1¼ cups buttermilk instead.
- Want extra crispy? Add ¼ cup cornstarch to the flour mixture.
The chicken pieces are flexible too – I prefer bone-in, skin-on thighs for maximum flavor and juiciness, but boneless breasts work if you’re in a hurry (just reduce frying time by 2-3 minutes).
How to Make Fried Chicken
Now for the fun part – let’s turn these simple ingredients into the crispiest, most flavorful fried chicken you’ve ever made. Follow these steps closely, and you’ll be rewarded with golden perfection every time.
Prepare the Dredging Stations
First, grab two medium bowls (I use my trusty 4-cup Pyrex ones) and set up your assembly line. In the first bowl, whisk together all the dry ingredients – that’s the flour, salt, pepper, paprika, and garlic powder. Mix it really well so every bite gets that perfect seasoning. In the second bowl, beat the egg and buttermilk until completely smooth. Pro tip: if you’ve got time, let the chicken soak in this mixture for an hour (or even overnight in the fridge) for extra tenderness.
Coat the Chicken
Here’s where the magic happens! Working with one piece at a time, dip the chicken in the buttermilk mixture, letting the excess drip off. Then roll it in the flour mixture, pressing firmly so the coating really sticks. For extra crispy fried chicken, do a double dip – back into the wet mixture, then the dry again. This builds up those delicious craggy bits that get super crunchy. Place each coated piece on a wire rack while you finish the rest – this helps the coating set and prevents soggy spots.
Fry to Perfection
Heat about 1½ inches of oil in a heavy skillet (I swear by my cast iron) over medium heat until it reaches 350°F. Use a thermometer – guessing will only lead to greasy or burnt chicken. Carefully add the chicken pieces skin-side down, being careful not to overcrowd the pan (I fry in two batches if needed). The oil should bubble actively but not violently. Fry for 12-15 minutes, turning occasionally, until the crust turns that perfect golden brown and the internal temperature hits 165°F. That sizzling sound and incredible smell will tell you it’s working! Drain on a wire rack over paper towels – this keeps the bottom from getting soggy. Let it rest for 5 minutes (I know, the hardest part!) so the juices redistribute.
Tips for the Best Fried Chicken
After frying more chicken than I can count (and yes, surviving a few kitchen disasters along the way), here are my hard-earned secrets for fried chicken that’ll make you feel like a pro:
The Golden Rules of Frying
Dry chicken = crispy crust: Always pat your chicken pieces completely dry with paper towels before dredging. Any moisture makes the coating slide right off. I learned this the hard way my first attempt when my “crust” ended up at the bottom of the pan!
Temperature is everything: Keep that oil steady at 350°F. Too hot and the outside burns before the inside cooks; too cool and you get greasy chicken. I keep my thermometer clipped to the pan like a security blanket.
Give ’em space to breathe: Overcrowding drops the oil temp fast and steams the chicken instead of frying it. I fry in batches, keeping cooked pieces warm in a 200°F oven. Your patience will be rewarded with evenly crispy results.
Little Tricks That Make a Big Difference
Season beyond the flour: I sprinkle a tiny bit of salt on the chicken before dredging. It seasons the meat itself, not just the crust.
Let it rest twice: After coating, let chicken sit 10 minutes before frying (this helps the coating stick). Then rest 5 minutes after frying so the juices don’t all run out when you bite in.
Use the right tools: Tongs are your best friend for flipping, and a spider strainer makes removing chicken a breeze. And please – no plastic utensils near hot oil!
Save that oil: Once cooled, strain used oil through cheesecloth into a jar. It keeps for a month in the fridge – perfect for your next fry session. Grandma never wasted a drop, and neither do I.
Fried Chicken Variations
Once you’ve mastered the basic recipe (and trust me, you’ll want to make it weekly), try these tasty twists to keep things exciting. I’ve tested them all – some came from happy accidents, others from late-night cravings!
Spicy Southern Style
For those who like it hot, add 1 teaspoon cayenne pepper to your flour mix – it gives just the right kick without being overwhelming. My husband swears by his “secret” addition: a tablespoon of hot sauce whisked into the buttermilk. If you’re feeling adventurous, swap regular paprika for chipotle powder – that smoky heat is downright addictive.
Extra-Crunchy Panko Version
Replace half the flour with panko breadcrumbs for unbelievable crunch. Here’s my trick: after the initial dredging, press the chicken firmly into a plate of panko. The irregular shapes create tons of crispy edges. My kids call this “dinosaur skin chicken” because of all the awesome texture!
Herb Garden Special
In summer when my herb pots are overflowing, I chop up whatever’s fresh (usually thyme, rosemary, and parsley) and mix it right into the flour. The herbs fry up crisp and fragrant – it’s like eating fried chicken in an Italian garden. A teaspoon of lemon zest in the buttermilk brightens everything up beautifully.
Sweet and Smoky
Add 2 tablespoons brown sugar and 1 tablespoon smoked paprika to the flour for a barbecue-inspired twist. The sugar caramelizes into this gorgeous mahogany crust that’ll have everyone asking for your recipe. Just watch it closely – the sugar makes it brown faster!
The beauty of fried chicken is how versatile it is – don’t be afraid to play with flavors you love. Last week I even tried adding grated Parmesan to the flour (oh my stars, so good!). What’ll you try first?
Serving Suggestions
Oh, the sheer joy of deciding what to serve with your golden, crispy fried chicken! Here’s how I love to round out the meal – these pairings make it feel like a proper Southern feast, even if you’re just eating at your kitchen counter:
The Classic Combo
- Mashed potatoes (extra buttery, obviously) for dragging those crispy bits through
- Creamy coleslaw – that cool crunch cuts through the richness perfectly
- Buttermilk biscuits still warm from the oven (use your leftover buttermilk!)
When You Want Something Lighter
- Corn and tomato salad with fresh basil – summer on a plate
- Quick-pickled veggies (I do cucumbers and red onions) for tangy contrast
- Watermelon wedges – the sweet juice balances the salty crust so well
And let’s be real – sometimes I just rip into the chicken straight from the rack with a side of hot sauce and a stack of napkins. No judgment here!
Storing and Reheating Fried Chicken
Okay, let’s talk leftovers – though in my house, we rarely have any! When you do manage to save a piece or two (congratulations on that willpower!), here’s how to keep that fried chicken tasting almost as good as when it first came out of the oil. The key is avoiding the microwave at all costs unless you want sad, soggy chicken. Trust me, I learned that lesson the hard way!
For storing, let the chicken cool completely first – I mean completely. If you put it away warm, you’ll get condensation that turns your beautiful crispy crust into a sad, soft mess. Once cooled, wrap each piece loosely in parchment paper or place them in a single layer in an airtight container. They’ll keep in the fridge for up to 3 days. You could freeze them for longer (about 2 months), but the texture won’t be quite the same when thawed.
Now for reheating – this is where the magic happens! Preheat your oven to 375°F and place the chicken on a wire rack over a baking sheet. This lets hot air circulate all around, crisping up every surface. Bake for 15-20 minutes until heated through and sizzling. For extra crunch, I sometimes give it a quick 30-second blast under the broiler at the end. The result? Fried chicken that’s crispy outside and piping hot inside – almost like it just came out of the fryer!
Fried Chicken FAQs
Over years of frying chicken (and fielding panicked texts from friends mid-recipe), I’ve answered every question imaginable. Here are the ones that come up most often – consider this your fried chicken troubleshooting guide!
Can I use boneless chicken?
Absolutely! Boneless thighs or breasts work great – just reduce frying time by 2-3 minutes since they cook faster. My tip? Pound boneless pieces to even thickness so they cook uniformly. Nothing’s worse than a perfectly crispy outside with a raw center!
How do I keep the crust from falling off?
Three tricks: 1) Pat chicken bone dry before dredging, 2) Let coated chicken rest 10 minutes before frying (this helps the coating set), and 3) Don’t move it too soon in the oil – let that crust form! If pieces still lose coating, your oil might be too cool.
What’s the best way to check doneness?
Besides reaching 165°F internally, look for these signs: juices run clear when pierced (no pink!), meat pulls easily from bones, and the crust is deep golden brown. My grandma taught me to listen for the sizzle slowing down – that’s nature’s timer!
Can I make this fried chicken ahead?
You can dredge chicken up to 24 hours ahead and keep it refrigerated (uncovered helps the coating dry slightly). For best results, fry just before serving. If you must reheat, use the oven method I mentioned earlier – never the microwave unless you enjoy disappointment!
Why does my chicken taste greasy?
Usually two culprits: oil temperature dropped too low (get that thermometer!) or you overcrowded the pan. Remember – frying is a solo sport for each piece! Also, let fried chicken drain on a rack, not paper towels, to prevent steaming.
Got more questions? Drop them in the comments – I check daily! Nothing makes me happier than helping others achieve fried chicken greatness.
Nutritional Information
Now, I’m no nutritionist (just a fried chicken enthusiast!), but here’s the general breakdown per serving to give you an idea of what you’re enjoying. Remember, these are estimates – actual numbers can vary based on your exact ingredients and how much oil the chicken absorbs during frying. Grandma always said, “Good food feeds the soul first!”
- Calories: About 320 per piece
- Fat: 18g (4g saturated)
- Protein: 25g – that’s nearly half your daily need!
- Carbs: 15g (mostly from the flour coating)
- Sodium: Around 450mg (easy to reduce by cutting salt if needed)
My philosophy? Everything in moderation – including moderation! This fried chicken is meant to be savored as part of a balanced diet. Pair it with those fresh veggie sides I mentioned earlier, and you’ve got yourself a meal that satisfies every craving without guilt.
Try this recipe and share your results in the comments! Did you stick to the classic version or try one of the fun variations? I can’t wait to hear about your fried chicken adventures.
Print
Crispy Fried Chicken Recipe with 4 Juicy Secrets
- Total Time: 30 minutes
- Yield: 4 servings 1x
- Diet: Low Lactose
Description
Crispy fried chicken with a golden crust and juicy interior.
Ingredients
- 4 chicken pieces (legs, thighs, or breasts)
- 1 cup all-purpose flour
- 1 tsp salt
- 1 tsp black pepper
- 1 tsp paprika
- 1 tsp garlic powder
- 1 egg
- 1 cup buttermilk
- Vegetable oil for frying
Instructions
- Mix flour, salt, pepper, paprika, and garlic powder in a bowl.
- Whisk egg and buttermilk in another bowl.
- Dip chicken pieces in the egg mixture, then coat with flour mixture.
- Heat oil in a deep pan to 350°F (175°C).
- Fry chicken for 12-15 minutes until golden brown and cooked through.
- Drain on paper towels before serving.
Notes
- Use a thermometer to check oil temperature.
- Let chicken rest for 5 minutes after frying for crispier skin.
- Prep Time: 15 minutes
- Cook Time: 15 minutes
- Category: Main Dish
- Method: Frying
- Cuisine: American
Nutrition
- Serving Size: 1 piece
- Calories: 320
- Sugar: 1g
- Sodium: 450mg
- Fat: 18g
- Saturated Fat: 4g
- Unsaturated Fat: 12g
- Trans Fat: 0g
- Carbohydrates: 15g
- Fiber: 1g
- Protein: 25g
- Cholesterol: 90mg
Keywords: fried chicken, crispy chicken, homemade fried chicken