Oh, the joy of Easter baking! It’s honestly one of my favorite times of the year when the kitchen fills with the sweet smells of springtime treats. There’s something magical about gathering with family, rolling up our sleeves, and creating delicious goodies that brighten up our celebrations. These *easter baking ideas* are all about bringing a splash of color and creativity to your table, making every bite feel like a little celebration in itself!
Whether you’re whipping up a batch of vibrant cupcakes or a classic cake adorned with pastel decorations, you can really let your imagination run wild. Kids love getting involved, from mixing the batter to decorating with sprinkles and icing. Trust me, you’ll not only fill your home with delightful aromas but also create lasting memories. So, grab your apron and let’s dive into these fun and festive baking ideas that will surely make your Easter gathering extra special!
Ingredients List
Gathering the right ingredients is key to making your Easter baking ideas come to life! Here’s what you’ll need:
- 2 cups all-purpose flour: This will form the base of your delicious treats. Make sure to measure it accurately for the perfect texture!
- 1 cup sugar: Regular granulated sugar works wonders for sweetness. You can even try using a mix of white and brown sugar for added depth!
- 1/2 cup butter: Softened and at room temperature, this will create a rich, buttery flavor. Don’t skimp on the good stuff!
- 3 eggs: These should be large eggs, and let them come to room temperature for better mixing.
- 1 cup milk: Whole milk is ideal, but you can use any milk you prefer. It brings moisture to the batter.
- 1 tablespoon baking powder: This helps your treats rise beautifully. Always check the expiration date for best results!
- 1 teaspoon vanilla extract: Pure vanilla extract adds a lovely aromatic flavor. Trust me, it makes a difference!
- 1/2 teaspoon salt: Just a pinch enhances all the flavors in your baked goods. Don’t skip it!
- Food coloring (optional): If you want to add some festive flair, grab your favorite colors to brighten up your treats!
With these ingredients in hand, you’re all set to create some delightful Easter goodies that will wow family and friends!
How to Prepare Instructions
Now that we have our ingredients ready, let’s get into the fun part – baking! Follow these step-by-step instructions, and I promise you’ll end up with the most delightful Easter treats.
- Preheat the oven: First things first, preheat your oven to 350°F (175°C). This ensures your treats bake evenly and rise beautifully!
- Mix the dry ingredients: In a medium-sized bowl, whisk together the flour, baking powder, and salt. This step is crucial because it helps distribute the baking powder evenly throughout the flour.
- Cream the butter and sugar: In a large bowl, beat the butter and sugar together until the mixture is light and fluffy. This usually takes about 3-4 minutes. You can use a hand mixer or a stand mixer; just make sure it’s nice and airy!
- Add the eggs: Next, add your eggs, one at a time, mixing well after each addition. This helps create that lovely emulsified mixture that makes your cake so tender.
- Incorporate milk and vanilla: Pour in the milk and vanilla extract, stirring gently until combined. You want to mix just enough to incorporate all the wet ingredients.
- Combine wet and dry ingredients: Gradually fold the dry mixture into the wet ingredients. Be gentle here – overmixing can lead to a dense cake. Just mix until there are no flour streaks left!
- Add color (optional): If you’re feeling festive, divide the batter into separate bowls and add food coloring to each. Swirl it together for a fun marbled effect or leave it as is for a classic look!
- Pour into pans: Carefully pour the batter into your greased baking pans. Use a spatula to smooth the tops if needed.
- Bake: Pop those beauties into the preheated oven and bake for 25-30 minutes. You’ll know they’re done when a toothpick inserted into the center comes out clean.
- Cool: Once baked, take them out and let them cool in the pan for about 10 minutes before transferring to a wire rack to cool completely. This helps prevent sogginess!
And there you have it! Follow these steps, and you’ll have a batch of delightful Easter treats ready for decorating and sharing. Happy baking!
Why You’ll Love These Easter Baking Ideas
These *Easter baking ideas* bring so much joy and creativity to your celebrations! Here’s why you’ll absolutely adore them:
- Creative expression: You can let your imagination run wild with colors and designs, making each treat uniquely yours!
- Fun for kids: Involve the little ones in mixing, decorating, and of course, taste-testing. It’s a fantastic way to bond!
- Joy of sharing: There’s nothing quite like bringing a homemade treat to the table and watching everyone’s faces light up.
- Memorable traditions: Bake together with family and friends, creating sweet memories that will last a lifetime.
Trust me, these ideas will make your Easter gatherings extra special!
Tips for Success
To ensure your Easter baking adventure goes off without a hitch, here are some handy tips that I swear by!
- Check your oven: Ovens can be a bit sneaky. It’s always a good idea to use an oven thermometer to make sure it’s at the right temperature. If your oven runs hot, your treats might bake faster than expected!
- Don’t skip the cooling: Allow your baked goods to cool in the pan for about 10 minutes before transferring them to a wire rack. This helps maintain that perfect texture and prevents sogginess on the bottom.
- Get creative with decorations: Use seasonal sprinkles, edible glitter, or even fresh fruit to jazz up your treats! Kids will love helping out with this part!
- Mind the mixing: Be gentle when combining the wet and dry ingredients. Overmixing can lead to dense treats rather than fluffy ones. Just mix until combined!
- Storage tips: If you have leftovers, store them in an airtight container to keep them fresh. You can even freeze them for later – just make sure to wrap them well!
With these tips in your back pocket, you’ll be well on your way to baking success this Easter!
Variations on Easter Baking Ideas
One of the best parts of Easter baking is how versatile it can be! Here are some fun variations to elevate your treats:
- Flavor twists: Experiment with different extracts like almond or lemon for a refreshing twist. You can even add a splash of coconut milk for a tropical vibe!
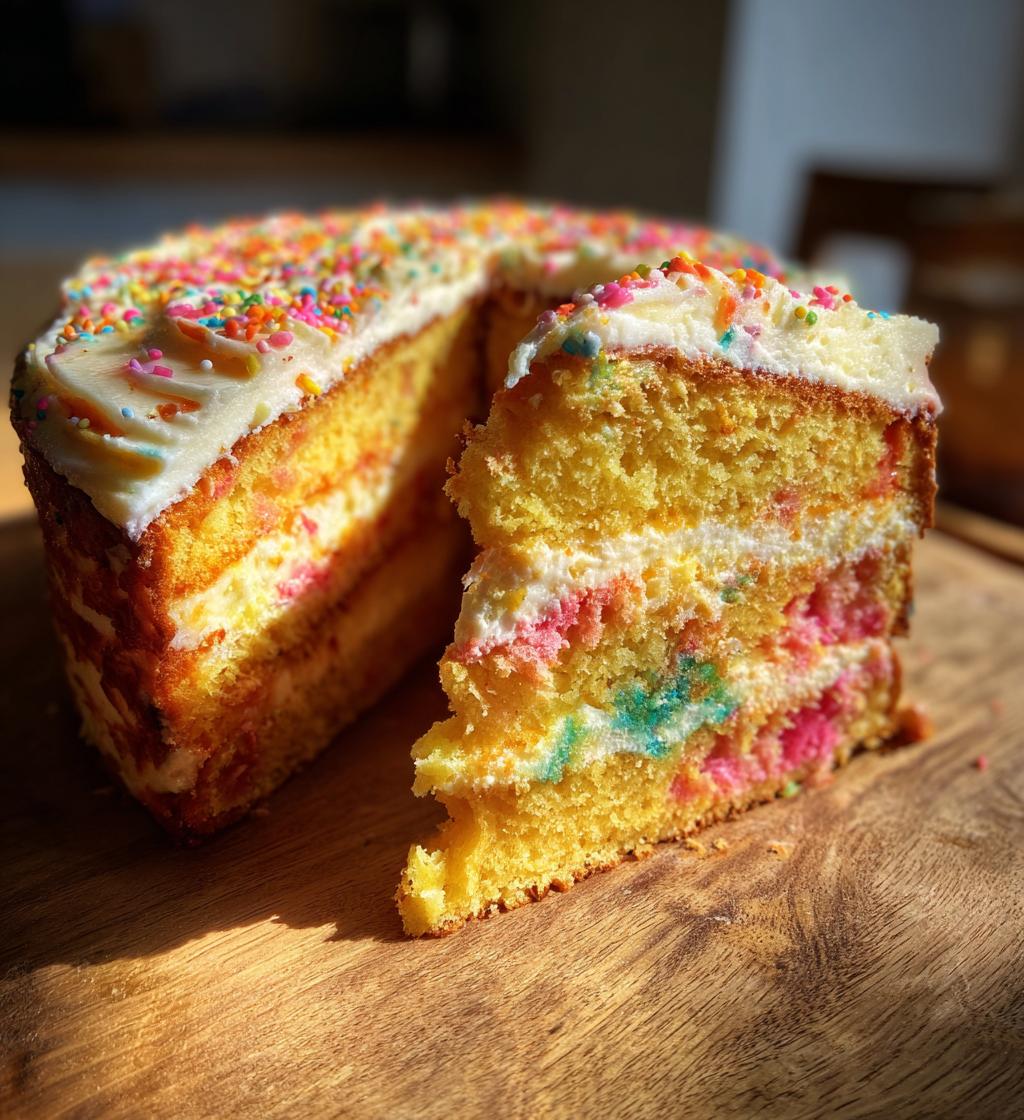
- Layered cakes: Create a multi-layered cake by dividing the batter into several pans, then stack them with colorful frosting in between. It’ll be a showstopper centerpiece!
- Fun shapes: Use Easter-themed cookie cutters to cut out fun shapes from your baked goods. Think bunnies, eggs, or flowers – it’s all about the festive spirit!
- Fruit additions: Toss in some chopped dried fruits like apricots or cranberries for added sweetness and texture. Fresh berries on top also make for a beautiful garnish!
- Chocolate drizzle: Don’t forget about the magic of chocolate! A simple drizzle of melted chocolate over your treats adds richness and an elegant touch.
These variations will not only keep things exciting in the kitchen but also delight your guests with unexpected flavors and presentations!
Storage & Reheating Instructions
Storing your delicious Easter treats properly is essential to keep them fresh and flavorful! Once completely cooled, place your baked goods in an airtight container at room temperature. They should stay fresh for about 3-4 days. If you want to keep them longer, you can freeze them! Just wrap individual pieces tightly in plastic wrap and then place them in a freezer-safe bag. When you’re ready to enjoy them again, thaw overnight in the fridge or let them sit out at room temperature for a couple of hours.
To reheat, pop them in a preheated oven at 300°F (150°C) for about 10 minutes. This will help restore their lovely texture without drying them out. Enjoy every bite!
Nutritional Information
Keep in mind that nutritional values can vary based on the specific ingredients and brands you use. The information provided here is an estimate and may not be exact. Always check product labels for precise details. Enjoy your baking while being mindful of your dietary preferences!
FAQ Section
Got questions? Don’t worry, I’ve got you covered! Here are some common queries about these *Easter baking ideas*:
- How long can I store my Easter treats? You can keep your baked goods in an airtight container at room temperature for about 3-4 days. If you want them to last longer, freeze them for up to 3 months!
- Can I substitute ingredients? Absolutely! You can use unsweetened applesauce instead of butter for a lower-fat version, or swap out the milk for a non-dairy alternative like almond or oat milk.
- What’s the best way to decorate my treats? You can use seasonal sprinkles, edible glitter, or even fresh fruit! Let the kids go wild with decorating – it’s part of the fun!
- Can I make these treats ahead of time? Yes! You can bake them a day or two in advance. Just store them properly, and they’ll taste just as delicious when it’s time to serve.
- What if my batter is too thick? If your batter seems too thick, don’t hesitate to add a splash of milk to loosen it up. This will help ensure a light and fluffy texture!
Happy baking, and feel free to reach out if you have more questions!
Print
Easter Baking Ideas: 7 Joyful Recipes to Enchant You
- Total Time: 50 minutes
- Yield: 12 servings 1x
- Diet: Vegetarian
Description
Creative ideas for baking during Easter celebrations.
Ingredients
- 2 cups all-purpose flour
- 1 cup sugar
- 1/2 cup butter
- 3 eggs
- 1 cup milk
- 1 tablespoon baking powder
- 1 teaspoon vanilla extract
- 1/2 teaspoon salt
- Food coloring (optional)
Instructions
- Preheat the oven to 350°F (175°C).
- In a bowl, mix flour, baking powder, and salt.
- In another bowl, cream butter and sugar until light.
- Add eggs one at a time, mixing well.
- Stir in vanilla and milk.
- Combine dry ingredients with wet ingredients.
- If desired, add food coloring.
- Pour batter into greased baking pans.
- Bake for 25-30 minutes or until a toothpick comes out clean.
- Let cool before decorating.
Notes
- Use seasonal decorations.
- Try different flavors with extracts.
- Consider using molds for fun shapes.
- Prep Time: 20 minutes
- Cook Time: 30 minutes
- Category: Dessert
- Method: Baking
- Cuisine: American
Nutrition
- Serving Size: 1 slice
- Calories: 210
- Sugar: 15g
- Sodium: 180mg
- Fat: 8g
- Saturated Fat: 5g
- Unsaturated Fat: 2g
- Trans Fat: 0g
- Carbohydrates: 30g
- Fiber: 1g
- Protein: 3g
- Cholesterol: 55mg
Keywords: easter baking ideas