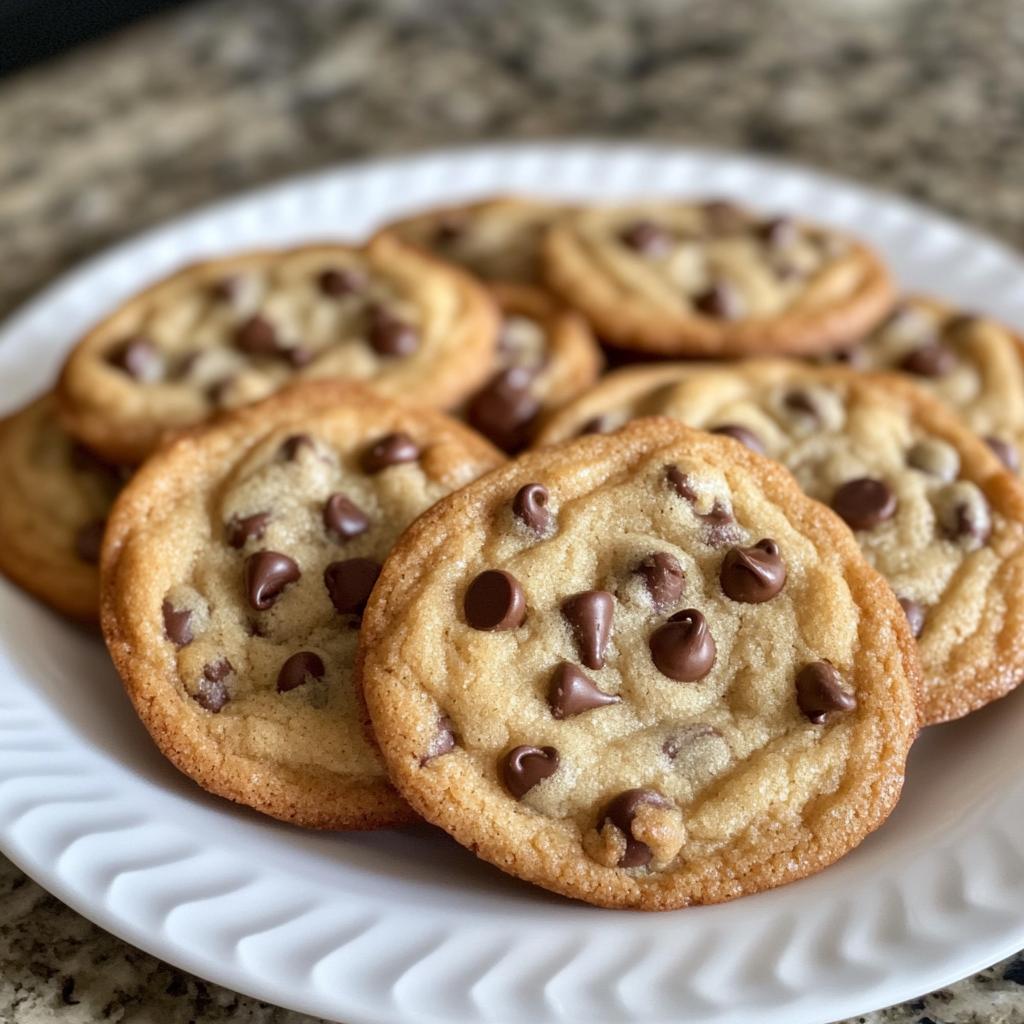
The holiday season is upon us, and there’s nothing quite like the joy of baking *easy Christmas cookies* to fill your home with warmth and cheer! I remember the first time I made these cookies with my little ones, their faces lighting up as we rolled the dough and sprinkled the chocolate chips. It turned into a delightful mess of flour and laughter that I’ll cherish forever. These cookies are not only quick to whip up, but they also deliver that perfect blend of sweetness and nostalgia that makes the holidays feel magical.
What I love most about this recipe is how versatile it is! You can easily customize it with different chips or nuts to suit your family’s taste. Plus, the aroma of cookies baking in the oven is simply irresistible — it’s like a warm hug from the holidays. In just under half an hour, you can have a batch of delicious cookies ready to share with friends and family, or to enjoy with a cozy cup of cocoa. Trust me, once you make these easy Christmas cookies, they’ll become a cherished tradition in your home, too!
Ingredients List
For these delightful *easy Christmas cookies*, you’ll need a handful of simple ingredients that come together beautifully. Here’s what you’ll gather:
- 2 cups all-purpose flour
- 1 cup sugar
- 1/2 cup butter, softened
- 1 large egg
- 1 teaspoon vanilla extract
- 1/2 teaspoon baking powder
- 1/4 teaspoon salt
- 1/2 cup chocolate chips
Make sure your butter is nice and soft—it’ll make creaming with the sugar a breeze! And don’t forget to grab your favorite chocolate chips; they’re the star of the show in these cookies. Happy baking!
How to Prepare Instructions
Making these *easy Christmas cookies* is a delightful process that anyone can master! Just follow these simple steps, and you’ll have a tasty batch ready in no time.
Preheat the Oven
First things first, you’ll want to preheat your oven to 350°F (175°C). This step is crucial because it ensures that your cookies bake evenly and come out perfectly golden. Trust me, there’s nothing worse than undercooked cookies! While the oven is warming up, you can gather the rest of your ingredients.
Creaming the Butter and Sugar
Now, let’s get to the fun part! In a mixing bowl, cream together the softened butter and sugar until it’s light and fluffy. I usually use a hand mixer for this, but a sturdy wooden spoon works just as well if you’re feeling old-school. You’ll want to beat it for about 2-3 minutes until it looks pale and creamy. This step is key because the air you whip in helps give the cookies that nice, soft texture!
Mixing in Wet Ingredients
Once your butter and sugar are looking fabulous, it’s time to add in the egg and vanilla extract. Mix well until everything is nicely combined. Don’t rush this! You want those flavors to meld together beautifully, creating that wonderful base for your cookies.
Combining Dry Ingredients
In a separate bowl, combine your flour, baking powder, and salt. I always make sure to whisk these together to evenly distribute the baking powder and salt. This step is super important because it helps your cookies rise evenly, preventing any weird lumps. Plus, who wants to bite into a salty surprise?
Mixing Wet and Dry Ingredients
Now, it’s time to bring it all together! Gradually add the dry mixture to your wet ingredients. I usually do this in three parts, mixing gently until just combined. Be careful not to overmix here! You want to see a few flour streaks left, as that’ll help keep your cookies tender and delicious.
Adding Chocolate Chips
Alright, now for the star of the show—chocolate chips! Gently fold them into the batter with a spatula. I like to do this carefully so that the chips are evenly distributed without breaking apart. We want those delightful chocolate morsels to shine in every bite!
Baking the Cookies
Using a spoon or cookie scoop, drop spoonfuls of dough onto a baking sheet lined with parchment paper. Make sure to leave some space between each cookie because they’ll spread a bit while baking. Pop them in the oven for 10-12 minutes, or until the edges are golden brown. You’ll know they’re done when they look set but still soft in the center. Oh, that smell wafting through your kitchen is heavenly!
Cooling the Cookies
Finally, once you’ve pulled these beauties from the oven, it’s important to let them cool on the baking sheet for about 5 minutes before transferring them to a wire rack. This helps them firm up a bit and makes them easier to handle. Trust me, letting them cool will give you that perfect texture you’re after. And there you have it—easy Christmas cookies that are ready to be devoured!
Why You’ll Love This Recipe
- Quick & Easy: You can whip up a batch of these cookies in under 30 minutes, making them perfect for last-minute holiday baking!
- Deliciously Customizable: Feel free to swap in your favorite mix-ins like nuts or different chocolate chips to create your own signature cookie.
- Fun to Make: Baking these cookies is a great activity to share with family and friends, especially little ones who love to help!
- Perfect for Sharing: With a yield of 24 cookies, there’s plenty to share with neighbors or bring to holiday gatherings.
- Irresistible Aroma: The smell of these cookies baking will fill your home with warm, festive vibes that everyone will love.
- Tradition Ready: These easy Christmas cookies have the potential to become a cherished family tradition year after year!
Tips for Success
Baking *easy Christmas cookies* is a breeze, but a few handy tips can take your cookie game to the next level! Here are some of my favorite pointers to ensure your cookies turn out perfectly every time:
- Butter Matters: Make sure your butter is at room temperature before you start. It should be soft enough to make an indent with your finger but not melted. If you forget to take it out ahead of time, you can cut it into small cubes and microwave it for about 10 seconds—just to soften, not melt!
- Don’t Skip the Salt: It may seem small, but a little salt goes a long way in balancing the sweetness of your cookies. If you’re using salted butter, you can omit the added salt in the recipe.
- Experiment with Flavors: Feel free to swap out the vanilla extract for almond extract for a different flavor profile! You can also add a teaspoon of cinnamon or nutmeg for a warm, festive twist that embraces the holiday spirit.
- Chill the Dough: If you find your dough is too soft to scoop, pop it in the fridge for about 30 minutes. Chilling not only helps with easier scooping but also leads to thicker cookies that won’t spread too much while baking.
- Watch the Bake Time: Every oven is different, so start checking your cookies at the 10-minute mark. They should look slightly underbaked in the center but golden around the edges. They’ll firm up as they cool!
- Storage Tips: If you have leftovers (which is rare!), store your cookies in an airtight container to keep them fresh. They’ll last about a week at room temperature, or you can freeze them for up to three months. Just make sure to layer parchment paper between them to prevent sticking!
- Don’t Overmix: When combining your wet and dry ingredients, mix just until incorporated. Overmixing can lead to tough cookies, and nobody wants that! A few flour streaks are okay.
With these tips in your back pocket, you’ll be well on your way to baking the best *easy Christmas cookies* ever! Enjoy the process, and remember that a little love goes a long way in making your treats truly special!
Storage & Reheating Instructions
Once you’ve baked your delicious *easy Christmas cookies*, you’ll want to make sure they stay fresh for as long as possible. Here’s how to store and reheat them properly:
First things first, let your cookies cool completely on a wire rack. This step is crucial because if they’re still warm when you store them, they can become soggy from trapped moisture. Once they’re cool, transfer your cookies to an airtight container. I love using a container with a tight seal to keep them fresh and chewy.
Stored this way, your cookies will last about a week at room temperature. If you want to keep them longer, you can freeze them! Just layer parchment paper between each cookie to prevent them from sticking together, then pop them in a freezer-safe bag or container. They’ll keep well for up to three months in the freezer.
When you’re ready to enjoy your cookies again, simply remove them from the freezer and let them thaw at room temperature. If you prefer a warm cookie (who doesn’t?), you can pop them in the microwave for about 10-15 seconds. Just be careful not to overdo it, or you might end up with a melted chocolate puddle instead of a perfectly warmed treat!
With these storage tips, you’ll be able to savor your *easy Christmas cookies* even after the holiday hustle and bustle has settled down. Happy snacking!
Nutritional Information
When baking *easy Christmas cookies*, it’s always good to know what you’re indulging in! Here’s a breakdown of the typical nutritional values per serving (1 cookie):
- Calories: 120
- Fat: 5g
- Saturated Fat: 3g
- Unsaturated Fat: 2g
- Trans Fat: 0g
- Cholesterol: 15mg
- Sodium: 50mg
- Carbohydrates: 18g
- Fiber: 1g
- Sugar: 8g
- Protein: 2g
These values are estimates, of course, and can vary based on specific ingredients or portion sizes. But knowing this can help you enjoy your cookies guilt-free while still indulging in the holiday spirit!
FAQ Section
Q1. Can I use different types of chocolate chips in these easy Christmas cookies?
Absolutely! You can switch out the regular chocolate chips for dark chocolate, white chocolate, or even peanut butter chips. Feel free to mix and match to create your perfect cookie!
Q2. How can I make these cookies even more festive?
Great question! You can add sprinkles or festive colored sugar to the tops of the cookies before baking. You could also fold in some dried cranberries or chopped nuts for a holiday twist. The options are endless!
Q3. What if I don’t have all-purpose flour? Can I substitute it?
Yes! You can use a gluten-free all-purpose flour blend if you need a gluten-free option. Just make sure it has xanthan gum in it, or add a little to help with the texture of your cookies.
Q4. Can I make the dough ahead of time and freeze it?
Definitely! You can scoop the cookie dough into balls and freeze them on a baking sheet. Once they’re frozen solid, transfer them to a freezer-safe bag. When you’re ready to bake, just add a couple of extra minutes to the baking time straight from the freezer!
Q5. How can I tell when my cookies are done baking?
The best way to check is to look for golden edges and a slightly soft center. They might look a little underbaked when you take them out, but they’ll continue to firm up as they cool. Trust your nose; if they smell divine, they’re likely ready!

Easy Christmas Cookies: 5 Secrets to Festive Bliss
- Total Time: 27 minutes
- Yield: 24 cookies 1x
- Diet: Vegetarian
Description
These easy Christmas cookies are quick to make and perfect for the holiday season.
Ingredients
- 2 cups all-purpose flour
- 1 cup sugar
- 1/2 cup butter, softened
- 1 large egg
- 1 teaspoon vanilla extract
- 1/2 teaspoon baking powder
- 1/4 teaspoon salt
- 1/2 cup chocolate chips
Instructions
- Preheat your oven to 350°F (175°C).
- In a bowl, cream together the butter and sugar.
- Add the egg and vanilla, mixing well.
- In another bowl, combine flour, baking powder, and salt.
- Gradually add the dry ingredients to the wet mixture.
- Fold in the chocolate chips.
- Drop spoonfuls of dough onto a baking sheet.
- Bake for 10-12 minutes or until edges are golden.
- Let cool before serving.
Notes
- Store in an airtight container.
- Can be decorated with icing or sprinkles.
- Use different chips or nuts for variety.
- Prep Time: 15 minutes
- Cook Time: 12 minutes
- Category: Dessert
- Method: Baking
- Cuisine: American
Nutrition
- Serving Size: 1 cookie
- Calories: 120
- Sugar: 8g
- Sodium: 50mg
- Fat: 5g
- Saturated Fat: 3g
- Unsaturated Fat: 2g
- Trans Fat: 0g
- Carbohydrates: 18g
- Fiber: 1g
- Protein: 2g
- Cholesterol: 15mg
Keywords: easy christmas cookies