Oh my goodness, there’s something so magical about cooking and sharing food and drinks with the people you love! I mean, whether it’s a cozy dinner with family or an impromptu gathering with friends, the right recipes can turn an ordinary day into something truly special. That’s why I’m thrilled to share this collection of easy-to-make recipes that are perfect for any occasion. Seriously, they’re so simple that even a kitchen novice can whip them up without breaking a sweat!
Every time I bake something delicious, I feel this warm, fuzzy feeling knowing that I’m creating memories. I can still remember the first time I tried a similar recipe—it was a hit at our potluck! The joy of seeing everyone savor every bite is priceless. Plus, these recipes are incredibly versatile, so you can mix and match them to create the perfect food and drinks pairing. Trust me, once you try them, you’ll want to share them with everyone you know. Let’s dive in and get cooking!
Ingredients List
To make this delightful recipe, you’ll need a few simple ingredients that you probably already have on hand. Here’s what you’ll need:
- 2 cups all-purpose flour: This is the backbone of your recipe, providing structure and a lovely crumb.
- 1 cup granulated sugar: Sweetness is key, and this sugar will help create that beautiful golden crust.
- 1 cup milk: Whole milk is best for richness, but feel free to use whatever you have! It keeps the batter smooth and moist.
- 1/2 cup unsalted butter (melted): Melted butter adds depth of flavor and a lovely moistness to your dish. Don’t skimp on this one!
- 2 large eggs: Eggs are essential for binding everything together and creating that perfect texture. Make sure they’re at room temperature for best results.
- 1 tablespoon baking powder: This is your leavening agent, helping your dish rise beautifully in the oven.
- 1 teaspoon pure vanilla extract: A splash of vanilla adds warmth and enhances the overall flavor. Trust me, it makes a difference!
Gather these ingredients, and you’re already on your way to creating something delicious! Don’t forget to have fun while you’re at it—cooking should always be an adventure!
How to Prepare Instructions
Alright, let’s get down to the delicious details of how to whip up this delightful dish! You’re going to love how simple it is, and I promise you’ll be amazed at the results. Ready? Let’s go!
- Preheat your oven: First things first, preheat your oven to 350°F (175°C). This step is crucial because it ensures that your dish bakes evenly and rises perfectly. You don’t want to skip this!
- Mix the dry ingredients: In a large mixing bowl, combine the 2 cups of all-purpose flour, 1 cup of granulated sugar, and 1 tablespoon of baking powder. Use a whisk to blend these together until they’re well mixed. This will help avoid any lumps later on.
- Add the wet ingredients: Now it’s time to bring in the wet ingredients! Pour in 1 cup of milk, add the 1/2 cup of melted unsalted butter, crack in 2 large eggs, and drizzle in 1 teaspoon of pure vanilla extract. The melted butter should be warm but not hot, so you don’t cook the eggs!
- Stir until smooth: Grab a spatula or a wooden spoon and mix everything together until you have a smooth batter. Make sure to scrape the sides of the bowl to incorporate all the dry ingredients. If you see a few lumps, don’t worry—just mix gently until it’s mostly smooth.
- Prepare your baking dish: Grease your baking dish thoroughly with a bit of butter or cooking spray. This will ensure your delicious creation comes out easily once it’s baked. If you’re feeling fancy, line the bottom with parchment paper for extra insurance against sticking!
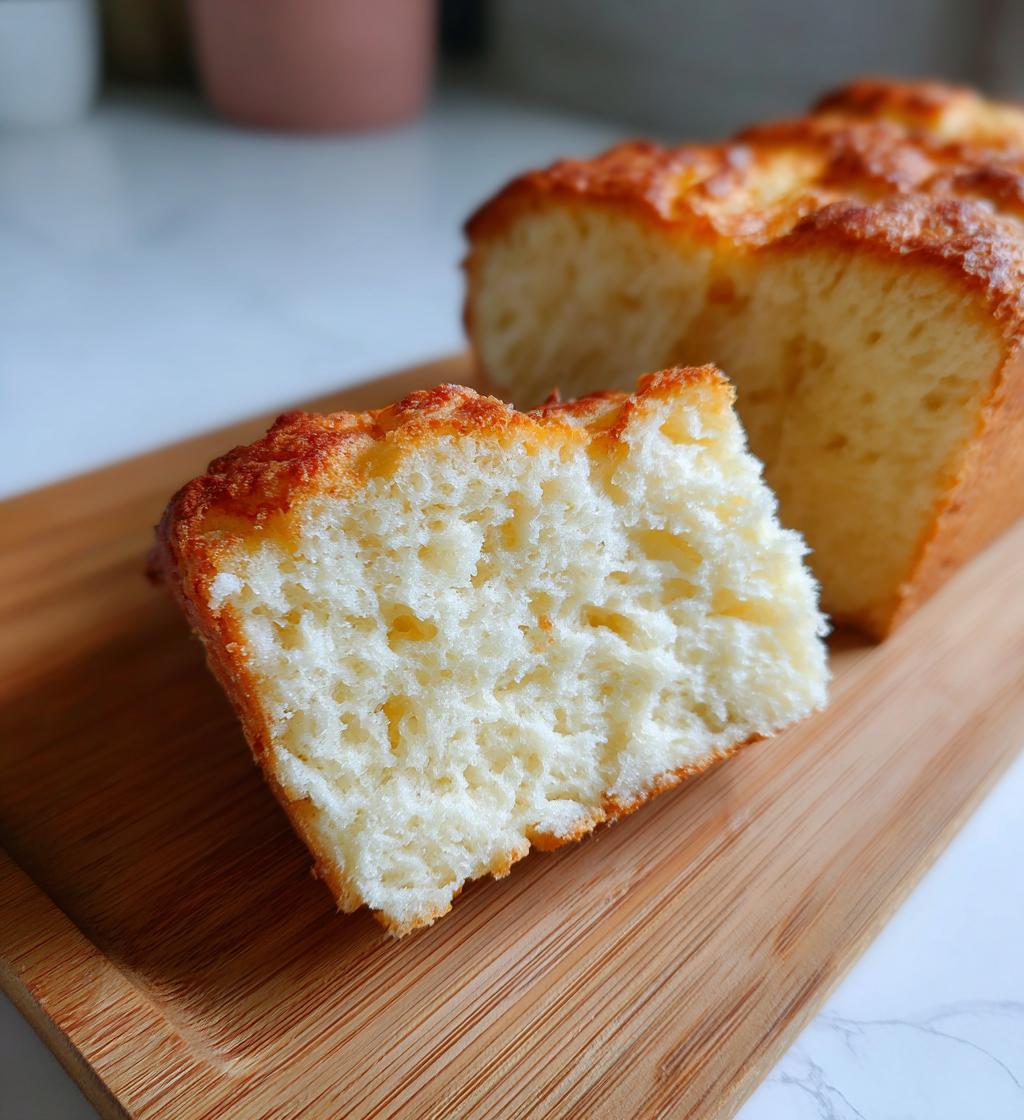
- Pour and bake: Now, pour the batter into your prepared baking dish, making sure it’s evenly spread out. Pop it into the oven and bake for about 30-35 minutes. You’ll know it’s ready when it’s golden brown on top and a toothpick inserted in the center comes out clean. Trust me, the smell will be heavenly!
- Cool before serving: Once it’s out of the oven, let it cool in the pan for about 10 minutes. Then, transfer it to a wire rack to cool completely. This will help it set and make it easier to slice.
And there you have it! Follow these steps, and you’ll have a scrumptious treat that’s sure to impress anyone who takes a bite. Happy baking!
Why You’ll Love This Recipe
This recipe is a true gem, and here are just a few reasons why you’re going to adore it:
- Quick Prep Time: With only 15 minutes of prep, you’ll be on your way to deliciousness in no time!
- Super Easy to Make: Even if you’re a beginner in the kitchen, this recipe is straightforward and foolproof.
- Tasty Results: You’ll be rewarded with a delightful treat that’s moist, flavorful, and utterly satisfying.
- Versatile Pairings: This dish is perfect for any occasion—serve it as a dessert or pair it with your favorite drinks for a delightful treat!
- Endless Customizations: Feel free to add fruits, nuts, or any flavorings you love, making it uniquely yours!
Trust me, once you try this recipe, it’ll quickly become a staple in your kitchen!
Tips for Success
To make sure your baking experience is a success, here are some tried-and-true tips that I swear by:
- Room Temperature Ingredients: Always use room temperature eggs and milk! This helps create a smooth batter and ensures everything mixes evenly. If you forget to take them out in advance, no worries! Just place the eggs in warm water for about 10 minutes.
- Flour Measurement: For the most accurate measurement, spoon the flour into your measuring cup and level it off with a knife. Scooping directly from the bag can pack it down and lead to a denser dish.
- Butter Consistency: When melting your butter, let it cool slightly before adding it to the mixture. If it’s too hot, it can cook the eggs or create a lumpy batter.
- Don’t Overmix: Once you combine the wet and dry ingredients, mix just until everything is combined. Overmixing can lead to a tough texture, and nobody wants that!
- Check for Doneness: Besides the toothpick test, look for a golden-brown top and gently press the center; it should spring back. If it leaves an indentation, give it a few more minutes in the oven.
With these helpful tips, you’ll be well on your way to baking perfection! Enjoy the process and embrace your inner chef!
Variations
One of the best parts about this recipe is how versatile it is! You can easily customize it to suit your taste or the occasion. Here are a few fun variations to inspire your creativity:
- Add Fruits: Toss in some fresh or frozen berries like blueberries, raspberries, or chopped strawberries for a burst of flavor. You can also try adding diced apples or bananas for a delicious twist!
- Nuts Galore: If you love a bit of crunch, consider folding in some chopped nuts like walnuts or pecans. They add texture and a lovely nutty flavor that elevates the dish.
- Spice It Up: Want to give your recipe a warm, cozy vibe? Add a teaspoon of cinnamon or nutmeg to the mix. You could also experiment with other spices like cardamom or ginger for a unique twist!
- Chocolate Delight: Who doesn’t love chocolate? Stir in some chocolate chips or chunks for a decadent treat. You could even swirl in some cocoa powder for a rich chocolatey flavor.
- Extract Adventures: Play around with different extracts! Instead of vanilla, try almond or coconut extract for a fun flavor change. Just remember, a little goes a long way!
Don’t be afraid to get creative! This recipe is a blank canvas waiting for your personal touch. Enjoy the process and have fun experimenting!
Storage & Reheating Instructions
Once you’ve whipped up this delicious treat, you’ll probably want to save some for later—and that’s totally okay! To store your leftovers, let the dish cool completely before covering it. I recommend placing it in an airtight container to keep it fresh. It can be kept at room temperature for a day or two, but if you want to extend its life, pop it in the fridge. Just make sure it’s well-sealed to avoid drying out.
When you’re ready to enjoy those scrumptious leftovers, reheating is a breeze! You can pop a slice in the microwave for about 15-20 seconds, or if you’re feeling fancy, warm it in the oven at 350°F (175°C) for about 10 minutes. This will help maintain that lovely texture and flavor. Enjoy your delightful dish again!
Nutritional Information
Now, let’s chat about the nutritional aspect of this delicious treat! Here’s a general estimate of what you can expect per serving (that’s one piece, by the way):
- Calories: 250
- Fat: 8g
- Saturated Fat: 5g
- Unsaturated Fat: 2g
- Trans Fat: 0g
- Cholesterol: 40mg
- Sodium: 150mg
- Carbohydrates: 40g
- Fiber: 1g
- Protein: 4g
- Sugar: 10g
Keep in mind, these values are estimates and can vary based on ingredient brands and any add-ins you choose to include. It’s always a good idea to adjust according to your dietary needs. Enjoy your baking adventure, and feel good knowing you’re making something tasty!
FAQ Section
I know you might have some questions, so let’s dive into some common ones regarding this delightful recipe!
- Can I substitute any ingredients? Absolutely! If you’re out of eggs, you can use flaxseed meal as a binder (1 tablespoon of flaxseed mixed with 2.5 tablespoons of water for each egg). For a dairy-free option, try almond milk or coconut milk instead of regular milk.
- What’s the best way to store leftovers? Once your delicious dish has cooled completely, store it in an airtight container. It’ll keep at room temperature for a day, but if you want it to last longer, pop it in the fridge!
- How should I serve this? This recipe is super versatile! You can enjoy it plain, or dress it up with a dollop of whipped cream or a scoop of ice cream. It pairs beautifully with coffee or a refreshing iced tea.
- Can I freeze this dish? Yes, you can! Just make sure it’s well-wrapped in plastic wrap or stored in a freezer-safe container. It should keep well for about 2-3 months. When you’re ready to enjoy it, let it thaw in the fridge overnight.
- What if I want to make it gluten-free? No problem! Substitute the all-purpose flour with a gluten-free flour blend and ensure your baking powder is gluten-free as well. Just keep an eye on the texture; it might need slight adjustments.
If you have any more questions, feel free to reach out! I’m here to help you create the best food and drinks experience possible!
Print
Food and Drinks: 7 Magical Recipes for Happy Memories
- Total Time: 50 minutes
- Yield: 8 servings 1x
- Diet: Vegetarian
Description
A collection of recipes for food and drinks that are easy to make.
Ingredients
- 2 cups flour
- 1 cup sugar
- 1 cup milk
- 1/2 cup butter
- 2 eggs
- 1 tablespoon baking powder
- 1 teaspoon vanilla extract
Instructions
- Preheat the oven to 350°F (175°C).
- Mix flour, sugar, and baking powder in a bowl.
- Add milk, melted butter, eggs, and vanilla.
- Stir until smooth.
- Pour batter into a greased baking dish.
- Bake for 30-35 minutes.
- Let cool before serving.
Notes
- You can add fruits or nuts for extra flavor.
- Store leftovers in an airtight container.
- Serve with whipped cream or ice cream.
- Prep Time: 15 minutes
- Cook Time: 35 minutes
- Category: Dessert
- Method: Baking
- Cuisine: American
Nutrition
- Serving Size: 1 piece
- Calories: 250
- Sugar: 10g
- Sodium: 150mg
- Fat: 8g
- Saturated Fat: 5g
- Unsaturated Fat: 2g
- Trans Fat: 0g
- Carbohydrates: 40g
- Fiber: 1g
- Protein: 4g
- Cholesterol: 40mg
Keywords: food, drinks, recipes