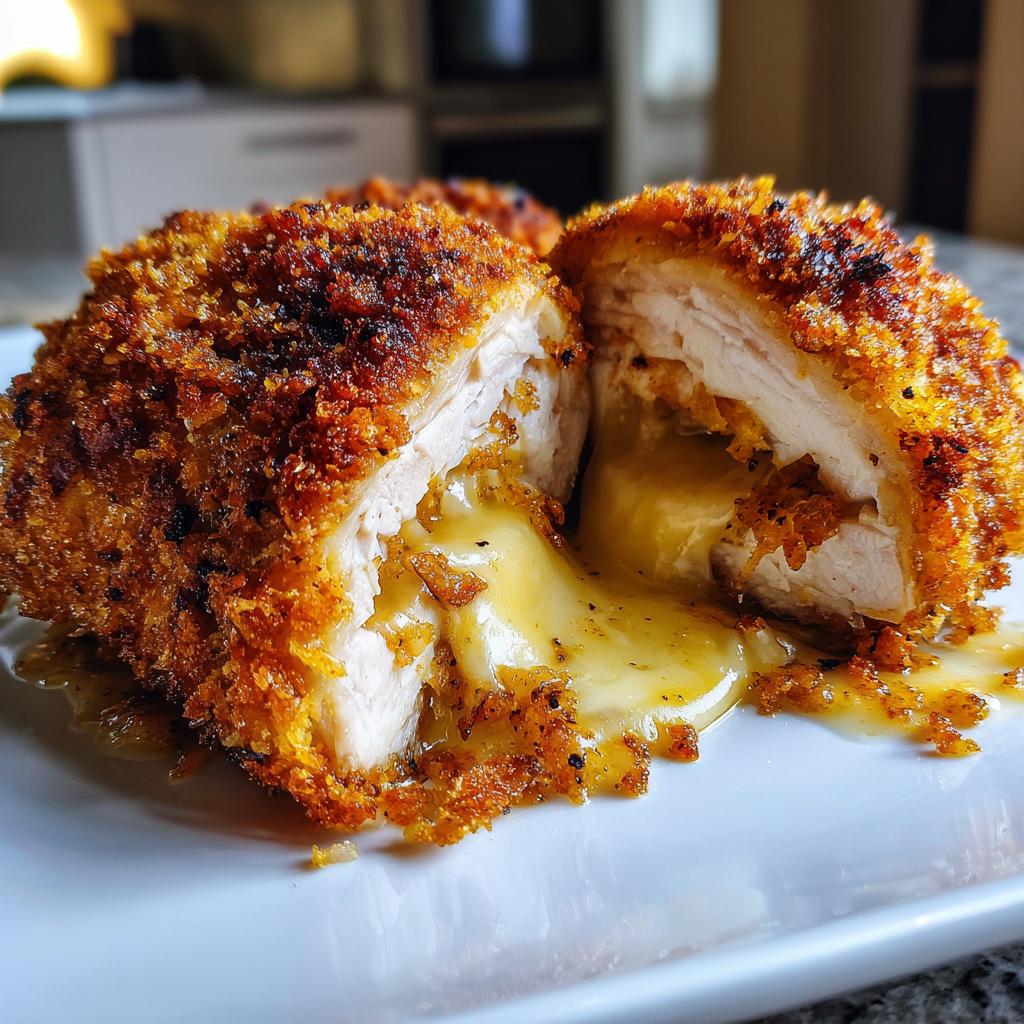
Oh, Garlic Butter Chicken Kiev – just saying the name makes my mouth water! There’s something magical about biting into that crispy golden crust and being rewarded with a river of melted garlic butter. This classic dish has been a star at European dinner tables for decades, and once you try it, you’ll understand why. I first fell in love with it during a trip to Kyiv (where it got its name!) and have been perfecting my version ever since. What I love most? It looks fancy but is surprisingly simple to make. The combination of tender chicken, fragrant garlic, and that irresistible butter filling is guaranteed to make this your new go-to recipe for impressing guests – or just treating yourself right!
Why You’ll Love This Garlic Butter Chicken Kiev
Trust me, this dish is a total showstopper that’s way easier than it looks. Here’s why it’ll become your new favorite:
- That crispy golden crust gives way to the juiciest chicken you’ve ever tasted
- The garlic butter explosion inside is pure magic – like a flavor bomb in every bite
- It looks fancy enough for company but comes together in under 30 minutes
- The aroma alone will have everyone rushing to the dinner table
- It’s versatile – dress it up for date night or keep it simple for weeknight dinners
Seriously, once you master this technique, you’ll be making it on repeat!
Garlic Butter Chicken Kiev Ingredients
Gather these simple ingredients – I bet you have most already! The magic happens when they come together:
- 4 boneless, skinless chicken breasts (about 6 oz each)
- 1/2 cup unsalted butter, softened (must be soft for mixing!)
- 4 cloves garlic, minced (fresh is best – no jarred stuff!)
- 1 tbsp fresh parsley, chopped (or 1 tsp dried in a pinch)
- 1 cup all-purpose flour (your dredging station base)
- 2 large eggs, beaten (creates that perfect glue)
- 1 cup breadcrumbs (panko works great for extra crunch)
- 1 tsp salt (I use kosher)
- 1/2 tsp black pepper
- 1/2 tsp paprika (for color and subtle warmth)
- Vegetable oil for frying (about 1/2 inch in the pan)
Ingredient Notes & Substitutions
Here’s why certain ingredients matter and how to swap if needed:
- Unsalted butter lets you control seasoning – salted works if you reduce added salt
- Chilled butter logs are crucial – they won’t melt out during frying
- No fresh garlic? Use 1/2 tsp garlic powder mixed into butter
- For gluten-free, use GF flour and breadcrumbs – the method stays the same
- Paprika’s mainly for color – smoked paprika adds nice depth if you have it
How to Make Garlic Butter Chicken Kiev
Okay, let’s get cooking! This method is easier than you think – just follow these steps for that perfect crispy-on-the-outside, buttery-on-the-inside magic:
Step 1: Prepare the Garlic Butter Filling
First, mix that glorious butter filling! Mash together the softened butter, minced garlic, and parsley until fully combined. Now here’s my secret – shape it into four little logs (about 1 tbsp each) and pop them in the freezer for 10 minutes. Don’t skip this chilling step – it keeps the butter from leaking out when frying!
Step 2: Stuff and Bread the Chicken
Time to stuff! Carefully cut a pocket into each chicken breast (don’t go all the way through!). Slide in a chilled butter log and seal the edges tight – I use toothpicks if needed. Now the fun part: dredge each breast in flour (shake off excess), dip in beaten egg, then press firmly into breadcrumbs. Really pack those crumbs on – this gives you that amazing crunch!
Step 3: Fry to Golden Perfection
Heat about 1/2 inch of oil in a pan to 350°F (175°C) – test with a breadcrumb (it should sizzle!). Fry the chicken 5-6 minutes per side until deeply golden and the internal temp hits 165°F. Drain on paper towels – that crispy, buttery masterpiece is ready to serve!
Tips for the Best Garlic Butter Chicken Kiev
Want restaurant-quality results every time? These little tricks make all the difference:
- Double breading is my secret for extra crunch – after the first egg wash, do a second coat of breadcrumbs
- That meat thermometer is your best friend – 165°F at the thickest part means perfectly cooked chicken
- Let the chicken rest 5 minutes after frying – this keeps all that garlic butter goodness inside
- Use tongs and a spoon to baste while frying – keeps the top golden while the bottom cooks
- Worried about leakage? Chill stuffed chicken for 15 minutes before breading
Follow these, and you’ll have everyone begging for seconds!
Garlic Butter Chicken Kiev Serving Suggestions
Now for the best part – plating up your masterpiece! I love serving this with creamy mashed potatoes to soak up all that garlic butter goodness. A simple steamed green veggie (like asparagus or green beans) adds freshness, while a squeeze of lemon wedge brightens everything up. For a complete meal, add a light arugula salad with lemon vinaigrette – that peppery bite cuts through the richness perfectly. Pro tip: serve immediately while the butter’s still oozy and the crust is at its crispiest!
Storing and Reheating Garlic Butter Chicken Kiev
Got leftovers? (Though I doubt it!) These tips will keep your Kiev tasting amazing:
- Fridge storage: Keep in an airtight container for up to 3 days – that butter will still be flavorful!
- Freezing: Wrap each piece individually in foil, then freeze for up to 2 months – perfect for quick meals
- Reheating magic: Always use the oven (350°F for 10-15 mins) – microwaving turns that crispy crust soggy
- Pro tip: Place on a rack over a baking sheet to keep the bottom crisp while reheating
Honestly? It’s best fresh, but these tricks make day-old Kiev almost as good as the first bite!
Garlic Butter Chicken Kiev FAQs
I get asked these questions ALL the time – here are my tried-and-true answers:
- “Can I bake instead of fry?” Absolutely! Bake at 375°F (190°C) for 25-30 minutes on a rack – still crispy, just less greasy.
- “Help! My butter leaks out!” Chill your butter logs AND stuffed chicken before cooking. Seal those edges like you’re closing a treasure chest!
- “Can I prep ahead?” You bet – assemble up to breading stage, then refrigerate overnight. Just add 2-3 minutes to cooking time.
- “Panko or regular breadcrumbs?” Panko gives extra crunch, but regular works great too – just press them on firmly!
- “How do I know it’s done?” That meat thermometer is your bestie – 165°F at the thickest part means perfect, juicy chicken.
Still stuck? Shoot me a comment – I’ve made every mistake so you don’t have to!
Nutritional Information
Here’s the breakdown per serving (1 chicken breast): 520 calories, 38g protein, 28g carbs, 32g fat. Remember, these are estimates – your actual values may vary slightly depending on ingredients and brands used. Now go enjoy that deliciousness guilt-free!
Final Thoughts
There you have it – my foolproof path to Garlic Butter Chicken Kiev bliss! Once you taste that first crispy, buttery bite, you’ll understand why this recipe never gets old. Give it a try this week and let me know how it turns out – I live for your kitchen success stories! Now if you’ll excuse me, all this talking about melted garlic butter has me craving another batch…
Print
Juicy Garlic Butter Chicken Kiev Recipe in 4 Simple Steps
- Total Time: 32 minutes
- Yield: 4 servings 1x
- Diet: Low Lactose
Description
A classic chicken dish featuring juicy chicken breasts stuffed with garlic butter, then breaded and fried to golden perfection.
Ingredients
- 4 boneless, skinless chicken breasts
- 1/2 cup unsalted butter, softened
- 4 cloves garlic, minced
- 1 tbsp fresh parsley, chopped
- 1 cup all-purpose flour
- 2 large eggs, beaten
- 1 cup breadcrumbs
- 1 tsp salt
- 1/2 tsp black pepper
- 1/2 tsp paprika
- Vegetable oil for frying
Instructions
- Mix butter, garlic, and parsley in a bowl. Shape into 4 small logs and freeze for 10 minutes.
- Cut a pocket into each chicken breast and stuff with a butter log. Seal the edges.
- Season chicken with salt, pepper, and paprika.
- Dredge each breast in flour, dip in beaten eggs, then coat in breadcrumbs.
- Heat oil in a pan over medium heat. Fry chicken until golden brown and cooked through, about 5-6 minutes per side.
- Drain on paper towels and serve hot.
Notes
- Chill butter logs to prevent melting during cooking.
- Use a meat thermometer to ensure chicken reaches 165°F internally.
- For a crispier crust, double-coat with breadcrumbs.
- Prep Time: 20 minutes
- Cook Time: 12 minutes
- Category: Main Course
- Method: Frying
- Cuisine: European
Nutrition
- Serving Size: 1 chicken breast
- Calories: 520
- Sugar: 1g
- Sodium: 680mg
- Fat: 32g
- Saturated Fat: 16g
- Unsaturated Fat: 12g
- Trans Fat: 1g
- Carbohydrates: 28g
- Fiber: 1g
- Protein: 38g
- Cholesterol: 210mg
Keywords: garlic butter chicken kiev, stuffed chicken, fried chicken recipe