Oh, Halloween! It’s that magical time of year when the air gets crisp, and the excitement of spooky treats fills the kitchen. I absolutely love making ghost sugar cookies! These delightful little monsters are not only fun to decorate, but they also taste amazing. Every year, I whip up a batch, and the aroma of butter and sugar wafting through the house instantly gets everyone in the Halloween spirit. I remember my kids giggling as they helped me pipe on the black icing, transforming simple cookies into adorable ghouls. Trust me, these ghost sugar cookies are perfect for sharing with friends and family during Halloween, making them a beloved tradition in our home. They’re easy to make, and I promise they’ll be a hit at any Halloween gathering!
Ingredients List
Here’s what you’ll need to whip up these spooky ghost sugar cookies:
- 2 3/4 cups all-purpose flour: This is the backbone of your cookies, giving them that perfect structure.
- 1 teaspoon baking soda: This helps the cookies rise just right, making them nice and fluffy.
- 1/2 teaspoon baking powder: A little extra lift to ensure they’re not too dense!
- 1 cup unsalted butter, softened: Real butter is key for flavor and texture; make sure it’s soft enough to cream easily!
- 1 1/2 cups white sugar: This sweetens the cookies beautifully and contributes to that lovely crisp edge.
- 1 egg: Just one will help bind everything together while keeping the cookies tender.
- 1 teaspoon vanilla extract: This adds a warm, comforting flavor that makes every bite delightful.
- 1/2 teaspoon almond extract: A hint of almond gives these cookies a unique twist that you won’t want to skip!
- 3 cups powdered sugar: This is for the icing to make your ghosts look extra spooky and sweet!
- 2 tablespoons milk: Just enough to thin the icing to the perfect consistency for decorating.
- Black icing for decoration: This is what will bring your ghost cookies to life (or afterlife) with adorable little faces!
Gather these ingredients, and you’ll be on your way to creating a batch of ghostly delights that will impress everyone this Halloween!
How to Prepare Ghost Sugar Cookies
Alright, let’s get to the fun part – making these adorable ghost sugar cookies! I promise, the process is simple and oh-so-rewarding. Just follow these steps, and you’ll have a spooky batch ready in no time!
First things first, preheat your oven to 375°F (190°C). This step is crucial; you want your cookies to bake evenly and come out perfectly golden. While that’s heating up, grab two mixing bowls. In one, whisk together 2 3/4 cups of all-purpose flour, 1 teaspoon of baking soda, and 1/2 teaspoon of baking powder. This dry mixture sets the foundation for your cookies.
Now, in your second bowl, it’s time to cream that 1 cup of softened unsalted butter with 1 1/2 cups of white sugar. Use a hand mixer or stand mixer for this – it’s so much easier! Beat them together until the mixture is light and fluffy, which should take about 2-3 minutes. This step is key for getting that nice, tender texture in your cookies!
Once your butter and sugar look dreamy, add in 1 egg, 1 teaspoon of vanilla extract, and 1/2 teaspoon of almond extract. Mix until everything is well combined. Now, it’s time to bring the dry ingredients into the party! Gradually add your flour mixture to the wet ingredients, stirring gently until just combined. Be careful not to overmix – we want tender cookies, not tough ones!
Next, it’s time to shape your cookies. Take rounded teaspoonfuls of dough and roll them into balls. Place them on your baking sheets, leaving some space in between because they’ll spread a little while baking. Now, flatten each dough ball slightly with the bottom of a glass. This gives them that nice, even shape.
Pop those sheets into your preheated oven and bake for about 8 to 10 minutes. Keep a close eye on them; you want them to be just golden around the edges. Once they’re done, take them out and let them cool on wire racks. This cooling step is essential because it helps the cookies firm up and makes decorating easier!
While your cookies are cooling, mix up your icing with 3 cups of powdered sugar and 2 tablespoons of milk. Adjust the consistency as needed; you want it to be smooth but thick enough to hold its shape when you pipe it onto your cookies. Once the cookies are completely cool, let your creativity flow as you decorate those ghostly faces with black icing. How fun is that?
And there you have it – delicious, spooky ghost sugar cookies ready to impress! Enjoy the process, and don’t forget to sneak a taste of the dough; it’s one of my favorite perks of baking!
Why You’ll Love These Ghost Sugar Cookies
- Easy Preparation: With just a few simple steps, these cookies come together quickly, making them perfect for both novice and experienced bakers.
- Fun Decoration: Get creative with the icing! Decorating these ghost sugar cookies is an enjoyable activity for kids and adults alike, bringing out everyone’s artistic side.
- Perfect for Halloween: These cookies are a delightful addition to any Halloween celebration, adding a spooky touch to your dessert table.
- Great for Gatherings: Whether you’re hosting a party or attending a potluck, these cookies are sure to impress and will disappear in no time!
- Customizable: Feel free to switch up the colors and shapes, making them unique for any occasion, not just Halloween!
Tips for Success
To make sure your ghost sugar cookies come out absolutely perfect, I’ve got some tried-and-true tips that will help you every step of the way. Let’s dive in!
Mastering Baking Time
Keep a close eye on your cookies as they bake! Every oven is a little different, so while I suggest 8 to 10 minutes, you might need to adjust that slightly. Look for those golden edges; they’re your cue that the cookies are ready. If you prefer a softer cookie, take them out a minute early and let them continue to set on the baking sheet for a few minutes before transferring them to wire racks.
Perfecting Your Icing
When it comes to decorating, the consistency of your icing is key! If it’s too runny, it won’t hold its shape on the cookies, and if it’s too thick, you won’t be able to pipe it easily. Aim for a smooth, pipeable consistency—think of it as just thick enough to hold its shape but still flows easily. If you need to thin it out, add a drop of milk at a time; if it’s too thin, just sprinkle in a bit more powdered sugar to thicken it back up.
Storing Your Cookies
To keep your cookies fresh and delicious, store them in an airtight container. They’ll last about a week (if they last that long!). If you want to keep them longer, you can freeze them. Just layer them between parchment paper in an airtight container, and they’ll be good for up to three months. When you’re ready to enjoy them, let them thaw at room temperature. They taste just as delightful as the day you baked them!
Get Creative with Decorations
Don’t be afraid to let your imagination run wild with the decorations! You can use colored icing, sprinkles, or edible glitter to give your ghost sugar cookies a unique twist. Try using different shapes like pumpkins or bats for added fun! And if you have little ones helping you, let them go crazy with the designs. It’s all about the fun of creating something together!
With these tips, you’ll be well on your way to making the most delicious and adorable ghost sugar cookies this Halloween. Happy baking!
Variations on Ghost Sugar Cookies
Now, while I absolutely adore the classic ghost design, I love to switch things up sometimes! There are so many fun variations you can try with these ghost sugar cookies to keep things interesting and tailor them to your taste or special occasions. Let me share a few of my favorites!
Colorful Icing Fun
Why stick to just black icing when you can create a whole rainbow of spooky colors? Use food coloring to dye your icing different shades. Imagine vibrant purple ghosts or bright orange pumpkins! You could even create a whole collection of Halloween-inspired colors. Just remember to use gel food coloring for the best results—it won’t water down your icing like liquid dye might.
Shaping for the Season
Get creative with your cookie shapes! Instead of traditional ghost cutouts, consider using Halloween-themed cookie cutters to make pumpkins, bats, or even friendly monsters. You can also roll the dough into fun shapes by hand, like little witch hats or candy corn. The possibilities are endless, and it adds an extra layer of fun to your baking!
Flavor Explorations
Don’t be afraid to experiment with your cookie flavors! While vanilla and almond are classic choices, you can try using other extracts like lemon or coconut for a fun twist. Or, how about adding a sprinkle of cinnamon or nutmeg into the dough for a warm, spiced flavor? You could even fold in some mini chocolate chips or colored sprinkles into the dough for added texture and sweetness!
Decorative Toppings
Let’s talk about embellishments! Once your cookies are iced, you can take them to the next level with some fun toppings. Try adding edible glitter for a magical touch or using small candies to create eyes and mouths. You could even sprinkle on some crushed candy corn or Halloween-themed sprinkles for an extra pop of color and texture. These little touches make your ghost sugar cookies not just tasty, but visually stunning!
With these variations, every batch of ghost sugar cookies can be a new adventure! Whether you’re making them for a party, classroom treat, or just for fun, these ideas will keep your baking exciting and fresh. Happy baking and decorating!
Storage & Reheating Instructions
To keep your ghost sugar cookies fresh and delicious, proper storage is essential! I recommend placing them in an airtight container as soon as they’ve cooled completely. This helps lock in moisture and keeps those cookies tasting as delightful as the day you baked them. If you’re like me and can’t resist sneaking a few, make sure to layer them with parchment paper to prevent any sticking.
Your cookies will stay fresh for about a week. But let’s be honest, they probably won’t last that long with all the Halloween festivities! If you want to store them for a longer period, you can freeze them. Just layer the cookies between sheets of parchment paper in an airtight container or a freezer bag. They’ll hold up beautifully for up to three months!
When you’re ready to enjoy those frozen treats, simply pull them out and let them thaw at room temperature for about 15-20 minutes. They’ll taste just as scrumptious as when they were first baked! If you want to warm them up a bit, pop them in the microwave for about 10-15 seconds. Just be careful not to overdo it; we want them warm, not a gooey mess!
With these simple storage and reheating tips, you can savor your ghost sugar cookies for days to come. Enjoy every spooky bite!
Nutritional Information
As you whip up these delightful ghost sugar cookies, you might be wondering about their nutritional values. Here’s a breakdown of what you can expect per cookie. Keep in mind that these are estimates, but they’ll give you a good idea of what you’re indulging in!
- Calories: 150
- Sugar: 10g
- Sodium: 50mg
- Fat: 7g
- Saturated Fat: 4g
- Unsaturated Fat: 3g
- Trans Fat: 0g
- Carbohydrates: 20g
- Fiber: 0g
- Protein: 2g
- Cholesterol: 20mg
These ghost sugar cookies are sure to be a hit, and now you can enjoy them while keeping track of your treats! Happy baking and enjoy every spooky bite!
FAQ Section
Q1. Can I use a different flavor of extract for my ghost sugar cookies?
Absolutely! While the classic vanilla and almond extracts work wonderfully, feel free to experiment with other flavors. Lemon or coconut extracts can add a fun twist to your cookies. Just keep in mind that different flavors can change the overall taste, so go with what you love!
Q2. How can I prevent my cookies from spreading too much while baking?
To keep your ghost sugar cookies from spreading too much, make sure your butter is softened but not melted. Chilling the dough for about 30 minutes before shaping and baking can also help maintain their shape. It’s a great little trick that makes a big difference!
Q3. Can I make these cookies ahead of time?
Yes, definitely! You can prepare the dough a day or two in advance and refrigerate it. Just wrap it tightly in plastic wrap before placing it in the fridge. When you’re ready to bake, simply roll and shape the cookies as directed. You can also bake them ahead of time and store them, as mentioned in the storage section!
Q4. What’s the best way to decorate my ghost sugar cookies?
Decorating is where the fun really begins! Use black icing to pipe on ghostly faces. If you want a more textured look, try using a small brush to swirl the icing. Don’t hesitate to add sprinkles or edible glitter for extra flair! Let your creativity shine—every ghost can have its own personality!
Q5. How can I make these ghost sugar cookies gluten-free?
You can easily adapt this recipe to be gluten-free by using a 1-to-1 gluten-free flour blend. Make sure it contains xanthan gum or another binding agent to help with the texture. The taste might vary slightly, but they’ll still be delicious and perfect for Halloween treats!

Ghost Sugar Cookies: 7 Spooky Ways to Delight Yourself
- Total Time: 25 minutes
- Yield: 24 cookies 1x
- Diet: Vegetarian
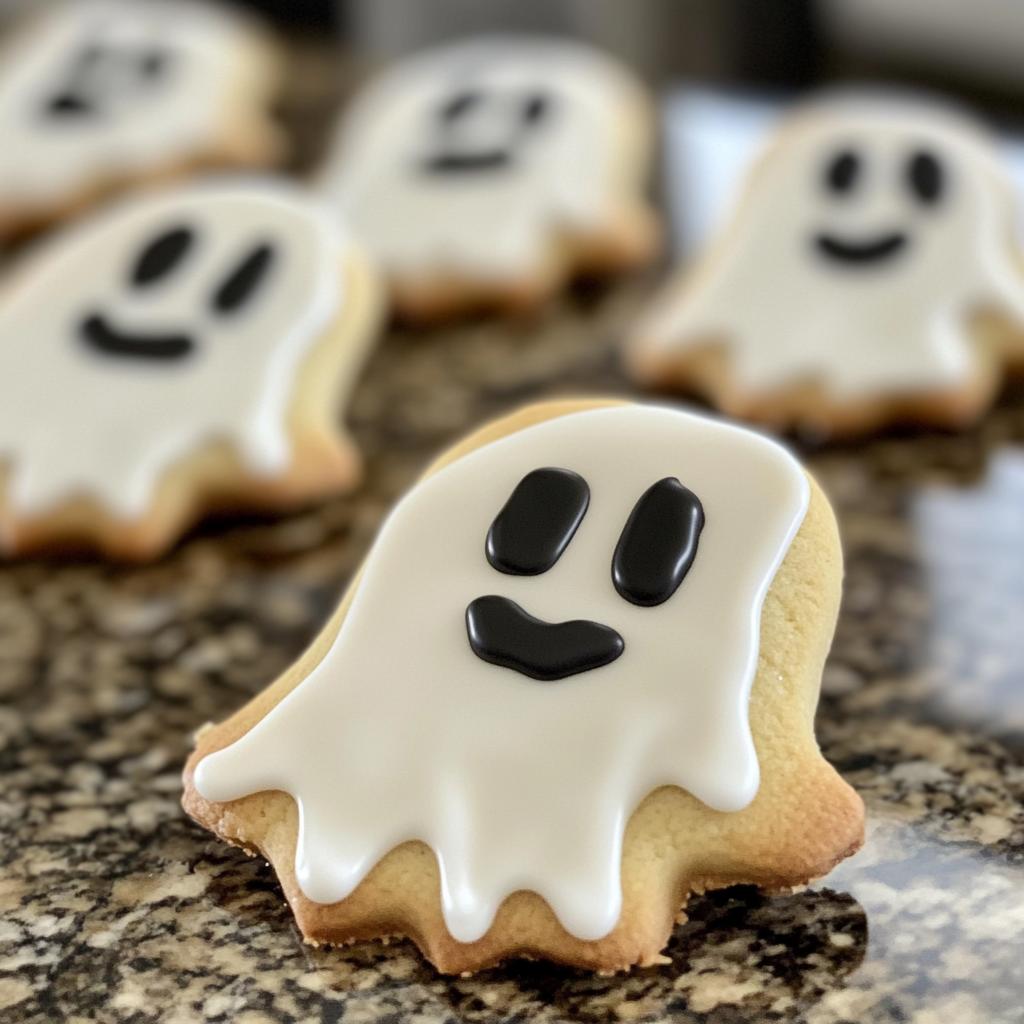
Description
These ghost sugar cookies are perfect for Halloween. They are easy to make and fun to decorate.
Ingredients
- 2 3/4 cups all-purpose flour
- 1 teaspoon baking soda
- 1/2 teaspoon baking powder
- 1 cup unsalted butter, softened
- 1 1/2 cups white sugar
- 1 egg
- 1 teaspoon vanilla extract
- 1/2 teaspoon almond extract
- 3 cups powdered sugar
- 2 tablespoons milk
- black icing for decoration
Instructions
- Preheat oven to 375°F (190°C).
- In a bowl, mix flour, baking soda, and baking powder.
- In another bowl, cream butter and sugar until smooth.
- Beat in egg, vanilla extract, and almond extract.
- Gradually add the dry ingredients to the wet mixture.
- Roll rounded teaspoonfuls of dough into balls and place on baking sheets.
- Flatten each ball slightly with the bottom of a glass.
- Bake for 8 to 10 minutes or until golden.
- Let cookies cool on wire racks.
- Mix powdered sugar and milk to make icing and decorate with black icing.
Notes
- Store cookies in an airtight container.
- You can use different colors for icing.
- Adjust baking time for desired crispness.
- Prep Time: 15 minutes
- Cook Time: 10 minutes
- Category: Dessert
- Method: Baking
- Cuisine: American
Nutrition
- Serving Size: 1 cookie
- Calories: 150
- Sugar: 10g
- Sodium: 50mg
- Fat: 7g
- Saturated Fat: 4g
- Unsaturated Fat: 3g
- Trans Fat: 0g
- Carbohydrates: 20g
- Fiber: 0g
- Protein: 2g
- Cholesterol: 20mg
Keywords: ghost sugar cookies, Halloween cookies, decorated sugar cookies