There’s something undeniably special about heart-shaped desserts, isn’t there? They bring a touch of love and whimsy to any occasion that calls for a little sweetness! Whether it’s a romantic dinner, a birthday celebration, or just because you want to brighten someone’s day, these delightful treats never fail to impress. I remember the first time I made heart-shaped brownies for my partner’s birthday; the look on their face was priceless! Trust me, when you serve up these charming little confections, it’s like giving a piece of your heart. Made with rich cocoa and a simple yet delicious batter, these heart-shaped desserts are as scrumptious as they are cute. So get ready to bring a smile to your loved ones’ faces and maybe even a little happy dance in the kitchen. Let’s dive into how to create these adorable sweet treats together!
Ingredients for Heart-Shaped Desserts
Here’s what you’ll need to whip up these delightful heart-shaped desserts. Grab these ingredients, and let’s make some magic happen!
- 1 cup all-purpose flour: This is the base of our batter, giving it structure and texture.
- 1/2 cup unsweetened cocoa powder: We want rich, chocolatey goodness, and this will do just the trick!
- 1 cup sugar: Sweetness is key! This will balance the cocoa’s bitterness beautifully.
- 1/2 cup butter, softened: Real butter adds richness and flavor. Make sure it’s nice and soft for easy creaming.
- 2 large eggs: These help bind everything together and ensure a moist crumb.
- 1 teaspoon vanilla extract: A splash of vanilla elevates the flavor profile to new heights.
- 1/2 cup milk: This will give our batter the perfect consistency—nice and smooth!
- 1/2 teaspoon baking powder: A little lift to keep our hearts fluffy and light.
- 1/4 teaspoon salt: Just a pinch to enhance all those delicious flavors.
Gather these ingredients, and you’re already halfway to creating something wonderful! Let’s keep the momentum going and dive into how to prepare these adorable heart-shaped desserts!
How to Prepare Heart-Shaped Desserts
Alright, let’s get our baking hats on and dive into the fun part! Making these heart-shaped desserts is a delightful journey, and I’m here to guide you every step of the way. So, grab your mixing bowls and let’s get started!
Preheat the Oven
First things first—let’s preheat the oven to 350°F (175°C). This step is super important! Preheating ensures that your heart-shaped desserts bake evenly and rise perfectly. If you skip this, you might end up with a sad, flat cake. So, while that’s heating up, we can start mixing our ingredients!
Mix Dry Ingredients
In a medium bowl, combine your 1 cup of all-purpose flour, 1/2 cup of unsweetened cocoa powder, 1/2 teaspoon of baking powder, and 1/4 teaspoon of salt. Use a whisk to blend everything together until it’s well combined. This is a crucial step because it ensures that your leavening agent is evenly distributed, helping your desserts rise beautifully. Set this bowl aside; we’ll come back to it in a moment!
Cream Butter and Sugar
Now, let’s move on to creaming our 1/2 cup of softened butter and 1 cup of sugar. In a large mixing bowl, use either a hand mixer or a sturdy spatula. Beat the butter and sugar together until the mixture is light and fluffy—about 2-3 minutes. You want it to be creamy and pale in color, which means you’re incorporating air into the batter. This step is essential for a light texture, so don’t rush it!
Combine Wet Ingredients
Next up, let’s add in our wet ingredients. Crack in the 2 large eggs and pour in 1 teaspoon of vanilla extract. Mix everything together until it’s just combined. You don’t want to over-mix here; just enough to see that lovely yellow color blending into the butter and sugar. It’s starting to smell amazing, isn’t it?
Combine Wet and Dry Ingredients
Now, it’s time to bring our dry ingredients into the mix! Gradually add the bowl of dry ingredients to the wet mixture. I like to do this in three parts: add some of the dry, mix it in, then add a little more. This helps to avoid any lumps and ensures everything is well combined without overworking the batter. You’ll end up with a thick, chocolatey batter that looks irresistible!
Add Milk
To get our batter to that perfect consistency, it’s time to stir in 1/2 cup of milk. This will help smooth everything out. Just mix until the batter is silky and lump-free. If you find it’s too thick, you can add a splash more milk. But don’t go overboard! You want a thick yet pourable batter.
Prepare for Baking
Now comes the fun part—pouring the batter into heart-shaped molds! Make sure your molds are greased well or lined with parchment paper to prevent sticking. I like to use a ladle or a measuring cup for this so I can control the pour. Fill each mold about three-quarters full, leaving some room for them to rise. You don’t want them overflowing, or they won’t keep their lovely heart shape!
Bake the Desserts
Pop those molds into your preheated oven and bake for about 25-30 minutes. Pro tip: To check if they’re done, insert a toothpick into the center of one of the heart-shaped desserts. If it comes out clean or with just a few moist crumbs, they’re ready! Keep an eye on them, though—ovens can vary, and you don’t want to overbake!
Cooling and Removal
Once they’re baked to perfection, take them out of the oven and let them cool in the molds for about 10 minutes. This helps them set up a bit. After that, carefully remove them from the molds and let them cool completely on a wire rack. This step is essential to prevent them from getting soggy. Plus, it gives you a moment to admire those adorable heart shapes before you decorate them!
Why You’ll Love This Recipe
These heart-shaped desserts are not just cute; they’re packed with love and flavor! Here are a few reasons why you’ll adore making them:
- Perfect for Romantic Occasions: Whether it’s Valentine’s Day, anniversaries, or just a special date night, these heart-shaped treats add a personal touch that makes any celebration feel extra special.
- Easy to Prepare: With simple ingredients and straightforward steps, you’ll be whipping these up in no time! Even if you’re a beginner, you can achieve impressive results without stress.
- Delicious Flavor: The rich chocolatey goodness paired with a tender crumb makes every bite a delight. Plus, they’re versatile enough to pair with fruits, whipped cream, or a dusting of powdered sugar.
- Share the Love: These desserts are perfect for sharing! Whether it’s with friends, family, or that special someone, everyone will appreciate the thoughtfulness of a homemade sweet treat.
- Fun to Decorate: Let your creativity shine! You can decorate them in so many ways, making each one unique and personal. It’s a great way to involve kids or friends in the kitchen!
Trust me, once you start making these heart-shaped desserts, you’ll find every reason to bake them again and again!
Tips for Success
Before you dive into baking these charming heart-shaped desserts, here are some of my best tips to ensure they turn out perfect every time! Trust me, these little tricks can make all the difference.
Use Room Temperature Ingredients
One of the keys to a great batter is using ingredients that are at room temperature. Take your butter and eggs out of the fridge about 30 minutes before you start. This helps them blend together more smoothly, creating a light and fluffy batter. You want to avoid lumps, so this is a game changer!
Don’t Overmix the Batter
It’s tempting to keep mixing until everything is perfectly smooth, but overmixing can lead to dense desserts. Once you see no dry streaks of flour, stop mixing! You want that light, airy texture that makes each bite melt in your mouth.
Check Your Oven Temperature
Ovens can be tricky and may not always be accurate. If you have an oven thermometer, use it to ensure you’re baking at the right temperature. This helps your heart-shaped desserts rise just right without burning or being undercooked.
Cool Them Right
Letting your desserts cool in the molds for a few minutes before transferring them to a wire rack is crucial. This helps them set up and makes them less likely to break apart when you remove them. Plus, it gives you a moment to admire your handiwork!
Experiment with Flavors
Feel free to get creative with the flavors! You can swap out the vanilla extract for almond or even add a splash of espresso for a mocha twist. The possibilities are endless, and it’s a fun way to make the recipe your own!
With these tips in hand, you’re all set to create heart-shaped desserts that not only look adorable but taste amazing too. Happy baking!
Storage & Reheating Instructions
Now that you’ve created these delightful heart-shaped desserts, you might be wondering how to keep them fresh for later enjoyment. Here’s how to store them properly and ensure they stay just as delicious!
Storing Leftovers
First things first, if you have any leftovers (which I doubt because they’re so tasty!), let them cool completely on a wire rack. Once cooled, transfer them to an airtight container. This will help keep them moist and prevent them from drying out. You can stack them, but I recommend placing a piece of parchment paper between layers to avoid sticking. Stored this way, they’ll stay fresh for about 3-4 days at room temperature. If you want to keep them longer, you can pop them in the fridge, where they’ll last about a week!
Freezing Heart-Shaped Desserts
If you want to save some for a later date, these heart-shaped beauties freeze like a dream! Just wrap each dessert tightly in plastic wrap and then place them in a freezer-safe container or a resealable plastic bag. They’ll keep well in the freezer for up to 2 months. When you’re ready to enjoy them, just pull out however many you need and let them thaw at room temperature for a couple of hours.
Reheating Instructions
For the best experience, I recommend enjoying these heart-shaped desserts at room temperature. But if you prefer them warm and gooey (who wouldn’t?), you can reheat them! Just pop them in the microwave for about 10-15 seconds. Keep an eye on them so they don’t overheat; you want them warm, not hot! If you’re reheating from frozen, it’s best to let them thaw first before microwaving.
And there you have it—simple storage and reheating instructions to keep your heart-shaped desserts fabulous and ready to share! Enjoy every bite, whether fresh or warmed up!
Nutritional Information
When it comes to indulging in these delightful heart-shaped desserts, it’s always nice to know what you’re enjoying! Here are the typical nutritional values per serving (1 dessert), but keep in mind these values are estimates and can vary based on your specific ingredients and portion sizes:
- Calories: 200
- Total Fat: 8g
- Saturated Fat: 5g
- Unsaturated Fat: 2g
- Trans Fat: 0g
- Cholesterol: 30mg
- Sodium: 150mg
- Total Carbohydrates: 30g
- dietary Fiber: 2g
- Sugar: 15g
- Protein: 3g
These heart-shaped desserts are a sweet treat that can fit into a balanced diet, especially when shared with loved ones! Enjoy each bite, knowing you’re indulging in something delicious and fun!
FAQ Section
Can I make these heart-shaped desserts gluten-free?
Absolutely! You can easily make these heart-shaped desserts gluten-free by substituting the all-purpose flour with a good-quality gluten-free flour blend. Just make sure to choose a blend that has a 1:1 ratio to regular flour for the best results. I recommend checking the package instructions, as some blends may require additional binding agents like xanthan gum. It’s a fantastic way to share the love with everyone, including those with dietary restrictions!
What can I use for decoration?
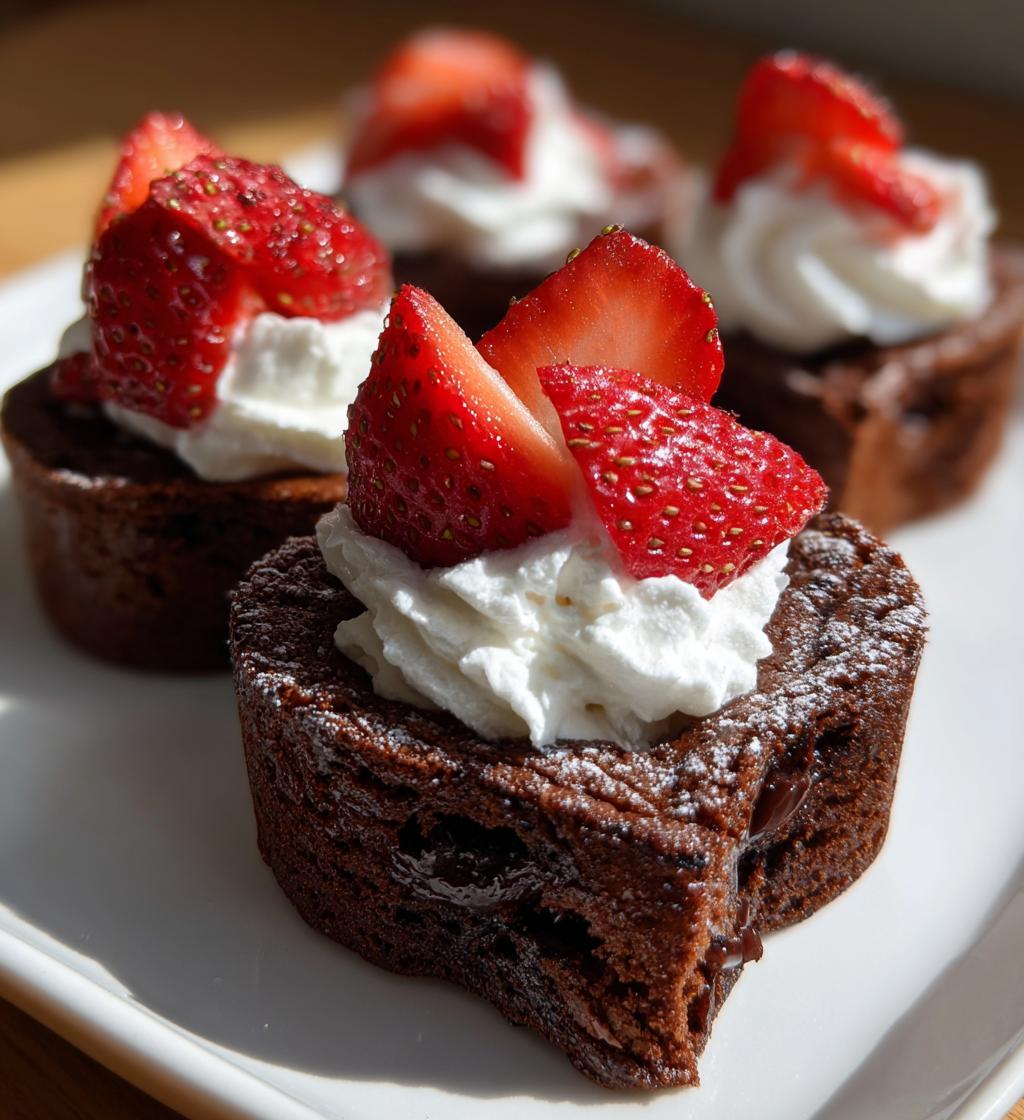
The decoration options for these heart-shaped desserts are endless! For a classic touch, you can whip up some whipped cream and pipe it on top for a delightful finish. Fresh strawberries or raspberries make a beautiful and tasty garnish, adding a pop of color and flavor. You could also dust them with powdered sugar for a simple yet elegant look. Feeling adventurous? Add a drizzle of chocolate sauce or even some edible glitter for that extra flair!
How can I adjust the sweetness?
If you find that you prefer a less sweet dessert, you can easily adjust the sugar in the recipe. Start by reducing the 1 cup of sugar by about 1/4 cup and see how you like it. You can also experiment with using honey or maple syrup as alternatives, but remember to reduce the amount of milk slightly to maintain the right batter consistency. Taste as you go, and make it your own!
How long do these desserts last?
Once you’ve baked these delightful heart-shaped desserts, they’ll stay fresh for about 3-4 days at room temperature when stored in an airtight container. If you decide to pop them in the fridge, they can last up to a week. If you want to keep them for longer, freezing is a great option! Just wrap them tightly and store them in the freezer for up to 2 months. You’ll be set for a sweet surprise whenever you need one!
Can I use different molds?
Of course! While heart-shaped molds are adorable, you can absolutely use different molds if you prefer. Round cake pans, muffin tins, or even mini loaf pans work beautifully. Just keep in mind that baking times might vary slightly, so be sure to check for doneness using the toothpick test. No matter the shape, you’ll still create delicious desserts that are sure to impress!
Print
Heart-shaped desserts that will melt your heart!
- Total Time: 45 minutes
- Yield: 12 servings 1x
- Diet: Vegetarian
Description
Delicious heart-shaped desserts perfect for any romantic occasion.
Ingredients
- 1 cup all-purpose flour
- 1/2 cup unsweetened cocoa powder
- 1 cup sugar
- 1/2 cup butter, softened
- 2 large eggs
- 1 teaspoon vanilla extract
- 1/2 cup milk
- 1/2 teaspoon baking powder
- 1/4 teaspoon salt
Instructions
- Preheat the oven to 350°F (175°C).
- In a bowl, mix flour, cocoa powder, baking powder, and salt.
- In another bowl, cream butter and sugar together.
- Add eggs and vanilla to the butter mixture and mix well.
- Gradually add the dry ingredients to the wet mixture.
- Stir in milk until the batter is smooth.
- Pour batter into heart-shaped molds.
- Bake for 25-30 minutes or until a toothpick comes out clean.
- Let cool before removing from molds.
Notes
- Decorate with whipped cream and strawberries.
- Store leftovers in an airtight container.
- Use gluten-free flour for a gluten-free option.
- Prep Time: 15 minutes
- Cook Time: 30 minutes
- Category: Dessert
- Method: Baking
- Cuisine: American
Nutrition
- Serving Size: 1 dessert
- Calories: 200
- Sugar: 15g
- Sodium: 150mg
- Fat: 8g
- Saturated Fat: 5g
- Unsaturated Fat: 2g
- Trans Fat: 0g
- Carbohydrates: 30g
- Fiber: 2g
- Protein: 3g
- Cholesterol: 30mg
Keywords: Heart-shaped desserts, romantic desserts, sweet treats