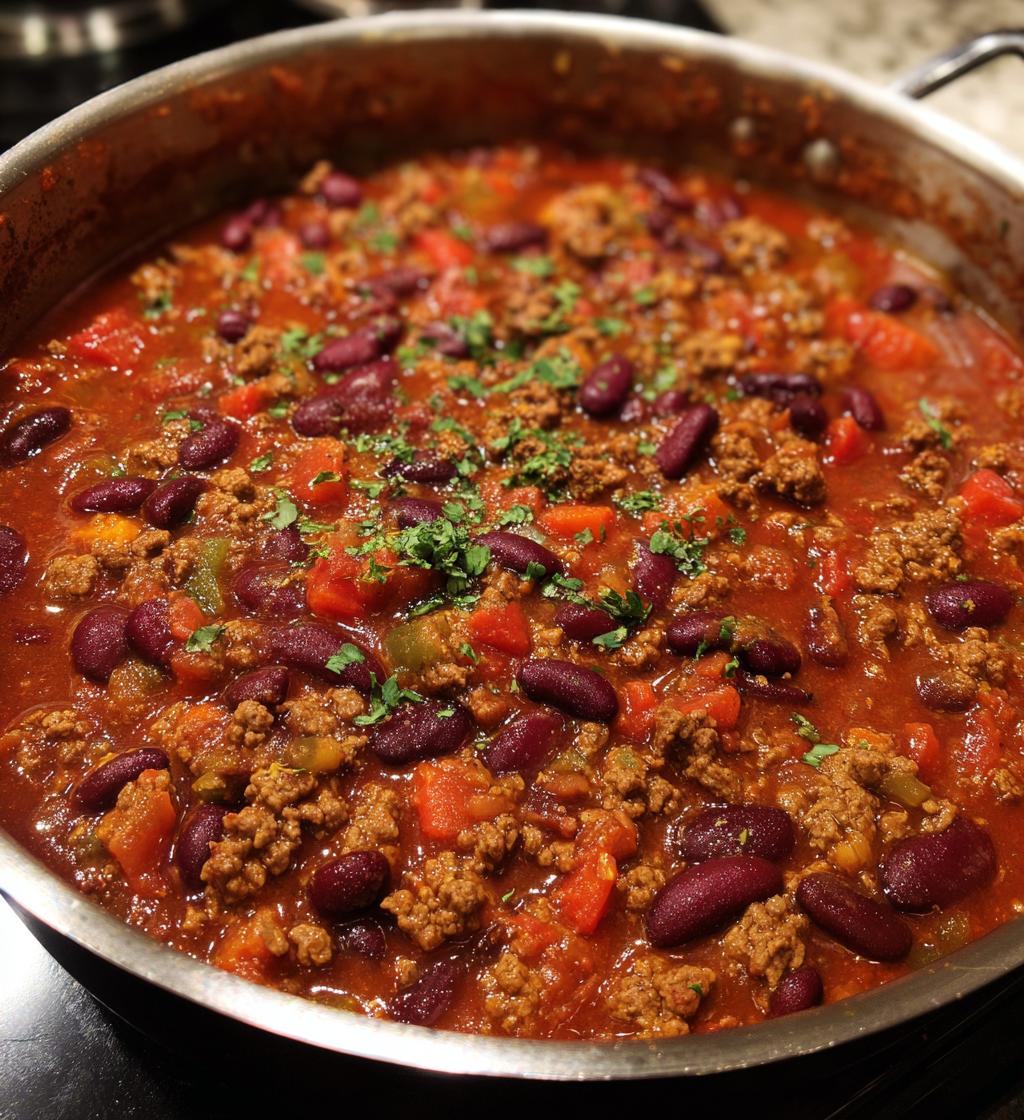
Ah, chili! It’s one of those recipes that instantly transports me back to chilly evenings spent cozied up with family. I remember my mom stirring a bubbling pot on the stove, filling the house with the warm, comforting aroma of spices and simmering goodness. That’s the magic of a homemade chili recipe – it’s not just a meal; it’s a hug in a bowl. This simple and hearty homemade chili recipe has become a go-to in my kitchen because it’s so easy to whip up yet so satisfying. You only need a handful of ingredients, and before you know it, you’re serving up a bowlful of warmth that brings everyone together. Trust me, once you try this recipe, it’ll become a staple in your home too!
Ingredients List
- 1 lb ground beef
- 1 can (15 oz) kidney beans, drained
- 1 can (15 oz) black beans, drained
- 1 can (28 oz) crushed tomatoes
- 1 medium onion, chopped
- 2 cloves garlic, minced
- 2 tbsp chili powder
- 1 tsp cumin
- 1 tsp salt
- 1/2 tsp black pepper
- 1 cup beef broth
Make sure to gather everything before you start! Freshly chopped onion and minced garlic will make a world of difference in flavor. And don’t skip draining the beans – you don’t want any extra liquid messing with your chili’s consistency. This simple preparation sets the stage for a deliciously hearty homemade chili that everyone will love!
How to Prepare the Home Made Chili Recipe
Now that you’ve got all your ingredients ready, let’s dive into the process of making this delicious homemade chili! Each step is simple, but trust me, it’s all about building layers of flavor. Follow along, and you’ll have a pot of chili bubbling away in no time!
Step 1: Brown the Ground Beef
First things first, grab a large pot and heat it over medium heat. Toss in the ground beef and let it sizzle away until it’s nicely browned. This should take about 5 to 7 minutes. Don’t rush this step! Browning the beef is essential for flavor development. That golden-brown color adds depth to your chili that you just can’t achieve otherwise.
Step 2: Cook Onion and Garlic
Once your beef is beautifully browned, it’s time to add the chopped onion and minced garlic. Stir them into the pot and cook for another 3 to 5 minutes, until the onion is translucent and you can smell that amazing aroma wafting through your kitchen. This step is crucial because the onion and garlic bring a wonderful sweetness that elevates the overall flavor of your chili.
Step 3: Add Spices
Now comes the fun part! Sprinkle in the chili powder, cumin, salt, and black pepper. Stir everything together and let those spices bloom for about a minute. Each spice plays a vital role: the chili powder gives that signature heat and color, while the cumin adds a warm, earthy undertone. Together, they create the heart and soul of your homemade chili recipe!
Step 4: Combine Ingredients
Next, it’s time to mix in the crushed tomatoes, drained kidney beans, black beans, and beef broth. I like to add the crushed tomatoes first, letting them coat the beef and spices nicely. Then, gently fold in the beans and pour in the broth. This order helps everything blend beautifully, allowing those flavors to mingle and create a rich, hearty chili.
Step 5: Simmer the Chili
Bring your chili to a boil, then reduce the heat and let it simmer uncovered for about 30 minutes. This is where all the magic happens! Simmering allows the flavors to deepen and meld together. Keep an eye on the consistency; if it gets too thick, just stir in a bit more beef broth. You want it to be hearty but not dry. Trust me, the longer you let it simmer, the better the flavor will be!
Nutritional Information
Now, let’s talk about the numbers behind this delicious homemade chili recipe! The following nutritional values are estimates based on the ingredients used, and they can vary depending on specific brands and amounts. But here’s a general idea of what you’re getting per serving:
- Serving Size: 1 cup
- Calories: 300
- Fat: 10g
- Saturated Fat: 4g
- Unsaturated Fat: 6g
- Trans Fat: 0g
- Cholesterol: 50mg
- Sodium: 600mg
- Carbohydrates: 35g
- Fiber: 10g
- Sugar: 5g
- Protein: 20g
This hearty chili is not just comforting but also packed with protein and fiber to keep you satisfied. Plus, it’s low in fat, making it a great option for a wholesome meal that won’t weigh you down. So dig in, knowing you’re treating yourself to something both delicious and nutritious!
FAQ Section
Can I make this chili vegetarian?
Absolutely! You can easily transform this homemade chili recipe into a delicious vegetarian option. Just substitute the ground beef with cooked lentils or your favorite plant-based meat substitute. I love using black beans or even crumbled tempeh for added texture. You won’t miss the meat at all, and the flavors will still shine through!
How long can I store leftovers?
Chili is fantastic for meal prep! You can store any leftovers in the refrigerator for up to 5 days. Just make sure to let it cool completely before transferring it to an airtight container. When you’re ready to enjoy it again, simply reheat it on the stovetop over low heat, stirring occasionally, or pop it in the microwave until hot. It’s almost like it gets better with time!
What can I serve with chili?
There are so many great side dishes and toppings that pair perfectly with chili! Some of my favorites include:
- Warm, buttery cornbread – it’s perfect for soaking up all that chili goodness!
- Freshly chopped cilantro or green onions for a pop of color and flavor.
- A sprinkle of shredded cheese or a dollop of sour cream to add creaminess.
- Crunchy tortilla chips or crackers for that delightful crunch!
Feel free to get creative and mix and match according to your taste! Enjoying chili is all about making it your own.
Why You’ll Love This Recipe
- Quick Preparation: With just 15 minutes of prep time, you can have this delicious homemade chili on the table in under an hour!
- Hearty Flavor: The rich combination of spices, ground beef, and beans creates a depth of flavor that warms you from the inside out.
- Versatile Options: This recipe is easily customizable! You can make it vegetarian, adjust the spice level, or mix in your favorite ingredients.
- Meal Prep Friendly: Chili stores beautifully in the refrigerator, making it perfect for leftovers or meal prep for the week ahead.
- Family Favorite: It’s a crowd-pleaser! Whether it’s game day or a cozy family dinner, this chili is sure to bring smiles all around.
Tips for Success
When it comes to making the best homemade chili recipe, a few little tips can take your dish from good to absolutely amazing! Here are some pro tips I’ve picked up over the years:
Don’t Rush the Browning
As I mentioned earlier, browning the ground beef is crucial for flavor. Make sure to take your time with this step. If you rush it, you might end up with gray meat instead of that beautiful brown color that brings depth to your chili. Give it a good 5 to 7 minutes, and let those juices caramelize!
Adjust the Spice Level
Chili is all about personal taste! If you’re sensitive to spice, start with less chili powder and taste as you go. You can always add more, but it’s tough to tone down the heat once it’s in there. If you love a kick, throw in some diced jalapeños or a pinch of cayenne for an extra layer of flavor!
Let It Simmer
Patience is key here! The longer you let your chili simmer, the more the flavors meld together. If you can, aim for a full 30 minutes, but if you have extra time, even an hour is fantastic. Just keep an eye on it, stirring occasionally, to prevent any sticking at the bottom of the pot.
Experiment with Toppings
Once your chili is ready, don’t be afraid to get creative with your toppings! A sprinkle of cheese, a dollop of sour cream, or some crunchy tortilla chips can elevate your dish to a whole new level. Plus, toppings are a fun way to make each serving unique!
Store Properly
If you have leftovers (which you likely will, since this recipe is so hearty!), make sure to let your chili cool completely before storing it in an airtight container in the fridge. This keeps it fresh and prevents any weird flavors from developing. And remember, chili often tastes even better the next day as the flavors continue to meld!
By following these tips, you’ll ensure your homemade chili recipe turns out perfectly every time. Enjoy the process and savor the warm, comforting dish you create!
Variations
One of the best things about this homemade chili recipe is its versatility! You can easily customize it to suit your taste or to use up ingredients you have on hand. Here are some fun variations to consider:
Spicy Kick
If you love heat, why not amp up the spice level? You can add diced jalapeños or serrano peppers along with the onion and garlic for an extra kick. A pinch of cayenne pepper or a splash of hot sauce can also elevate the heat. Just be sure to taste as you go, so you find the perfect balance for your palate!
Beans Galore
Feel free to mix and match your beans! While kidney and black beans are a classic combo, you can throw in pinto beans, cannellini beans, or even chickpeas for a different texture and flavor. Each type of bean adds its own unique twist to the chili.
Vegetable Medley
Add more veggies for a heartier chili! Diced bell peppers, zucchini, or corn can enhance the flavor and nutrition of your dish. Just sauté them along with the onion and garlic until they’re tender before adding the rest of the ingredients. You’ll be amazed at how delicious and colorful your chili becomes!
Smoky Flavor
If you’re a fan of smoky flavors, try adding a couple of teaspoons of smoked paprika or chipotle powder. These spices introduce a wonderful depth and complexity to your chili that’s absolutely irresistible. You can also use smoked sausage or bacon instead of ground beef for a meatier, smokier version.
Sweet and Savory
For a unique twist, consider adding a tablespoon of brown sugar or a splash of maple syrup to your chili. The sweetness balances the spiciness beautifully and can really enhance the overall flavor profile. You’ll be surprised at how a touch of sweetness can make a difference!
Slow Cooker Chili
If you’re short on time, you can easily adapt this recipe for a slow cooker. Just brown the beef and sauté the onion and garlic first, then transfer everything into the slow cooker along with the remaining ingredients. Cook on low for 6 to 8 hours or high for 3 to 4 hours. You’ll come home to a wonderfully fragrant chili waiting for you!
With these variations, you can make this homemade chili recipe a new experience each time. Don’t be afraid to experiment and find your favorite combinations! Enjoy the process and the delicious results!
Storage & Reheating Instructions
Storing your delicious homemade chili properly is key to enjoying those wonderful flavors even days later! Here’s how to do it right:
How to Store Leftovers
Once your chili has cooled down to room temperature, transfer it into an airtight container. I love using glass containers because they’re durable and don’t absorb any odors. Make sure to leave a little space at the top, as the chili may expand when frozen. You can store your chili in the refrigerator for up to 5 days.
If you want to keep it longer, you can freeze it! Just portion out the chili into freezer-safe bags or containers, removing as much air as possible before sealing. It can last in the freezer for up to 3 months. When you’re ready to enjoy it again, simply thaw it in the fridge overnight before reheating.
Reheating Your Chili
Reheating chili is super easy, and you want to make sure to do it gently to keep all those lovely flavors intact. For stovetop reheating, just pour your chili into a pot and warm it over medium heat. Stir occasionally to prevent it from sticking to the bottom of the pot. If it’s too thick, you can add a splash of beef broth or water to reach your desired consistency.
If you’re short on time, the microwave works great too! Just place your chili in a microwave-safe bowl and cover it loosely with a microwave-safe lid or wrap. Heat in 1-minute intervals, stirring in between, until it’s warmed through. Be careful, as it can get hot quickly, and you don’t want any splatters!
By following these storage and reheating tips, you can enjoy your homemade chili just as deliciously as the first time you made it. So go ahead, make a big batch, and savor every moment!
Print
home made chili recipe: 5 Secrets for Heartwarming Flavor
- Total Time: 45 minutes
- Yield: 4 servings 1x
- Diet: Low Fat
Description
A simple and hearty homemade chili recipe.
Ingredients
- 1 lb ground beef
- 1 can (15 oz) kidney beans, drained
- 1 can (15 oz) black beans, drained
- 1 can (28 oz) crushed tomatoes
- 1 medium onion, chopped
- 2 cloves garlic, minced
- 2 tbsp chili powder
- 1 tsp cumin
- 1 tsp salt
- 1/2 tsp black pepper
- 1 cup beef broth
Instructions
- In a large pot, brown the ground beef over medium heat.
- Add onion and garlic, cook until softened.
- Stir in chili powder, cumin, salt, and pepper.
- Add crushed tomatoes, kidney beans, black beans, and beef broth.
- Bring to a boil, then reduce heat and simmer for 30 minutes.
- Serve hot.
Notes
- Adjust spices to your taste.
- For a vegetarian version, substitute ground beef with lentils.
- Chili can be stored in the refrigerator for up to 5 days.
- Prep Time: 15 minutes
- Cook Time: 30 minutes
- Category: Main Dish
- Method: Stovetop
- Cuisine: American
Nutrition
- Serving Size: 1 cup
- Calories: 300
- Sugar: 5g
- Sodium: 600mg
- Fat: 10g
- Saturated Fat: 4g
- Unsaturated Fat: 6g
- Trans Fat: 0g
- Carbohydrates: 35g
- Fiber: 10g
- Protein: 20g
- Cholesterol: 50mg
Keywords: home made chili recipe