Mother’s Day is such a beautiful occasion, isn’t it? It’s all about celebrating the incredible women in our lives, and what better way to show our love than with a delicious cake? Mother’s Day cakes have a special way of brightening up any celebration, transforming a simple gathering into something truly magical. I still remember the first cake I baked for my mom—her face lit up like it was her birthday! That moment sparked my passion for baking, and now I can’t imagine this day without whipping up something sweet to share.
This cake recipe is perfect for Mother’s Day celebrations; it’s simple yet absolutely delightful. You can personalize it with her favorite frosting or toppings, making it a heartfelt treat. Trust me, when that warm, sweet aroma starts filling your kitchen, it’s like a hug in the air. Let’s dive into the ingredients and get this cake baking!
Ingredients for Mother’s Day Cakes
Gathering the right ingredients is key to baking a cake that’ll make your mom’s heart sing! Here’s what you’ll need:
- 2 cups all-purpose flour
- 1 1/2 cups sugar
- 1 cup butter, softened
- 4 large eggs
- 1 cup milk
- 2 tsp vanilla extract
- 1 tbsp baking powder
- 1/2 tsp salt
Make sure your butter is at room temperature for easy creaming—this really helps create that light, fluffy texture we all love. And don’t forget to measure everything accurately; it makes a world of difference in the final cake. Let’s get ready to mix these goodness together!
How to Prepare Mother’s Day Cakes
Now that we’ve gathered our ingredients, it’s time to bring this cake to life! Follow these simple steps, and I promise you’ll have a cake that will make your mom smile from ear to ear.
- Preheat the Oven: First things first, preheat your oven to 350°F (175°C). This ensures the cake bakes evenly. Trust me, you don’t want to skip this step!
- Prepare the Cake Pans: Grease and flour two 9-inch round cake pans. This helps the cake slide right out when it’s done. I like to use a bit of butter to grease them, then sprinkle in flour, shaking off the excess. It’s like giving your cake a cozy little bed to rest on.
- Cream the Butter and Sugar: In a large mixing bowl, cream together the softened butter and sugar until it’s light and fluffy. This usually takes about 3-5 minutes. You can use a hand mixer or stand mixer for this—just make sure you scrape down the sides of the bowl to get everything mixed well. You’re looking for a pale, creamy mixture that’s a bit airy!
- Add the Eggs: Now, add the eggs one at a time, mixing well after each addition. This step is crucial; it helps to incorporate air and makes the cake rise beautifully. Don’t rush it—mix until each egg is fully blended before adding the next one.
- Stir in the Vanilla: Add in the vanilla extract and give it a quick mix. Ah, the smell of vanilla! It’s like a warm hug.
- Combine the Dry Ingredients: In a separate bowl, whisk together the flour, baking powder, and salt. This helps distribute the baking powder evenly, which is super important for a good rise!
- Mix it All Together: Gradually add the dry ingredients to the creamed mixture, alternating with the milk. Start with a bit of flour, then some milk, and keep alternating until everything is combined. This method keeps the batter from becoming too thick and helps maintain that fluffy texture. Be careful not to overmix—just stir until you see no more flour streaks!
- Pour the Batter: Divide the batter evenly between the two prepared pans. You can use a spatula to smooth the tops if they’re a little lumpy.
- Bake: Pop those pans in the oven and bake for 30-35 minutes. You’ll know they’re done when a toothpick inserted in the center comes out clean. Keep an eye on them during the last few minutes, as oven times can vary.
- Cool the Cakes: Once baked, let the cakes cool in the pans for about 10 minutes. This helps them set. Then, gently run a knife around the edges and flip them out onto a wire rack to cool completely. Cooling is key—don’t rush into frosting them while they’re still warm, or you might end up with a melty mess!
And voila! You’ve just prepared the base for an amazing Mother’s Day cake. The delightful aroma wafting through your kitchen is just a hint of the deliciousness that awaits. Once they’re completely cool, you’ll be ready to add your favorite frosting and toppings. I can’t wait for you to see how beautiful it turns out!
Why You’ll Love This Recipe
This Mother’s Day cake recipe is truly something special, and I can’t wait to share the reasons why you’ll absolutely adore it:
- Quick Preparation: With just 20 minutes of prep time, you’ll have a delicious cake in the oven in no time. Perfect for those busy mornings leading up to Mother’s Day!
- Delicious Flavor: The combination of butter, sugar, and vanilla creates a rich, mouthwatering flavor that’s hard to resist. Each bite is a delightful experience that your mom will cherish.
- Perfect for Celebrations: This cake is versatile enough for any occasion, but it shines brightest on Mother’s Day. It makes for a beautiful centerpiece at your celebration!
- Customizable: You can easily personalize this cake with her favorite frosting, fruits, or nuts, making it an extra special treat just for her.
- Family-Friendly: Whether you’re baking with kids or surprising your mom solo, this recipe is easy to follow and great for bakers of all ages.
Trust me, once you try this recipe, you’ll want to make it a tradition for years to come. It’s not just a cake; it’s a way to create sweet memories together!
Tips for Success with Mother’s Day Cakes
Getting everything just right can be the difference between a good cake and a truly spectacular one! Here are some tried-and-true tips to help you achieve cake perfection:
Measure Accurately
Trust me, baking is all about precision. Use a kitchen scale if you have one; it’s the most accurate way to measure your ingredients. If you’re using cups, make sure to spoon the flour into the measuring cup and level it off with a knife. Don’t scoop directly from the bag, or you might end up with too much flour, leading to a dense cake.
Room Temperature Ingredients
Having your butter, eggs, and milk at room temperature makes a huge difference! It helps create a smooth batter that traps air, which makes your cake light and fluffy. Just take them out of the fridge about 30 minutes before you start baking.
Don’t Overmix
When combining your dry and wet ingredients, mix just until everything is combined. Overmixing can develop gluten, making your cake tough. You want to see a few flour streaks in your batter; it’s okay! It’ll all come together in the oven.
Check for Doneness
Ovens can be tricky, so always start checking your cakes a few minutes before the recommended baking time. I like to do the toothpick test—insert a toothpick into the center, and if it comes out clean or with a few moist crumbs, you’re good to go. If it comes out with wet batter, give it a few more minutes.
Cool Completely
Patience is key here! Let your cakes cool in the pans for about 10 minutes before transferring them to a wire rack. Cooling them completely before frosting is crucial; otherwise, the frosting might melt right off! Plus, it gives you a chance to admire your work before decorating.
Have Fun with Frosting
Don’t be shy when it comes to frosting! Use a spatula to spread it on generously. If you’re feeling adventurous, try piping it on for a fancy look. And remember, topping it with fresh fruit or nuts can add a delicious crunch and a burst of flavor. It’s all about making it personal!
With these tips in mind, you’re all set to create a stunning Mother’s Day cake that your loved ones will absolutely adore. Happy baking!
Variations of Mother’s Day Cakes
Why stick to one flavor when you can get creative with your Mother’s Day cake? I love experimenting with different variations that add a personal touch to this special dessert. Here are some fantastic ideas to switch things up:
Chocolate Delight
If your mom loves chocolate as much as I do, why not turn this cake into a rich chocolate version? Just substitute 3/4 cup of all-purpose flour with unsweetened cocoa powder. You can also fold in some chocolate chips for an extra indulgent treat!
Citrus Zing
For a refreshing twist, try adding lemon or orange zest to the batter. Just a tablespoon or two will brighten the flavor beautifully. You can also mix in a splash of citrus juice into the milk for an extra zing that pairs perfectly with a light cream cheese frosting.
Nutty Banana Cake
Imagine the combination of bananas and nuts! Mash up about 1 cup of ripe bananas and fold them gently into the batter, along with some chopped walnuts or pecans. This variation not only adds a lovely flavor but also makes the cake incredibly moist.
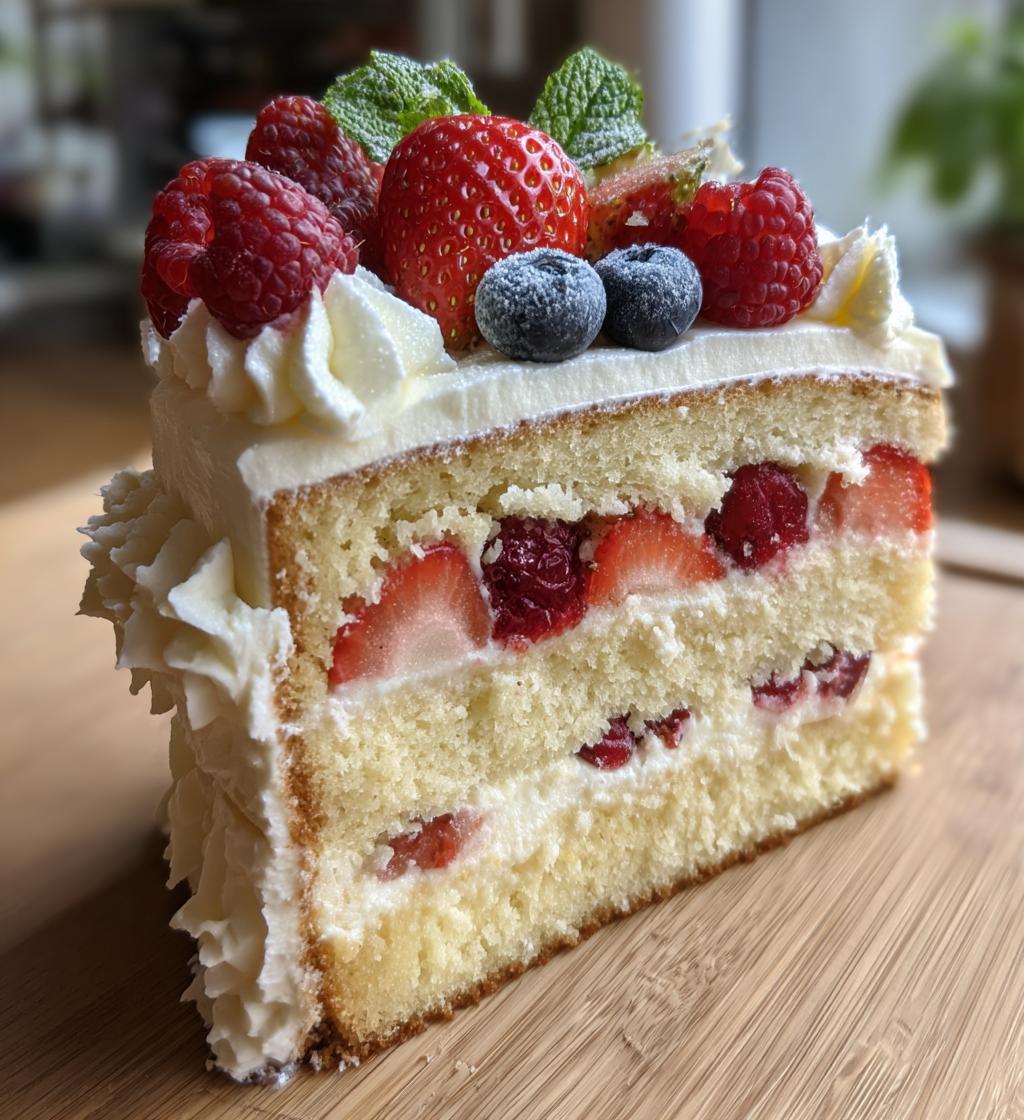
Berry Bliss
Want to add a fruity flair? Fold in a cup of fresh or frozen berries, like blueberries or raspberries, right before pouring the batter into the pans. The burst of fruitiness in every bite is sure to make your mom smile!
Layered Surprise
If you’re feeling adventurous, consider making a layered cake! Bake three or four smaller cakes instead of two, and stack them with different fillings. You could use whipped cream, fruit preserves, or even a chocolate ganache in between each layer for a show-stopping dessert!
Frosting Fantasies
Don’t forget about the frosting! There are so many delicious options to consider. From classic buttercream to a tangy cream cheese frosting, or even a light whipped cream topping—each adds its own flair. You can also mix in flavors like almond or coconut extract for an unexpected twist!
With these variations, you can create a Mother’s Day cake that’s just as unique as the wonderful woman you’re celebrating. So go ahead, get creative, and make this cake your own! I can’t wait to hear what delicious combinations you come up with!
Storage & Reheating Instructions
Once you’ve baked this delightful Mother’s Day cake, you might be wondering how to store it properly so that it stays fresh and delicious. Here’s what I recommend:
Storing Leftover Cake
First off, if you have any leftover cake (which is a big if, but let’s be optimistic!), make sure to let it cool completely before wrapping it up. This is super important to avoid any condensation, which can make the cake soggy. Here’s how to store it:
- Room Temperature: If you plan to eat the cake within a couple of days, keep it at room temperature. Just place it in an airtight container or cover it tightly with plastic wrap. This keeps it moist and tasty!
- Refrigeration: If you want to save it for longer, pop it in the fridge. Again, use an airtight container or wrap it well in plastic wrap. Just keep in mind that refrigeration can dry out the cake a little, so try to consume it within a week.
- Freezing: For longer storage, you can freeze the cake! Slice it into individual portions for easy thawing later. Wrap each slice tightly in plastic wrap and then place them in a freezer-safe bag or container. It’s best to enjoy frozen cake within three months for optimal taste.
Reheating Instructions
If you find yourself with chilled or frozen cake and you want to enjoy it warm, here’s how to reheat it without losing that delightful texture:
- Thawing Frozen Cake: If your cake is frozen, transfer it to the fridge the night before to allow it to thaw slowly. If you’re in a hurry, you can let it sit at room temperature for about an hour.
- Microwave Method: To reheat individual slices, pop a slice on a microwave-safe plate, cover it with a damp paper towel (this helps keep it moist), and heat for about 10-15 seconds. Keep an eye on it to make sure it doesn’t get too hot!
- Oven Method: For a whole cake or multiple slices, preheat your oven to 350°F (175°C). Wrap the cake in aluminum foil and heat for about 10-15 minutes. This method helps to maintain that freshly baked flavor and texture.
With these storage and reheating tips, you can savor every last bite of your Mother’s Day cake, making those sweet moments last just a little longer. Enjoy!
Nutritional Information for Mother’s Day Cakes
As you whip up this delightful Mother’s Day cake, it’s always good to know what you’re indulging in! Here’s a general breakdown of the nutritional values per slice, though keep in mind these are estimates and can vary based on your specific ingredients and portion sizes:
- Calories: 350
- Fat: 15g
- Saturated Fat: 9g
- Unsaturated Fat: 4g
- Trans Fat: 0g
- Cholesterol: 60mg
- Sodium: 200mg
- Carbohydrates: 50g
- Fiber: 1g
- Sugar: 25g
- Protein: 4g
These numbers give you a rough idea of what you’re serving up to your loved ones. Remember, it’s all about balance—especially when celebrating the special women in your life! So enjoy every slice and the sweet moments that come with it!
FAQ Section about Mother’s Day Cakes
Got questions about making the perfect Mother’s Day cake? You’re in the right place! Here are some common queries I’ve encountered along the way, along with my answers to help you out:
Can I use different types of flour for this recipe?
Absolutely! While all-purpose flour is my go-to for this Mother’s Day cake, you can experiment with cake flour for an even lighter texture. Just keep in mind that if you switch to whole wheat flour, you might need to adjust the liquid slightly since it absorbs more moisture.
What’s the best way to frost the cake?
Oh, frosting is where the fun really begins! I recommend using a buttercream or cream cheese frosting, as they add a lovely richness. For a smooth finish, spread a thin layer of frosting over the entire cake first (this is called a crumb coat) and chill it for 30 minutes. Then, add another layer of frosting for that gorgeous look!
Can I make this cake ahead of time?
Yes, you can! I often bake the cakes a day or two in advance. Just let them cool completely, wrap them in plastic wrap, and store them at room temperature or in the fridge. This can actually enhance the flavor as the moisture settles in. Just frost it the day you plan to serve it for the best results!
How can I make this recipe gluten-free?
Easy peasy! Just substitute the all-purpose flour with a gluten-free flour blend that’s designed for baking. Make sure it contains xanthan gum to help with structure, or add it separately if your blend doesn’t include it. Your cake will still be delicious and perfect for celebrating!
What are some good topping ideas for my Mother’s Day cake?
The options are endless! Fresh berries, chopped nuts, or even shavings of chocolate can add a delightful touch. If you want a pop of color, consider edible flowers for a beautiful presentation. Whatever you choose, let your creativity shine—your mom will love it!
With these FAQs in mind, you’re all set to bake a Mother’s Day cake that’s sure to impress! Happy baking, and don’t forget to enjoy the process!
Final Thoughts
Baking for Mother’s Day is such a joyful experience, and I hope you find as much happiness in it as I do! The process of mixing, measuring, and creating something sweet is a wonderful way to show your love. As you whip up this delightful cake, don’t forget to savor those little moments in the kitchen—like the smell of vanilla wafting through the air or the excitement of frosting your creation.
And remember, it’s not just about the cake; it’s about the memories you’re making. Whether you’re baking alongside your kids or surprising your mom with a special treat, every moment spent in the kitchen is a chance to connect and create joy. I’d love to hear all about your baking adventures! Feel free to share your experiences, tips, or any variations you come up with. Happy baking, and may your Mother’s Day be filled with love and delicious cake!
Print
Mother’s Day Cakes: 5 Ways to Create Sweet Memories
- Total Time: 55 minutes
- Yield: 12 servings 1x
- Diet: Vegetarian
Description
Delicious cake recipes perfect for Mother’s Day celebrations.
Ingredients
- 2 cups all-purpose flour
- 1 1/2 cups sugar
- 1 cup butter
- 4 large eggs
- 1 cup milk
- 2 tsp vanilla extract
- 1 tbsp baking powder
- 1/2 tsp salt
Instructions
- Preheat oven to 350°F (175°C).
- Grease and flour two 9-inch round cake pans.
- In a bowl, cream butter and sugar until light and fluffy.
- Add eggs one at a time, mixing well after each.
- Stir in vanilla extract.
- Combine flour, baking powder, and salt; gradually add to creamed mixture alternating with milk.
- Pour batter into prepared pans.
- Bake for 30-35 minutes or until a toothpick comes out clean.
- Let cakes cool before frosting.
Notes
- Use your favorite frosting for decoration.
- Add fruit or nuts for extra flavor.
- Store leftovers in an airtight container.
- Prep Time: 20 minutes
- Cook Time: 35 minutes
- Category: Dessert
- Method: Baking
- Cuisine: American
Nutrition
- Serving Size: 1 slice
- Calories: 350
- Sugar: 25g
- Sodium: 200mg
- Fat: 15g
- Saturated Fat: 9g
- Unsaturated Fat: 4g
- Trans Fat: 0g
- Carbohydrates: 50g
- Fiber: 1g
- Protein: 4g
- Cholesterol: 60mg
Keywords: mother's day cakes, cake recipes, dessert recipes