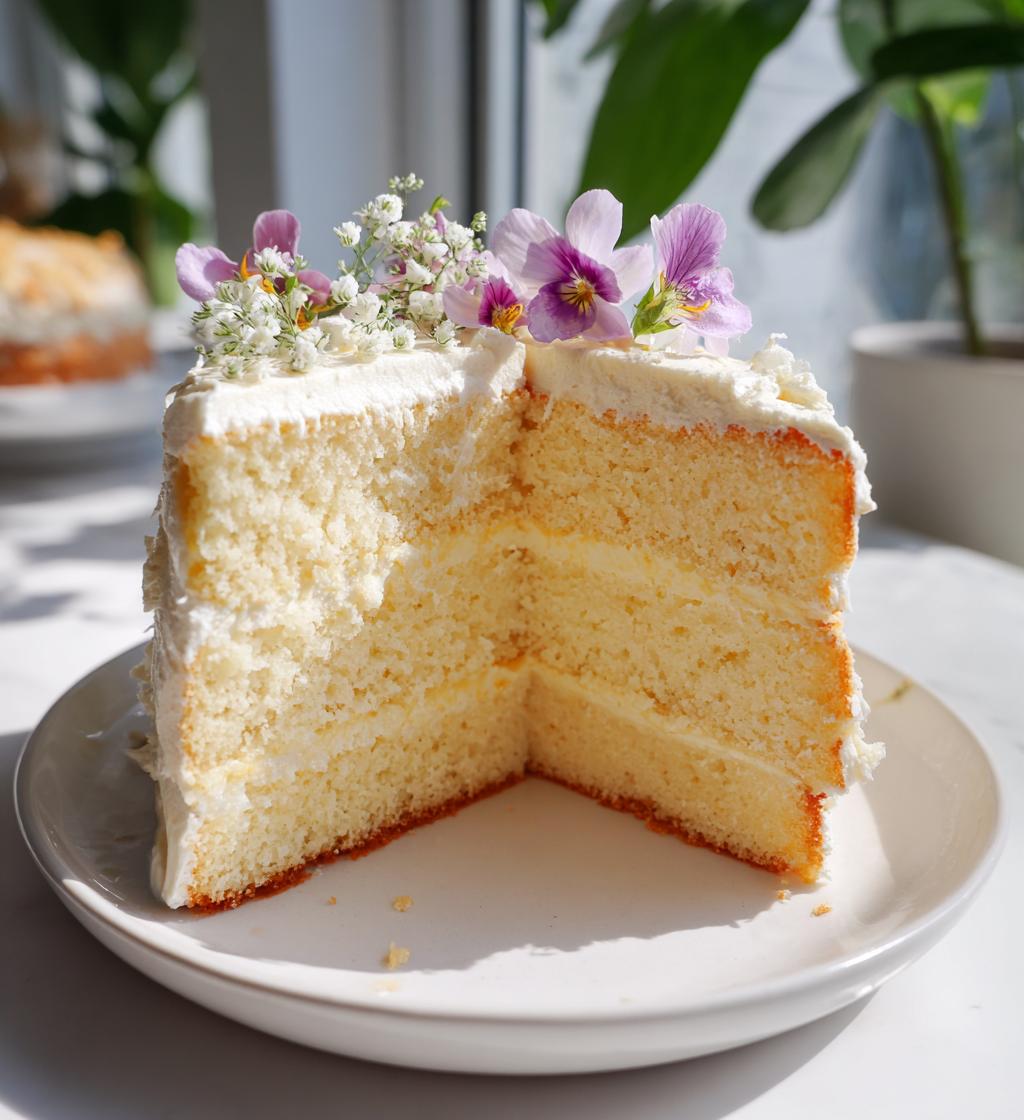
Mother’s Day is such a special occasion, isn’t it? It’s that one day dedicated to celebrating the incredible women who shape our lives with love and care. What better way to show appreciation than with a homemade cake? Trust me, there’s something magical about baking for your mom – the way her eyes light up when she sees a cake made just for her is priceless. This year, I’m excited to share some *simple and elegant cake designs for Mother’s Day* that are not only easy to whip up but also bursting with flavor. Whether you’re a seasoned baker or just starting, these cake designs will help you create a heartfelt treat without any fuss. Plus, there’s a certain warmth that fills your kitchen while you mix and bake, and that aroma wafting through the house will surely make her day even more special. So, let’s get started on this delicious journey to celebrate the amazing moms in our lives!
Ingredients List
To create the perfect Mother’s Day cake, you’ll need some simple yet essential ingredients. Here’s what you’ll need to gather:
- 2 cups all-purpose flour: This will be the base of your cake, giving it structure and texture.
- 1 1/2 cups sugar: For sweetness and to help create that lovely fluffy texture.
- 1 cup unsalted butter: Make sure it’s at room temperature for easy creaming; this adds richness to your cake.
- 4 large eggs: They provide moisture and structure, helping the cake rise beautifully.
- 1 cup milk: This adds moisture and helps blend all the ingredients together.
- 2 tsp baking powder: This is your leavening agent, ensuring your cake rises perfectly!
- 1 tsp vanilla extract: A splash of vanilla for that warm, comforting flavor that makes everything better.
Make sure to have everything ready before you start baking, as it makes the process so much smoother and more enjoyable!
How to Prepare Mother’s Day Cakes Designs Simple
Let’s dive into the delightful process of baking! Getting everything ready is key to creating a cake that’s not just good, but *great*! Here’s how to make sure you’re set for success:
Preheat and Prepare
First things first, you’ll want to preheat your oven to 350°F (175°C). Preheating is super important because it gets your oven hot enough to give your cake that lovely rise and golden color. While the oven warms up, grease and flour two 9-inch round cake pans. This step ensures your cakes slide right out after baking without sticking. I like to use a bit of butter to grease the pans and then dust them with flour, shaking out the excess. It takes just a minute but makes a world of difference!
Creaming the Butter and Sugar
Now, grab a large mixing bowl and cream together that room-temperature butter and sugar until it’s light and fluffy—about 3-5 minutes. You want it to look pale and airy. This step is where the magic starts! The sugar will help incorporate air into the butter, which is essential for a light texture. So, don’t rush it; this is where your cake gets its lovely lift!
Mixing in Eggs and Vanilla
Next up, it’s time to add the eggs! Make sure to add them one at a time, mixing well after each addition. This allows each egg to fully incorporate into the mixture, giving you a smooth batter. Don’t forget to add that teaspoon of vanilla extract in this step too—it adds such a beautiful flavor that makes the cake taste homemade and special.
Combining Dry Ingredients
In a separate bowl, whisk together your flour and baking powder. This ensures the baking powder gets evenly distributed throughout the flour, so your cake rises perfectly! It’s a small step, but it makes a big difference in the final texture of your cake.
Mixing Wet and Dry Ingredients
Now comes the fun part! Gradually add the dry mixture to the creamed butter and sugar, alternating with the milk. Start with a bit of dry, then a splash of milk, and repeat until everything is combined. This method helps keep the batter from becoming too dense. Plus, it ensures a well-mixed cake that’s moist and delicious!
Baking the Cakes
Pour the batter evenly into your prepared pans and pop them in the oven. Bake for about 30-35 minutes. To check if they’re done, insert a toothpick into the center of the cakes. If it comes out clean, they’re ready to come out! The smell will be heavenly, trust me. And remember, don’t open the oven door too soon—this could cause your cakes to sink!
Cooling and Frosting
Once baked, let the cakes cool in the pans for about 10 minutes before transferring them to a wire rack to cool completely. This cooling step is crucial because it helps the cakes firm up, making them easier to frost. When they’re cool, you can get creative with your frosting! I love using a simple buttercream or even a cream cheese frosting. And for a special touch, think about adding fresh flowers or sprinkles on top. It’s all about making it look as beautiful as it tastes!
Why You’ll Love This Recipe
This Mother’s Day cake recipe is a dream come true for anyone looking to whip up something special without the stress. Here’s why you’ll absolutely adore it:
- Quick Preparation: With just 20 minutes of prep time, you can have everything ready to go in no time. Perfect for those busy days leading up to Mother’s Day!
- Simple Decoration: The cake’s elegant design is easy to achieve, whether you choose to frost it simply or add fresh flowers for a stunning touch.
- Delicious Flavor: The combination of butter, sugar, and vanilla creates a rich, comforting flavor that will make your mom’s heart melt.
- Customizable: You can easily switch up the frosting or add different flavors to make it your own. Chocolate, lemon, or even a fruity twist—endless possibilities!
- Perfect for Any Occasion: While it’s great for Mother’s Day, this recipe is versatile enough for birthdays, anniversaries, or just a sweet treat any day of the week!
- Family-Friendly: This recipe is approachable for bakers of all skill levels, making it a fun activity to share with your kids or partner!
Trust me, this cake will not only taste fantastic but will also bring smiles and warmth to your celebration. What’s not to love?
Tips for Success
To ensure your Mother’s Day cakes turn out perfectly every time, I’ve gathered some tried-and-true tips that I swear by. These little nuggets of wisdom will help you avoid common pitfalls and elevate your baking game!
- Room Temperature Ingredients: Make sure your butter, eggs, and milk are at room temperature before you start. This helps them blend together more smoothly, resulting in a better texture for your cake.
- Don’t Overmix: Once you add the flour mixture to your wet ingredients, mix just until combined. Overmixing can develop gluten, making your cake dense instead of light and fluffy.
- Oven Thermometer: Ovens can be tricky! If you have one, use an oven thermometer to check that your oven is at the right temperature. An oven that’s too hot can lead to burnt edges, while one that’s too cool can result in underbaking.
- Cooling Time: Don’t rush the cooling process! Letting your cakes cool in the pans first helps them firm up and makes them easier to remove. Trust me, you don’t want to end up with a crumbled mess!
- Frosting Tips: If you’re using buttercream, make sure it’s not too soft. If it is, pop it in the fridge for a few minutes to firm up. This will help you achieve those smooth, beautiful layers you’re aiming for.
- Experiment with Flavors: Don’t be afraid to get creative! Add a pinch of cinnamon or even a splash of almond extract to the batter for an extra layer of flavor that will surprise and delight.
- Practice Patience: Baking is a science, so take your time and enjoy the process. If something doesn’t go as planned, remember that practice makes perfect, and every attempt is a step toward mastering your baking skills!
These tips will set you up for baking success and make your Mother’s Day cake the star of the celebration. Happy baking!
Variations
One of the best things about this Mother’s Day cake recipe is how versatile it is! You can easily tweak it to fit different tastes or occasions. Here are some fun ideas to change it up:
- Flavor Infusions: Try adding lemon zest or almond extract to the batter for a fresh twist. You can also mix in some cocoa powder to make a chocolate version—just replace some of the flour with it!
- Fruit Additions: Fold in fresh berries like raspberries or chopped strawberries into the batter before baking. They’ll add a burst of flavor and moisture that’s simply delightful.
- Layered Cakes: Instead of two layers, consider baking your batter in three or four smaller pans to create a stunning multi-layered cake. Just adjust the baking time accordingly, and don’t forget to frost between each layer for a show-stopping presentation!
- Different Frostings: Experiment with various frostings! A light whipped cream frosting can give a lovely, airy touch, while a rich chocolate ganache can satisfy any chocolate lover. Cream cheese frosting adds a tangy flavor that pairs beautifully with the cake’s sweetness.
- Decorative Toppings: Get creative with toppings! Fresh flowers, edible glitter, or even a dusting of powdered sugar can elevate the look of your cake. You can also use chocolate shavings, nuts, or coconut flakes for added texture and flavor.
- Mini Cakes or Cupcakes: If you want to make serving easier, try making mini cakes or cupcakes instead. Just adjust the baking time, and you’ll have adorable treats that are perfect for sharing!
These variations let you tailor the cake to your mom’s taste or the theme of your celebration, making it even more special. Enjoy experimenting and creating a masterpiece that she’ll cherish!
Storage & Reheating Instructions
After all that hard work baking your beautiful Mother’s Day cake, you might find yourself with some delicious leftovers! Here’s how to keep your cake fresh and tasty for days to come.
To store your cake, make sure it’s completely cooled before wrapping it up. If you’ve frosted it, I recommend placing it in the fridge if you used cream cheese frosting or anything that needs to stay cold. Cover it loosely with plastic wrap or aluminum foil to prevent it from drying out. For cakes without frosting, you can wrap them tightly in plastic wrap or place them in an airtight container at room temperature for up to three days.
If you want to keep your cake for longer, consider freezing it! Slice the cake into individual pieces, wrap each slice in plastic wrap, and then place them in a freezer-safe bag or container. This way, you can pull out just what you need later without thawing the whole cake. It’ll stay fresh in the freezer for about three months.
When you’re ready to enjoy those leftover slices, reheating is a breeze! For a slice or two, pop them in the microwave for about 10-15 seconds. Just be careful not to overdo it—you want it warm, not hot! If you’re reheating a whole cake, you can place it in a 350°F (175°C) oven for about 10-15 minutes to warm it through. This will help restore some of that fresh-baked magic!
And there you have it—simple storage and reheating tips to keep your Mother’s Day cake delicious and ready to share, even after the big day. Enjoy every bite!
Nutritional Information Section
As you whip up this delightful Mother’s Day cake, it’s always nice to know what you’re indulging in! Here’s an estimated breakdown of the nutritional values per slice (based on 12 servings):
- Calories: 350
- Fat: 15g
- Saturated Fat: 9g
- Unsaturated Fat: 4g
- Trans Fat: 0g
- Cholesterol: 70mg
- Sodium: 200mg
- Carbohydrates: 50g
- Fiber: 1g
- Sugar: 22g
- Protein: 4g
Keep in mind that these values are estimates and can vary based on the specific ingredients you choose, especially if you modify the recipe. But knowing the basics can help you enjoy your sweet creation with a bit more awareness. Happy baking and celebrating!
Your Turn to Celebrate!
Now that you know how to create the perfect Mother’s Day cake, it’s time to get in the kitchen and start baking! I can’t wait to hear about your experiences and the delightful creations you whip up. Whether you stick to the classic recipe or add your own twist, every cake has a story to tell.
If you try this recipe, please share your thoughts in the comments below! I love hearing how it turned out for you. Did you add fresh flowers, or maybe you experimented with different flavors? Your creativity could inspire someone else to bake something amazing!
Also, if you enjoyed this recipe, consider giving it a rating. It really helps others find this sweet treat that’s perfect for celebrating the incredible moms in our lives. So, let’s spread the joy of baking together! Happy Mother’s Day, and happy baking!
Print
mothers day cakes designs simple that will Melt Hearts
- Total Time: 55 minutes
- Yield: 12 servings 1x
- Diet: Vegetarian
Description
Simple and elegant cake designs for Mother’s Day.
Ingredients
- 2 cups all-purpose flour
- 1 1/2 cups sugar
- 1 cup unsalted butter
- 4 large eggs
- 1 cup milk
- 2 tsp baking powder
- 1 tsp vanilla extract
Instructions
- Preheat your oven to 350°F (175°C).
- Grease and flour two 9-inch round cake pans.
- In a bowl, cream butter and sugar until light and fluffy.
- Add eggs one at a time, mixing well after each addition.
- Stir in vanilla extract.
- In another bowl, mix flour and baking powder.
- Gradually add the dry ingredients to the wet ingredients, alternating with milk.
- Pour batter into prepared pans.
- Bake for 30-35 minutes or until a toothpick comes out clean.
- Let cakes cool before frosting.
Notes
- Use your favorite frosting for decoration.
- Add fresh flowers for a special touch.
- Consider making cupcakes for easier serving.
- Prep Time: 20 minutes
- Cook Time: 35 minutes
- Category: Dessert
- Method: Baking
- Cuisine: American
Nutrition
- Serving Size: 1 slice
- Calories: 350
- Sugar: 22g
- Sodium: 200mg
- Fat: 15g
- Saturated Fat: 9g
- Unsaturated Fat: 4g
- Trans Fat: 0g
- Carbohydrates: 50g
- Fiber: 1g
- Protein: 4g
- Cholesterol: 70mg
Keywords: mothers day cakes designs simple