Oh, St. Patrick’s Day! It’s that magical time when everything turns a vibrant shade of green, and the air is filled with laughter and joy. One of my favorite ways to celebrate this festive occasion is by whipping up some delightful Saint Patrick’s desserts. There’s just something so special about gathering with friends and family, indulging in sweet treats that bring smiles to our faces. I remember one year, I made a batch of green cupcakes that were a hit at our neighborhood party. The kids went wild over them, and I loved seeing their faces light up with each bite. Trust me, there’s nothing quite like the combination of fun and flavor that these desserts bring to the table! So, let’s dive into this festive world of Saint Patrick’s desserts, where every bite is a little piece of luck and happiness.
Ingredients for Saint Patrick’s Desserts
To create these festive Saint Patrick’s desserts, you’ll need a handful of simple yet essential ingredients:
- 2 cups all-purpose flour: This forms the base of your cake, giving it structure.
- 1 cup sugar: Sweetness is key, and this will balance the rich cocoa flavor.
- 1/2 cup unsweetened cocoa powder: For that deep, chocolatey goodness that pairs so well with the other flavors.
- 1 cup buttermilk: This adds moisture and tang, making the cake tender.
- 1/2 cup vegetable oil: Keeps the cake moist and adds richness.
- 2 large eggs: Essential for binding the ingredients together.
- 1 teaspoon vanilla extract: A touch of vanilla enhances all the flavors.
- 1 teaspoon baking soda: This helps the cake rise perfectly.
- 1/2 teaspoon salt: Just a pinch to balance the sweetness.
- Green food coloring: The star of the show, giving our dessert that festive look!
- Whipped cream for topping: A light, fluffy finish that complements the rich chocolate.
How to Prepare Saint Patrick’s Desserts
Getting ready to make these delightful Saint Patrick’s desserts is half the fun! Let’s walk through the steps together, so you can create a dessert that looks as good as it tastes.
Prepping the Oven and Mixing Dry Ingredients
First things first, preheat your oven to 350°F (175°C). This is key because it ensures that your cake starts baking right away, creating that perfect rise. While that’s happening, grab a large mixing bowl and combine the dry ingredients: flour, sugar, cocoa powder, baking soda, and salt. I like to whisk them together to break up any lumps and ensure everything is evenly distributed. This mixture is the foundation of our cake, so give it a good mix!
Combining Wet Ingredients
Now, let’s move on to the wet ingredients. In another bowl, whisk together the buttermilk, vegetable oil, eggs, and vanilla extract. The whisking is super important here—don’t rush it! You want to create a nice, smooth mixture that’s fully blended. This step helps to incorporate air, making your cake light and fluffy. Plus, that vanilla aroma is simply divine!
Merging Wet and Dry Ingredients
Once your wet ingredients are ready, it’s time to combine them with the dry ones. Pour the wet mixture into the bowl with the dry ingredients. Gently fold them together until just combined. Be careful not to overmix; a few flour streaks are totally okay! The goal is to create a smooth batter without developing too much gluten. Trust me, this will keep your cake tender and delicious.
Adding Color and Baking
Now comes the fun part—adding the green food coloring! Start with a few drops and stir it in, adjusting until you reach your desired shade of festive green. Once that’s done, pour the batter into your greased cake pan. Bake it for 30-35 minutes, but here’s a tip: check for doneness by inserting a toothpick in the center. If it comes out clean or with a few moist crumbs, your cake is ready to come out!
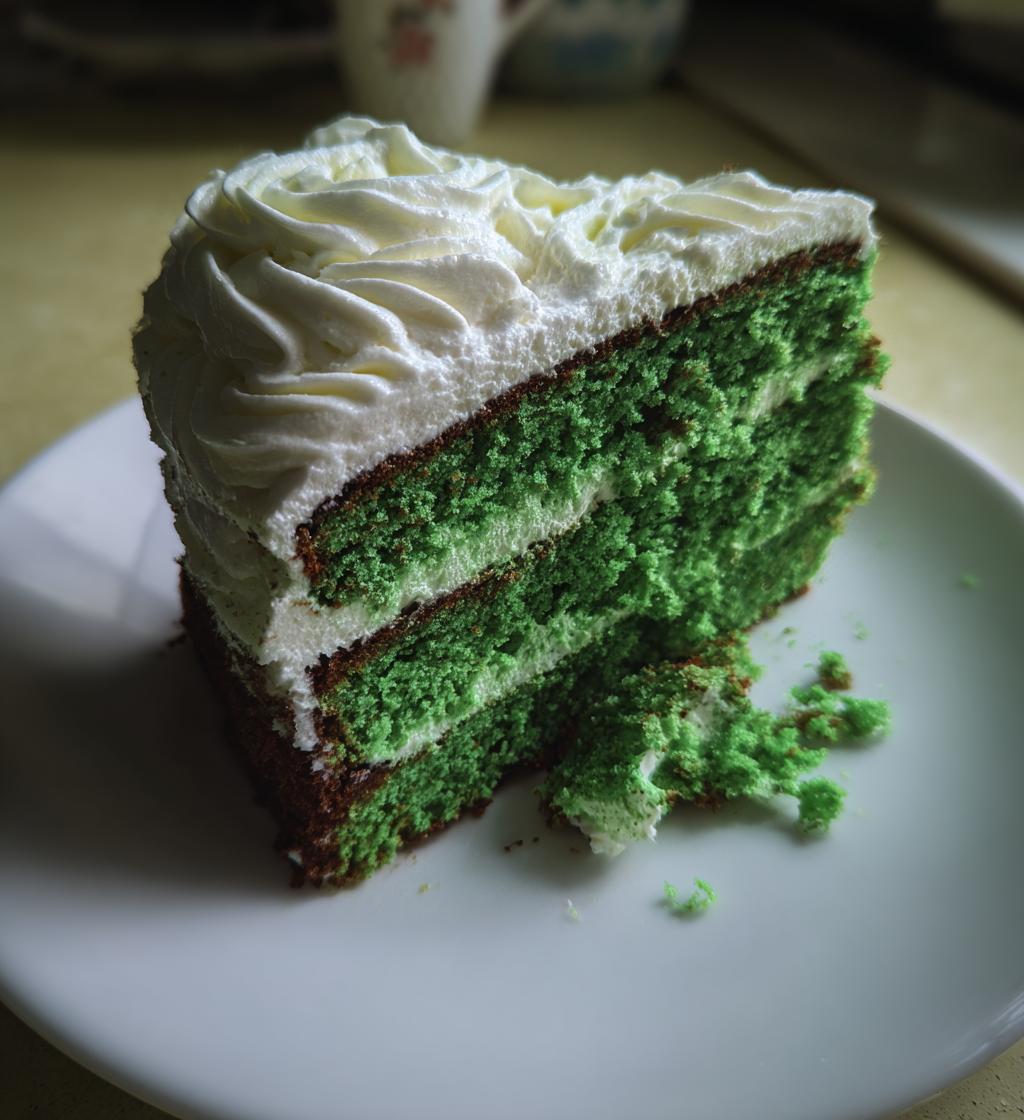
Cooling and Topping
Let your cake cool in the pan for about 10 minutes before transferring it to a wire rack. This step is crucial to avoid a soggy bottom! Once it’s completely cool, top it with a generous dollop of whipped cream. The lightness of the cream balances beautifully with the rich chocolate. For an extra touch, you could even sprinkle some green sprinkles on top for that festive flair! Serve it up and get ready for the compliments!
Nutritional Information for Saint Patrick’s Desserts
Now, let’s talk about the nutritional side of these delightful Saint Patrick’s desserts! Each slice packs about 250 calories, making it a sweet treat worth celebrating. You’ll find around 20 grams of sugar in every piece, which gives it that deliciously sweet flavor. Plus, it contains about 10 grams of fat, with 2 grams being saturated. Don’t worry, it also has a bit of protein—around 4 grams per serving! Keep in mind that these values are estimates and can vary based on ingredients and portion sizes. But hey, it’s all in good fun for a festive occasion!
Tips for Success with Saint Patrick’s Desserts
To make your Saint Patrick’s desserts truly shine, here are some of my favorite pro tips! First off, when adding the green food coloring, start with just a few drops and mix well. You can always add more, but it’s tough to take color away! This way, you’ll get that perfect festive hue without going overboard.
Another little trick is to sift your dry ingredients before mixing. It not only helps to eliminate lumps but also aerates the flour, resulting in a lighter cake. If you want to elevate the flavor, consider adding a pinch of mint extract to the wet ingredients for a refreshing twist!
For presentation, a sprinkle of cocoa powder or some chocolate shavings on top of the whipped cream can add a lovely touch. And don’t forget to serve your desserts on colorful plates or platters to really highlight those vibrant greens. Trust me, these small adjustments will make a big difference!
Variations of Saint Patrick’s Desserts
Now, let’s get a little creative with our Saint Patrick’s desserts! One fun variation is to swap out the cocoa powder for some lemon zest and juice, creating a delightful citrus cake that’s still festive with a gorgeous green hue. You could also try adding a splash of Irish cream liqueur to the batter for an adult twist—just be sure to adjust the baking time slightly.
If you want to play around with toppings, consider using a mint-flavored whipped cream for a refreshing kick, or even a chocolate ganache drizzled over the top. Mixing in some crushed mint candies or chocolate chips into the batter can also add a fun surprise in every bite. The possibilities are endless, so let your imagination run wild!
Serving Suggestions for Saint Patrick’s Desserts
To really amp up the festive vibe of your Saint Patrick’s desserts, consider serving them alongside some fun Irish-themed treats! A classic choice is pairing them with a rich Irish coffee, which balances the sweetness beautifully. You might also want to whip up some traditional Irish soda bread, lightly toasted and slathered with butter—it’s a perfect contrast to the sweet cake.
For a colorful presentation, arrange your desserts on a vibrant green platter, and sprinkle some edible gold or shamrock-shaped confetti around. And don’t forget, a side of fresh fruit like strawberries or kiwi can add a refreshing touch that complements the rich flavors. Enjoy the celebrations!
FAQ About Saint Patrick’s Desserts
Got questions about making the perfect Saint Patrick’s desserts? Don’t worry, I’ve got you covered! Here are some common queries I often hear.
Q: Can I use a different type of flour in this recipe?
Absolutely! While all-purpose flour is the go-to for these Saint Patrick’s desserts, you can substitute it with cake flour for a lighter texture. Just keep in mind that the results may vary slightly.
Q: How do I store leftovers?
To keep your cake fresh, store it in an airtight container in the fridge for up to 3 days. Just be sure to add the whipped cream right before serving to maintain its fluffiness!
Q: Can I make this dessert in advance?
Yes, you can! Bake the cake ahead of time and let it cool completely before wrapping it tightly in plastic wrap. It’ll keep well in the freezer for up to a month. Just thaw it overnight in the fridge when you’re ready to enjoy it.
Q: What other toppings can I use instead of whipped cream?
You can get creative! Try a drizzle of chocolate ganache, a scoop of ice cream, or even a dollop of mascarpone cheese mixed with a hint of vanilla. These alternatives can add a unique twist to your Saint Patrick’s desserts!
With these tips, you’re all set to impress your friends and family with your festive treats!
Print
Saint Patrick’s Desserts: 7 Irresistible Sweet Treats
- Total Time: 55 minutes
- Yield: 12 servings 1x
- Diet: Vegetarian
Description
Delicious desserts inspired by Saint Patrick’s Day.
Ingredients
- 2 cups all-purpose flour
- 1 cup sugar
- 1/2 cup unsweetened cocoa powder
- 1 cup buttermilk
- 1/2 cup vegetable oil
- 2 large eggs
- 1 teaspoon vanilla extract
- 1 teaspoon baking soda
- 1/2 teaspoon salt
- Green food coloring
- Whipped cream for topping
Instructions
- Preheat your oven to 350°F (175°C).
- In a bowl, mix flour, sugar, cocoa powder, baking soda, and salt.
- In another bowl, whisk together buttermilk, oil, eggs, and vanilla.
- Combine wet and dry ingredients until smooth.
- Add green food coloring until desired shade is achieved.
- Pour batter into a greased cake pan.
- Bake for 30-35 minutes or until a toothpick comes out clean.
- Let cool, then top with whipped cream.
Notes
- Adjust the amount of food coloring for a deeper green.
- Serve chilled for best taste.
- This recipe makes a great layer cake too.
- Prep Time: 20 minutes
- Cook Time: 35 minutes
- Category: Dessert
- Method: Baking
- Cuisine: Irish
Nutrition
- Serving Size: 1 slice
- Calories: 250
- Sugar: 20g
- Sodium: 150mg
- Fat: 10g
- Saturated Fat: 2g
- Unsaturated Fat: 8g
- Trans Fat: 0g
- Carbohydrates: 35g
- Fiber: 2g
- Protein: 4g
- Cholesterol: 30mg
Keywords: saint patricks desserts, green desserts, Irish dessert recipes