There’s something truly magical about cake decorating—it’s where creativity meets dessert, and the results are always worth celebrating. I’ll never forget the first time I tried my hand at it. My best friend’s birthday was coming up, and I wanted to surprise her with something special. Armed with a piping bag and a YouTube tutorial, I discovered how simple (and fun!) it can be to turn a plain cake into a masterpiece. The best part? You don’t need to be a professional to create something beautiful. With a little patience and a lot of heart, cake decorating lets you express yourself in the sweetest way possible. Trust me, once you start, you’ll be hooked!
Why You’ll Love This Cake Decorating Guide
This guide is perfect for anyone who wants to dive into cake decorating without feeling overwhelmed. Here’s why you’ll love it:
- Simple & easy: No fancy skills required—just follow the steps and watch your cake transform.
- Endless creativity: Mix colors, try piping designs, or go wild with sprinkles—it’s all up to you.
- Impress everyone: Even basic techniques can make your cake look like it came from a bakery.
Ingredients for Cake Decorating
Gathering the right ingredients is half the fun—and trust me, you probably have most of these already! Here’s what you’ll need:
- 1 pre-baked cake (any flavor—I love vanilla or chocolate for decorating)
- 2 cups frosting, softened (homemade or store-bought both work!)
- Food coloring (optional, but so fun for vibrant designs)
- Sprinkles (optional—the more colorful, the better!)
That’s it! See? Simple. Now let’s grab those decorating tools and get creative.
Equipment You’ll Need for Cake Decorating
Okay, let’s talk tools! Don’t worry—you don’t need a fancy kitchen to make a gorgeous cake. Here’s what I always have on hand:
- Piping bags: Disposable or reusable, either works. (Tip: If you don’t have one, a ziplock bag with the corner snipped off works in a pinch!)
- Piping tips: Start with a basic round tip and a star tip—they’re super versatile.
- Offset spatula: This little wonder makes smoothing frosting a breeze.
- Turntable (optional but amazing): If you’re serious about decorating, this helps you rotate the cake smoothly.
That’s really it! With just these basics, you’re ready to create something beautiful.
How to Decorate a Cake Step-by-Step
Alright, let’s get to the fun part—turning that plain cake into something spectacular! Follow these steps, and you’ll be amazed at what you can create. Don’t stress if it’s not perfect the first time—my early attempts were… well, let’s just say they were “rustic.” Practice makes progress!
Preparing the Cake
First things first: level your cake. Use a serrated knife to gently slice off any domed top so you have a flat surface. Trust me, this makes frosting way easier. Next, apply a thin layer of frosting (the “crumb coat”) to seal in crumbs. Don’t worry about it looking pretty—this is just the foundation. Pop it in the fridge for 15 minutes to set.
Applying the Final Frosting Layer
Now for the smooth finish! Scoop a generous amount of frosting onto the cake and spread it evenly with your offset spatula. Pro tip: Dip the spatula in warm water and wipe it dry for ultra-smooth edges. If you see air bubbles, just gently tap the cake on the counter to settle them.
Piping Techniques for Cake Decorating
Time to pipe! Fit your piping bag with a tip, fill it with frosting, and twist the top to secure. Practice a few swirls or dots on parchment paper first—it’s like a warm-up for your decorating muscles. Then, go wild on the cake! Try borders, rosettes, or even writing. (If your hand gets shaky, just take a deep breath and go slow.)
Adding the Finishing Touches
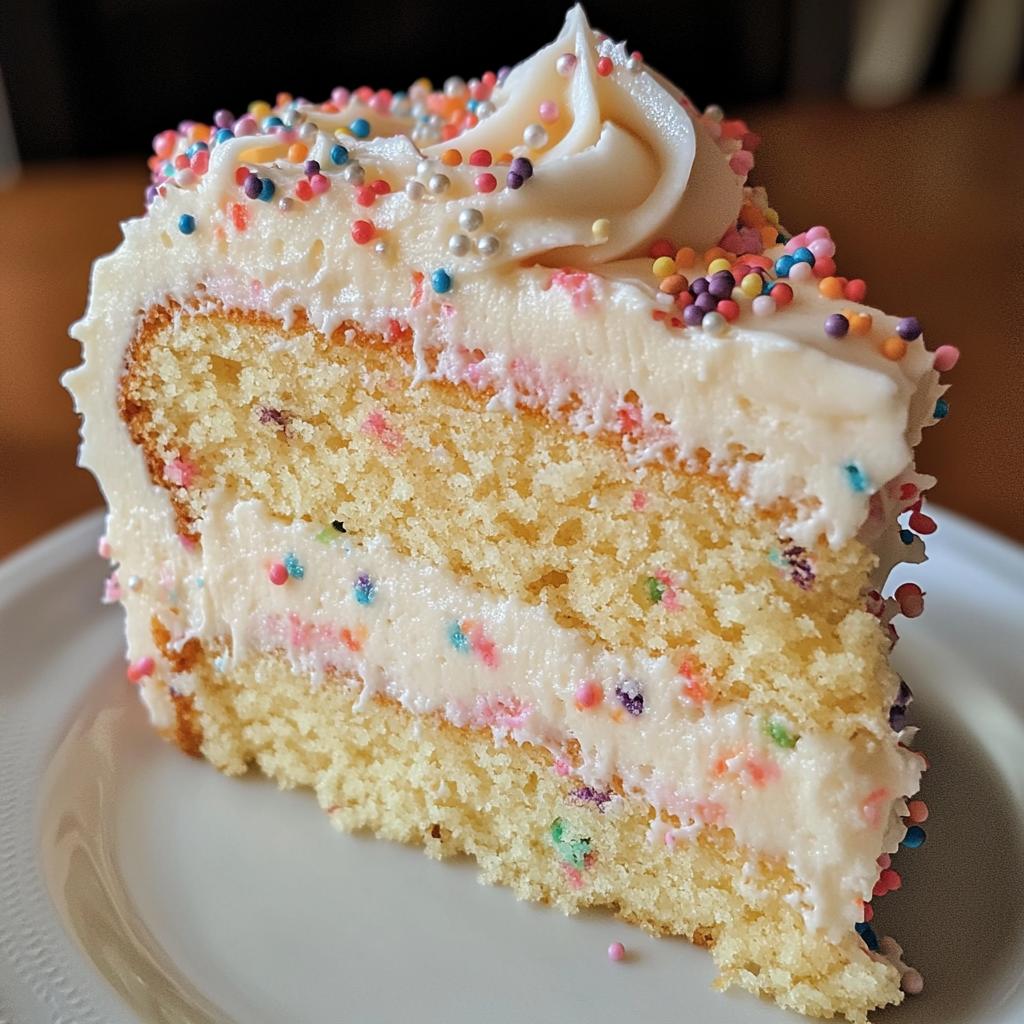
Sprinkle time! Toss them on, press them into the sides, or use them to outline designs. Edible glitter? Yes, please. Crushed cookies? Absolutely. This is where you let your personality shine. And hey, if it doesn’t turn out exactly as planned, just call it “abstract art” and serve it with confidence. Everyone will love it anyway!
Tips for Perfect Cake Decorating
Here are my go-to tips for cake decorating success:
- Keep tools clean: Wipe piping tips and spatulas often to avoid smudges.
- Work in a cool space: Frosting melts fast in warm rooms—trust me, I’ve learned the hard way!
- Practice first: Test piping designs on parchment paper before committing to the cake.
- Don’t rush: Take your time—it’s all part of the fun!
Variations for Cake Decorating
Once you’ve mastered the basics, the real fun begins—mixing it up! Here are some of my favorite ways to play with cake decorating:
- Color themes: Match frosting colors to holidays (red/green for Christmas, pastels for Easter) or go wild with rainbow swirls.
- Texture tricks: Try a rustic look with a spoon-swirled frosting or go glam with edible gold leaf.
- Seasonal touches: Fresh berries in summer, cinnamon-dusted designs in fall—let the seasons inspire you!
Seriously, there’s no wrong way to decorate—just grab your tools and start experimenting!
Serving and Storing Your Decorated Cake
Okay, you’ve created a masterpiece—now let’s keep it looking (and tasting) amazing! For serving, let the cake sit at room temperature for about 15 minutes if it’s been chilled—this softens the frosting just enough. Store any leftovers in an airtight container at room temperature for up to 2 days, or pop it in the fridge for up to 5 days (just bring it back to room temp before serving again). Pro tip: If your cake has fresh fruit or whipped cream frosting, refrigerate it immediately—no exceptions! And hey, if you somehow have leftovers (unlikely, I know), slices freeze beautifully for up to a month. Just wrap them tightly in plastic wrap first!
Nutritional Information
Just a heads up—nutritional info can vary based on your specific ingredients and brands. The estimates here give you a general idea, but always check your own labels for exact numbers!
Frequently Asked Questions About Cake Decorating
Cake decorating can feel a little intimidating at first, but don’t worry—I’ve got answers to the questions I hear most often from beginners (and ones I definitely asked myself when starting out!).
What if I don’t have piping bags?
No problem! A ziplock bag with the corner snipped off works in a pinch. Just use scissors to cut a small hole—start small; you can always make it bigger if needed. For finer details, try taping a piping tip to the inside of the bag before filling it.
Can I use store-bought frosting?
Absolutely! I’ve used it plenty of times when short on time. If it’s too stiff for piping, microwave it for 5-10 seconds to soften, then stir well. For a smoother texture, beat it with a mixer for a minute—it makes a world of difference.
How do I fix mistakes?
First—don’t panic! Most frosting blunders are easily fixed. Smudged piping? Scrape it off with a clean knife and try again. Uneven frosting? Smooth it out with a warm spatula. Remember, sprinkles are the ultimate cover-up for any oops moments!
Share Your Cake Decorating Creations
I’d love to see what you create! Tag me on social media or leave a comment below—nothing makes me happier than seeing your gorgeous cakes. Remember, every masterpiece starts with a first try, so be proud and share away!
Print
How to Master Cake Decorating With Just 3 Simple Tools
- Total Time: 35 minutes
- Yield: 1 decorated cake 1x
- Diet: Vegetarian
Description
Learn how to decorate cakes with simple techniques.
Ingredients
- 1 pre-baked cake
- 2 cups frosting
- Food coloring (optional)
- Sprinkles (optional)
- Decorating tools (piping bags, tips, spatula)
Instructions
- Prepare your cake by leveling the top if needed.
- Apply a thin crumb coat of frosting to seal in crumbs.
- Chill the cake for 15 minutes to set the crumb coat.
- Apply the final layer of frosting smoothly.
- Use piping bags with different tips to create designs.
- Add sprinkles or other decorations as desired.
Notes
- Keep your tools clean for best results.
- Practice piping on parchment paper first.
- Work in a cool environment to prevent frosting from melting.
- Prep Time: 20 minutes
- Cook Time: 0 minutes
- Category: Dessert
- Method: No-Cook
- Cuisine: International
Nutrition
- Serving Size: 1 slice
- Calories: 250
- Sugar: 20g
- Sodium: 150mg
- Fat: 10g
- Saturated Fat: 5g
- Unsaturated Fat: 4g
- Trans Fat: 0g
- Carbohydrates: 35g
- Fiber: 1g
- Protein: 2g
- Cholesterol: 15mg
Keywords: cake decorating, frosting, piping, dessert