There’s something truly magical about the holiday season, especially when it comes to baking. The joy of making festive treats fills the air with warmth and laughter, and these simple Christmas cookies decorated with your favorite icing and sprinkles are the perfect way to spread cheer! Not only are they easy to whip up, but they also become a canvas for creativity, inviting everyone—kids and adults alike—to join in the fun. Imagine gathering around the kitchen table, rolling out dough and experimenting with colors, all while sharing stories and laughter. These cookies aren’t just delicious; they’re a celebration of togetherness and holiday spirit. Whether you’re baking for a festive gathering or simply enjoying a cozy night at home, these simple Christmas cookies decorated with love are sure to bring everyone together. Trust me, you’ll want to make a batch (or two) this season!
Ingredients for Simple Christmas Cookies Decorated
- 2 3/4 cups all-purpose flour: This is the base of your cookie dough, giving it structure and that delicious chewy texture.
- 1 teaspoon baking soda: This helps the cookies rise and gives them a light, fluffy quality.
- 1/2 teaspoon baking powder: Another leavening agent that works alongside baking soda for that perfect lift.
- 1 cup unsalted butter: Make sure it’s softened to room temperature for easy creaming with sugar, adding rich flavor.
- 1 1/2 cups white sugar: This provides the sweetness and helps the cookies spread just right in the oven.
- 1 egg: A binding agent that keeps everything together, contributing to the cake-like texture.
- 1 teaspoon vanilla extract: For that classic cookie flavor that complements the sweetness beautifully.
- 1/2 teaspoon almond extract: A delightful twist that adds a hint of nuttiness—trust me, it elevates the flavor!
- 3 to 4 cups powdered sugar: This will be used for the icing, ensuring your decorations are sweet and delightful.
- 2 tablespoons milk: To mix with the powdered sugar for your icing—adjust the amount for your desired consistency.
- Food coloring: Get creative! Use different colors to make your decorations pop.
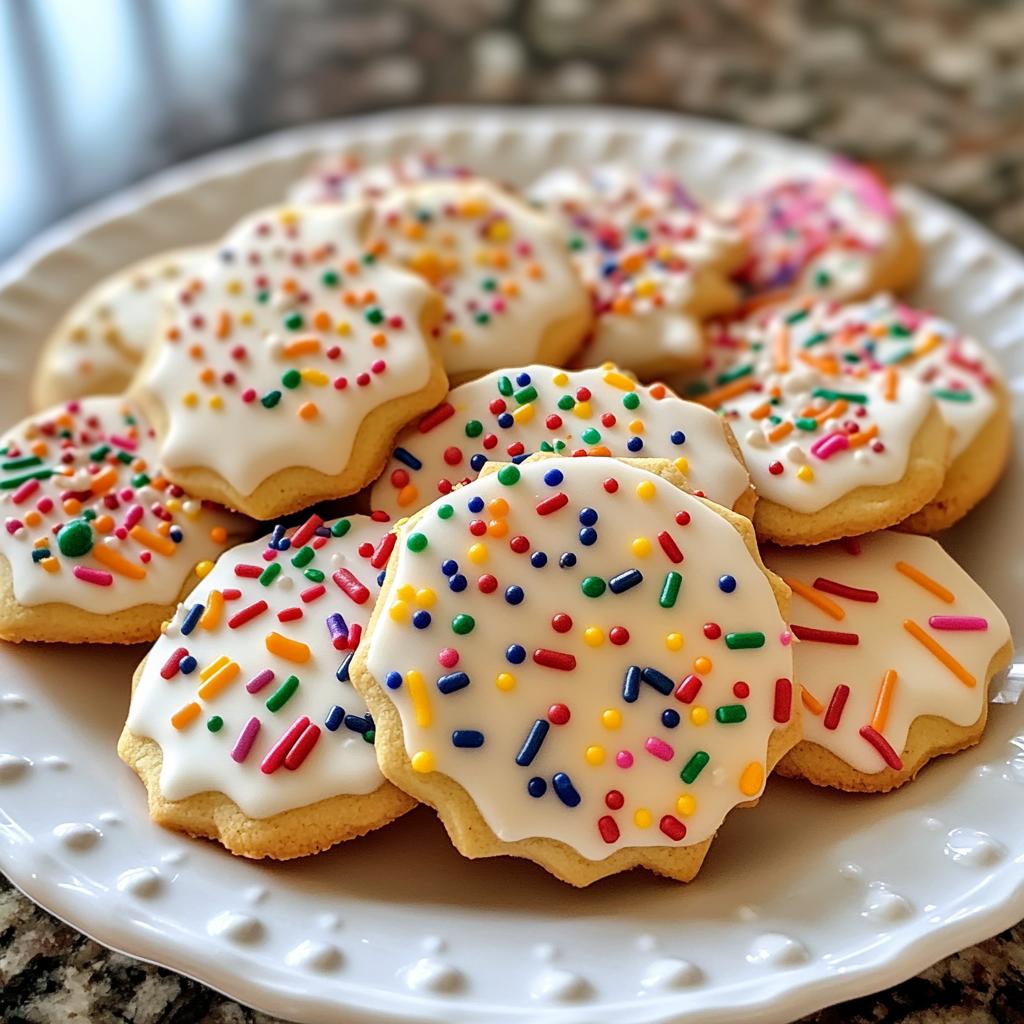
- Sprinkles: Because what’s a decorated cookie without a little sparkle?
How to Prepare Simple Christmas Cookies Decorated
Prepping the Dough
First things first, let’s get that dough ready! In a large mixing bowl, whisk together the flour, baking soda, and baking powder until they’re well combined. This step is crucial because it ensures your cookies rise beautifully. In another bowl, cream the softened butter and white sugar together using a hand mixer or a sturdy wooden spoon until the mixture is light and fluffy—about 3 to 5 minutes. You want it to look almost like whipped cream! Next, beat in the egg, vanilla extract, and almond extract, mixing until everything is well incorporated. Gradually add the dry ingredients to the wet mixture, stirring until just combined. Be careful not to overmix; a few flour streaks are totally okay. Once everything is blended, wrap the dough in plastic wrap and pop it in the fridge for about 30 minutes. This chilling time helps the flavors meld and makes the dough easier to handle.
Rolling and Baking
Now that your dough is chilled, it’s time to roll it out! Preheat your oven to 375°F (190°C). On a lightly floured surface, take a portion of the dough and roll it into balls about 1 inch in diameter. Place the balls on ungreased cookie sheets, leaving enough space for them to spread. Here’s a little tip: flatten each ball slightly with the palm of your hand or the bottom of a glass. This helps them bake evenly and gives them that lovely cookie shape we all know and love! Bake your cookies for 8 to 10 minutes, or until the edges are just turning golden. Don’t worry if they look a little soft when you take them out; they’ll firm up as they cool. Let them cool on the cookie sheets for a few minutes before transferring them to wire racks to cool completely.
Making the Icing
While those cookies are cooling, let’s whip up the icing! In a medium bowl, mix the powdered sugar with the milk. Start with 2 tablespoons of milk and stir until smooth. You’re aiming for a consistency that’s thick but still pourable—think syrup! If it’s too thick, add a splash more milk. Want it thinner? Just keep adding little bits of milk until you get it right. For added fun, you can divide the icing into separate bowls and mix in different food coloring to create a rainbow of options!
Decorating Your Cookies
Now comes the fun part—decorating! Grab your cooled cookies and your colorful icing. Use a piping bag or a simple plastic sandwich bag with a corner snipped off to drizzle icing over the cookies in whatever design your heart desires. Let your creativity shine! Once you’ve iced your cookies, sprinkle them with your favorite decorations. Sprinkles, edible glitter, or even tiny candies can add that extra festive flair. Don’t be shy—mix and match colors and designs! After decorating, let the icing set for a bit before diving in. Trust me, you’ll want to admire your beautiful creations before enjoying them!
Nutritional Information
When it comes to indulging in these delightful simple Christmas cookies decorated with icing and sprinkles, you’ll want to know what you’re enjoying! Each cookie is estimated to contain about 150 calories, with 10 grams of sugar and 7 grams of fat. They also have 1 gram of protein and 20 grams of carbohydrates. Keep in mind that these values are estimates and can vary based on the specific ingredients used and portion sizes. So, as you enjoy these festive treats, remember they’re not just delicious but also part of the joyful holiday experience!
Why You’ll Love This Recipe
- Easy to Make: These simple Christmas cookies are a breeze to prepare, even for beginner bakers! With straightforward steps and common ingredients, you’ll have them whipped up in no time.
- Festive Appeal: Their delightful decorations make these cookies a perfect addition to your holiday festivities. They bring a splash of color and cheer to any gathering!
- Versatile Options: Whether you want to stick to classic icing or go wild with colors and sprinkles, the possibilities are endless! Each batch can be uniquely decorated to match your holiday theme.
- Fun for Everyone: Baking and decorating these cookies is a fantastic way to involve the whole family. Kids will love getting creative with the icing, and it’s a wonderful opportunity to make memories together.
- Perfect for Gifting: These cookies make great gifts! Pack them in a festive tin or box, and you’ve got a sweet handmade present that friends and family will adore.
Tips for Success with Simple Christmas Cookies Decorated
To ensure your simple Christmas cookies decorated come out perfectly, here are some pro tips I swear by! First, don’t skip the chilling step for the dough; it’s crucial for preventing spreading and helps maintain that lovely cookie shape. If you find the dough too sticky, just dust your hands with a bit of flour as you roll. When it comes to baking, keep an eye on your cookies! They can go from perfectly golden to overdone in a blink, so set a timer and check them a minute or two early.
Also, make sure your icing isn’t too runny—nobody wants a puddle instead of a design! If it is, simply add more powdered sugar until you reach that perfect consistency. Lastly, let the icing set completely before stacking your cookies; this prevents any smudging and keeps your decorations looking fabulous! With these tips, you’ll be well on your way to creating a batch of festive, picture-perfect cookies!
Variations of Simple Christmas Cookies Decorated
Now that you’ve mastered the basic recipe for these delightful simple Christmas cookies decorated, why not get a little adventurous? One of the best parts about baking is the chance to experiment with flavors and decorations, so let your creativity run wild! Here are some fun variations to try:
- Flavor Infusions: Swap out the almond extract for peppermint or orange extract for a festive twist! A teaspoon of cinnamon or ginger can add a warm, spiced flavor that perfectly complements the holiday season.
- Chocolate Chip Delight: Mix in a cup of semi-sweet or white chocolate chips into the dough for extra sweetness. They melt beautifully and add a rich, gooey texture that everyone will love!
- Nutty Crunch: Fold in some chopped nuts—like walnuts, pecans, or even macadamia nuts—into the dough. It adds a lovely crunch and depth of flavor that pairs wonderfully with the sweetness of the cookies.
- Fun Shapes: Use festive cookie cutters to create various shapes like stars, trees, or gingerbread men. You can even mix it up by layering colors in the icing for a multi-colored effect!
- Seasonal Sprinkles: Change up your toppings according to the occasion! Use red and green sprinkles for Christmas, pastels for Easter, or even themed sprinkles for birthdays. The options are endless!
Don’t be afraid to play around with different combinations. Baking is all about having fun, so try out new flavors and decorations that resonate with you and your holiday spirit. Who knows? You might just create a new family favorite recipe!
Storage & Reheating Instructions
To keep your simple Christmas cookies decorated fresh and delicious, store them in an airtight container at room temperature. They’ll stay tasty for about a week, but trust me, they’ll likely disappear much faster than that! If you want to keep them longer, you can freeze the cookies. Just make sure they are completely cooled, then layer them between sheets of parchment paper in a freezer-safe container. They can last up to three months in the freezer!
When you’re ready to enjoy them again, simply let the cookies thaw at room temperature. If you want to warm them up, pop them in the microwave for about 10-15 seconds. This will bring back that delightful softness. Just be careful not to overdo it, or they might become a bit too chewy!
FAQ Section
Q1: Can I use margarine instead of butter for these cookies?
While you can substitute margarine for butter, I highly recommend sticking with unsalted butter for the best flavor and texture. Butter gives these simple Christmas cookies decorated their rich, delicious taste that margarine just can’t match!
Q2: How can I make the icing different colors?
It’s super easy! Divide your icing into separate bowls and add a few drops of food coloring to each bowl. Mix until you achieve the desired color. You can create a whole rainbow of icing to make your cookies even more festive!
Q3: What if my cookie dough is too sticky?
If your dough feels sticky, don’t panic! Just sprinkle a little more flour onto your hands and the work surface as you roll it into balls. This will help you shape the cookies without sticking. A little extra flour goes a long way!
Q4: How do I store leftover cookies?
To keep your simple Christmas cookies decorated fresh, store them in an airtight container at room temperature. They’re best enjoyed within a week, but trust me, they’ll probably be gone long before then!
Q5: Can I freeze the cookies for later?
Absolutely! Once your cookies have completely cooled, you can freeze them in an airtight container with layers of parchment paper in between. They’ll stay fresh for up to three months. Just let them thaw at room temperature when you’re ready to enjoy them again!

Simple Christmas Cookies Decorated: 7 Joyful Twists
- Total Time: 30 minutes
- Yield: 24 cookies 1x
- Diet: Vegetarian
Description
These simple Christmas cookies are easy to make and fun to decorate.
Ingredients
- 2 3/4 cups all-purpose flour
- 1 teaspoon baking soda
- 1/2 teaspoon baking powder
- 1 cup unsalted butter
- 1 1/2 cups white sugar
- 1 egg
- 1 teaspoon vanilla extract
- 1/2 teaspoon almond extract
- 3 to 4 cups powdered sugar
- 2 tablespoons milk
- Food coloring
- Sprinkles
Instructions
- Preheat oven to 375°F (190°C).
- In a bowl, mix flour, baking soda, and baking powder.
- In another bowl, cream butter and sugar until smooth.
- Add egg, vanilla extract, and almond extract; mix well.
- Gradually blend in the dry ingredients.
- Roll dough into balls and place on cookie sheets.
- Flatten each ball slightly.
- Bake for 8 to 10 minutes until golden.
- Let cookies cool on wire racks.
- Mix powdered sugar with milk to make icing.
- Decorate cookies with icing and sprinkles.
Notes
- Use different cookie cutters for shapes.
- Store cookies in an airtight container.
- Let icing set before stacking cookies.
- Prep Time: 20 minutes
- Cook Time: 10 minutes
- Category: Dessert
- Method: Baking
- Cuisine: American
Nutrition
- Serving Size: 1 cookie
- Calories: 150
- Sugar: 10g
- Sodium: 50mg
- Fat: 7g
- Saturated Fat: 4g
- Unsaturated Fat: 2g
- Trans Fat: 0g
- Carbohydrates: 20g
- Fiber: 0g
- Protein: 1g
- Cholesterol: 20mg
Keywords: simple christmas cookies decorated