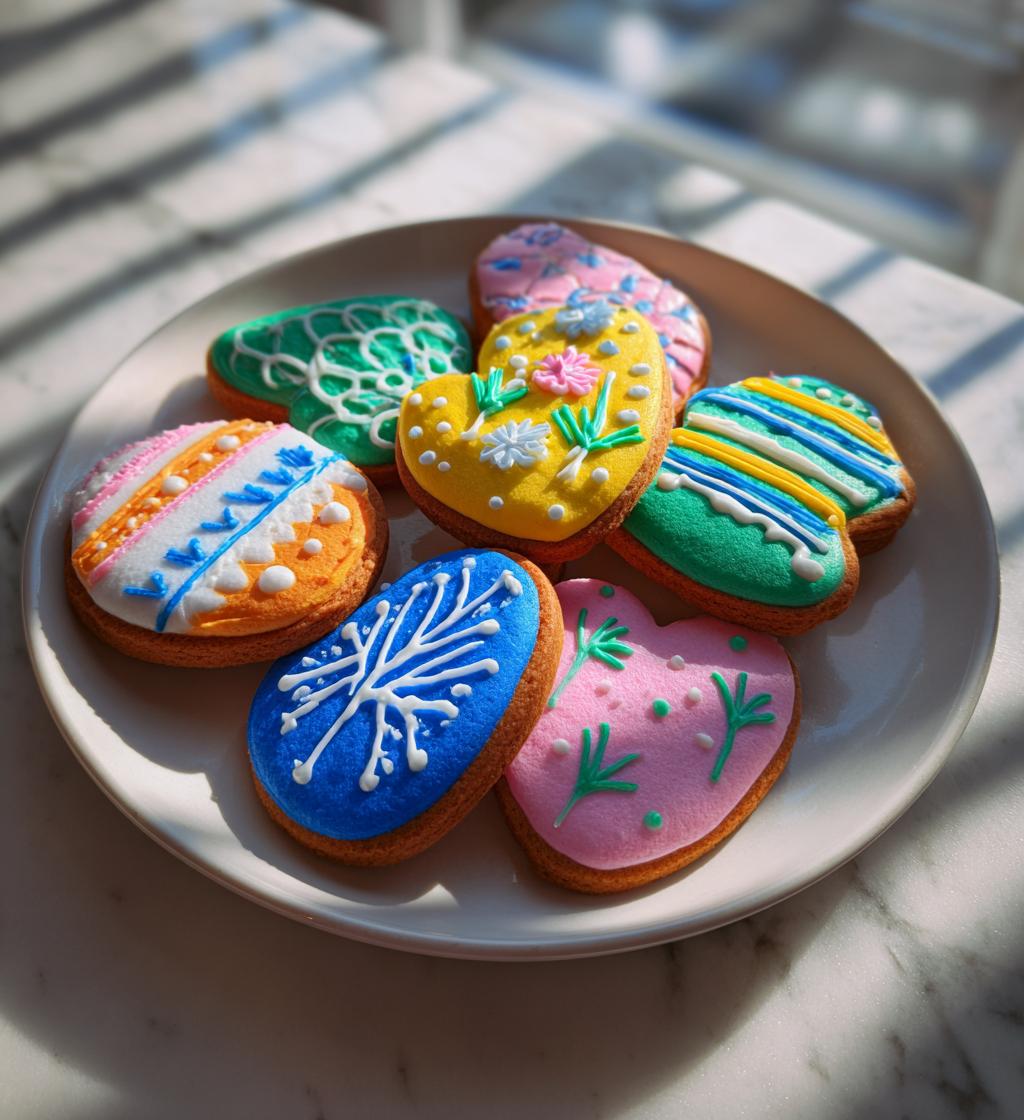
There’s something extra magical about baking *spring cookies decorated* in vibrant colors! As the flowers bloom and the sun shines brighter, these cookies become a joyful celebration of the season. Whether it’s for a spring gathering, a birthday party, or just an afternoon treat with the kids, these cookies are perfect for any occasion. I love how they bring a splash of color to the table and a smile to everyone’s face. Plus, the decorating part is where the real fun begins! Trust me, getting creative with royal icing and food coloring transforms simple cookies into little works of art. Let’s dive into how to whip up these delightful treats that will surely brighten your day!
Ingredients List
Gathering the right ingredients is the first step to making your spring cookies decorated come to life! Here’s what you’ll need:
- 2 cups all-purpose flour
- 1/2 cup butter, softened (make sure it’s at room temperature for easy creaming!)
- 1 cup sugar (I always use packed sugar for that perfect sweetness)
- 1 egg (large, please!)
- 1 teaspoon vanilla extract (the real stuff makes a difference)
- 1/2 teaspoon baking powder (this helps the cookies rise just right)
- 1/4 teaspoon salt (a pinch to enhance all those sweet flavors)
- Royal icing for decoration (you can make it from scratch or buy it pre-made)
- Food coloring (get ready to unleash your creativity with vibrant hues!)
Make sure to have everything measured out and ready to go before you start baking. It makes the process so much smoother and more enjoyable! Happy baking!
How to Prepare Spring Cookies Decorated
Now that we’ve gathered all our ingredients, it’s time to jump into the fun part—making our spring cookies decorated! Follow these simple steps, and you’ll have a batch of beautiful cookies ready to impress.
Prepping the Dough
First things first, let’s get that dough ready! Start by creaming together the softened butter and sugar in a large mixing bowl. I like to use a hand mixer for this part, but a sturdy wooden spoon works just fine too. Beat them together until the mixture is light and fluffy—it usually takes about 2-3 minutes. You want to see a nice pale color that indicates air is getting in there!
Once that’s done, crack in the egg and pour in the vanilla extract. Mix everything thoroughly until well combined. This step adds richness and flavor, making your cookies irresistible!
Mixing Dry Ingredients
In a separate bowl, combine the all-purpose flour, baking powder, and salt. Whisk them together until they’re well blended. This ensures that the baking powder is evenly distributed, which is key for achieving that lovely rise in your cookies.
Now, it’s time to add this dry mixture to your wet ingredients. I always do this in parts—starting with a little dry, mixing it in, then adding a bit more. This method helps avoid any lumps and keeps the dough smooth. Just mix until you don’t see any more flour; be careful not to overmix, as that can lead to tougher cookies!
Shaping and Baking
With your dough ready, it’s time to shape those delicious cookies! Roll the dough into small balls, about a tablespoon in size. Place them on a baking sheet lined with parchment paper, leaving about two inches between each ball. They’ll spread a bit while baking, so give them some space!
Now, pop them into your preheated oven at 350°F (175°C) and bake for 10-12 minutes. Keep an eye on them—look for the edges to turn a light golden brown, but don’t worry if the centers still look a little soft; they’ll continue to firm up as they cool. The smell wafting through your kitchen will be pure bliss!
Cooling and Decorating
Once the cookies are done baking, remove them from the oven and let them cool on the baking sheet for about 5 minutes. This helps them set a bit before transferring them to a wire rack to cool completely. Trust me, letting them cool is crucial—if you try to decorate too soon, the icing will just melt into a puddle!
Once they’re completely cool, it’s time to unleash your inner artist! Use the royal icing and food coloring to create colorful designs. You can pipe flowers, patterns, or even just drizzle some icing for a fun touch. Let the icing dry completely before stacking up your cookies to avoid any smudges. Get ready for a beautiful display of spring sweetness!
Nutritional Information
Here’s the estimated nutritional data for each delightful spring cookie decorated:
- Calories: 150
- Fat: 7g
- Saturated Fat: 4g
- Unsaturated Fat: 2g
- Trans Fat: 0g
- Cholesterol: 20mg
- Sodium: 50mg
- Carbohydrates: 20g
- Fiber: 0g
- Sugar: 10g
- Protein: 1g
Keep in mind that these values are estimates and can vary based on the exact ingredients and portion sizes used. Enjoy these cookies in moderation as part of a balanced diet, and remember, they’re made with love and a sprinkle of joy!
Why You’ll Love This Recipe
- Quick to Prepare: With just 20 minutes of prep time, you can whip up a batch of these delightful cookies in no time!
- Fun to Decorate: Get creative with royal icing and vibrant food coloring. Each cookie becomes a personal masterpiece that you and your loved ones can enjoy decorating together!
- Perfect for Spring Celebrations: These cookies add a splash of color and sweetness to any spring event, whether it’s an Easter gathering, a birthday party, or just a sunny afternoon treat.
- Customizable: You can easily switch up the shapes and colors to match any occasion or theme. Let your imagination run wild!
- Deliciously Tasty: With a buttery, sweet base, these cookies are irresistible on their own, making them perfect for snacking even before you get to the decorating!
Tips for Success
To make sure your spring cookies decorated turn out perfectly every time, I’ve got some tried-and-true tips to help you achieve the best results!
Ensure Even Baking
First off, make sure your oven is properly preheated before you pop those cookies in. An oven thermometer can be a game changer if you’re unsure about your oven’s true temperature. Also, try to bake your cookies in batches, rotating the trays halfway through to ensure even baking. If you’re using multiple racks, switch their positions too. Nothing worse than cookies that are perfectly golden on one side and pale on the other!
Chill the Dough for Neater Shapes
If you prefer cookies with tidy edges, consider chilling your dough for about 30 minutes before rolling it into balls. This little step helps the cookies hold their shape during baking, and you won’t get those lumpy edges. Plus, it’s a great excuse to take a break and enjoy a cup of tea while you wait!
Mastering Royal Icing
When it comes to decorating, mastering royal icing is key! To get that perfect smooth finish, make sure your icing is the right consistency. It should flow easily but still hold its shape. A good trick is the “10-second rule”—the icing should settle back into a smooth surface within about 10 seconds if you lift a spatula out of it. If it’s too runny, add a bit more powdered sugar; if it’s too thick, add a tiny splash of water.
Use Piping Bags for Precision
I love using piping bags for decorating, as they allow for more control and precision. If you don’t have a piping bag, a zip-top bag with a corner snipped off works just as well! Just remember to keep your icing covered with a damp cloth or plastic wrap when you’re not using it; royal icing can dry out quickly!
Let It Dry Completely
Lastly, don’t rush the drying process. I know it’s tempting to stack those beautifully decorated cookies right away, but letting the icing dry completely is crucial for avoiding smudges and messes. I usually let them sit out for at least a few hours, or even overnight if I have the time. Patience pays off, trust me!
With these tips in your back pocket, you’re all set to create a stunning batch of spring cookies decorated that will wow your friends and family. Happy baking!
Variations
The fun doesn’t stop with just one recipe! There are so many delicious ways to change up your spring cookies decorated. Here are some of my favorite variations that will keep things exciting:
Creative Shapes
Instead of traditional round cookies, why not use cookie cutters to create fun shapes? Think bunnies, flowers, or even butterflies! These playful designs will certainly capture the spirit of spring and make your treats even more delightful. Plus, they’re perfect for themed parties or just to add a little extra whimsy to your cookie platter!
Flavor Twists
If you want to change the flavor profile, you can easily switch things up! Try adding a teaspoon of almond extract for a nutty twist or even a bit of lemon zest to brighten the flavor. For chocolate lovers, replace a quarter cup of the flour with cocoa powder for chocolate cookies. Oh, and don’t forget about spices! A dash of cinnamon or a hint of cardamom can elevate your cookies to a whole new level!
Colorful Icing Techniques
When it comes to decorating, the sky’s the limit! Use different techniques with your royal icing. Try flooding the cookies with a base color and then add detailed designs on top with a more concentrated icing. You can also experiment with marbling by swirling two colors together for a stunning effect. And how about sprinkles or edible glitter? They can add that extra pop and shimmer that makes your cookies sparkle!
Surprise Fillings
For a fun surprise inside, consider adding a filling! You could place a small dollop of fruit jam or chocolate ganache in the center before baking. Just make sure to adjust your baking time slightly so the cookies cook evenly. The surprise filling will make every bite a delightful experience!
Themed Decor
If you’re baking for a specific occasion, tailor your decorations accordingly! For Easter, you can use pastel colors and designs like eggs or chicks. For a garden party, think floral patterns and vibrant greens. Themed decorations make your cookies not only delicious but also visually stunning and engaging for your guests!
With these variations, you can turn your spring cookies decorated into endless delightful possibilities. So go ahead, let your creativity flow and make each batch unique and special! Happy baking!
Serving Suggestions
Now that you’ve baked and decorated your delightful spring cookies, it’s time to think about how to serve them! Pairing these cookies with the right accompaniments can elevate your spring gatherings even more. Here are some of my favorite ideas:
Refreshing Beverages
Nothing beats a cool drink alongside your sweet treats! Consider serving your spring cookies with:
- Lemonade: A classic, refreshing choice that balances the sweetness of the cookies beautifully. You can even add fresh mint for a delightful twist!
- Iced Tea: A lightly sweetened iced tea, whether it’s black, green, or herbal, makes for a perfect pairing. Try adding a slice of lemon or a sprig of lavender for an extra touch of spring.
- Fruit Punch: A colorful, fruity punch can brighten up your table and complement the vibrant colors of your cookies. Just blend your favorite fruit juices and add plenty of ice!
Delicious Desserts
If you’re hosting a gathering or party, consider serving your cookies alongside other desserts for a delightful spread:
- Mini Cheesecakes: Their creamy texture and rich flavor contrast beautifully with the light sweetness of your spring cookies.
- Fruit Tarts: A fresh fruit tart filled with pastry cream adds a touch of elegance and pairs perfectly with the sweetness of your cookies.
- Brownies: For chocolate lovers, brownies are always a hit! Their fudgy goodness provides a wonderful contrast to the lighter cookies.
Fun for Kids
If you’re serving these cookies for a kid-friendly event, consider adding some fun elements:
- Milk Bar: Set up a milk station with various flavors—chocolate, strawberry, and even almond milk. Kids will love dipping their cookies!
- Decorating Station: For a fun twist, have a small station where kids can decorate their own cookies with leftover icing and sprinkles!
With these serving suggestions, your spring cookies decorated will shine even brighter at your next gathering. Don’t forget to enjoy the process and share these sweet moments with friends and family!
Storage & Reheating Instructions
Once you’ve enjoyed your beautiful spring cookies decorated, you’ll want to make sure they stay fresh for as long as possible. Luckily, storing them is super easy!
To keep your cookies at their best, place them in an airtight container. I like to use a plastic or glass container with a tight-fitting lid. Depending on how many cookies you have, you can layer them with parchment paper in between to prevent them from sticking together. This method helps maintain their texture and keeps them deliciously soft!
If you’re storing them at room temperature, they should stay fresh for about a week. Just make sure to keep them in a cool, dry place away from direct sunlight. If you live in a more humid area, you might want to consider refrigerating them to extend their shelf life a bit longer.
Now, if you find yourself with a bunch of cookies left over (which is a great problem to have!), you can freeze them for later. Just make sure they’re completely cool before you freeze them. Place them in a single layer on a baking sheet and pop them in the freezer for about an hour. Once they’re frozen solid, transfer them to a freezer-safe bag or container and label it with the date. They’ll keep well for up to three months!
When you’re ready to enjoy your frozen cookies, simply take out as many as you want and let them thaw at room temperature for about 30 minutes. If you prefer them warm, you can pop them in the oven at 300°F (150°C) for about 5-7 minutes. Just keep an eye on them so they don’t get too hot! This little trick brings back that fresh-baked goodness, and you’ll be in cookie heaven all over again!
Print
spring cookies decorated: 7 Joyful Ways to Brighten Your Day
- Total Time: 32 minutes
- Yield: 24 cookies 1x
- Diet: Vegetarian
Description
Delicious spring cookies decorated with vibrant colors.
Ingredients
- 2 cups all-purpose flour
- 1/2 cup butter, softened
- 1 cup sugar
- 1 egg
- 1 teaspoon vanilla extract
- 1/2 teaspoon baking powder
- 1/4 teaspoon salt
- Royal icing for decoration
- Food coloring
Instructions
- Preheat oven to 350°F (175°C).
- In a bowl, cream together butter and sugar.
- Add egg and vanilla, mix well.
- In another bowl, combine flour, baking powder, and salt.
- Gradually add dry ingredients to wet ingredients.
- Roll dough into balls and place on baking sheets.
- Bake for 10-12 minutes or until edges are lightly golden.
- Let cookies cool completely.
- Decorate with royal icing and food coloring.
Notes
- Use different shapes for cookies.
- Let icing dry completely before stacking cookies.
- Store cookies in an airtight container.
- Prep Time: 20 minutes
- Cook Time: 12 minutes
- Category: Dessert
- Method: Baking
- Cuisine: American
Nutrition
- Serving Size: 1 cookie
- Calories: 150
- Sugar: 10g
- Sodium: 50mg
- Fat: 7g
- Saturated Fat: 4g
- Unsaturated Fat: 2g
- Trans Fat: 0g
- Carbohydrates: 20g
- Fiber: 0g
- Protein: 1g
- Cholesterol: 20mg
Keywords: spring cookies, decorated cookies, colorful cookies