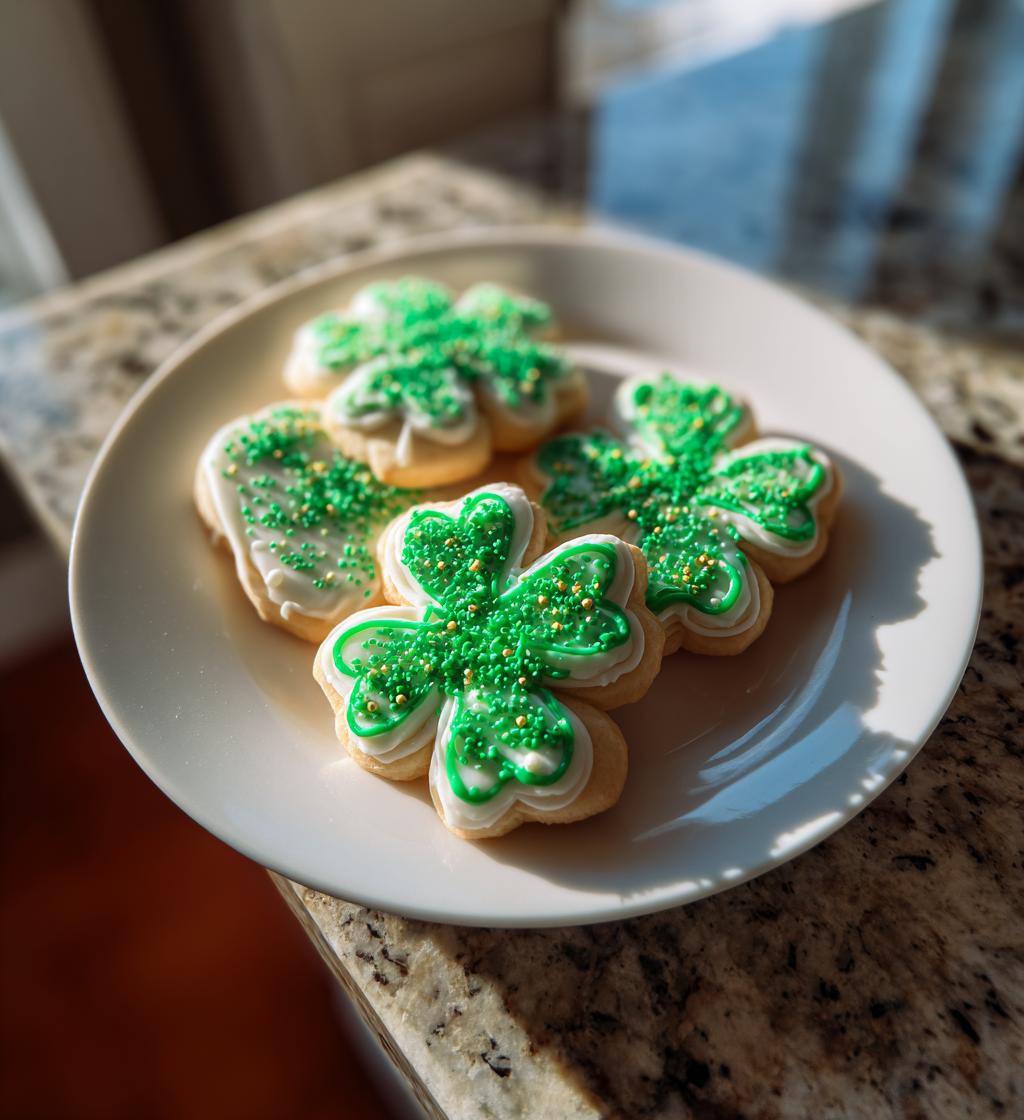
Baking festive cookies for St. Patrick’s Day is a delightful way to celebrate the spirit of the holiday! I can’t help but feel giddy when I think about the vibrant green cookies, topped with shamrock sprinkles, that fill my kitchen with the sweet aroma of vanilla and butter. These St. Patrick’s Day cookies are not just a treat; they’re a celebration on a plate! The joy of rolling the dough, cutting it into fun shapes, and decorating them with colorful icing makes for a perfect activity with family or friends. Plus, they’re simple enough that even the kids can lend a hand, which makes the whole experience even more special. Trust me, you’ll want to whip up a batch (or two) of these cheerful cookies to share with loved ones or to brighten up your own St. Patrick’s Day festivities. So, let’s dive into the fun of baking these delightful treats together!
Ingredients List
To create these delightful St. Patrick’s Day cookies, you’ll need the following ingredients:
- 2 cups all-purpose flour
- 1/2 cup unsalted butter, softened to room temperature
- 1 cup granulated sugar
- 1 large egg
- 1 teaspoon vanilla extract
- 1/2 teaspoon baking powder
- 1/4 teaspoon salt
- Green food coloring (as much as you desire for that festive hue!)
- 1 cup powdered sugar (for the icing)
- 2 tablespoons milk (to mix with the powdered sugar)
- Shamrock sprinkles (to make them extra festive!)
Gather these ingredients, and you’ll be well on your way to baking up a batch of cheerful cookies that bring a smile to everyone’s face!
How to Prepare St Patrick’s Day Cookies
Now that we’ve gathered all our ingredients, let’s get down to the fun part: preparing these festive St. Patrick’s Day cookies! Follow these simple steps, and you’ll have a batch of delicious cookies in no time.
Step-by-Step Instructions
- Preheat your oven: Start by preheating your oven to 350°F (175°C). This step is crucial because you want those cookies to bake evenly and perfectly!
- Cream the butter and sugar: In a large mixing bowl, combine the softened unsalted butter and granulated sugar. Use a hand mixer or a sturdy wooden spoon to cream them together until the mixture is light and fluffy. This usually takes about 2-3 minutes.
- Add the egg and vanilla: Crack one large egg into the bowl and pour in the teaspoon of vanilla extract. Mix everything together until fully incorporated. The batter should look smooth and creamy.
- Mix the dry ingredients: In another bowl, whisk together the all-purpose flour, baking powder, and salt. This step helps to evenly distribute the baking powder and ensures your cookies rise beautifully.
- Combine wet and dry ingredients: Gradually add the dry mixture into the wet ingredients, stirring gently to combine. Don’t overmix! You want a soft dough that holds together without being too tough.
- Add the festive color: Now comes the fun part! Add green food coloring to your dough, mixing until you reach your desired shade of green. Feel free to go bold; it’s St. Patrick’s Day after all!
- Shape the cookies: Use your hands to roll the dough into small balls, about 1 inch in diameter. Place them on a baking sheet lined with parchment paper, leaving some space between each ball as they will spread a little while baking.
- Bake: Pop the baking sheet into the preheated oven and bake for 10-12 minutes, or until the edges are golden brown. Your kitchen will smell heavenly!
- Cool the cookies: Once baked, remove the cookies from the oven and let them cool on the baking sheet for a few minutes before transferring them to a wire rack. Let them cool completely before decorating!
- Prepare the icing: While the cookies are cooling, mix together the powdered sugar and milk in a small bowl until you achieve a smooth icing consistency.
- Decorate: Once the cookies are completely cool, drizzle or spread the icing on top and sprinkle shamrock sprinkles for that extra festive touch!
And there you have it! You’ve just made a delightful batch of St. Patrick’s Day cookies that are sure to impress. Enjoy the sweet moments of baking and sharing these treats with your loved ones!
Why You’ll Love This Recipe
These St. Patrick’s Day cookies are not just delicious; they bring a whole lot of joy to your baking experience. Here’s why you’ll absolutely love making them:
- Quick and Easy: With just a few simple steps, you can whip up a batch in under an hour, making them perfect for last-minute celebrations!
- Festive Fun: Their vibrant green color and shamrock decorations instantly bring the spirit of St. Patrick’s Day into your home, making them a hit at any gathering.
- Kid-Friendly: These cookies are a fantastic way to get the kids involved in the kitchen! They’ll love rolling the dough and decorating with sprinkles.
- Customizable: Feel free to switch up the colors or add different toppings to suit your style or party theme. Get creative!
- Deliciously Sweet: The perfect balance of buttery goodness and sweet icing makes these cookies a delightful treat for everyone.
- Great for Sharing: With a yield of 24 cookies, you’ll have plenty to share with friends, family, or even your neighbors, spreading the festive cheer!
So, gather your ingredients and get ready to enjoy the magic of baking these delightful cookies that are sure to bring smiles all around!
Tips for Success
To ensure your St. Patrick’s Day cookies turn out perfectly every time, I’ve got some handy tips that will help you avoid common pitfalls and make the baking process a breeze!
- Measure Your Ingredients Accurately: Baking is a science, so be sure to measure your flour and sugar correctly. I like to spoon flour into my measuring cup and level it off with a knife for accuracy. Too much flour can lead to dry cookies!
- Don’t Skip the Cooling Time: Letting your cookies cool for a few minutes on the baking sheet before transferring them to a wire rack is crucial. This helps them set up without falling apart, ensuring they stay nice and soft!
- Keep an Eye on Baking Time: Ovens can vary, so check your cookies a minute or two before the suggested baking time. You want the edges to be golden brown, but the centers should still be soft. If you’re making larger cookies, just add a couple more minutes to the baking time.
- Use Fresh Ingredients: Make sure your baking powder is fresh; expired powder can lead to flat cookies. Check the expiration date on your baking powder before starting!
- Experiment with Colors: Feel free to get creative with colors! You can mix in other shades of food coloring for a fun twist, or even try layering different colors in the dough for a unique look.
- Decorating Tips: If the icing is too thick, add a tiny bit more milk to loosen it up. Conversely, if it’s too runny, a little more powdered sugar will thicken it perfectly. You want it just right for drizzling or spreading!
- Store Properly: To keep your cookies fresh, store them in an airtight container at room temperature. They should last about a week, but I doubt they’ll stick around that long with how delicious they are!
With these tips in your back pocket, you’ll be well on your way to baking the most delicious and festive St. Patrick’s Day cookies that are sure to impress everyone who tries them!
Variations
The beauty of these St. Patrick’s Day cookies is that they’re incredibly versatile! You can easily switch things up to keep the festive spirit alive while adding your own personal touch. Here are some fun ideas to inspire your creativity:
- Colorful Cookie Dough: While green is the star for St. Patrick’s Day, why not mix in other colors? You could create a rainbow effect by dividing the dough and tinting it with various food colorings. Layer the colors in the dough for a vibrant surprise when you bite into them!
- Different Shapes: Instead of the typical round cookies, use cookie cutters to make shamrocks, pots of gold, or even leprechauns! These fun shapes can add an extra layer of excitement to your baking.
- Alternative Decorations: Swap out the shamrock sprinkles for other themed toppings. Try gold star sprinkles, edible glitter, or even chocolate chips for a deliciously sweet twist. You can also drizzle melted chocolate over the cookies for a rich, decadent finish.
- Flavor Variations: Add a twist to the flavor by incorporating different extracts to the dough. A splash of almond extract or a hint of mint could elevate the taste and make them even more delightful!
- Stuffed Cookies: For an indulgent treat, consider stuffing the cookies with chocolate or caramel. Just flatten the dough, place a small dollop of your favorite filling in the center, and then wrap the dough around it before baking. You’ll be in for a gooey surprise!
- Frosting Options: Instead of the simple icing, try using a buttercream frosting or even a cream cheese frosting for a richer taste. You can also color the frosting to match the festive theme or pipe it into fun designs!
These variations will not only keep things interesting in the kitchen, but they’ll also make your St. Patrick’s Day cookies the talk of the party. So don your apron, get creative, and have fun with these festive treats!
Storage & Reheating Instructions
Once you’ve baked and decorated your delightful St. Patrick’s Day cookies, you’ll want to ensure they stay fresh and delicious for as long as possible! Here’s how to store any leftovers properly and some tips on reheating them if needed.
First, be sure to let your cookies cool completely on a wire rack after baking. This step is so important because it prevents moisture from building up, which can lead to soggy cookies! Once they’re cool, you can store them in an airtight container. I like to layer parchment paper between the cookies to keep them from sticking together, especially if you’ve made a batch with different decorations.
These cookies will stay fresh at room temperature for about a week. If you want to keep them longer, consider freezing them! Just place the cookies in a freezer-safe container or a resealable plastic bag, separating layers with parchment paper. They can last in the freezer for up to three months. When you’re ready to enjoy them again, simply let them thaw at room temperature for a couple of hours.
If you prefer a warm treat, you can reheat your cookies in the microwave for about 10-15 seconds. Just be careful not to overdo it, or they might become tough! Alternatively, you can pop them in a preheated oven at 300°F (150°C) for about 5 minutes. This method helps restore that fresh-baked texture and warmth that makes them so irresistible.
With these storage and reheating tips, you can savor every delicious bite of your festive St. Patrick’s Day cookies long after they’re out of the oven!
Nutritional Information Section
When it comes to enjoying your delicious St. Patrick’s Day cookies, it’s always nice to know what you’re indulging in! However, keep in mind that nutritional values can vary based on the specific ingredients and brands you use. So, while I can provide some estimated nutritional information, it’s not set in stone.
Here’s a rough breakdown per cookie:
- Calories: Approximately 120
- Total Fat: 6g
- Saturated Fat: 3g
- Trans Fat: 0g
- Cholesterol: 15mg
- Sodium: 50mg
- Carbohydrates: 15g
- Fiber: 0g
- Sugar: 10g
- Protein: 1g
So, while you’re baking up a storm and sharing these festive treats, just remember to enjoy them in moderation. I promise they’ll be worth every calorie! Happy baking!
FAQ Section
If you’ve got questions about making the best St. Patrick’s Day cookies, you’re not alone! Here are some common questions I hear, along with my tried-and-true answers to help you out in the kitchen.
Q: How should I store my St. Patrick’s Day cookies?
A: To keep your cookies fresh, let them cool completely before storing them in an airtight container at room temperature. If you want them to last longer, you can freeze them for up to three months. Just make sure to separate layers with parchment paper!
Q: How can I achieve a vibrant green color in my cookie dough?
A: The key to a bold green color is to use gel food coloring rather than liquid, as it gives a richer hue without altering the dough’s consistency. Start with a few drops and mix until you reach your desired shade, adding more as needed!
Q: What if I don’t have all-purpose flour? Can I use something else?
A: Absolutely! If you’re out of all-purpose flour, you can substitute it with a gluten-free blend or whole wheat flour. Just be aware that the texture may vary slightly, but they should still turn out delicious!
Q: Can I make these cookies ahead of time?
A: Yes! You can prepare the dough a day in advance and refrigerate it. Just be sure to wrap it tightly in plastic wrap. When you’re ready to bake, let the dough sit at room temperature for about 10 minutes before rolling it out.
Q: How can I make the icing spreadable for decorating?
A: If your icing is too thick, just add a little more milk until it reaches your desired consistency. On the other hand, if it’s too runny, sprinkle in some more powdered sugar to thicken it up. You want it just right for drizzling or spreading!
Q: Can I use different shapes for my cookies?
A: Definitely! Feel free to use cookie cutters to create fun shapes like shamrocks, rainbows, or anything else that fits the St. Patrick’s Day theme. It adds an extra element of fun to your baking!
Hopefully, these FAQs help clarify any questions you may have about making your festive St. Patrick’s Day cookies. Happy baking!
Print
St Patrick’s Day Cookies: 7 Delicious Ways to Celebrate
- Total Time: 32 minutes
- Yield: 24 cookies 1x
- Diet: Vegetarian
Description
Festive cookies for St. Patrick’s Day.
Ingredients
- 2 cups all-purpose flour
- 1/2 cup unsalted butter, softened
- 1 cup granulated sugar
- 1 large egg
- 1 teaspoon vanilla extract
- 1/2 teaspoon baking powder
- 1/4 teaspoon salt
- Green food coloring
- 1 cup powdered sugar
- 2 tablespoons milk
- Shamrock sprinkles
Instructions
- Preheat your oven to 350°F (175°C).
- In a bowl, cream the butter and sugar together.
- Add the egg and vanilla, mix well.
- In another bowl, combine flour, baking powder, and salt.
- Gradually add the dry ingredients to the wet mixture.
- Add green food coloring until desired color is reached.
- Roll dough into small balls and place on a baking sheet.
- Bake for 10-12 minutes until edges are golden.
- Let cookies cool.
- Mix powdered sugar and milk to create icing.
- Decorate cookies with icing and shamrock sprinkles.
Notes
- Store cookies in an airtight container.
- Use different colors for variety.
- Adjust baking time for larger cookies.
- Prep Time: 20 minutes
- Cook Time: 12 minutes
- Category: Dessert
- Method: Baking
- Cuisine: Irish
Nutrition
- Serving Size: 1 cookie
- Calories: 120
- Sugar: 10g
- Sodium: 50mg
- Fat: 6g
- Saturated Fat: 3g
- Unsaturated Fat: 2g
- Trans Fat: 0g
- Carbohydrates: 15g
- Fiber: 0g
- Protein: 1g
- Cholesterol: 15mg
Keywords: st patrick's day cookies, festive cookies, holiday baking