Ah, St. Patrick’s Day! A time when everyone gets a little more cheerful, and the world seems to be painted in shades of green. I can’t help but get excited about whipping up some delightful St. Patrick’s Day treats to celebrate! Every year, I gather my family in the kitchen, and we create these sweet masterpieces that are not only fun to make but also deliciously festive.
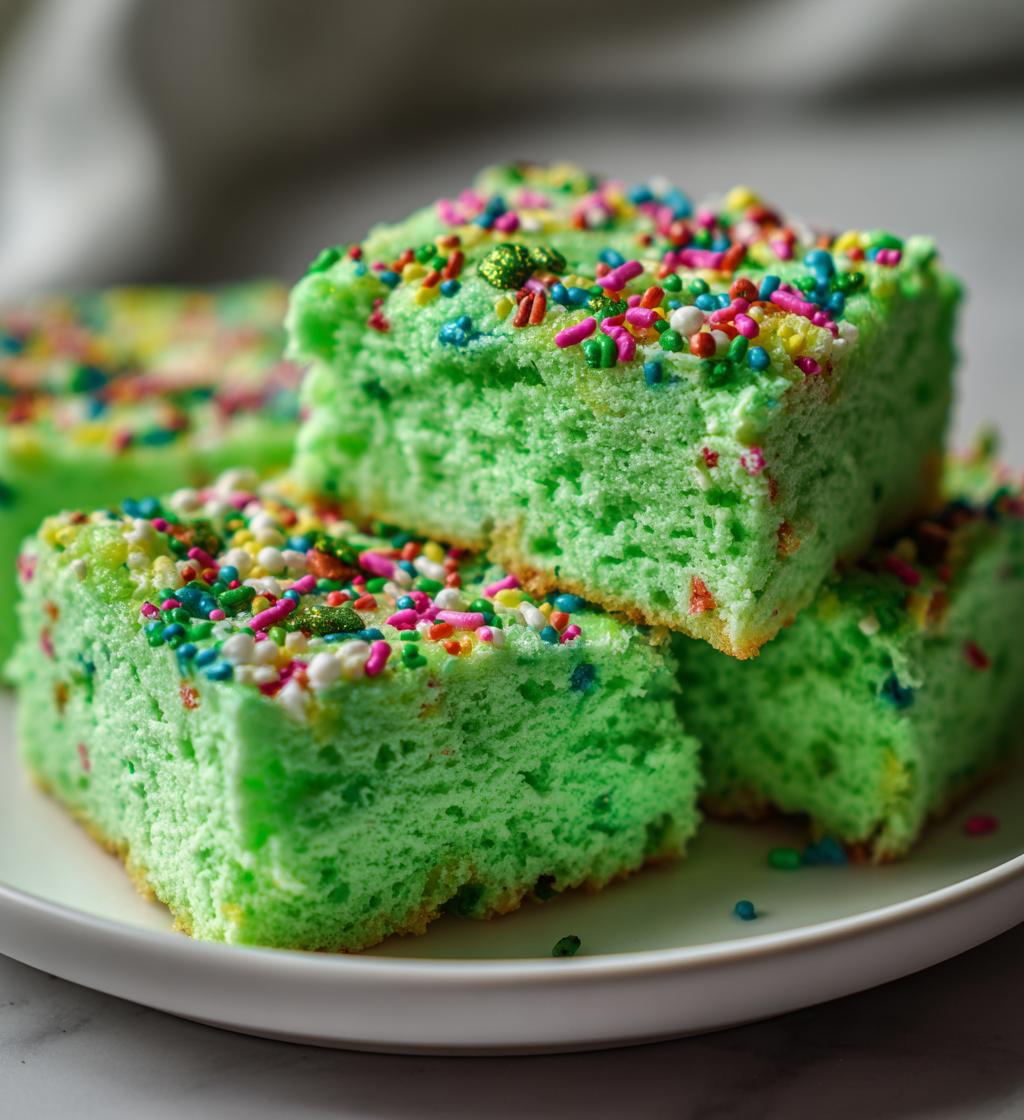
One of my fondest memories is when my kids and I decided to experiment with traditional recipes, adding a playful twist with vibrant green food coloring and colorful sprinkles. The laughter and joy that filled our kitchen was just as sweet as the treats themselves! These treats have become a staple in our house for celebrating St. Patrick’s Day, bringing smiles to faces and a little extra luck to our day. Trust me, once you try these, you’ll want to make them a regular part of your celebrations too!
Ah, St. Patrick’s Day! A time when everyone gets a little more cheerful, and the world seems to be painted in shades of green. I can’t help but get excited about whipping up some delightful St. Patrick’s Day treats to celebrate! Every year, I gather my family in the kitchen, and we create these sweet masterpieces that are not only fun to make but also deliciously festive.
One of my fondest memories is when my kids and I decided to experiment with traditional recipes, adding a playful twist with vibrant green food coloring and colorful sprinkles. The laughter and joy that filled our kitchen was just as sweet as the treats themselves! These treats have become a staple in our house for celebrating St. Patrick’s Day, bringing smiles to faces and a little extra luck to our day. Trust me, once you try these, you’ll want to make them a regular part of your celebrations too!
Ingredients List
Gather these simple ingredients to create your delightful St. Patrick’s Day treats:
- 2 cups all-purpose flour
- 1 cup sugar
- 1/2 cup butter, softened to room temperature
- 2 large eggs
- 1/2 cup milk
- 1 teaspoon vanilla extract
- 1 teaspoon baking powder
- 1/4 teaspoon salt
- Green food coloring (adjust according to your desired shade)
- Sprinkles for decoration (the more colorful, the better!)
Make sure your butter is nice and soft; it really makes a difference when you cream it with the sugar! And don’t be shy with the sprinkles – they add that festive touch that makes these treats so special. Happy baking!
How to Prepare St Patrick’s Day Treats
Now that you’ve gathered all your ingredients, let’s dive into the fun part—making these festive St. Patrick’s Day treats! This process is straightforward, and I promise it’ll be a joy to see your creation come to life. Follow these simple steps, and you’ll have deliciously green goodies in no time!
Step 1: Preheat the Oven
First things first, you’ll want to preheat your oven to 350°F (175°C). This step is crucial because a properly preheated oven ensures that your treats bake evenly and rise beautifully. Trust me, starting with the right temperature sets the stage for success!
Step 2: Creaming Butter and Sugar
Grab your softened butter and sugar, and let the magic begin! In a mixing bowl, cream them together until the mixture is light and fluffy. This process helps incorporate air into your batter, which gives your treats that delightful texture. It should look pale and creamy—like a dream!
Step 3: Mixing in Eggs
Now, it’s time to add the eggs. Crack them in one at a time, mixing well after each addition. This helps to fully incorporate each egg into the batter, ensuring your treats are moist and tender. I always find that taking this step slowly pays off in the end!
Step 4: Incorporating Wet Ingredients
Next, stir in the milk and vanilla extract. This is where the flavor really starts to shine! Mix until everything is well combined, and you’re left with a smooth, luscious batter that smells heavenly. You might even want to sneak a taste—it’s that good!
Step 5: Preparing Dry Ingredients
In another bowl, combine your flour, baking powder, and salt. Whisk them together to make sure there are no lumps, and everything is evenly distributed. This step is key for ensuring your treats rise perfectly and have the right balance of flavors.
Step 6: Combining Wet and Dry Ingredients
Now, let’s bring it all together! Gradually add your dry mixture to the wet ingredients, stirring gently. Do this in batches to prevent overmixing, which can make your treats tough. You want to mix just until combined—some flour streaks are completely fine!
Step 7: Adding Color
Time to add some fun! Mix in your green food coloring until you achieve your desired shade of festive green. Don’t be afraid to be bold! This is where the magic happens, and your batter transforms into the perfect St. Patrick’s Day hue.
Step 8: Baking the Treats
Pour your vibrant batter into a greased baking pan and pop it in the oven. Bake for 25-30 minutes, but keep an eye on it! You’ll know they’re ready when a toothpick inserted into the center comes out clean. The aroma will be irresistible!
Step 9: Cooling and Decorating
Once baked, allow your treats to cool in the pan for about 10 minutes before transferring them to a wire rack. This helps prevent sogginess! Once they’re completely cool, go wild with sprinkles—they’re the finishing touch that makes these St. Patrick’s Day treats truly special!
Nutritional Information
Let’s talk numbers! Each of these delightful St. Patrick’s Day treats is a fun indulgence, coming in at approximately 150 calories per serving. You’ll also find:
- Fat: 7g
- Saturated Fat: 4g
- Trans Fat: 0g
- Cholesterol: 30mg
- Sodium: 50mg
- Carbohydrates: 20g
- Sugar: 12g
- Protein: 2g
- Fiber: 0g
Keep in mind that these values are estimates, and your actual nutritional content may vary based on specific ingredients and portion sizes. Enjoy these treats in moderation while celebrating, and don’t forget to share with family and friends!
Tips for Success
To ensure your St. Patrick’s Day treats turn out perfectly, start by using room temperature ingredients, especially your butter and eggs. This makes it easier to cream the butter and sugar together, resulting in a fluffier texture. When mixing, be gentle; overmixing can lead to dense treats. Also, don’t rush the baking time—every oven is different, so keep an eye on those treats and check for doneness with a toothpick. Lastly, have fun with the sprinkles! They’re the finishing touch that adds a festive flair, so go ahead and be generous with them!
Why You’ll Love This Recipe
- Quick and Easy: With just a few simple steps, you’ll have these tasty treats ready in no time!
- Festive Fun: The vibrant green color and colorful sprinkles make these treats perfect for celebrating St. Patrick’s Day.
- Delicious Flavor: The combination of buttery sweetness and vanilla makes every bite a delightful experience.
- Customizable: Feel free to experiment with different food colorings and sprinkles to make them uniquely yours!
- Family-Friendly: These treats are a hit with both kids and adults alike, making them a perfect addition to any gathering.
Storage & Reheating Instructions
To keep your delicious St. Patrick’s Day treats fresh, store them in an airtight container at room temperature. They should stay tasty for about 3-4 days, but honestly, they might not last that long with all the love they’ll get! If you want to keep them longer, feel free to pop them in the fridge for up to a week.
When it comes to reheating, a quick 10-15 seconds in the microwave will bring back that fresh-baked warmth. Just be cautious not to overheat them, as they can get a bit tough. Enjoy your treats as if they were just baked!
FAQ Section
Q1. Can I use different colors for my St. Patrick’s Day treats?
Absolutely! While green is the classic choice, you can mix it up with other colors to suit your celebration. Just remember to adjust the food coloring as needed to achieve your desired hue!
Q2. How do I make these treats extra festive?
Sprinkles are your best friend! Add a rainbow of sprinkles on top after decorating, or even mix some into the batter for a surprise. You can also use themed cookie cutters to create fun shapes!
Q3. What can I do if my treats are too dry?
If your treats turn out dry, it might be due to overbaking. Make sure to check for doneness a few minutes before the suggested time. If they do happen to dry out, a light glaze or frosting can help add moisture.
Q4. Can I make these treats in advance?
Absolutely! You can bake them a day or two ahead of your celebration. Just store them in an airtight container to keep them fresh. They’re perfect for prepping ahead of time!
Q5. Are these St. Patrick’s Day treats suitable for kids?
Yes, indeed! This recipe is family-friendly and perfect for kids to help with. They’ll love mixing the batter and decorating with sprinkles, making it a fun activity for all!

St Patrick’s Day Treats: 7 Delightful Recipes to Try
- Total Time: 45 minutes
- Yield: 12 servings 1x
- Diet: Vegetarian
Description
Delicious treats to celebrate St. Patrick’s Day.
Ingredients
- 2 cups all-purpose flour
- 1 cup sugar
- 1/2 cup butter, softened
- 2 eggs
- 1/2 cup milk
- 1 teaspoon vanilla extract
- 1 teaspoon baking powder
- 1/4 teaspoon salt
- Green food coloring
- Sprinkles for decoration
Instructions
- Preheat your oven to 350°F (175°C).
- In a bowl, cream together the butter and sugar.
- Add the eggs one at a time, mixing well after each.
- Stir in the milk and vanilla extract.
- In another bowl, combine the flour, baking powder, and salt.
- Gradually add the dry ingredients to the wet mixture.
- Mix in green food coloring until desired color is achieved.
- Pour the batter into a greased baking pan.
- Bake for 25-30 minutes or until a toothpick comes out clean.
- Let cool and decorate with sprinkles.
Notes
- Store treats in an airtight container.
- Adjust food coloring for intensity.
- Prep Time: 15 minutes
- Cook Time: 30 minutes
- Category: Dessert
- Method: Baking
- Cuisine: Irish
Nutrition
- Serving Size: 1 treat
- Calories: 150
- Sugar: 12g
- Sodium: 50mg
- Fat: 7g
- Saturated Fat: 4g
- Unsaturated Fat: 2g
- Trans Fat: 0g
- Carbohydrates: 20g
- Fiber: 0g
- Protein: 2g
- Cholesterol: 30mg
Keywords: st patrick's day treats