Ah, Valentine’s Day! The perfect excuse to whip up something special, and let me tell you, my *Valentines cake* is the star of the show. It’s this delightful creation that turns an ordinary celebration into a sweet memory. I remember the first time I made this cake for my partner; the kitchen was filled with the warm, inviting scent of vanilla and butter. As the vibrant red batter came together, I couldn’t help but feel a rush of excitement. When it finally came out of the oven, perfectly risen and tantalizingly fragrant, I knew I had something magical on my hands.
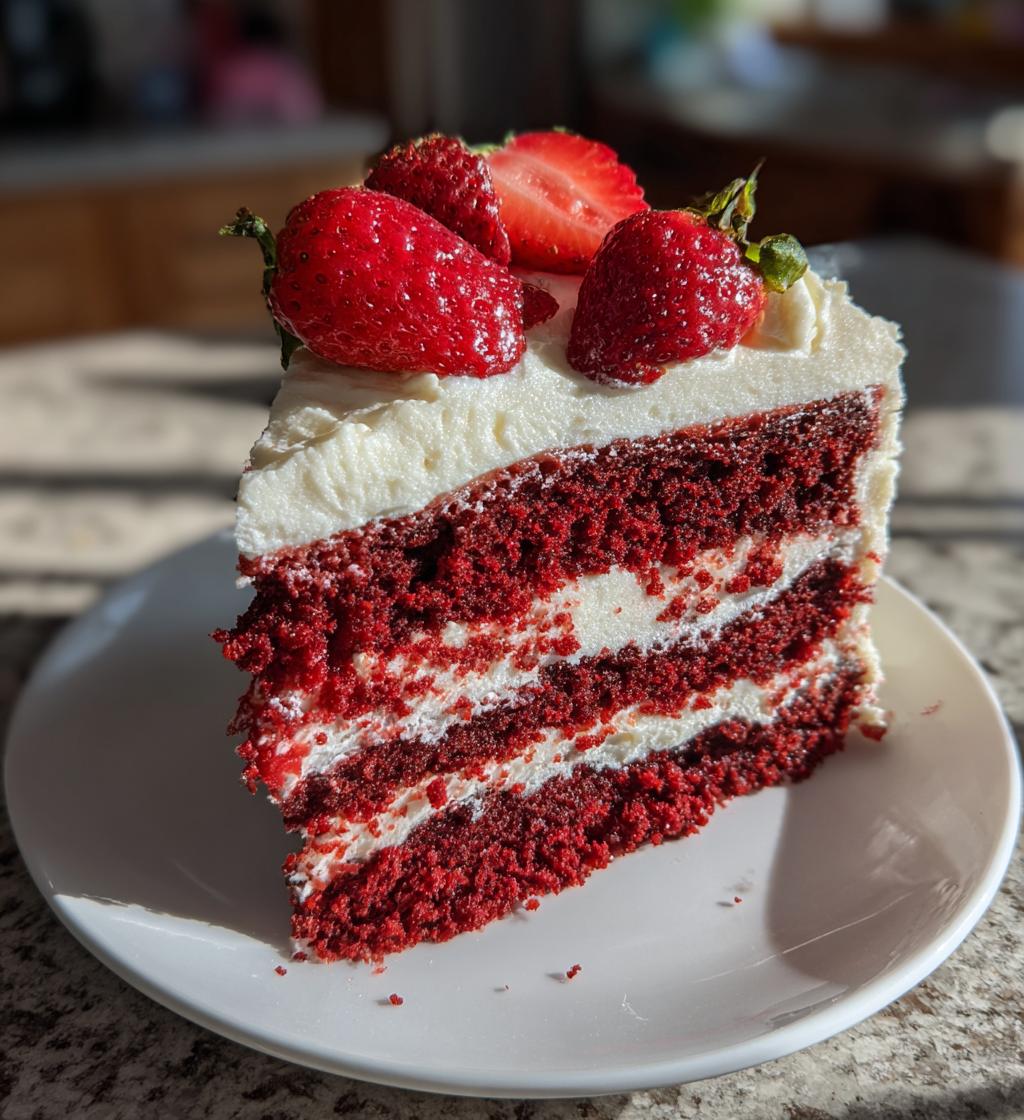
This cake isn’t just about taste; it’s about love and connection. Each slice is a celebration of affection, adorned with fresh strawberries that make it look as good as it tastes. Whether you’re planning a romantic dinner or a fun gathering with friends, this cake captures the spirit of love in every bite. Trust me, there’s nothing quite like watching someone’s eyes light up as they take that first forkful, knowing you poured your heart into creating something so delightful. So, let’s get baking and make some sweet memories together!
Ingredients List
To create this enchanting *Valentines cake*, you’ll need the following ingredients. Make sure you have everything ready before you start for a smooth baking experience!
- 2 cups all-purpose flour
- 1 1/2 cups sugar
- 1/2 cup unsalted butter, softened to room temperature
- 1 cup milk, at room temperature
- 3 large eggs, at room temperature
- 1 tablespoon vanilla extract
- 2 teaspoons baking powder
- 1/2 teaspoon salt
- Red food coloring, to achieve desired shade
- 1 cup cream cheese, softened
- 1/2 cup powdered sugar
- Fresh strawberries, for decoration
Having your ingredients at room temperature helps the batter mix together beautifully, so don’t skip that step! And remember, adjusting the amount of food coloring can help you achieve just the right hue for your special occasion. Happy baking!
How to Prepare Instructions
Alright, let’s dive into the delightful process of making this *Valentines cake*! I promise, it’s not just about following steps; it’s about creating something beautiful and delicious. Here’s how to do it:
Prepping the Oven and Pans
First things first, we need to get that oven warmed up! Preheat it to 350°F (175°C). This is a crucial step because a properly heated oven ensures your cake rises beautifully. While that’s happening, grab your two 9-inch round cake pans and grease them well. I like to use unsalted butter for greasing, then dust them with a little flour. This helps the cakes come out easily without sticking. Make sure to tap out any excess flour, so you don’t end up with a white dusting on your lovely red cake!
Mixing the Batter
Now, let’s make that luscious batter! In a large mixing bowl, cream together the softened unsalted butter and sugar until it’s light and fluffy. This usually takes about 3-5 minutes with a hand mixer or stand mixer. The mixture should look pale and airy—this is what will give your cake that lovely texture. Next, add the eggs one at a time, mixing well after each addition. Don’t rush this part; it’s vital for a smooth batter!
Stir in the vanilla extract, and then in another bowl, combine your all-purpose flour, baking powder, and salt. Gradually add this dry mixture to your creamed butter and sugar, alternating with the milk. This keeps the batter from becoming too thick. Mix just until everything is combined—overmixing can lead to a dense cake. Now, here comes the fun part! Add in your red food coloring until you reach your desired shade. I usually go for a vibrant red, but you can adjust it to your liking!
Baking the Cake
Once your batter is mixed, it’s time to divide it evenly between the prepared pans. I like to use a kitchen scale for this, but if you don’t have one, eyeballing it works just fine! Smooth the tops with a spatula, and pop them into your preheated oven. Bake for about 25-30 minutes. You’ll know they’re done when a toothpick inserted into the center comes out clean or with just a few moist crumbs. This is an important moment—don’t open the oven door too early, or your cakes might sink!
Once baked, let the cakes cool in the pans for about 10 minutes. This makes them easier to handle. After that, carefully transfer them to wire racks to cool completely. This is super important because frosting a warm cake can lead to a melty mess!
Making the Frosting
While the cakes are cooling, let’s whip up that creamy frosting. In a mixing bowl, beat the softened cream cheese and powdered sugar together until smooth. You want it to be fluffy and spreadable. If you like, you can add a little vanilla extract for extra flavor. Just make sure to taste test—this is the best part!
Decorating the Cake
Now, the fun part—decorating! Once your cakes are completely cool, place one layer on a serving plate. Spread a generous amount of frosting on top, then gently place the second layer on top. Frost the top and sides of the cake with the remaining cream cheese frosting. Don’t worry if it’s not perfect; a little rustic charm adds character!
Finally, grab those fresh strawberries! You can slice some and arrange them on top for a beautiful finish, or just place whole ones around the edges. Get creative with it! The vibrant red of the strawberries against the cake makes it look stunning and festive. There you go! Your *Valentines cake* is ready to steal the show! Enjoy every moment of this sweet creation!
Nutritional Information
Now, let’s talk about the nutritional info for a slice of this delightful *Valentines cake*. Keep in mind that these values are estimates, but they give you a good idea of what you’re indulging in with each sweet bite. Here’s what you can expect per serving:
- Calories: 350
- Fat: 15g
- Saturated Fat: 9g
- Unsaturated Fat: 4g
- Trans Fat: 0g
- Cholesterol: 50mg
- Sodium: 200mg
- Carbohydrates: 50g
- Fiber: 1g
- Sugar: 30g
- Protein: 4g
Remember, while this cake is a treat, it’s all about balance! Enjoy this slice of joy on a special occasion, and don’t forget to share the love!
Why You’ll Love This Recipe
- Easy to Make: This *Valentines cake* comes together effortlessly with simple ingredients and straightforward steps, making it perfect even for beginner bakers.
- Delicious Flavor: The combination of sweet vanilla, rich cream cheese frosting, and a hint of red food coloring creates a delightful taste that’s simply irresistible!
- Visually Stunning: With its vibrant red hue and fresh strawberry decorations, this cake is a showstopper on any table, instantly elevating any romantic occasion or celebration.
- Perfect for Sharing: This recipe yields a generous 12 servings, making it ideal for sharing with loved ones or at gatherings—because who doesn’t love a little sweetness on Valentine’s Day?
- Customizable: Feel free to get creative! You can adjust the sweetness, add more fruits, or even try different frosting flavors to make it your own.
Tips for Success
Making the perfect *Valentines cake* is easier than you might think, especially with a few pro tips up your sleeve! Here’s what I’ve learned along the way to help you create a stunning cake that not only looks fabulous but tastes divine too.
Ingredient Handling
Always start with ingredients at room temperature. This includes your butter, eggs, and milk! It helps the batter mix more smoothly and ensures even baking. If you’re short on time, you can warm eggs in a bowl of warm water for about five minutes. Trust me, this little trick makes a big difference in your cake’s texture.
Baking Times
Keep an eye on the clock but also trust your instincts! Ovens can vary, so start checking your cake a couple of minutes before the timer goes off. Insert a toothpick into the center; it should come out clean or with just a few moist crumbs. If you find your cake is browning too much on top before it’s fully baked, you can lightly cover it with aluminum foil to prevent burning!
Cooling and Frosting
Let your cakes cool completely before frosting. This might seem tedious, but it’s crucial to avoid a melty frosting disaster. If you’re in a hurry, you can pop them in the refrigerator for a bit to speed up the cooling process. When frosting, use a spatula to create a smooth finish, but don’t worry about perfection! A little rustic charm makes it even more inviting.
Troubleshooting Common Issues
If your cake rises too much in the center and sinks in the middle, it could be due to overmixing or an oven that’s too hot. Make sure to mix just until combined and check your oven temperature with an oven thermometer. If you find your cake is too dry, it might be overbaked, so adjust your baking time for next time. And if you’re worried about the cake sticking, remember: a good greasing and flouring of the pans is key!
With these tips in mind, you’ll be well on your way to creating a *Valentines cake* that not only tastes amazing but also brings joy to anyone lucky enough to share a slice. Happy baking!
Variations
Feeling adventurous? Don’t worry; there are plenty of ways to mix things up with your *Valentines cake*! Here are some delightful variations and ideas to inspire your creativity:
Flavor Twists
If you want to shake things up, consider swapping out the vanilla extract for almond extract. It gives the cake a lovely nutty aroma that pairs beautifully with the cream cheese frosting. You can also experiment with adding a tablespoon of cocoa powder to the batter for a chocolate twist—think red velvet vibes!
Fruit Infusions
Why not incorporate some fresh fruit into your batter? Chopped strawberries or raspberries can add a burst of flavor and a pop of color. Just make sure to coat them lightly in flour before adding, so they don’t sink to the bottom. You could also mix in some zesty lemon or orange zest for a refreshing citrus flavor that brightens up the cake!
Dairy-Free or Vegan Options
If you’re looking to make a dairy-free or vegan version, you can substitute the butter with coconut oil or a plant-based butter. For the eggs, try using flaxseed meal or chia seeds mixed with water as a binding agent. And for a creamy frosting, a blend of coconut cream and powdered sugar works wonders—just whip it until fluffy!
Decorative Delight
Get creative with decorations! Instead of just fresh strawberries, you can top the cake with an assortment of berries, like blueberries and raspberries, for a colorful berry medley. Drizzling some melted dark chocolate or white chocolate over the top adds a decadent touch. And don’t forget about edible flowers; they can make your cake look extra special and romantic!
Layered Elegance
If you’re feeling ambitious, try making a layered cake! Bake an extra batch of the batter and create a three or four-layer cake for an impressive presentation. Alternate layers with frosting and fresh fruit, and watch your *Valentines cake* transform into a stunning centerpiece that will wow your loved ones!
These variations not only keep things exciting but also allow you to personalize the cake to fit different tastes and dietary preferences. So, go ahead, have fun in the kitchen, and make this *Valentines cake* truly your own!
Storage & Reheating Instructions
So, you’ve made this gorgeous *Valentines cake*, and now you have some leftovers—lucky you! Storing your cake properly ensures it stays fresh and delicious for days to come. Here’s how to do it right:
First, let the cake cool completely before you store it. This is super important because wrapping a warm cake can lead to moisture buildup, which can make it soggy. Once it’s cool, you can either leave it on a cake stand covered with a cake dome or wrap it tightly in plastic wrap. If you’ve already frosted it, I recommend placing it in the fridge to keep the cream cheese frosting fresh and safe from any pesky critters.
If you want to keep it for a longer time, you can also slice the cake and place the pieces in an airtight container. This way, you can grab a slice whenever you have a sweet craving! Just make sure to eat the cake within about 3-5 days for the best flavor and texture. If you need to keep it longer, consider freezing it.
To freeze, wrap each slice tightly in plastic wrap followed by aluminum foil to prevent freezer burn. You can store it in the freezer for up to three months. When you’re ready to enjoy it again, just take it out and let it thaw in the fridge overnight. If you want to enjoy it warm, you can pop it in the microwave for about 10-15 seconds—just enough to take the chill off and revive that deliciously soft texture!
With these storage and reheating tips, your *Valentines cake* will stay delightful, and you can savor the love even after the holiday is over. Enjoy every sweet moment!
FAQ Section
Got questions about making your *Valentines cake*? Don’t worry; I’ve got you covered! Here are some common queries I often hear, along with my answers to help you bake the perfect cake.
Can I substitute the all-purpose flour for a gluten-free option?
Absolutely! You can use a 1:1 gluten-free baking flour blend in place of all-purpose flour. Just make sure it contains xanthan gum, which helps with the texture. Your *Valentines cake* will still come out delicious and moist!
What can I use instead of cream cheese for frosting?
If you’re looking for a lighter option or need a dairy-free alternative, you can try using whipped coconut cream or dairy-free cream cheese. Both will give you that creamy texture without compromising on taste. Just be mindful that the flavor profile might change slightly, but it’ll still be delightful!
How do I make sure my cake doesn’t stick to the pans?
Great question! Properly greasing and flouring your cake pans is key. I like to use unsalted butter for greasing and make sure to dust the pans with flour, tapping out the excess. If you’re worried about sticking, you could also use parchment paper on the bottoms for extra security!
Can I make this cake in advance?
You bet! This *Valentines cake* can be made a day ahead. Just store it in the fridge once frosted, and it’ll be just as fresh the next day. If you want to bake the cakes in advance, you can freeze them before frosting. Just wrap them well and pop them in the freezer!
What’s the best way to serve the cake?
For a lovely presentation, slice the cake and serve it with a dollop of whipped cream or a scoop of vanilla ice cream. You can also drizzle some chocolate sauce over the top for an extra indulgent touch. And don’t forget those fresh strawberries—they add a beautiful and tasty garnish!
With these FAQs, I hope you feel even more confident in your baking adventure. Remember, the heart of the *Valentines cake* is all about love and creativity, so have fun and enjoy the process!
Print
Valentines cake: 7 Magical Ways to Create Sweet Love
- Total Time: 50 minutes
- Yield: 12 servings 1x
- Diet: Vegetarian
Description
A delightful cake perfect for Valentine’s Day celebrations.
Ingredients
- 2 cups all-purpose flour
- 1 1/2 cups sugar
- 1/2 cup unsalted butter
- 1 cup milk
- 3 large eggs
- 1 tablespoon vanilla extract
- 2 teaspoons baking powder
- 1/2 teaspoon salt
- Red food coloring
- 1 cup cream cheese
- 1/2 cup powdered sugar
- Fresh strawberries for decoration
Instructions
- Preheat your oven to 350°F (175°C).
- Grease and flour two 9-inch round cake pans.
- In a bowl, cream together butter and sugar.
- Add eggs one at a time, mixing well after each addition.
- Stir in vanilla extract.
- In another bowl, combine flour, baking powder, and salt.
- Gradually add the dry ingredients to the creamed mixture, alternating with milk.
- Add red food coloring until desired color is reached.
- Divide the batter between the prepared pans.
- Bake for 25-30 minutes or until a toothpick comes out clean.
- Let the cakes cool in the pans for 10 minutes, then transfer to wire racks.
- For frosting, beat cream cheese and powdered sugar until smooth.
- Frost the cooled cakes and decorate with fresh strawberries.
Notes
- Ensure all ingredients are at room temperature.
- Adjust the amount of food coloring based on your preference.
- Store leftovers in an airtight container.
- Prep Time: 20 minutes
- Cook Time: 30 minutes
- Category: Dessert
- Method: Baking
- Cuisine: American
Nutrition
- Serving Size: 1 slice
- Calories: 350
- Sugar: 30g
- Sodium: 200mg
- Fat: 15g
- Saturated Fat: 9g
- Unsaturated Fat: 4g
- Trans Fat: 0g
- Carbohydrates: 50g
- Fiber: 1g
- Protein: 4g
- Cholesterol: 50mg
Keywords: Valentines cake, romantic dessert, love cake, red velvet cake