Ah, Valentine’s Day! It’s that wonderful time of year when love is in the air and sweet treats abound. And let me tell you, nothing says “I care” quite like a batch of homemade Valentines cookies. These delightful little gems are perfect for sharing with friends, family, or that special someone in your life. The simple act of baking these cookies fills my kitchen with warmth and sweet aromas that instantly lift my spirits. I remember making them with my mom as a kid, carefully rolling the dough and adding colorful sprinkles to each cookie. It felt like art! Now, I continue that tradition, creating these lovely cookies to gift to my loved ones. They’re not just cookies; they’re little tokens of affection, and I promise they’ll bring smiles all around. So, let’s get started on making some memories with these scrumptious Valentines cookies!
Ingredients List
Gathering the right ingredients is key to making the best Valentines cookies. Here’s what you’ll need:
- 2 cups all-purpose flour: Make sure to spoon and level it for accuracy.
- 1 cup unsalted butter, softened: Let it sit at room temperature until it’s nice and creamy.
- 1 cup granulated sugar: This will help sweeten and provide that lovely texture.
- 1 large egg: Room temperature eggs mix in better, so take it out of the fridge ahead of time.
- 1 teaspoon vanilla extract: The star ingredient that adds depth and warmth to your cookies.
- 1/2 teaspoon baking powder: This helps the cookies rise just right!
- 1/4 teaspoon salt: A pinch is necessary to balance all the sweetness.
- Red and pink sprinkles: Use these to top off your cookies and make them festive!
With these simple ingredients, you’re on your way to baking a batch of love-filled Valentines cookies that are sure to impress!
How to Prepare Valentines Cookies
Step 1: Preheat the Oven
First things first, let’s get that oven working! Preheat it to 350°F (175°C). This step is crucial because a properly preheated oven ensures even baking, which is key to achieving those lovely, golden edges we all crave. If you skip this part, your cookies might spread too much or bake unevenly, and we definitely don’t want that!
Step 2: Cream Butter and Sugar
Now, grab your softened unsalted butter and granulated sugar. In a large mixing bowl, cream the two together until they’re light and fluffy. This usually takes about 2-3 minutes with a hand mixer or a stand mixer. You’ll know it’s time to move on when the mixture turns a pale yellow and has a smooth, creamy texture. This process is super important because it incorporates air into the dough, giving your cookies that perfect texture—light on the inside with just the right amount of crispiness on the edges.
Step 3: Combine Wet Ingredients
Next, it’s time to add the egg and vanilla extract. Crack the egg right into the bowl and pour in the vanilla. Mix everything together until well combined—don’t rush this step! Make sure everything is nicely blended, as this will help create a smooth and cohesive dough. You want to see a uniform mixture without any streaks of butter or sugar remaining.
Step 4: Mix Dry Ingredients
In a separate bowl, combine the flour, baking powder, and salt. Whisk them together until well blended. This is a great time to break up any lumps in the flour and ensure the baking powder and salt are evenly distributed. Mixing the dry ingredients separately helps to prevent clumping when you add them to the wet mixture later on.
Step 5: Combine Wet and Dry Ingredients
Now comes the fun part! Gradually add the dry mixture to the wet ingredients. Do this in about three additions, mixing gently after each addition to create a smooth dough. Be careful not to overmix! You want to just combine everything until you see no dry flour—some small lumps are okay. Overmixing can lead to tough cookies, and we want them tender and melt-in-your-mouth good!
Step 6: Shape the Cookies
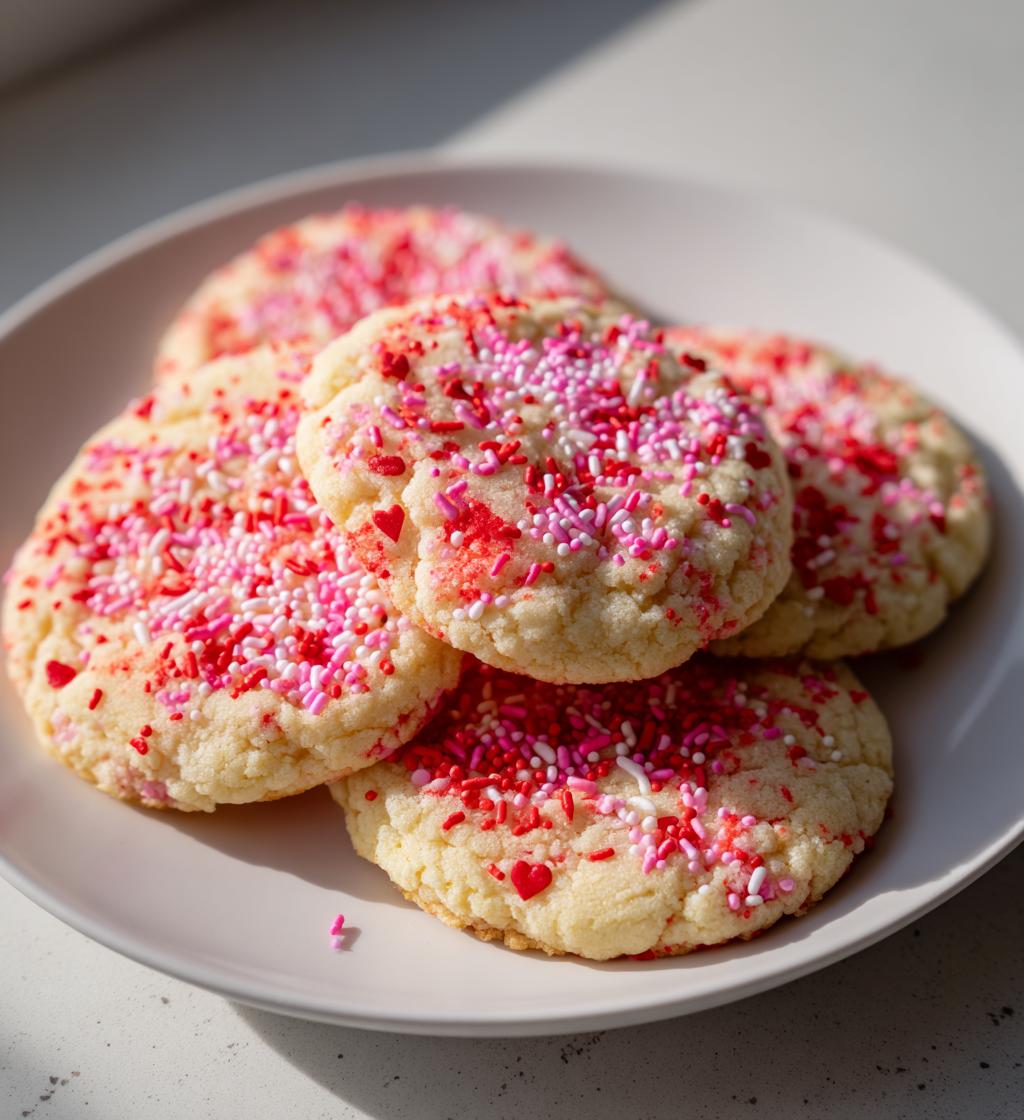
Time to get your hands a little doughy! Roll the dough into small balls, about 1 inch in diameter, and place them on a baking sheet lined with parchment paper. Once they’re all lined up, gently flatten each ball slightly with the palm of your hand. This is where you can go wild with the red and pink sprinkles—don’t be shy! Sprinkle generously on top before they head into the oven. They’ll look so festive!
Step 7: Bake the Cookies
Finally, pop those beauties into your preheated oven and bake them for about 10-12 minutes. Keep an eye on them! You’ll know they’re done when the edges are lightly golden, and the centers look set but still soft. Let them cool on the baking sheet for a few minutes before transferring them to a wire rack. This resting period helps them firm up a bit. Don’t rush to serve them right away—let them cool fully for the best texture!
Why You’ll Love This Recipe
These Valentines cookies are not just any cookies; they’re a delightful experience! Here’s why you’ll absolutely adore them:
- Quick to make: With just 20 minutes of prep, you’ll have fresh cookies ready to enjoy in no time!
- Perfect for sharing: They’re ideal for gifting or bringing to parties, spreading joy wherever they go.
- Customizable: Get creative with different colored sprinkles or even add chocolate chips for a twist!
- Classic holiday treat: These cookies are a timeless favorite, making every Valentine’s Day feel extra special.
Tips for Success
To ensure your Valentines cookies turn out perfectly, here are some of my favorite tips:
- Chill the dough: If the dough feels too sticky, pop it in the fridge for about 30 minutes. This makes it easier to handle and helps the cookies maintain their shape while baking.
- Use a cookie scoop: For uniform sizes, a cookie scoop is a game changer! It ensures each cookie bakes evenly and looks fabulous on the platter.
- Don’t skip the parchment paper: It makes for easy cleanup and prevents the cookies from sticking, ensuring they come off the baking sheet smoothly.
With these little tricks, you’ll be on your way to baking the best Valentines cookies ever!
Nutritional Information Section
When it comes to enjoying these delightful Valentines cookies, it’s good to know what you’re indulging in! Here’s a breakdown of the typical nutritional values per cookie:
- Calories: 150
- Fat: 8g
- Sugars: 10g
- Protein: 2g
Keep in mind these values are estimates, and they can vary based on specific ingredient brands and measurements. Enjoy your cookies guilt-free, knowing they’re made with love!
FAQ Section
Got questions about these delightful Valentines cookies? I’ve got answers! Here are some common queries I hear:
- How should I store my cookies? Keep your cookies in an airtight container at room temperature. They’ll stay fresh for about a week, but trust me, they won’t last that long!
- Can I use different types of flour? Absolutely! While all-purpose flour gives the best results, you can try using whole wheat flour for a heartier cookie. Just keep in mind it may alter the texture slightly.
- Are there any dairy-free options? Yes! You can substitute the butter with a dairy-free butter alternative and use a flax egg (1 tablespoon of ground flaxseed mixed with 2.5 tablespoons of water) in place of the egg for a vegan-friendly version.
- Can I freeze the cookie dough? You bet! Just roll the dough into balls, freeze them on a baking sheet, and once solid, transfer them to a freezer bag. When you’re ready to bake, just pop them in the oven straight from the freezer—no thawing needed!
These tips should help you navigate any baking adventures with ease. Happy baking!
Serving Suggestions
These delightful Valentines cookies are perfect for pairing with a tall glass of cold milk or a warm cup of coffee—trust me, the combination is heavenly! You can also get creative by using them as sweet decorations for your Valentine’s Day table or even as thoughtful gifts. Stack them in a cute tin or box, tie a ribbon around it, and you’ve got a charming present that anyone would love to receive. They’ll brighten up any celebration!
Print
Valentines cookies: 7 Love-Filled Tricks to Bake Joy
- Total Time: 32 minutes
- Yield: 24 cookies 1x
- Diet: Vegetarian
Description
Delicious Valentine’s Day cookies perfect for sharing.
Ingredients
- 2 cups all-purpose flour
- 1 cup unsalted butter, softened
- 1 cup granulated sugar
- 1 large egg
- 1 teaspoon vanilla extract
- 1/2 teaspoon baking powder
- 1/4 teaspoon salt
- Red and pink sprinkles
Instructions
- Preheat your oven to 350°F (175°C).
- In a bowl, cream together the butter and sugar.
- Add the egg and vanilla, mix well.
- In another bowl, combine flour, baking powder, and salt.
- Gradually add the dry ingredients to the wet mixture.
- Roll the dough into small balls and place them on a baking sheet.
- Flatten each ball slightly and add sprinkles on top.
- Bake for 10-12 minutes or until lightly golden.
- Let them cool before serving.
Notes
- Store cookies in an airtight container.
- Use different colored sprinkles for variety.
- Chill the dough for better handling.
- Prep Time: 20 minutes
- Cook Time: 12 minutes
- Category: Dessert
- Method: Baking
- Cuisine: American
Nutrition
- Serving Size: 1 cookie
- Calories: 150
- Sugar: 10g
- Sodium: 50mg
- Fat: 8g
- Saturated Fat: 5g
- Unsaturated Fat: 3g
- Trans Fat: 0g
- Carbohydrates: 20g
- Fiber: 0g
- Protein: 2g
- Cholesterol: 20mg
Keywords: Valentines cookies, holiday cookies, sugar cookies