Ah, Valentine’s Day! A time for love, laughter, and, of course, delicious treats! I can’t tell you how much joy it brings me to whip up sweet creations for this special occasion. There’s something so magical about baking cookies that are not only tasty but also beautifully packaged and ready to share with friends, family, and even customers. These Valentine’s Day treats to sell are more than just desserts; they’re little pieces of love that you can offer to others. Imagine the smiles as people bite into these rich, chocolatey cookies, each one bursting with flavor and made with care. It’s a fantastic way to spread happiness and maybe even a little romance! Plus, with the right presentation and a sprinkle of creativity, these treats can be a delightful addition to any Valentine’s Day sales. Let’s dive into how to create these irresistible goodies together!
Ingredients List
Gathering the right ingredients is key to making these amazing Valentine’s Day treats to sell. Here’s exactly what you’ll need:
- 2 cups all-purpose flour
- 1 cup sugar
- 1/2 cup unsweetened cocoa powder
- 1/2 cup butter, softened
- 2 large eggs
- 1 teaspoon vanilla extract
- 1/2 teaspoon baking powder
- 1/2 teaspoon salt
- 1 cup chocolate chips
These simple ingredients come together to create a rich, chocolatey delight that’s perfect for sharing! Make sure to measure everything accurately to ensure your cookies turn out perfectly soft and chewy. Trust me, you’ll want to savor every bite of these scrumptious treats!
How to Prepare Instructions
Now, let’s get our hands a little messy and dive into the fun part – making these delightful Valentine’s Day treats to sell! Follow these steps, and you’ll have cookies that’ll make hearts flutter.
Preheat the Oven
First things first, you’ll want to preheat your oven to 350°F (or 175°C). This step is super important because it ensures that your cookies bake evenly from the moment you pop them in. Trust me, a properly preheated oven makes all the difference in achieving that perfect texture!
Cream Butter and Sugar
Next up, grab a mixing bowl and cream together the softened butter and sugar. You can use a hand mixer or even a wooden spoon if you’re feeling strong! Beat them together until the mixture is light and fluffy, which usually takes about 2-3 minutes. This step is crucial because it incorporates air into the batter, giving your cookies that wonderful, tender texture.
Mix Wet Ingredients
Now, let’s add the eggs and vanilla extract. Crack the eggs right into the bowl and pour in that fragrant vanilla. Mix everything together until it’s well combined and smooth. You want to ensure there are no streaks of egg left – a homogenous batter is key!
Combine Dry Ingredients
In a separate bowl, whisk together the all-purpose flour, cocoa powder, baking powder, and salt. This step helps distribute the dry ingredients evenly, which is super important for consistent flavor and texture throughout your cookies. Don’t skip this – it’s a game changer!
Combine Mixtures
Now comes the fun part! Gradually add your dry mixture to the wet ingredients. I like to do this in three parts, mixing gently until just combined after each addition. This helps maintain that lovely smoothness you’re aiming for. Don’t overmix – just enough to see no floury bits!
Add Chocolate Chips
Time to fold in the chocolate chips! Gently stir them into the dough so they’re evenly distributed. Who doesn’t want a chocolatey surprise in every bite, right? Make sure they’re mixed in well, but again, don’t overdo it!
Shape the Cookies
Now, grab a baking sheet and drop spoonfuls of dough onto it, spacing them about 2 inches apart. I like to use a cookie scoop or two tablespoons for uniformity. This way, they’ll all bake evenly! Don’t worry if they’re not perfectly round – those rustic shapes add charm!
Bake and Cool
Pop those bad boys in the preheated oven and bake for about 10-12 minutes. Keep an eye on them; you want them to be set around the edges but still soft in the middle. Once they’re done, let them cool on the baking sheet for a few minutes before transferring them to a wire rack. This cooling time is essential to let them firm up just a bit!
And there you have it! Your delicious Valentine’s Day treats to sell are ready to spread some love. Enjoy the sweet aroma filling your kitchen as you prepare to share these goodies!
Why You’ll Love This Recipe
Oh, where do I even start? These Valentine’s Day treats to sell are not just cookies; they’re little bundles of joy that are so easy to make! Seriously, if you’re looking for a way to impress friends, family, or customers this Valentine’s Day, look no further. The combination of rich cocoa and sweet chocolate chips creates flavors that are absolutely delightful, making each bite feel like a warm hug.
But it gets better! These cookies are perfect for gifting. Picture this: you’ve packaged them up in cute little boxes or bags, tied with a lovely ribbon, ready to share with your loved ones. It’s not just a treat; it’s a heartfelt gesture that says, “I care.” Plus, their appealing presentation, especially if you sprinkle some festive decorations on top, makes them an eye-catching addition to any Valentine’s Day sale or event.
And don’t worry about complicated techniques or hard-to-find ingredients. This recipe is straightforward, giving you the confidence to whip up a batch (or two!) without breaking a sweat. Trust me, once you start baking these cookies, their irresistible aroma will fill your home, making it feel like Valentine’s Day all month long. You’ll love how simple they are to make and how they bring so much joy to everyone who gets to taste them!
Tips for Success
To make sure your Valentine’s Day treats to sell turn out perfectly, here are some handy tips I’ve gathered over the years. Each little detail counts when it comes to baking, and these suggestions will help you achieve cookie perfection!
Measure Ingredients Accurately
First off, always measure your ingredients accurately. Baking is a science, and even a slight variation can affect the outcome. Use a kitchen scale if you have one, or make sure to level off your measuring cups for dry ingredients. This ensures consistency in your cookie texture!
Chill the Dough for Extra Richness
If you have the time, consider chilling the dough for about 30 minutes before baking. This little step helps the flavors meld beautifully and can enhance the chewy texture of the cookies. Plus, it makes them less likely to spread too much while baking!
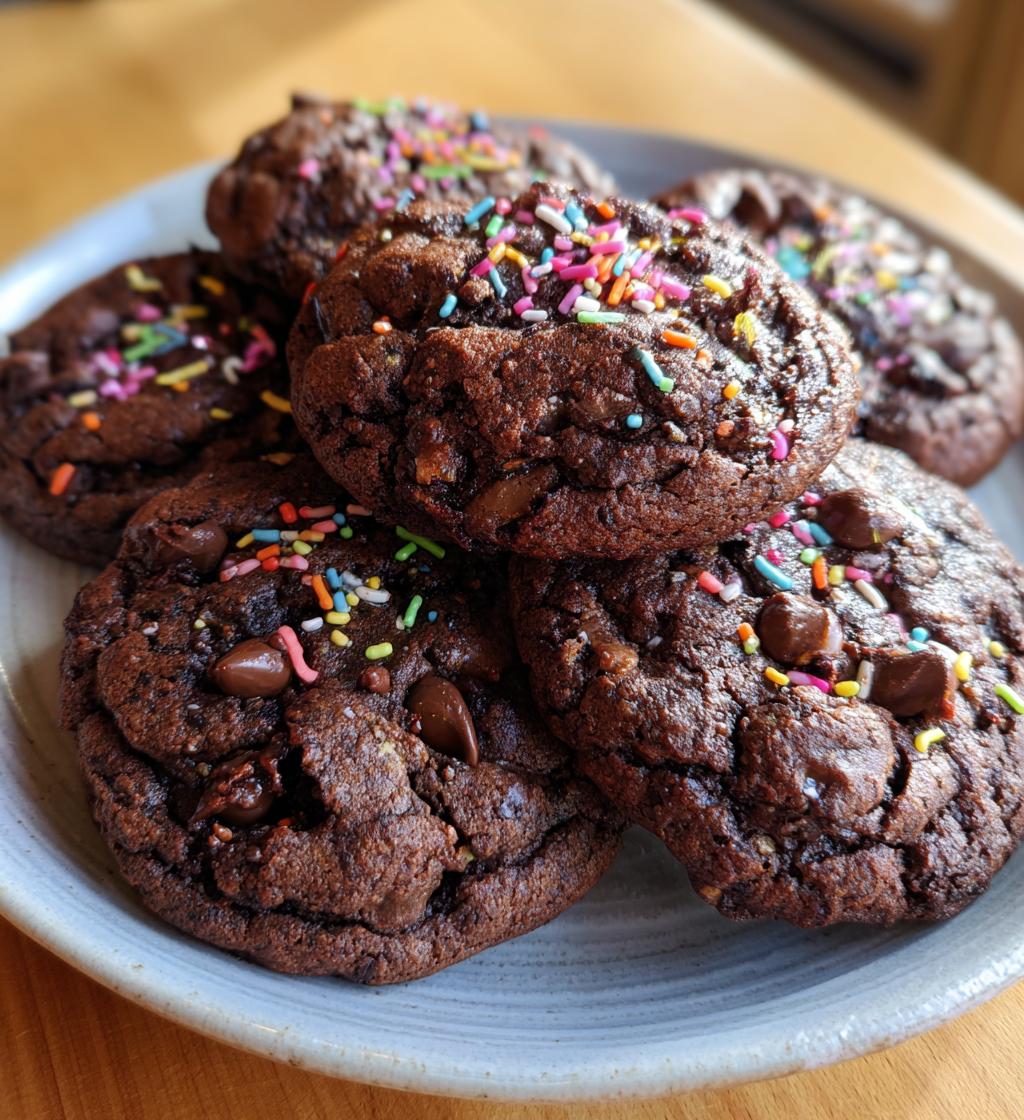
Experiment with Decorations
Don’t hesitate to get creative with decorations! A simple dusting of powdered sugar can add a lovely touch, or you can sprinkle some colorful heart-shaped sprinkles on top before baking for that extra festive look. You can even drizzle some melted chocolate over the cooled cookies for a decadent finish!
Storage Tips
Once your cookies are baked and cooled, store them in an airtight container at room temperature. They’ll stay fresh for about a week. If you’re planning to sell them, consider vacuum-sealing them for longer shelf life and to keep them extra fresh! You can also freeze the dough for up to a month, so you can bake them fresh whenever you need a batch.
Presentation Matters
When it comes to selling your cookies, presentation is key! Use clear bags tied with pretty ribbons or decorative boxes to make them visually appealing. Adding a little label with the name of your treat and a sweet message can really grab attention. Trust me, people love beautifully packaged goodies!
With these tips, you’re all set to create amazing Valentine’s Day treats to sell. Happy baking, and may your cookies bring smiles and sweetness to everyone who tries them!
Storage & Reheating Instructions
Once you’ve baked your delicious Valentine’s Day treats to sell, you’ll want to keep them fresh and tasty! The best way to store these cookies is in an airtight container. This helps maintain their soft, chewy texture and keeps them from drying out. I usually line the bottom of the container with parchment paper before adding the cookies, just to be extra careful!
These cookies can stay fresh at room temperature for about a week, which is perfect for those delightful Valentine’s Day sales. If you’re planning to make them ahead of time or have leftovers, you can also freeze them! Just place them in a freezer-safe bag or container, separating layers with parchment paper to prevent sticking. They can last in the freezer for up to a month!
When you’re ready to enjoy them again, there’s no need to thaw them out completely. Just pop them in a preheated oven at 350°F (175°C) for about 5-7 minutes. This quick reheating will revive their freshly baked taste and warmth. Alternatively, you can microwave them for about 10-15 seconds, but be careful not to overdo it; you don’t want them to get tough.
With these simple storage and reheating tips, you’ll be able to enjoy your Valentine’s Day treats to sell whenever you like, keeping that sweet spirit alive long after the holiday!
Nutritional Information Section
Understanding the nutritional content of your Valentine’s Day treats to sell can help you and your customers make informed choices. However, please keep in mind that nutrition can vary based on the specific ingredients and brands you use, so the values provided here are estimates.
For each cookie, you can expect approximately:
- Calories: 150
- Fat: 7g
- Saturated Fat: 4g
- Trans Fat: 0g
- Cholesterol: 20mg
- Sodium: 50mg
- Carbohydrates: 20g
- Fiber: 1g
- Sugar: 10g
- Protein: 2g
These little treats pack a delicious punch, but it’s always good to enjoy them in moderation. Happy baking and indulging in these sweet delights!
FAQ Section
Got questions about these Valentine’s Day treats to sell? Don’t worry, I’ve got you covered! Here are some common queries I often hear, along with my answers to help you out.
What are the best ways to package these treats for sale?
Presentation is key when selling your treats! I love using clear cellophane bags tied with colorful ribbons or decorative boxes to make them look extra special. You can also add a cute tag or label with the name of the treat and a sweet message. This not only grabs attention but also makes your treats feel more personal and thoughtful!
Can I make these cookies ahead of time?
Absolutely! These cookies can be made a few days in advance. Just store them in an airtight container at room temperature to keep them fresh. If you want to prepare even further ahead, you can freeze the dough and bake them fresh when you need them. Just remember to thaw the dough in the fridge overnight before baking!
How do I know when my cookies are done baking?
Great question! You’ll want to look for a set edge and a soft center. They should look slightly underbaked when you take them out, as they will continue to firm up while cooling. A good rule of thumb is to check them around the 10-minute mark, but keep an eye on them to avoid overbaking!
Can I substitute any ingredients in this recipe?
Sure! If you’re looking to make a healthier version, you can try using whole wheat flour instead of all-purpose flour. You can also swap out the butter for coconut oil or a vegan butter substitute if you want a dairy-free option. Just keep in mind that any substitutions might slightly change the texture or taste, so it’s fun to experiment!
What’s the best way to decorate these cookies?
Oh, let your creativity shine! You can sprinkle colorful heart-shaped sprinkles on top before baking for a festive touch. After baking, a drizzle of melted chocolate or a dusting of powdered sugar can elevate their appearance. For an extra special treat, consider adding some edible glitter or a light glaze to really catch the eye!
With these FAQs, I hope you feel more prepared to create and sell your own delightful Valentine’s Day treats. Happy baking, and may your sales be sweet!
Print
Valentine’s Day Treats to Sell: 5 Irresistible Ideas
- Total Time: 27 minutes
- Yield: 24 cookies 1x
- Diet: Vegetarian
Description
Delicious treats perfect for Valentine’s Day sales.
Ingredients
- 2 cups all-purpose flour
- 1 cup sugar
- 1/2 cup unsweetened cocoa powder
- 1/2 cup butter
- 2 eggs
- 1 teaspoon vanilla extract
- 1/2 teaspoon baking powder
- 1/2 teaspoon salt
- 1 cup chocolate chips
Instructions
- Preheat your oven to 350°F (175°C).
- In a bowl, cream together butter and sugar.
- Add eggs and vanilla; mix well.
- In another bowl, combine flour, cocoa, baking powder, and salt.
- Gradually add the dry ingredients to the wet mixture.
- Stir in chocolate chips.
- Drop spoonfuls of dough onto a baking sheet.
- Bake for 10-12 minutes.
- Let cool before serving.
Notes
- Store in an airtight container.
- Use festive shapes for a special touch.
- Consider adding sprinkles for decoration.
- Prep Time: 15 minutes
- Cook Time: 12 minutes
- Category: Dessert
- Method: Baking
- Cuisine: American
Nutrition
- Serving Size: 1 cookie
- Calories: 150
- Sugar: 10g
- Sodium: 50mg
- Fat: 7g
- Saturated Fat: 4g
- Unsaturated Fat: 2g
- Trans Fat: 0g
- Carbohydrates: 20g
- Fiber: 1g
- Protein: 2g
- Cholesterol: 20mg
Keywords: valentines day treats to sell