Ah, Valentine’s Day! A time for love, laughter, and of course, indulgent desserts! There’s just something magical about sharing sweet treats with those you adore. Picture this: a beautifully arranged *valentines dessert table*, bursting with an array of delightful goodies. It’s like a feast for the eyes and the taste buds, all in one. Trust me, it adds an extra sprinkle of joy to any celebration!
Growing up, my family always had a tradition of gathering around a table filled with heart-shaped cookies, chocolate-dipped strawberries, and rich brownies. I can still remember the excitement in the air as we selected our favorites, each bite bursting with love and sweetness. It was those moments that taught me the true essence of sharing food — it’s about connection and creating cherished memories.
So, whether you’re planning a romantic evening or a fun gathering with friends, this *valentines dessert table* is sure to impress your loved ones and make the day even more special. Let’s dive into the deliciousness and create something unforgettable together!
Ingredients List
To create the sweetest *valentines dessert table*, you’ll need the following ingredients. Make sure to gather these before diving into the baking adventure!
- 1 cup all-purpose flour
- 1/2 cup unsweetened cocoa powder
- 1 cup granulated sugar
- 1/2 cup butter, softened to room temperature
- 2 large eggs
- 1 teaspoon vanilla extract
- 1/2 teaspoon baking powder
- 1/4 teaspoon salt
- 1 cup chocolate chips (feel free to use semi-sweet or dark for extra richness!)
Each of these ingredients plays a crucial role in achieving that dreamy, chocolatey delight. Trust me, you won’t want to skip any of them! Happy baking!
How to Prepare the *Valentines Dessert Table*
Now that you’ve gathered your ingredients, it’s time to bring your *valentines dessert table* to life! I promise, this process is as fun as it is rewarding. Let’s break it down step-by-step to ensure everything flows smoothly.
Step-by-Step Instructions
- Preheat your oven: Start by preheating your oven to 350°F (175°C). This is crucial because it ensures your dessert bakes evenly and rises beautifully.
- Mix the dry ingredients: In a medium bowl, whisk together the all-purpose flour, cocoa powder, baking powder, and salt. Take a moment to enjoy the rich chocolate aroma that fills the air!
- Cream the butter and sugar: In a separate large bowl, cream the softened butter and granulated sugar together until the mixture is smooth and fluffy. This should take about 2-3 minutes. You want it to be light in color, almost like whipped honey.
- Add the eggs and vanilla: Crack in the two large eggs and pour in the vanilla extract. Mix until everything is well combined. The mixture should be silky and inviting!
- Combine the mixtures: Gradually add the dry ingredients to the wet mixture, mixing gently until just combined. Be careful not to overmix; we want a tender crumb!
- Fold in the chocolate chips: Now comes the best part! Gently fold in the chocolate chips, ensuring they’re evenly distributed throughout the batter. You can almost taste the chocolatey goodness already!
- Prepare your baking pan: Pour the batter into a greased baking pan, spreading it evenly. A 9×9-inch square pan works perfectly for this recipe.
- Bake to perfection: Pop the pan into your preheated oven and bake for 25-30 minutes. You’ll know it’s done when a toothpick inserted into the center comes out clean – just a few moist crumbs are okay, though!
- Cool and cut: Once baked, remove the pan from the oven and let it cool for about 10-15 minutes. Then, transfer it to a wire rack to cool completely before cutting it into delightful squares. This step is essential for achieving those perfect cuts!
And there you have it! Your *valentines dessert table* is coming together beautifully. I can already imagine how amazing it will look and taste. Get ready for those “oohs” and “aahs” when you serve these treats!
Why You’ll Love This Recipe
This *valentines dessert table* is not just a collection of sweets; it’s a heartfelt way to celebrate love and togetherness! One of the best things about this recipe is how quick it is to prepare. In just 45 minutes, you can whip up a delicious dessert that’ll have everyone swooning. Seriously, what’s not to love about that?
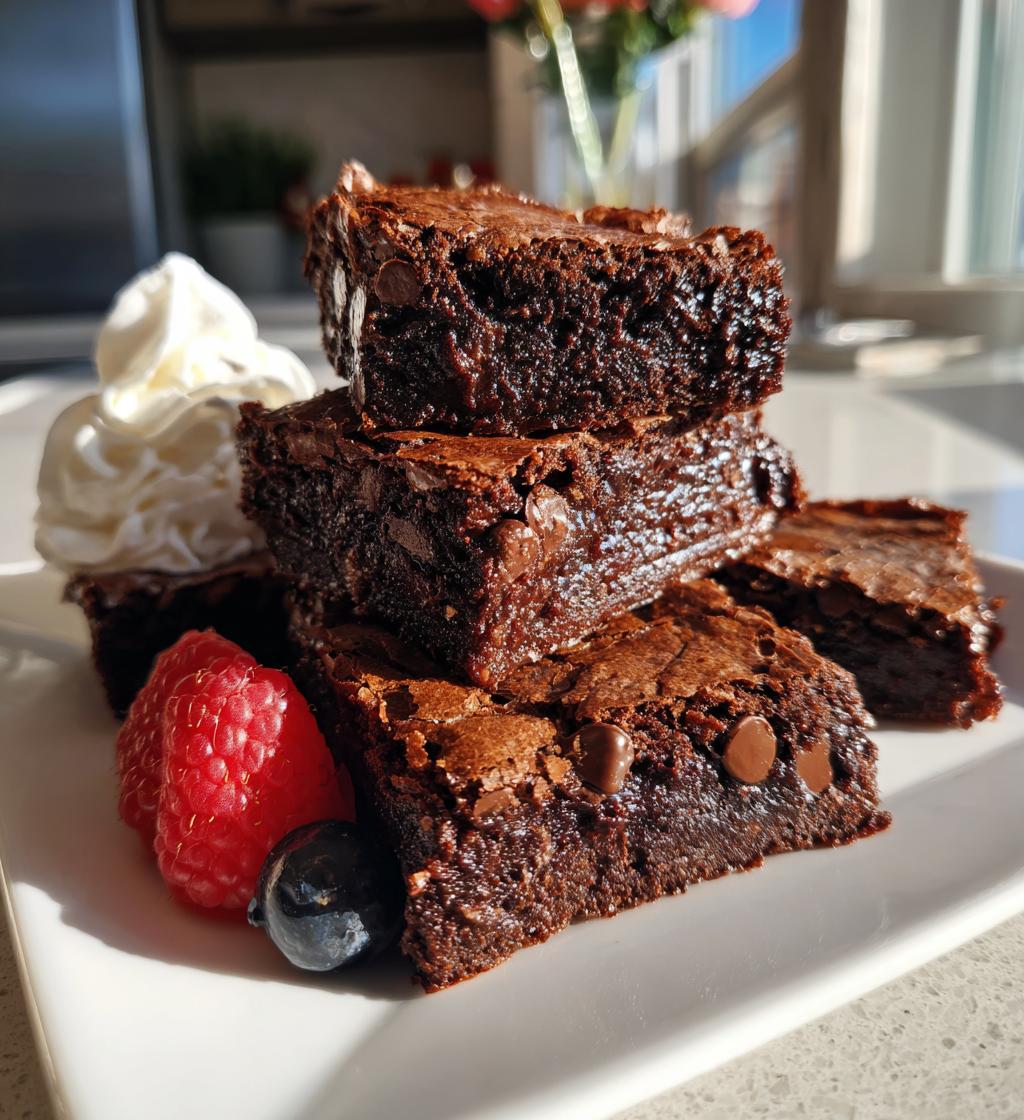
The flavors are absolutely delightful, with rich chocolate and a touch of sweetness that strikes the perfect balance. I mean, who can resist warm, gooey chocolate chips melting in each bite? Plus, they’re so versatile! You can serve them as is, or dress them up with whipped cream and fresh berries for a touch of elegance. Trust me, your friends and family will be raving about them!
And let’s not forget the joy of sharing. There’s something special about gathering around a beautifully arranged dessert table, indulging in sweet treats while creating unforgettable memories. Whether it’s a romantic dinner or a fun get-together with friends, this *valentines dessert table* is sure to bring smiles and warmth to your celebration. Get ready for a lot of love and laughter as you dig into these scrumptious delights!
Equipment List
Before you dive into creating your fabulous *valentines dessert table*, let’s make sure you have all the necessary tools at hand. Having the right equipment will make the process smooth and enjoyable. Here’s what you’ll need:
- Mixing bowls: A medium bowl for the dry ingredients and a large bowl for creaming the butter and sugar.
- Whisk: Perfect for combining your dry ingredients and ensuring they’re well mixed.
- Electric mixer or wooden spoon: Either works great for creaming butter and sugar. I personally love the old-school wooden spoon for that nostalgic feel!
- Rubber spatula: Ideal for folding in those delicious chocolate chips and scraping down the sides of your mixing bowl.
- Baking pan: A 9×9-inch square pan is perfect for this recipe, but feel free to use whatever you have on hand!
- Measuring cups and spoons: Accurate measurements are key to baking success, so don’t skimp on these!
- Cooling rack: Essential for letting your dessert cool evenly before cutting into those tempting squares.
- Toothpick or cake tester: A simple tool for checking doneness—it’s a must-have in any baker’s arsenal!
With these tools ready to go, you’re all set to create a stunning *valentines dessert table* that will wow your loved ones. Happy baking!
Tips for Success
Okay, my fellow bakers, let’s talk about how to ensure your *valentines dessert table* is nothing short of spectacular! With just a few pro tips, you can avoid common pitfalls and make this dessert shine. Trust me, these little nuggets of wisdom will help you create a chocolatey masterpiece!
Use room temperature ingredients: Make sure your butter and eggs are at room temperature before you start. This helps them blend more easily, creating that lovely, fluffy texture we all crave. If you forget to take them out ahead of time, don’t panic! Just put your eggs in a bowl of warm water for a few minutes, and you’re good to go.
Measure accurately: Baking is all about precision! Be sure to level off your flour and cocoa powder when measuring. A heaping cup can throw off the entire recipe, which we definitely don’t want! Use a kitchen scale if you have one—it’s a game changer for accuracy.
Don’t overmix: When you combine your wet and dry ingredients, mix until just combined. Overmixing can lead to tough, dense brownies instead of the tender, melt-in-your-mouth goodness we’re aiming for. A few flour streaks are perfectly fine!
Check for doneness carefully: When it’s time to test your dessert, remember that every oven is different. Start checking a couple of minutes before the recommended time. Insert a toothpick into the center; it should come out with a few moist crumbs. If it’s too wet, pop it back in for a minute or two more!
Let them cool completely: I know it’s hard to resist diving in right away, but allowing your brownies to cool fully before cutting is crucial for clean, perfect squares. If you’re in a hurry, you can stick them in the fridge for a bit to speed up the cooling process.
With these tips in your back pocket, you’re all set to create a stunning *valentines dessert table* that will leave everyone wanting more. Happy baking, and enjoy the process!
Variations
One of the best things about creating a *valentines dessert table* is the endless possibilities for customization! You can easily switch things up to cater to your taste and impress your loved ones. Here are some fabulous ideas to take your dessert table to the next level:
- Decadent toppings: Consider adding a drizzle of caramel or a sprinkle of sea salt on top of your brownies for that perfect sweet and salty combo. You could even whip up a quick ganache by melting chocolate with heavy cream for a luxurious finish!
- Flavor variations: Why not experiment with different extracts? Swap out the vanilla for almond extract for a nutty twist, or add a splash of peppermint extract for a refreshing touch. A little orange zest could also brighten up the chocolate flavor wonderfully!
- Mix in some crunch: If you’re a fan of textures, try folding in chopped nuts like walnuts or pecans into the batter. They add a delightful crunch and richness that complements the chocolate perfectly. Just be sure to adjust the amount of chocolate chips accordingly if you do!
- Fruit additions: For a fruity kick, add in some fresh raspberries or chopped strawberries right into the batter before baking. The juicy fruit pairs beautifully with chocolate and adds a pop of color to your dessert table!
- Mini dessert cups: Instead of cutting the brownies into squares, consider layering them in small cups with layers of whipped cream and berries for an elegant presentation. These mini desserts are perfect for parties and look so adorable!
- Additional desserts: Round out your *valentines dessert table* by including other sweet treats like heart-shaped sugar cookies, chocolate-covered strawberries, or even a rich cheesecake! This variety not only satisfies different cravings but also makes your table visually stunning!
With these variations, you can create a personalized *valentines dessert table* that reflects your style and delights your guests. Get creative and have fun with it—the sky’s the limit when it comes to sweetening up the day of love!
Storage & Reheating Instructions
Now that you’ve created your fabulous *valentines dessert table*, let’s talk about how to store those delightful leftovers (if there are any!). Proper storage is key to keeping your treats fresh and delicious for days to come!
Storing your brownies: Once your brownies have cooled completely, you can store them in an airtight container. I recommend cutting them into squares first to make it easier when you’re ready to enjoy them again. Layer the squares with parchment paper to prevent them from sticking together. They’ll stay fresh at room temperature for up to a week—perfect for those late-night cravings!
Freezing for later: If you want to keep your brownies for longer, they freeze beautifully! Just wrap each square tightly in plastic wrap, then place them in a freezer-safe container or zip-top bag. They should be good for about 2-3 months in the freezer. When you’re ready to indulge, just take out what you need and let them thaw at room temperature for a bit.
Reheating: If you prefer your brownies warm and gooey, you can easily reheat them! Pop them in the microwave for about 10-15 seconds, just enough to warm them through without turning them into a molten mess. If you’re feeling fancy, top with a scoop of ice cream or a dollop of whipped cream for an extra treat!
With these simple storage and reheating tips, you can savor the sweetness of your *valentines dessert table* long after the celebrations are over. Enjoy every last bite!
Nutritional Information
As you dive into the deliciousness of your *valentines dessert table*, it’s good to know what’s packed into those scrumptious squares. Here’s the estimated nutritional information per serving (1 square) to keep you informed:
- Calories: 200
- Fat: 10g
- Saturated Fat: 5g
- Trans Fat: 0g
- Cholesterol: 30mg
- Sodium: 150mg
- Carbohydrates: 28g
- Fiber: 2g
- Sugar: 18g
- Protein: 3g
Keep in mind that these values are estimates and can vary based on specific brands and ingredients used. Enjoy your treats guilt-free, knowing you’re sharing something that not only tastes amazing but also brings everyone together. Happy indulging!
FAQ Section
Q1: Can I use a different type of flour for this recipe?
Absolutely! While all-purpose flour gives the best results, you can experiment with alternatives like whole wheat flour or gluten-free flour blends. Just keep in mind that this might change the texture a bit, so be ready for some delicious experimentation!
Q2: How should I store the leftovers from my *valentines dessert table*?
Once your brownies have cooled completely, store them in an airtight container at room temperature. They’ll stay fresh for up to a week! If you want to keep them longer, consider freezing individual squares wrapped in plastic wrap for up to 2-3 months.
Q3: What can I do if I don’t have cocoa powder?
If you’re out of cocoa powder, you could try using carob powder as a substitute. It has a different flavor but can still give you that chocolatey vibe. Just remember, it won’t taste exactly the same, but it can be a fun twist!
Q4: Can I make these brownies without eggs?
Yes, you can! If you’re looking for an egg-free option, try using unsweetened applesauce or mashed bananas as a substitute. About 1/4 cup of either will replace one egg. This will also add a little extra moisture and sweetness!
Q5: How can I add extra flavor to my *valentines dessert table*?
There are so many ways to amp up the flavor! You can add a teaspoon of espresso powder to enhance the chocolate flavor or swap vanilla extract for almond or peppermint extract for a unique twist. Get creative with your favorites!
Q6: Can I double the recipe for a larger gathering?
Definitely! Just double all the ingredients and use a larger baking pan. Adjust the baking time as needed, keeping an eye on it to ensure it’s baked through. You may need to add a few extra minutes, but trust your toothpick test!

valentines dessert table: 7 Sweet Ideas to Savor Together
- Total Time: 45 minutes
- Yield: 12 servings 1x
- Diet: Vegetarian
Description
A delightful assortment of desserts perfect for a Valentine’s Day celebration.
Ingredients
- 1 cup all-purpose flour
- 1/2 cup unsweetened cocoa powder
- 1 cup granulated sugar
- 1/2 cup butter, softened
- 2 large eggs
- 1 teaspoon vanilla extract
- 1/2 teaspoon baking powder
- 1/4 teaspoon salt
- 1 cup chocolate chips
Instructions
- Preheat the oven to 350°F (175°C).
- In a bowl, mix flour, cocoa powder, baking powder, and salt.
- In another bowl, cream butter and sugar until smooth.
- Add eggs and vanilla to the butter mixture, mixing well.
- Gradually add the dry ingredients to the wet mixture.
- Fold in the chocolate chips.
- Pour batter into a greased baking pan.
- Bake for 25-30 minutes or until a toothpick comes out clean.
- Let cool before cutting into squares.
Notes
- Serve with whipped cream or fresh berries.
- Can be stored in an airtight container for up to a week.
- Feel free to add nuts or other toppings as desired.
- Prep Time: 15 minutes
- Cook Time: 30 minutes
- Category: Dessert
- Method: Baking
- Cuisine: American
Nutrition
- Serving Size: 1 square
- Calories: 200
- Sugar: 18g
- Sodium: 150mg
- Fat: 10g
- Saturated Fat: 5g
- Unsaturated Fat: 3g
- Trans Fat: 0g
- Carbohydrates: 28g
- Fiber: 2g
- Protein: 3g
- Cholesterol: 30mg
Keywords: valentines dessert table