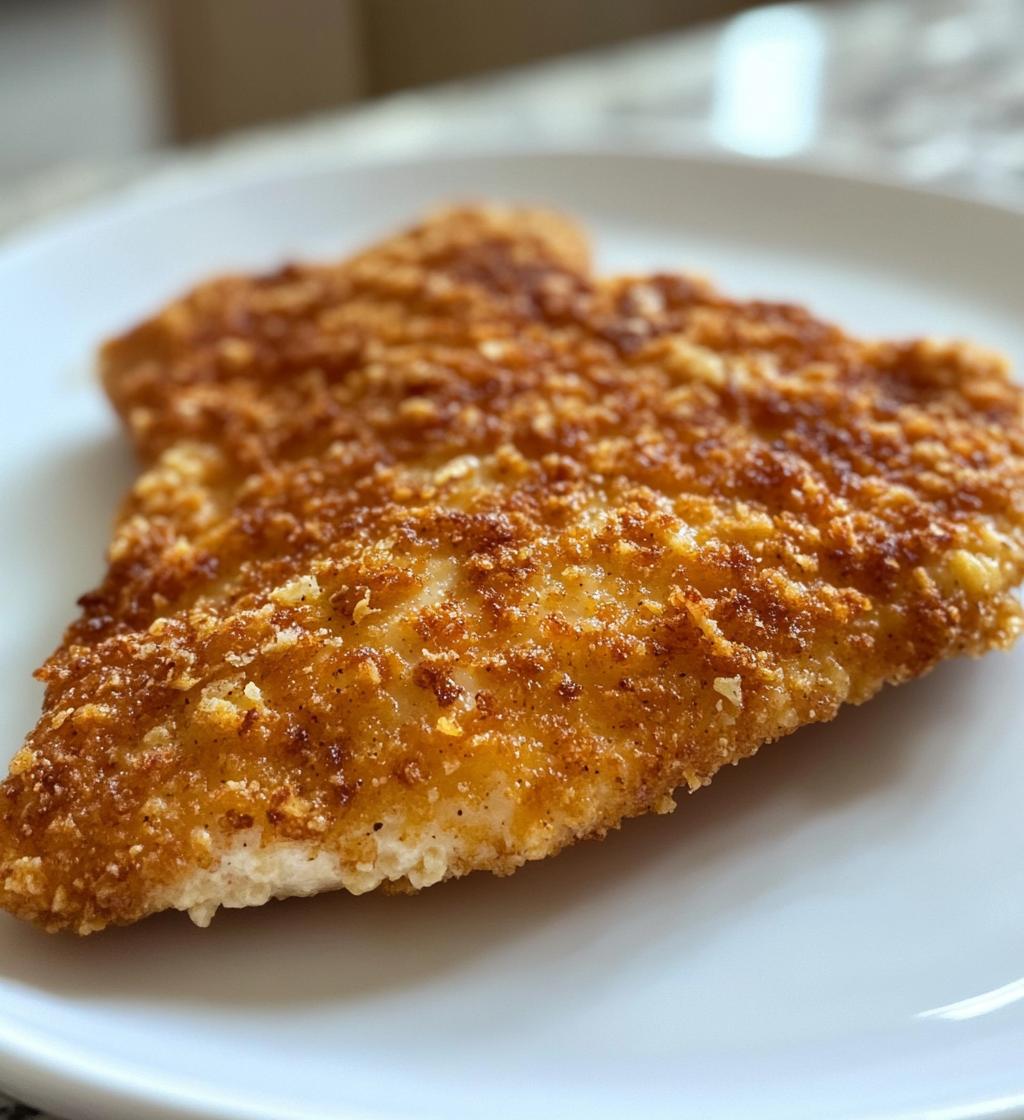
Let me let you in on a little secret – my air fryer crispy chicken cutlets have become the MVP of my weeknight dinners. I know what you’re thinking: “Fried chicken can’t possibly be healthy.” But here’s the magic – with just a light spritz of oil and that amazing air fryer circulation, you get all that glorious crunch without the guilt. I’ve been perfecting this recipe since the day I got my first air fryer (a birthday gift I initially thought was just another kitchen gadget).
These cutlets come out so crispy you’d swear they were deep-fried, but with way less mess and cleanup. The best part? They’re ready in under 30 minutes from fridge to table. My kids go crazy for them (I call that a parenting win), and honestly, they’ve saved me on more rushed evenings than I can count. Whether you’re cooking for picky eaters or just craving that perfect golden crunch, these air fryer crispy chicken cutlets never disappoint.
Why You’ll Love These Air Fryer Crispy Chicken Cutlets
Oh, where do I even start? These crispy chicken cutlets have completely changed my weeknight dinner game. Here’s why they’ll become your new obsession too:
- That perfect crunch without the guilt: The air fryer works magic—giving you that deep-fried texture with just a tiny bit of oil. No heavy, greasy feeling afterward, I promise!
- Faster than takeout: From fridge to table in under 30 minutes. Seriously, by the time your side dishes are ready, these cutlets are golden and crispy.
- Less mess, less stress: No splattering oil all over the stove, no lingering fried-food smell in the kitchen. Just pop them in the air fryer and walk away.
- Kid-approved (and husband-approved!): Even my pickiest eater can’t resist that crispy Parmesan crust. It’s a total crowd-pleaser.
- Meal prep superstar: These reheat like a dream in the air fryer—just a few minutes and they’re crispy all over again. Lunch for tomorrow? Done.
Trust me, once you try these, you’ll wonder how you ever made chicken cutlets any other way.
Ingredients for Air Fryer Crispy Chicken Cutlets
Here’s everything you’ll need to make these irresistible crispy cutlets – simple ingredients you probably already have in your kitchen:
- 2 boneless, skinless chicken breasts (sliced horizontally into thin cutlets – trust me, this makes all the difference!)
- 1 cup breadcrumbs (I prefer panko for extra crunch, but regular works great too)
- 1/2 cup grated Parmesan cheese (pack it lightly when measuring – the real stuff, not the powdery kind)
- 1 teaspoon garlic powder (my secret weapon for flavor)
- 1 teaspoon paprika (for that beautiful golden color)
- 1/2 teaspoon salt & black pepper (freshly ground pepper if you’ve got it)
- 1 egg (room temperature blends better)
- 1 tablespoon water (just to thin the egg wash)
- 1 tablespoon olive oil (for spraying – but you’ll use way less than frying!)
See? Nothing fancy – just good, simple ingredients that come together in the most magical way. Now let’s make some crispy magic!
How to Make Air Fryer Crispy Chicken Cutlets
Okay, let’s get cooking! I’ve made these crispy chicken cutlets more times than I can count, and I’ve learned all the little tricks to make them perfect every single time. Follow these steps and you’ll have golden, crunchy chicken magic in no time.
Step 1: Prep the Chicken
First things first – let’s get those chicken breasts ready. Place them on a cutting board and carefully slice each one horizontally into thin cutlets (about 1/2 inch thick). Don’t stress if they’re not perfectly even – rustic is charming! Just pat them dry with paper towels (this helps the coating stick better) and give them a light sprinkle of salt and pepper on both sides.
Step 2: Coat the Cutlets
Now for the fun part – the crispy coating! In one shallow bowl, whisk together your egg and water. In another bowl, mix the breadcrumbs, Parmesan, garlic powder, paprika, salt, and pepper. Here’s my pro tip: use one hand for dipping in the egg (the “wet hand”) and the other for the breadcrumb mixture (the “dry hand”) – saves so much mess! Dip each cutlet in the egg, let the excess drip off, then press firmly into the breadcrumbs until fully coated. Don’t be shy – really press those crumbs on there for maximum crunch!
Step 3: Air Fry to Perfection
Preheat your air fryer to 375°F (190°C) for about 3 minutes – this helps get that perfect crisp. Lightly spray the basket with oil, then add your cutlets in a single layer (no stacking or they won’t crisp up!). Give them a light spray of oil too – just a quick spritz is enough. Cook for 10 minutes, then flip (they should be beautifully golden on one side) and cook for another 5-7 minutes until they’re crispy all over and the internal temperature hits 165°F (74°C). That’s it – crispy perfection achieved!
Pro tip: If you’re making multiple batches, keep the cooked ones warm in a 200°F oven while you fry the rest. Now try not to eat them all before they make it to the table!
Tips for the Best Air Fryer Crispy Chicken Cutlets
After making these crispy chicken cutlets more times than I can count, I’ve picked up some foolproof tricks that’ll take yours from good to “oh-my-goodness” amazing:
- The oil spray makes all the difference: Just a light mist before cooking gives you that perfect golden crunch without making them greasy. I use a simple spray bottle with olive oil – way cheaper than those aerosol cans!
- Don’t crowd the basket: Give those cutlets some breathing room! Overcrowding = steamed chicken instead of crispy chicken. Cook in batches if needed (I promise it’s worth the extra few minutes).
- Uniform thickness is key: If some parts are thicker than others, pound them gently with a meat mallet or rolling pin. This way everything cooks evenly – no dry edges with raw centers!
- Flip with care: Use tongs to turn them halfway through – they’re delicate when hot. If breading sticks, they probably needed another minute before flipping.
- Let them rest: I know it’s tempting to dig right in, but giving them 2 minutes after cooking helps the crust stay extra crisp.
Follow these simple tips and you’ll get restaurant-quality crispy chicken cutlets right at home – minus the deep-fryer mess!
Ingredient Substitutions & Variations
One of my favorite things about this recipe is how easily you can switch things up! Here are some simple swaps and variations I’ve tried (and loved) over the years:
- Gluten-free? No problem! Use gluten-free breadcrumbs or crushed gluten-free crackers instead. I’ve even used crushed pork rinds for a low-carb version – shockingly delicious!
- Cheese lovers: Swap the Parmesan for Pecorino Romano or Asiago for a bolder flavor. My kids go nuts when I mix in a little shredded cheddar with the breadcrumbs.
- Spice it up: Add a pinch of cayenne or smoked paprika to the breading mix. Sometimes I’ll toss in some Italian seasoning or dried herbs for extra flavor.
- Panko alternative: If you don’t have breadcrumbs, crushed cornflakes make an amazing crispy coating (my grandma’s secret trick!).
- Egg-free option: Dip the chicken in buttermilk or plain yogurt instead of egg wash – gives it a nice tang and helps the coating stick.
The beauty of these cutlets is how forgiving they are – get creative and make them your own! Just don’t skip that final oil spray if you want maximum crispiness.
Serving Suggestions
Now for the best part – what to serve with these golden beauties! My family’s absolute favorite is a simple arugula salad with lemon vinaigrette – the peppery greens cut through the richness perfectly. But honestly, these cutlets pair with just about anything:
- Classic sides: Creamy mashed potatoes or roasted garlic broccoli always disappear fast at my table
- Fresh & light: A bright cucumber tomato salad or simple slaw keeps things fresh
- Dipping delights: Honey mustard, ranch, or my personal weakness – spicy mayo with a squeeze of lemon
- Sandwich style: Pile them on a toasted bun with pickles and hot sauce for an incredible chicken sandwich
No matter how you serve them, just make sure to dig in while they’re still crispy – that first bite is pure magic!
Storage & Reheating Instructions
Here’s the good news – these crispy chicken cutlets hold up beautifully as leftovers! Let them cool completely, then store in an airtight container in the fridge for up to 3 days. Freeze them between parchment paper in a freezer bag for up to 2 months (perfect for quick meals later).
When reheating, your air fryer is your best friend – just 3-4 minutes at 375°F brings back that perfect crunch. No air fryer? A quick pop in the oven at 400°F for about 8 minutes works too. Skip the microwave unless you like soggy breading (trust me, you don’t!).
Nutritional Information
Here’s the scoop on what you’re eating (per serving): about 250 calories, 28g protein, and just 8g fat – way better than traditional fried chicken! Remember, these numbers are estimates and might change based on your exact ingredients. But hey, when something tastes this good and is this guilt-free, who’s counting?
Frequently Asked Questions
I get asked about these crispy chicken cutlets all the time! Here are answers to the questions that pop up most often:
Can I use frozen chicken?
Absolutely! Just thaw completely first – I leave mine in the fridge overnight. Frozen-to-air-fryer doesn’t work well here because the coating won’t stick properly to icy chicken.
Why are my cutlets soggy?
Three likely culprits: overcrowding the basket (steams instead of crisps), skipping the oil spray (needed for browning), or not preheating the air fryer. Fix these and you’ll get perfect crunch every time!
Can I make these ahead?
You bet! Bread the cutlets and refrigerate them (uncovered) for up to 2 hours before cooking – the coating actually gets crispier this way. Just add a minute or two to the cooking time since they’ll be cold from the fridge.
What if I don’t have an air fryer?
No worries! Bake at 400°F on a wire rack over a baking sheet for about 15-20 minutes, flipping halfway. They won’t get quite as crispy but still taste amazing.
How do I know when they’re done?
Always check with a meat thermometer – 165°F in the thickest part means safe to eat. The coating should be deep golden brown and sound crisp when tapped.
Got more questions? Drop them in the comments – I’m happy to help troubleshoot!
Try This Recipe and Share Your Results in the Comments!
Okay, now it’s your turn! Whip up these air fryer crispy chicken cutlets and let me know how they turn out. Did your family go crazy for them like mine does? Did you try any fun variations? I love hearing about your kitchen adventures – the triumphs, the “oops” moments, and everything in between. Drop a comment below with your results, questions, or even your favorite way to serve these golden beauties. Happy air frying, friends – can’t wait to hear how yours turn out!
Print
Irresistible Air Fryer Crispy Chicken Cutlets in 30 Minutes
- Total Time: 25 minutes
- Yield: 4 servings 1x
- Diet: Low Fat
Description
Crispy chicken cutlets made in an air fryer for a healthier twist on a classic dish.
Ingredients
- 2 boneless, skinless chicken breasts
- 1 cup breadcrumbs
- 1/2 cup grated Parmesan cheese
- 1 teaspoon garlic powder
- 1 teaspoon paprika
- 1/2 teaspoon salt
- 1/2 teaspoon black pepper
- 1 egg
- 1 tablespoon water
- 1 tablespoon olive oil
Instructions
- Preheat the air fryer to 375°F (190°C).
- Slice each chicken breast in half horizontally to create thin cutlets.
- In a shallow bowl, mix breadcrumbs, Parmesan cheese, garlic powder, paprika, salt, and black pepper.
- In another bowl, whisk the egg with water.
- Dip each chicken cutlet into the egg mixture, then coat with the breadcrumb mixture.
- Place the coated cutlets in the air fryer basket in a single layer, lightly spraying with olive oil.
- Cook for 10 minutes, then flip and cook for another 5-7 minutes until golden and crispy.
- Check internal temperature reaches 165°F (74°C). Serve hot.
Notes
- For extra crispiness, spray the breaded cutlets lightly with oil before air frying.
- Adjust cooking time based on thickness of the cutlets.
- Use gluten-free breadcrumbs if needed.
- Prep Time: 10 minutes
- Cook Time: 15 minutes
- Category: Main Course
- Method: Air Frying
- Cuisine: American
Nutrition
- Serving Size: 1 cutlet
- Calories: 250
- Sugar: 1g
- Sodium: 480mg
- Fat: 8g
- Saturated Fat: 2g
- Unsaturated Fat: 5g
- Trans Fat: 0g
- Carbohydrates: 15g
- Fiber: 1g
- Protein: 28g
- Cholesterol: 120mg
Keywords: air fryer, crispy chicken, chicken cutlets, easy dinner, healthy