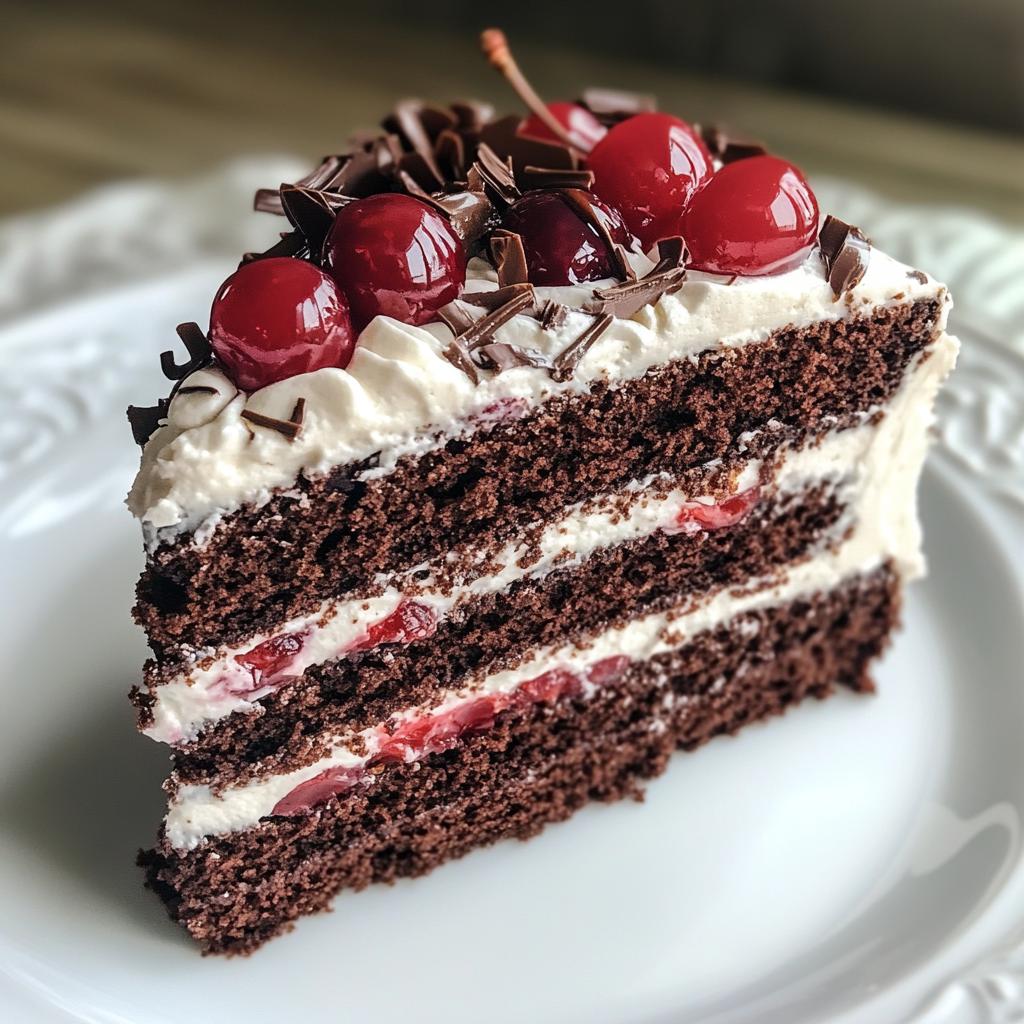
There’s something magical about slicing into a Black Forest Cake with Whipped Cream Swirls—the way the chocolate layers crumble just slightly against your fork, the tart cherries peeking through clouds of cream, that first bite where all the flavors dance together. I’ll never forget the first time I made this cake for my husband’s birthday. The look on his face when he saw those perfect whipped cream swirls? Priceless.
This isn’t just any chocolate cake—it’s a celebration cake with serious German roots. My version stays true to the classic Black Forest flavors while adding those dreamy whipped cream peaks that make it extra special. Whether it’s birthdays, anniversaries, or just “I need chocolate” days, this cake turns ordinary moments into little celebrations.
The secret? It’s all about balance—rich cocoa sponge, juicy cherries that cut through the sweetness, and that light-as-air whipped cream topping. Trust me, once you’ve made this beauty, it’ll become your go-to showstopper dessert too.
Why You’ll Love This Black Forest Cake
Let me tell you why this Black Forest Cake with Whipped Cream Swirls will steal your heart (and probably your diet resolutions). It’s not just gorgeous—it’s the kind of dessert that makes people close their eyes and sigh after the first bite.
Rich Chocolate Layers
That first layer? Pure chocolate magic. The sponge bakes up moist but sturdy enough to hold all that cream and fruit—no sad, crumbly slices here! I use extra dark cocoa powder because I want that deep, almost bitter chocolate flavor to shine through. It’s the perfect base for all the sweetness coming its way.
Tart Cherry Balance
Here’s where things get interesting. Those juicy cherries aren’t just pretty—they’re the yin to the cake’s yang. When you bite into one nestled between chocolate and cream? Wow. The tartness cuts right through the richness and keeps each bite exciting. Pro tip: save some cherry juice to brush on the cake layers—it adds moisture and an extra flavor punch.
Light Whipped Cream Swirls
Now for the crowning glory! Those billowy whipped cream swirls aren’t just decoration—they’re essential. The cream’s cool lightness balances the dense chocolate layers beautifully. I pipe mine high because, let’s be honest, more cream is always better. When you slice into those perfect peaks… well, that’s when the oohs and aahs start.
Ingredients for Black Forest Cake with Whipped Cream Swirls
Gathering the right ingredients makes all the difference between a good Black Forest Cake and an unforgettable one. Here’s everything you’ll need—measured precisely because baking is equal parts art and science!
For the Chocolate Sponge Layers:
- 2 cups all-purpose flour (spooned & leveled)
- 1 3/4 cups granulated sugar (yes, it seems like a lot—trust me)
- 3/4 cup cocoa powder (I use Dutch-processed for that deep flavor)
- 1 1/2 tsp baking powder
- 1 1/2 tsp baking soda
- 1 tsp salt (don’t skip—it balances the sweetness)
- 2 large eggs (room temperature, always!)
- 1 cup whole milk (the fat content matters)
- 1/2 cup vegetable oil (or melted coconut oil for extra richness)
- 2 tsp pure vanilla extract (the good stuff, no imitation)
- 1 cup boiling water (sounds odd, but it works magic)
For the Filling & Topping:
- 2 cups fresh cherries, pitted (frozen works too—thaw and drain first)
- 2 cups heavy whipping cream (cold, cold, cold—I even chill my measuring cup)
- 1/4 cup powdered sugar (sifted to prevent lumps)
- Optional: Cherry liqueur or syrup for brushing layers
See those notes? They’re not just decoration—they’re my hard-earned baking secrets! Now let’s turn these ingredients into something spectacular.
How to Make Black Forest Cake with Whipped Cream Swirls
Alright, let’s get to the fun part—turning those ingredients into a showstopping Black Forest Cake with Whipped Cream Swirls! Don’t let the layers intimidate you. I’ll walk you through each step, from mixing that dreamy chocolate batter to piping those perfect cream peaks. Just follow along, and you’ll have a cake worthy of any celebration.
Baking the Chocolate Sponge
First things first—preheat that oven to 350°F (175°C) and grease two 9-inch cake pans like your cake’s life depends on it (because it kinda does). Now, here’s my foolproof method for the perfect chocolate sponge:
- Whisk together all your dry ingredients—flour, sugar, cocoa powder, baking powder, baking soda, and salt—in a big bowl. Get out any cocoa lumps now, or they’ll haunt you later.
- In another bowl, beat the eggs, milk, oil, and vanilla until they’re best friends. Pour this into the dry ingredients and mix just until combined—no overmixing allowed!
- Here’s the weird part: slowly stir in that boiling water. The batter will look alarmingly thin, but this is what gives our cake that incredible moist texture. Trust the process!
- Divide the batter evenly between your prepared pans (I use a kitchen scale for precision) and bake for 30-35 minutes. The cakes are done when a toothpick comes out with moist crumbs—not wet batter.
Let the cakes cool completely in their pans before attempting to remove them. I know it’s tempting, but warm cake equals crumbly disaster. Patience, my friend!
Preparing the Whipped Cream
While those chocolate beauties cool, let’s tackle the whipped cream. This isn’t the time for shortcuts—cold is key! Here’s how I get those perfect stiff peaks every time:
- Chill your mixing bowl and beaters in the freezer for 15 minutes. Yes, really! This helps the cream whip up faster and hold its shape better.
- Pour your cold heavy cream into the chilled bowl and start beating on medium speed. After about a minute, when it starts thickening, gradually add the powdered sugar.
- Now crank up the speed to high and watch magic happen. Stop when you get stiff peaks—that means the cream stands straight up when you lift the beaters. But don’t overdo it, or you’ll end up with butter (been there, cried over that).
Keep the whipped cream chilled until assembly time. If your kitchen’s warm, you might even want to pop it back in the fridge between steps. We want those swirls to stand tall, not slump!
Assembling the Layers
Now for the grand finale—bringing all these elements together into one glorious Black Forest Cake with Whipped Cream Swirls!
- Place your first cake layer on a serving plate. If you’re feeling fancy, brush it lightly with cherry juice or a touch of liqueur for extra moisture and flavor.
- Spread about 1 cup of whipped cream over the layer, then scatter half your cherries evenly across. Gently press some cherries into the cream so they don’t roll away when sliced.
- Carefully place the second cake layer on top. This is where a cake lifter or large spatula becomes your best friend—take it slow!
- Now cover the entire cake with the remaining whipped cream. For those signature swirls, fit a piping bag with a large star tip and pipe generous rosettes around the top edge. Get creative—I sometimes do a spiral in the center too!
- Finish by artfully arranging the remaining cherries on top. A dusting of cocoa powder or chocolate shavings adds that final professional touch.
There you have it—a Black Forest Cake that looks like it came from a fancy bakery but was made with your own two hands. Now the hardest part? Waiting at least an hour before slicing so all those flavors can get to know each other!
Tips for Perfect Black Forest Cake
After making this Black Forest Cake with Whipped Cream Swirls more times than I can count (okay fine, I lost track after the 20th birthday party), I’ve picked up some game-changing tricks that’ll take your cake from good to “how did you make this?!” Here are my absolute must-know tips:
Keep Everything Cold for Stable Whipped Cream
I can’t stress this enough—cold is your whipped cream’s best friend! Chill your bowl, beaters, even the cream itself for at least 15 minutes before starting. When it’s hot out? I’ll sometimes pop my mixing bowl in the freezer for 10 minutes. The cooler everything stays, the stiffer those beautiful swirls will hold their shape.
Level Those Cake Layers Like a Pro
Here’s my secret for perfectly even layers: after cooling, I take a serrated knife and gently saw off any domed tops. Don’t toss those scraps though—they make amazing cake pops or chef’s treats! Flat layers mean no sliding, and your whipped cream will distribute evenly without any awkward gaps.
Pipe Like You Mean It
Want those picture-perfect whipped cream swirls? Use a large star tip (I swear by Wilton 1M) and hold your piping bag straight up when making rosettes. Start in the center, pipe in a tight spiral outward, then pull up sharply at the end. Practice makes perfect—I may or may not have piped swirls on parchment paper for hours before my sister’s wedding cake!
Cherry Placement Matters
Scatter those cherries evenly across each layer, but press a few gently into the cream too—this keeps them from rolling off when sliced. For the top decoration, I like to arrange cherries in concentric circles, saving the prettiest ones for the very center. A little cherry juice drizzle over the finished cake adds gorgeous color and extra flavor.
The Chill Factor
This cake actually tastes better after chilling for at least an hour—the flavors meld beautifully. But here’s my golden rule: always assemble on the serving plate because moving a fully decorated Black Forest Cake is… well, let’s just say I’ve had some tragic icing incidents!
Ingredient Substitutions & Notes
Listen, I know we don’t always have exactly what a recipe calls for—and sometimes we just want to put our own spin on things! Here are my tried-and-true substitutions for when you’re staring into your pantry thinking, “Can I use…?” The answer is usually yes—with a few caveats.
Cocoa Powder Choices
The original recipe calls for Dutch-process cocoa because it gives that deep, rich chocolate flavor we all crave. But regular unsweetened cocoa works too—just add 1/8 teaspoon of baking soda per 3 tablespoons of cocoa to balance the acidity. And if you’re feeling fancy? Black cocoa powder makes an incredibly dramatic dark cake, though you might want to mix it half-and-half with regular cocoa so it’s not too intense.
Cherry Variations
Fresh cherries are ideal, but let’s be real—they’re not always in season. Frozen pitted cherries thaw beautifully (just drain them well!). In a pinch, quality canned cherries work too—look for ones packed in water or juice, not heavy syrup. And here’s my confession: I’ve even used cherry pie filling when desperate (just drain off most of the gloop). Want an adult twist? Soak your cherries in kirsch or brandy overnight!
Dairy Swaps
Whole milk gives the best texture, but 2% works fine—just don’t use skim unless absolutely necessary. For the whipped cream, heavy whipping cream is non-negotiable—light cream or half-and-half won’t whip properly. But if you’re dairy-free? Coconut cream (the thick part from chilled full-fat coconut milk) makes a surprisingly good substitute—just add a teaspoon of cornstarch while whipping to help stabilize it.
Flour Alternatives
Need gluten-free? Swap the all-purpose flour 1:1 with your favorite GF blend—I’ve had great results with Bob’s Red Mill 1-to-1. For a nuttier flavor, you can replace up to 1/4 of the flour with almond flour—just know it’ll make the cake denser. Cake flour works beautifully too for an extra-tender crumb—use 2 1/4 cups cake flour plus 2 tablespoons cornstarch instead of the 2 cups all-purpose.
Remember—baking is part science, part art. Don’t be afraid to experiment, but maybe don’t try all these substitutions at once! Stick to changing one thing at a time until you find your perfect version of this Black Forest Cake with Whipped Cream Swirls.
Serving & Storing Black Forest Cake
Oh, the moment of truth—slicing into that gorgeous Black Forest Cake with Whipped Cream Swirls! But first, a few key tips to make sure every bite is as perfect as can be. This cake actually gets better after a little fridge time—I always try to wait at least an hour before serving (though I’ll admit, the smell makes this rule hard to follow!). The chill helps the flavors marry and firms up that whipped cream just enough for clean slices.
The Perfect Slice
Here’s my trick for picture-perfect pieces: run a sharp knife under hot water, dry it quickly, then make one smooth cut. Wipe the knife clean between slices, and you’ll get those gorgeous layers showing all their chocolate-cherry-cream glory. I usually go for modest slices—this cake is rich!—but let’s be real, seconds are almost always in order.
Keeping It Fresh
Leftovers? (As if!) If by some miracle there’s cake left, cover it loosely with plastic wrap or pop it in a cake carrier. The fridge is your friend here—it’ll keep beautifully for up to 3 days. The whipped cream might deflate a tiny bit, but the flavor just gets better as those cherry juices mingle with the chocolate. Just don’t freeze it—whipped cream and freezing don’t play nice together.
Room Temperature Rules
If you prefer your cake less chilled, take it out of the fridge about 15 minutes before serving. That little break lets the chocolate layers soften slightly while keeping the whipped cream perfectly stable. Pro tip: if your kitchen’s warm, set the cake over a bowl of ice water while you slice—those swirls will stay picture-perfect!
Now the most important storage tip? Hide a slice for yourself before your family finds the cake. Trust me on this one—I’ve learned the hard way that this Black Forest beauty disappears fast!
Black Forest Cake FAQs
I get asked about this cake ALL the time—here are the questions that pop up most often, along with my hard-earned answers from years of Black Forest Cake experiments (and a few delicious disasters!).
Can I use canned cherries instead of fresh?
Absolutely! I’ve used canned cherries more times than I can count when fresh ones aren’t available. Just make sure to drain them really well—I even pat them dry with paper towels to prevent sogginess. The juice? Don’t toss it! Brush some on your cake layers for extra moisture and flavor. If you use cherries packed in syrup, give them a quick rinse first to cut down on sweetness.
How do I prevent soggy cake layers?
Oh boy, soggy layers—every baker’s nightmare! My triple-protection method: 1) Make sure your cakes are completely cooled before assembling (warm cake = moisture trap). 2) If using cherry juice or liqueur to brush the layers, go light—just a thin layer does the trick. 3) Create a “moisture barrier” by spreading a thin layer of whipped cream first, then add cherries. This trick has saved many a cake from turning into mush!
Can I make the cake ahead of time?
Yes—with strategy! You can bake the chocolate layers up to 2 days in advance; just wrap them tightly in plastic once cooled. The whipped cream? Make it the day of—it doesn’t hold its shape for long. My favorite make-ahead trick: assemble the whole cake (minus final decorations) the night before, then add fresh whipped cream swirls and cherries right before serving. The fridge time actually makes the flavors even better!
Nutritional Information
Okay, let’s be real—this Black Forest Cake with Whipped Cream Swirls isn’t exactly a low-calorie treat, but sometimes you just need to indulge! Here’s the nutritional breakdown per slice (based on 12 servings), but keep in mind these are estimates—actual values can vary depending on the brands you use. So, take these numbers as a guide, not gospel!
- Calories: 320
- Fat: 18g
- Saturated Fat: 8g
- Carbohydrates: 38g
- Sugar: 25g
- Protein: 5g
- Sodium: 280mg
- Fiber: 3g
And hey, if you’re feeling a little guilty, just remember: those cherries count as fruit, right? Balance is key, and this cake is totally worth every delicious bite. Now, go enjoy that slice—you’ve earned it!
Share Your Black Forest Cake Masterpiece!
I absolutely LIVE for seeing your creations—there’s nothing more exciting than spotting one of my recipes come to life in someone else’s kitchen! When you make this Black Forest Cake with Whipped Cream Swirls (and trust me, once you do, you’ll be making it often), snap a photo of that gorgeous layered beauty. Those perfect whipped cream peaks? The way the cherries peek through? Yes, show me all the angles!
Tag me @[YourHandle] on Instagram or Facebook—I’ll be your personal cheerleader, celebrating every swirl and cherry placement. Bonus points if you capture that magical moment when someone takes their first bite (those happy/surprised faces are priceless). And if you put your own spin on it—maybe some chocolate shavings or an extra splash of liqueur—I want to hear all about your creative tweaks!
Your photos might just inspire someone else to bake their first Black Forest Cake. So don’t be shy—share the love and let’s keep this delicious tradition going. Who knows? Your cake might become the next family heirloom just like mine did!
Print
Irresistible Black Forest Cake with Heavenly Whipped Cream Swirls
- Total Time: 55 minutes
- Yield: 1 cake (12 servings) 1x
- Diet: Vegetarian
Description
A classic Black Forest Cake with layers of chocolate sponge, cherries, and whipped cream swirls.
Ingredients
- 2 cups all-purpose flour
- 1 3/4 cups granulated sugar
- 3/4 cup cocoa powder
- 1 1/2 tsp baking powder
- 1 1/2 tsp baking soda
- 1 tsp salt
- 2 eggs
- 1 cup milk
- 1/2 cup vegetable oil
- 2 tsp vanilla extract
- 1 cup boiling water
- 2 cups pitted cherries
- 2 cups heavy cream
- 1/4 cup powdered sugar
Instructions
- Preheat oven to 350°F (175°C). Grease and flour two 9-inch cake pans.
- Mix flour, sugar, cocoa, baking powder, baking soda, and salt in a large bowl.
- Add eggs, milk, oil, and vanilla. Beat for 2 minutes.
- Stir in boiling water. Batter will be thin.
- Pour into pans. Bake for 30-35 minutes. Cool completely.
- Whip cream and powdered sugar until stiff peaks form.
- Layer cake with cherries and whipped cream. Decorate with swirls.
Notes
- Use fresh cherries for best flavor.
- Chill the bowl and beaters before whipping cream.
- Dust with cocoa powder for extra decoration.
- Prep Time: 20 minutes
- Cook Time: 35 minutes
- Category: Dessert
- Method: Baking
- Cuisine: German
Nutrition
- Serving Size: 1 slice
- Calories: 320
- Sugar: 25g
- Sodium: 280mg
- Fat: 18g
- Saturated Fat: 8g
- Unsaturated Fat: 9g
- Trans Fat: 0g
- Carbohydrates: 38g
- Fiber: 3g
- Protein: 5g
- Cholesterol: 55mg
Keywords: Black Forest Cake, chocolate cake, whipped cream, cherries, dessert