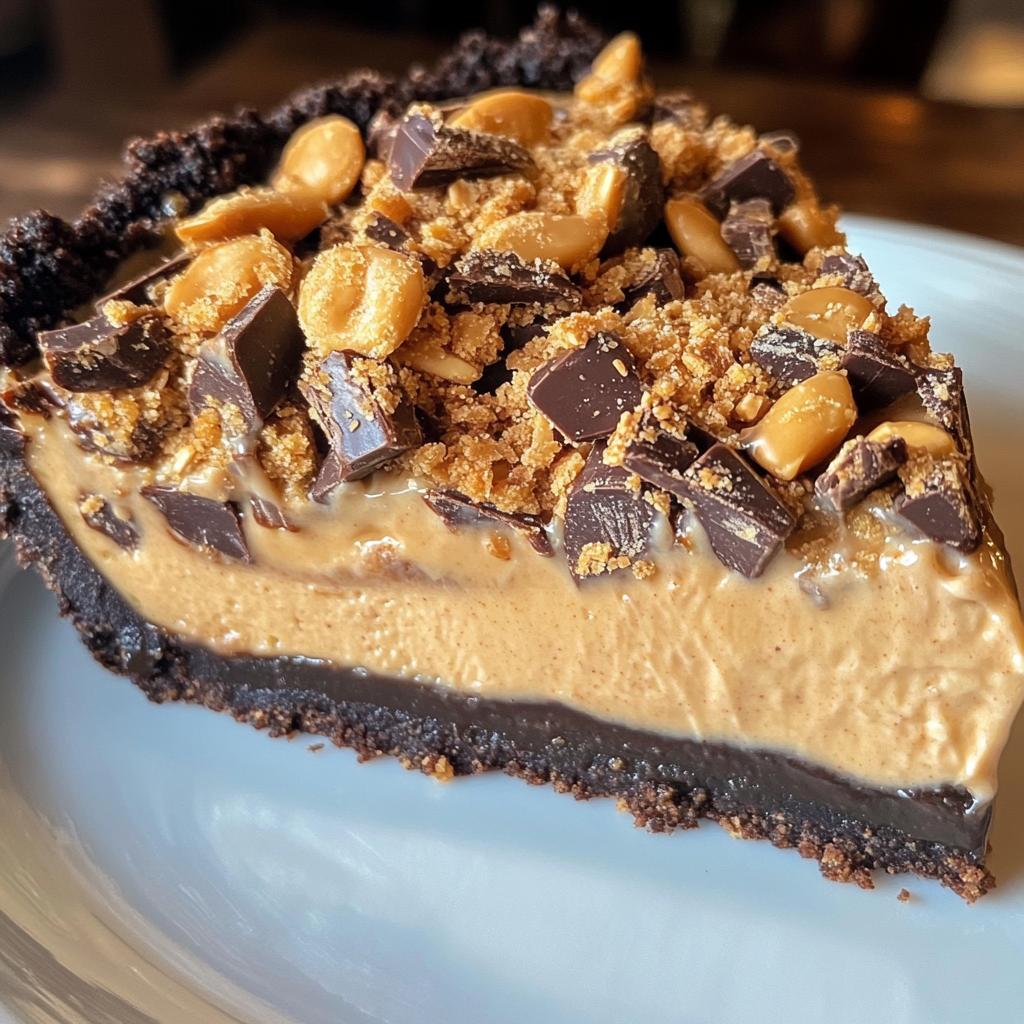
Oh my goodness, if there’s one dessert that disappears faster than I can blink, it’s this Butterfinger Pie with Peanut Butter. I swear, every time I bring it to a potluck, people start hovering around the dessert table like vultures! What makes it so special? That dreamy combo of silky peanut butter filling and those addictive Butterfinger bits that give you the perfect crunch in every bite. The best part? You don’t even need to turn on your oven—just mix, chill, and watch it vanish. After testing this recipe more times than I can count (tough job, I know), I’ve nailed down the perfect balance of sweet, salty, and downright irresistible.
Why You’ll Love This Butterfinger Pie with Peanut Butter
Honestly, this pie is a game-changer, and here’s why:
- No oven required: Seriously, just mix and chill—perfect for hot summer days when baking sounds like torture
- 15-minute prep: Faster than running to the store for dessert
- That magical texture: Creamy peanut butter meets crunchy Butterfinger in every single bite
- Crowd-pleaser: I’ve yet to meet a soul who doesn’t go back for seconds
- Make-ahead magic: Tastes even better after chilling overnight (if you can resist digging in sooner!)
Trust me, once you try this Butterfinger Pie with Peanut Butter, it’ll become your secret weapon for every gathering.
Ingredients for Butterfinger Pie with Peanut Butter
Here’s the thing – you can’t cut corners with this recipe. Every ingredient plays a specific role in creating that perfect bite. I learned this the hard way when I tried using natural peanut butter once (big mistake – way too oily!). Here’s exactly what you’ll need:
- 1 prepared chocolate cookie crust (9-inch) – store-bought is fine, but grab a good quality one
- 1 cup creamy peanut butter – Jif or Skippy work best (not the natural kind that separates!)
- 8 oz full-fat cream cheese – softened to room temperature (this is crucial for smooth mixing)
- 1 cup powdered sugar – sifted if yours is lumpy
- 1 tsp pure vanilla extract – the real stuff makes all the difference
- 8 oz whipped topping – thawed completely (I use Cool Whip, but homemade whipped cream works too)
- 4 full-size Butterfinger bars (2.1 oz each) – crushed, divided (you’ll use half in the filling, half on top)
Pro tip: Leave the cream cheese and peanut butter out for about 30 minutes before starting – cold ingredients just won’t blend as smoothly. And don’t be shy with those Butterfingers – more crunch is always better in my book!
Equipment You’ll Need
Don’t worry – you won’t need any fancy gadgets for this Butterfinger Pie with Peanut Butter! Just grab these basics from your kitchen:
- Large mixing bowl – big enough to hold all that creamy goodness
- Hand mixer or stand mixer – your arms will thank you
- Rubber spatula – for scraping every last bit of filling into the crust
- 9-inch pie dish – standard size works perfectly
That’s it! No special tools required – just simple equipment you probably already have. Now let’s get mixing!
How to Make Butterfinger Pie with Peanut Butter
Ready to make the most addictive pie ever? Let’s get started! Follow these steps, and you’ll have a Butterfinger Pie with Peanut Butter that’ll make you the hero of any dessert table.
Mixing the Filling
First, grab your hand mixer and let’s get that filling smooth and dreamy. In a large bowl, beat the peanut butter and softened cream cheese together for about 2 minutes until they’re completely combined and creamy. Scrape down the sides of the bowl with a rubber spatula to make sure everything gets mixed in. Next, add the powdered sugar and vanilla extract, and beat for another minute until it’s all incorporated. Now, here’s the secret to keeping it light and fluffy: gently fold in the whipped topping. Use your spatula to carefully mix it in, making wide, sweeping motions to keep that airy texture. Finally, stir in half of your crushed Butterfinger bars—this is where that signature crunch comes in!
Assembling the Pie
Now, let’s put it all together. Pour that luscious filling into your prepared chocolate cookie crust. Smooth the top with your spatula so it looks picture-perfect. Here’s the fun part: take the remaining crushed Butterfinger bars and sprinkle them generously over the top. Trust me, you’ll want that crunch in every bite. Once it’s assembled, pop it in the fridge to chill for at least 4 hours—though overnight is even better. The longer it sits, the more the flavors meld together into pure magic. When you’re ready to serve, slice it up and watch it disappear!
Tips for Perfect Butterfinger Pie with Peanut Butter
Alright, let me share my hard-earned secrets for Butterfinger Pie with Peanut Butter perfection – because I’ve made every mistake so you don’t have to!
- Full-fat cream cheese is non-negotiable: That light stuff makes the filling weepy – trust me, I learned the sad way
- Crush Butterfingers unevenly: Some fine crumbs mixed with bigger chunks gives you amazing texture contrasts
- Chill your mixing bowl: Pop it in the freezer for 10 minutes beforehand to help the whipped topping hold its shape
- Patience is key: Resist slicing too soon! That 4-hour chill sets the filling perfectly
One more trick? Keep extra Butterfingers hidden – people always ask “Can I lick the wrapper?”
Variations & Substitutions
Listen, I’m all about sticking to the original – but sometimes you gotta mix things up! Here are my favorite twists on Butterfinger Pie with Peanut Butter:
- Candy swap: Reese’s Pieces or crushed peanut butter cups work beautifully if you’re out of Butterfingers
- Crust upgrade: Try an Oreo crust for double chocolate goodness (just replace the chocolate cookie crumbs)
- Nutty variation: Add chopped salted peanuts to the filling for extra crunch
- Chocolate drizzle: Melt some chocolate chips and swirl it over the top before adding Butterfinger crumbs
The beauty? No matter how you tweak it, this pie always delivers that perfect creamy-crunchy combo we all crave!
Serving & Storing Butterfinger Pie with Peanut Butter
Here’s how to keep your Butterfinger Pie with Peanut Butter tasting its absolute best:
- Slice it cold: Straight from the fridge gives you those perfect, clean slices (warm pie = melty mess)
- Storage secret: Cover tightly with plastic wrap – press it right against the surface to prevent crust sogginess
- Freshness window: Enjoy within 3 days for peak texture (though let’s be real – it never lasts that long!)
- Serving hack: Microwave your knife for 5 seconds before slicing for extra-clean cuts
Pro tip: If you’re transporting it, chill it in the freezer for 30 minutes first – those Butterfinger bits won’t go anywhere!
Butterfinger Pie with Peanut Butter FAQs
I get asked the same questions about this Butterfinger Pie with Peanut Butter every time I serve it – so let me save you some trouble with my tried-and-true answers!
Can I use chunky peanut butter instead of creamy?
Oh honey, don’t do it! I tried once and the texture was all wrong – those peanut chunks compete with the Butterfinger crunch. Stick with creamy for that velvety smooth filling we all love.
Can I freeze this pie?
Absolutely! It freezes surprisingly well for up to a month. Just know the whipped topping might get slightly softer when thawed – still delicious though. Pro tip: Freeze slices individually for quick treats!
Why does my filling look grainy?
This usually means your cream cheese wasn’t soft enough. Next time, let it sit out longer (about 30 minutes) before mixing. Cold cream cheese = lumpy filling = sad baker!
Can I make this without a mixer?
You bet – just be ready for an arm workout! Use a sturdy whisk and mix vigorously. The key is getting that cream cheese completely smooth before adding other ingredients.
How do I prevent the crust from getting soggy?
Give your crust a quick “seal” by brushing it with melted chocolate before adding filling. Works like a charm every time!
Nutritional Information
Just a quick heads up – all nutritional info for this Butterfinger Pie with Peanut Butter depends on your specific ingredients. Those numbers you see online? They’re always estimates, so take ’em with a grain of salt (not literally – we’ve got enough flavor already!). If you’re watching certain nutrients, definitely check your own ingredient labels.
Rate This Recipe
Tried it? Share your thoughts below!
Print
Irresistible Butterfinger Pie with Peanut Butter Recipe
- Total Time: 4 hours 15 minutes
- Yield: 8 servings 1x
- Diet: Vegetarian
Description
A creamy peanut butter pie with crushed Butterfinger candy bars for a crunchy texture.
Ingredients
- 1 prepared chocolate cookie crust
- 1 cup creamy peanut butter
- 8 oz cream cheese, softened
- 1 cup powdered sugar
- 1 tsp vanilla extract
- 8 oz whipped topping
- 4 Butterfinger candy bars, crushed
Instructions
- Beat peanut butter, cream cheese, powdered sugar, and vanilla until smooth.
- Fold in whipped topping.
- Stir in half of the crushed Butterfinger.
- Pour mixture into crust.
- Sprinkle remaining Butterfinger on top.
- Chill for at least 4 hours before serving.
Notes
- Use full-fat cream cheese for best texture.
- Chilling overnight enhances flavor.
- Substitute with Reese’s Pieces for variation.
- Prep Time: 15 minutes
- Cook Time: 0 minutes
- Category: Dessert
- Method: No-Bake
- Cuisine: American
Nutrition
- Serving Size: 1 slice
- Calories: 480
- Sugar: 32g
- Sodium: 280mg
- Fat: 28g
- Saturated Fat: 10g
- Unsaturated Fat: 14g
- Trans Fat: 0g
- Carbohydrates: 45g
- Fiber: 2g
- Protein: 9g
- Cholesterol: 25mg
Keywords: Butterfinger pie, peanut butter dessert, no-bake pie