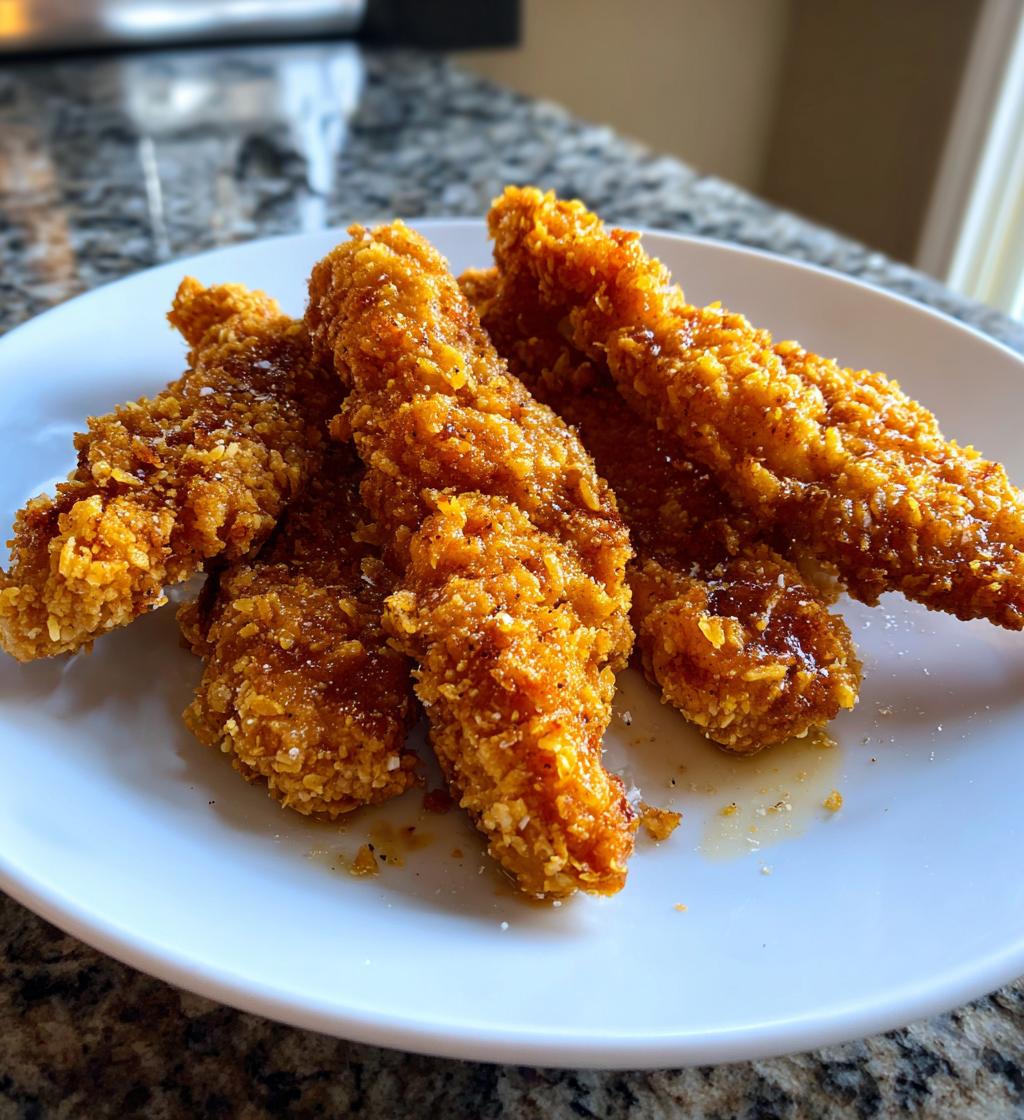
Oh, chicken tenders! They’re the ultimate comfort food, aren’t they? Whether I’m whipping them up for a quick weeknight dinner or serving them at a gathering, these homemade chicken tender recipes never fail to impress. The beauty of making your own chicken tenders is that you can control everything – from the seasoning to the cooking method – ensuring that each bite is as delicious as can be. Trust me, there’s nothing quite like the crispy, golden coating and juicy, tender chicken inside. Plus, they’re super easy to make! You can whip these up in just about 30 minutes, making them perfect for busy days when you want something scrumptious without spending hours in the kitchen. I love how versatile they are too; you can dip them in your favorite sauce or serve them alongside a fresh salad. So, if you’re ready to take your chicken tender game to the next level, let’s dive into these easy and mouthwatering chicken tender recipes together!
Ingredients List
To create these mouthwatering homemade chicken tenders, you’ll need the following ingredients:
- 1 pound chicken tenders
- 1 cup breadcrumbs (I prefer panko for extra crunch!)
- 1/2 cup all-purpose flour
- 2 large eggs
- 1 teaspoon garlic powder
- 1 teaspoon paprika
- Salt and pepper to taste
- Oil for frying (vegetable or canola works best)
These ingredients combine to create that perfect crispy exterior while keeping the chicken tender and juicy inside. Feel free to adjust the seasonings to suit your taste—maybe a dash of cayenne for some heat or a sprinkle of Italian herbs for a different twist!
How to Prepare Chicken Tender Recipes
Now that you’ve got your ingredients ready, let’s get down to the fun part – making those incredible chicken tenders! I promise, it’s super simple, and I’ll walk you through every step to ensure you achieve that golden, crispy perfection. Ready? Let’s go!
Setting Up Your Breading Station
First things first, let’s set up your breading station! This is where all the magic happens. You’ll need three shallow dishes. In the first dish, add the all-purpose flour. The second dish is for the beaten eggs – just crack those two large eggs in and whisk them until they’re smooth. In the third dish, pour in the breadcrumbs. I like to use panko for that extra crunch, but regular breadcrumbs work just fine too. Having everything ready to go makes the process so much smoother, trust me!
Seasoning the Chicken Tenders
Next, let’s add some flavor to our chicken tenders! Grab your pound of chicken tenders and sprinkle them with garlic powder, paprika, salt, and pepper. Don’t be shy with the seasoning! I usually go with about a teaspoon of garlic powder and paprika, plus a good pinch of salt and pepper. Make sure to coat them evenly so each tender packs a punch of flavor. You want that delicious taste in every bite!
Breading the Chicken Tenders
Now, it’s time to coat those seasoned tenders! Start by taking a chicken tender and dredging it in the flour, making sure it’s completely covered. Shake off any excess – we don’t want clumps! Next, dip it in the beaten eggs, letting any extra drip off, and then roll it in the breadcrumbs until it’s fully coated. I like to pat the breadcrumbs on a bit to make sure they stick well. Repeat this for all your tenders. It’s a bit messy, but that’s part of the fun!
Cooking the Chicken Tenders
Alright, let’s cook these beauties! Heat about half an inch of oil in a large skillet over medium heat. You want the oil hot enough that it sizzles when you add the chicken – usually around 350°F (175°C). Carefully place the breaded chicken tenders in the pan, making sure not to overcrowd them. Fry for about 3-4 minutes on each side, until they turn a gorgeous golden brown. Once they’re crispy, transfer them to a baking sheet and pop them in the oven at 400°F (200°C) for about 10 minutes. This helps ensure they’re fully cooked and extra tender on the inside. Trust me, you’re going to love the aroma wafting through your kitchen!
Why You’ll Love This Recipe
- Quick Preparation Time: You can have these chicken tenders ready in just 30 minutes! Perfect for busy weeknights or last-minute gatherings.
- Easy to Customize: Feel free to play around with the seasonings! Add some cayenne for heat or swap out the spices to match your mood.
- Delicious Flavor: The combination of garlic powder and paprika gives these tenders a mouthwatering taste that everyone will love.
- Perfect for Any Meal: Whether it’s a casual lunch, a cozy dinner, or a party snack, these chicken tenders fit right in!
- Kid-Friendly: Kids adore these crispy bites, making them a hit at family meals. Serve them with their favorite dipping sauce for an extra treat!
Tips for Success
To make sure your chicken tender recipes turn out perfectly every time, here are some pro tips that I swear by:
- Frying Temperature is Key: Keeping the oil at the right temperature is crucial for that perfect golden crust. Aim for around 350°F (175°C). If the oil is too hot, your tenders will burn on the outside while staying raw inside. If it’s too cool, they’ll absorb too much oil and get soggy. A little oil thermometer can be your best friend here!
- Don’t Overcrowd the Pan: Give those chicken tenders some space! Frying them in batches ensures that they get that nice, crispy coating without steaming. If you crowd the pan, they’ll end up cooking unevenly.
- Baking for Tenderness: After frying, transferring the tenders to the oven is a game-changer. Baking them at 400°F (200°C) for about 10 minutes ensures they’re cooked through and super juicy. This step also keeps them warm while you finish frying the rest!
- Seasoning Adjustments: Feel free to adjust the seasonings according to your taste! If you like things spicy, add a pinch of cayenne pepper or some chili powder to the breading mix. Want a bit of a herby twist? Try adding dried oregano or thyme. The possibilities are endless!
- Let Them Rest: After cooking, let your chicken tenders rest for a few minutes on a paper towel-lined plate. This helps absorb any excess oil and keeps them crispy. Plus, it gives you a moment to set the table or prepare your favorite dipping sauces!
With these tips, you’ll be well on your way to chicken tender perfection. Trust me, everyone will be coming back for seconds!
Variations
One of the best things about chicken tender recipes is how versatile they are! You can easily switch things up to keep your meals exciting. Here are some fun variations to try:
- Different Seasonings: Don’t be afraid to experiment with different spices! Try adding some Italian seasoning, Cajun spice blend, or even a hint of lemon zest to the breadcrumbs for a fresh twist. If you’re a fan of Asian flavors, mix in some sesame seeds and garlic powder, and serve with a soy sauce dip.
- Marinades Galore: For even juicier tenders, marinate your chicken in your favorite dressing or sauce for a couple of hours before breading. A zesty buttermilk marinade adds incredible flavor and tenderness! You could also try a spicy Sriracha marinade for an extra kick.
- Alternative Cooking Methods: While frying gives that perfect crunch, you can also bake or air-fry your chicken tenders for a healthier option. For baking, simply place your breaded tenders on a lightly greased baking sheet and bake at 400°F (200°C) for about 15-20 minutes, flipping halfway through. Air-frying is another fantastic method; just preheat your air fryer, cook the tenders at 400°F (200°C) for around 10-12 minutes, and you’ll have crispy tenders with less oil!
- Stuffed Chicken Tenders: For a fun twist, try stuffing your chicken tenders with cheese or veggies before breading! Slice a pocket into each tender, fill it with shredded mozzarella or spinach and cream cheese, and then proceed with your usual breading and cooking process. They’ll be a delicious surprise when you bite into them!
- Global Flavors: Switch up the cuisine by adding flavors from around the world. For an Indian twist, add curry powder to the breadcrumbs and serve with a mango chutney. For a Mediterranean flair, try using feta cheese and herbs like dill and oregano, paired with a tzatziki sauce!
These variations can take your chicken tender recipes from ordinary to extraordinary! Feel free to mix and match until you find your favorites. Happy cooking!
Storage & Reheating Instructions
Once you’ve whipped up a batch of these delicious chicken tenders, you might find yourself with some leftovers (though I doubt they’ll last long!). Storing them properly is key to keeping that crispy texture and juicy flavor intact.
To store your chicken tenders, let them cool completely to room temperature first. This step is important because placing hot food directly into the fridge can create moisture, making them soggy. Once they’re cool, transfer the tenders to an airtight container. I love using glass containers for this since they keep everything fresher, but any airtight option will do. Just make sure to layer them carefully, separating each layer with parchment paper to prevent them from sticking together.
Stored this way, your chicken tenders will last for about 3-4 days in the fridge. If you want to keep them longer, consider freezing them! Just place the cooled tenders in a freezer-safe bag or container, and they should stay good for up to 3 months.
When it’s time to enjoy those leftovers, reheating them properly is essential to maintain that crispy goodness. If you have the time, I recommend using the oven. Preheat your oven to 375°F (190°C) and place the chicken tenders on a baking sheet lined with parchment paper. Bake for about 10-15 minutes or until they’re heated through and the coating is crispy again. This method helps restore that delightful crunch!
If you’re in a hurry, you can use the microwave, but be aware that this method might make them a bit softer. Place the tenders on a microwave-safe plate and cover them with a damp paper towel (this prevents them from drying out). Heat them in 30-second intervals until warmed through, but keep an eye on them to avoid overcooking.
With these storage and reheating instructions, you can enjoy your chicken tenders even days later without sacrificing flavor or texture. Happy snacking!
Nutritional Information Section
Now, let’s take a moment to appreciate the goodness packed into these chicken tenders! Here’s the estimated nutritional information per serving, which is about four tenders:
- Calories: 350
- Fat: 15g
- Saturated Fat: 3g
- Unsaturated Fat: 10g
- Trans Fat: 0g
- Cholesterol: 85mg
- Sodium: 600mg
- Carbohydrates: 30g
- Fiber: 2g
- Sugar: 1g
- Protein: 25g
Keep in mind that these values are estimates and can vary based on the specific ingredients you use and cooking methods. But overall, you can feel good about serving up these tasty chicken tenders as a satisfying meal option!
Frequently Asked Questions
Got questions about chicken tender recipes? Don’t worry, I’ve got you covered! Here are some common queries that pop up when making these delicious homemade chicken tenders:
- Q: Can I use frozen chicken tenders for this recipe?
Absolutely! Just make sure to thaw them completely before you start. You can do this by leaving them in the fridge overnight or using the defrost setting on your microwave. Keep in mind that thawed chicken tenders may need a bit more time to cook, so keep an eye on them while frying and baking! - Q: What’s the best way to keep my chicken tenders crispy after cooking?
The best way to maintain that crispy coating is to avoid stacking them right after frying. Place them on a wire rack set over a baking sheet instead of directly on paper towels. This allows air to circulate around them, keeping them crispy. If you need to store them, follow the storage instructions I shared earlier! - Q: Can I make chicken tenders without breading?
Sure thing! If you’re looking for a lighter option, you can simply season the chicken tenders and grill or bake them without breading. They’ll still be delicious and juicy! Just make sure to keep an eye on the cooking time since they won’t have that crispy coating. - Q: What are some good dipping sauces to serve with chicken tenders?
The world is your oyster when it comes to dipping sauces! I love classic options like honey mustard, ranch, or barbecue sauce. If you’re feeling adventurous, try a spicy Sriracha mayo or a creamy garlic dip. Trust me, the right sauce can elevate your chicken tender experience to a whole new level! - Q: How can I make these chicken tenders gluten-free?
No problem at all! To make gluten-free chicken tenders, simply swap out the all-purpose flour for a gluten-free flour blend and use gluten-free breadcrumbs. Many brands offer excellent gluten-free options that will give you that crunch you love without the gluten!
If you have any more questions or need further tips, feel free to reach out! I’m always here to help you whip up the best chicken tenders possible!
Print
chicken tender recipes that will wow your taste buds
- Total Time: 30 minutes
- Yield: 4 servings 1x
- Diet: Low Calorie
Description
Easy and delicious chicken tender recipes for any meal.
Ingredients
- 1 pound chicken tenders
- 1 cup breadcrumbs
- 1/2 cup flour
- 2 eggs
- 1 teaspoon garlic powder
- 1 teaspoon paprika
- Salt and pepper to taste
- Oil for frying
Instructions
- Preheat your oven to 400°F (200°C).
- Set up a breading station with flour, beaten eggs, and breadcrumbs.
- Season the chicken tenders with garlic powder, paprika, salt, and pepper.
- Dredge each tender in flour, dip in eggs, and coat with breadcrumbs.
- Heat oil in a pan over medium heat.
- Fry the chicken tenders until golden brown on both sides.
- Transfer to a baking sheet and bake for 10 minutes to ensure they are cooked through.
Notes
- Serve with your favorite dipping sauce.
- Can be baked instead of fried for a healthier option.
- Store leftovers in an airtight container in the fridge.
- Prep Time: 15 minutes
- Cook Time: 15 minutes
- Category: Main Course
- Method: Frying and Baking
- Cuisine: American
Nutrition
- Serving Size: 1 serving
- Calories: 350
- Sugar: 1g
- Sodium: 600mg
- Fat: 15g
- Saturated Fat: 3g
- Unsaturated Fat: 10g
- Trans Fat: 0g
- Carbohydrates: 30g
- Fiber: 2g
- Protein: 25g
- Cholesterol: 85mg
Keywords: chicken tender recipes, easy chicken tenders, homemade chicken tenders