Welcome to my kitchen, where I’m about to share with you my absolute favorite chili sauce recipe! This sauce is so simple yet bursting with flavor, and it enhances just about any dish you can dream up. Whether you’re spicing up tacos, drizzling it over grilled veggies, or just adding a kick to your favorite sandwich, this homemade chili sauce brings fresh zest to the table like nothing else.
One of the best parts about making your own chili sauce is the ability to customize it to your taste. Want it sweeter? Just add more sugar. Prefer a little extra heat? Toss in more chilies! The possibilities are endless, and you get to control every ingredient that goes into it. Plus, there’s just something so satisfying about creating your own sauces from scratch. You can feel the love and care in each batch, knowing exactly what’s inside. Trust me, once you try this chili sauce recipe, you won’t want to go back to store-bought!
Ingredients List
Here’s what you’ll need to whip up this delightful chili sauce. I promise, it’s all pretty straightforward, and you might even have most of these ingredients hanging around your kitchen already!
- 2 cups fresh red chilies, chopped: Choose vibrant, ripe chilies for the best flavor. You can use a mix of mild and hot varieties depending on your heat preference!
- 1/2 cup garlic, minced: Fresh garlic packs a punch! Make sure to chop it finely so it can infuse the sauce with that irresistible aroma.
- 1/2 cup vinegar: I recommend using white or apple cider vinegar for a bright, tangy kick that balances the sweetness of the sugar.
- 1/4 cup sugar: This sweetener helps mellow out the heat from the chilies. Feel free to adjust this based on how spicy you like your sauce!
- 1 teaspoon salt: A necessary ingredient to enhance all the other flavors. Don’t skimp on this one!
- 1 tablespoon oil: Any neutral oil will work, but I prefer using vegetable oil for its high smoke point, which is perfect for sautéing.
Gather these ingredients, and let’s get cooking! The fresh scents and vibrant colors are just the beginning of what’s to come!
How to Prepare Chili Sauce
Now that we’ve got our ingredients ready, let’s dive into the fun part: making this delicious chili sauce! I promise, it’s a straightforward process, and you’ll be amazed at how quickly it comes together. Just follow these steps, and soon you’ll be enjoying a batch of homemade goodness!
Step 1: Heat the Oil
First things first, let’s get that oil heating! Grab a medium-sized pan and pour in your tablespoon of oil. You want to warm it over medium heat—this is key to avoiding any burnt flavors. Once the oil shimmers a bit, you’ll know it’s ready for the next step. Trust me, this is the perfect temperature to start building flavor!
Step 2: Sauté the Garlic
Now, it’s time to add that fragrant minced garlic! Toss it into the hot oil and sauté it for about 30 seconds. Keep stirring! You want it to be golden and aromatic but not burnt—burnt garlic can turn bitter, and we definitely don’t want that. Just a little patience here, and you’ll be rewarded with that irresistible garlic smell wafting through your kitchen!
Step 3: Add the Chilies
Next up, add in those vibrant chopped chilies. Stir them in and let them cook for about 5 minutes. You’ll notice them softening and becoming beautifully fragrant. This is where the magic starts happening! Keep an eye on them; they should turn a bit glossy but not brown. You want them to release their flavors without overcooking.
Step 4: Combine Other Ingredients
Once your chilies are just right, it’s time to stir in the vinegar, sugar, and salt. As you add these ingredients, make sure to give everything a good stir to combine. The vinegar will add a lovely tang, while the sugar balances out the heat. This mixture should start to bubble a little as it heats up—just what we want!
Step 5: Simmer the Mixture
Now, lower the heat and let the sauce simmer for about 10 minutes. This is when it thickens and the flavors meld beautifully together. Keep stirring occasionally to prevent anything from sticking to the bottom of the pan. You’ll know it’s done when it coats the back of a spoon, and the sauce has a nice, rich consistency that feels just right!
Step 6: Cool and Store
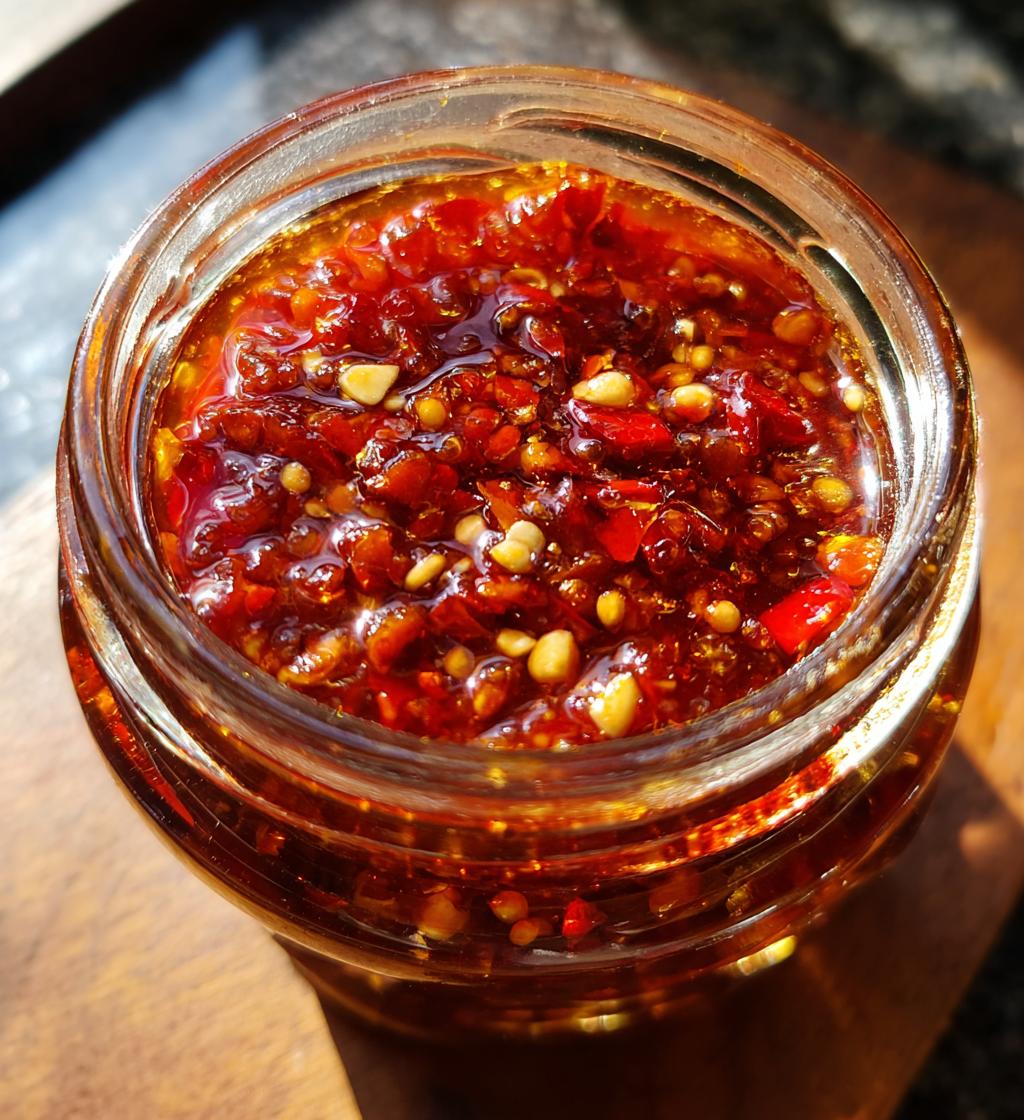
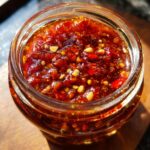
After simmering, remove the pan from heat and let the sauce cool down before transferring it to a jar. Make sure it’s completely cool before sealing it up; this helps preserve the freshness. Store your chili sauce in the refrigerator, and it should last for about a month (if it lasts that long!). Enjoy it on everything from tacos to grilled meats—you’re going to love it!
Nutritional Information
Curious about the nutritional benefits of my homemade chili sauce? Here’s a breakdown of the estimated values per serving (1 tablespoon). Keep in mind that these are approximations and can vary based on the specific ingredients you use.
- Calories: 30
- Fat: 2g
- Saturated Fat: 0g
- Unsaturated Fat: 2g
- Trans Fat: 0g
- Carbohydrates: 5g
- Sugar: 3g
- Fiber: 1g
- Protein: 1g
- Sodium: 100mg
- Cholesterol: 0mg
This chili sauce is not only delicious but also a great way to add flavor without loading up on calories. Enjoy it guilt-free, and feel good about enhancing your meals with this vibrant sauce!
Why You’ll Love This Chili Sauce Recipe
This homemade chili sauce recipe is a game-changer in the kitchen, and here’s why you’ll adore it just as much as I do:
- Simple Ingredients: With just a handful of fresh, easy-to-find ingredients, you can create something truly special. No complicated components here!
- Customizable Flavor: You control the heat and sweetness! Adjust the sugar and chilies to match your personal taste, making it perfect for everyone in the family.
- Freshness Guaranteed: There’s nothing like the bright flavors of homemade sauce. You’ll taste the difference, and your dishes will shine!
- Versatile Use: It’s perfect for a variety of dishes—tacos, burgers, grilled veggies, or even as a dipping sauce. The possibilities are endless!
- Quick Prep Time: In just 25 minutes, you can whip up a jar of this delicious sauce. Perfect for busy weeknights or last-minute gatherings!
- Healthier Option: This sauce is vegan, low in calories, and free from preservatives, making it a guilt-free addition to your meals.
Trust me, once you make this chili sauce, you’ll find yourself reaching for it time and again. It’s the perfect way to add a pop of flavor to just about anything!
Tips for Success
Ready to make your chili sauce shine? Here are some pro tips that I’ve picked up along the way to ensure your sauce turns out absolutely perfect every time. Trust me, these little nuggets of wisdom can make all the difference!
Choose Your Chilies Wisely
Not all chilies are created equal! If you prefer a milder sauce, consider using bell peppers alongside your red chilies. For a fiery kick, look for varieties like serrano or jalapeño. I love experimenting with different combinations to find my perfect balance of heat and flavor!
Mind the Garlic
Garlic can go from fragrant to burnt in a heartbeat, so keep a close eye on it! If you see it starting to brown too quickly, lower the heat immediately. Remember, you want it golden, not blackened. The aroma of sautéing garlic is half the fun, so let that delicious smell guide you!
Adjust the Sugar
Don’t be afraid to taste as you go! If you find the sauce a bit too tangy for your liking, add a touch more sugar to balance it out. The sweetness can really enhance the overall flavor, so feel free to adjust until it’s just right for you!
Simmering is Key
When it comes to thickening your sauce, patience is everything. Let it simmer gently without rushing the process. If you notice it thickening too much, you can always add a splash of water to loosen it up. Just be sure to stir frequently to keep it from sticking!
Let It Rest
After cooking, allow your chili sauce to cool completely before storing it. This step is crucial for locking in flavors and ensuring it stays fresh. Plus, resting allows the flavors to meld together beautifully—trust me, it’s worth the wait!
Storage Tips
Store your sauce in an airtight container in the fridge to keep it fresh for up to a month. I like to use glass jars for easy visibility, and don’t forget to label them with the date so you’ll know exactly how long it’s been hanging out in there!
By following these tips, you’re setting yourself up for success in making the best chili sauce ever. Get ready to impress family and friends with your homemade creation! Enjoy the journey, and happy cooking!
Storage & Reheating Instructions
Once you’ve whipped up your delicious chili sauce, you’ll want to make sure it stays fresh and flavorful. Proper storage is key, and I’ve got some easy tips to help you keep your sauce at its best!
First off, let your chili sauce cool completely after cooking. This step is super important because sealing warm sauce in a jar can create moisture, which might lead to spoilage. Once it’s cool, transfer your sauce into a clean, airtight container. I love using glass jars for this, as they not only look great in the fridge but also help me keep track of how much I have left!
When it comes to storage, your homemade chili sauce will last for up to a month in the refrigerator. Just be sure to label the jar with the date, so you know when it was made. If you notice any off smells or changes in color, it’s best to toss it out. But trust me, with how good this sauce is, it might just disappear before you even get the chance!
As for reheating, you can simply scoop out the amount you need and warm it in a small saucepan over low heat. This gentle reheating helps maintain the flavors without cooking it further. Keep stirring occasionally until it’s nice and warm. If you find it’s thickened a bit too much in the fridge, don’t hesitate to add a splash of water to loosen it up. Just remember to taste and adjust the seasoning as needed!
And there you have it! With these storage and reheating tips, you can enjoy your homemade chili sauce for weeks to come, bringing that delightful kick to all your meals. Happy saucing!
FAQ Section
Q1: Can I use different types of chilies for this chili sauce recipe?
Absolutely! Experimenting with different chilies can lead to exciting flavor profiles. If you like it milder, try using sweet bell peppers alongside the red chilies. For a spicier kick, serrano or jalapeño chilies work wonderfully. Just remember, the heat level varies with each type, so adjust according to your taste!
Q2: How long can I store this chili sauce in the fridge?
Once made, this homemade chili sauce can last up to a month in the refrigerator when stored in an airtight container. I recommend labeling your jar with the date it was made, so you’ll know when it’s time to whip up another batch!
Q3: Can I make this chili sauce recipe without sugar?
Yes, you can! If you’d like to skip the sugar, consider using a natural sweetener like honey or agave syrup if you’re not strictly vegan. You can also decrease the amount of vinegar to balance the flavors. Just remember, a little sweetness helps to mellow the heat from the chilies, so adjust carefully!
Q4: What’s the best way to serve this chili sauce?
This chili sauce is incredibly versatile! You can drizzle it over tacos, grilled meats, or roasted vegetables for an extra burst of flavor. It also makes a fantastic dip for appetizers or a zesty topping for sandwiches. The options are endless, so get creative and enjoy!
Q5: Can I freeze this chili sauce for later use?
Yes, you can freeze your chili sauce! Just pour it into an airtight container or freezer-safe bag, leaving some space for expansion. When you’re ready to use it, thaw it in the fridge overnight or warm it gently in a saucepan. Just be sure to give it a good stir before using, as it may separate a bit during freezing!
chili sauce recipe that transforms your meals in 25 minutes
- Total Time: 25 minutes
- Yield: 1 jar 1x
- Diet: Vegan
Description
A simple and flavorful chili sauce recipe that enhances any dish.
Ingredients
- 2 cups fresh red chilies, chopped
- 1/2 cup garlic, minced
- 1/2 cup vinegar
- 1/4 cup sugar
- 1 teaspoon salt
- 1 tablespoon oil
Instructions
- Heat oil in a pan over medium heat.
- Add garlic and sauté until fragrant.
- Add the chopped chilies and cook for 5 minutes.
- Stir in vinegar, sugar, and salt.
- Simmer for 10 minutes until thickened.
- Let cool and store in a jar.
Notes
- Adjust sugar based on your taste.
- Use gloves when handling chilies.
- Store in the refrigerator for up to a month.
- Prep Time: 10 minutes
- Cook Time: 15 minutes
- Category: Sauce
- Method: Stovetop
- Cuisine: Mexican
Nutrition
- Serving Size: 1 tablespoon
- Calories: 30
- Sugar: 3g
- Sodium: 100mg
- Fat: 2g
- Saturated Fat: 0g
- Unsaturated Fat: 2g
- Trans Fat: 0g
- Carbohydrates: 5g
- Fiber: 1g
- Protein: 1g
- Cholesterol: 0mg
Keywords: chili sauce recipe