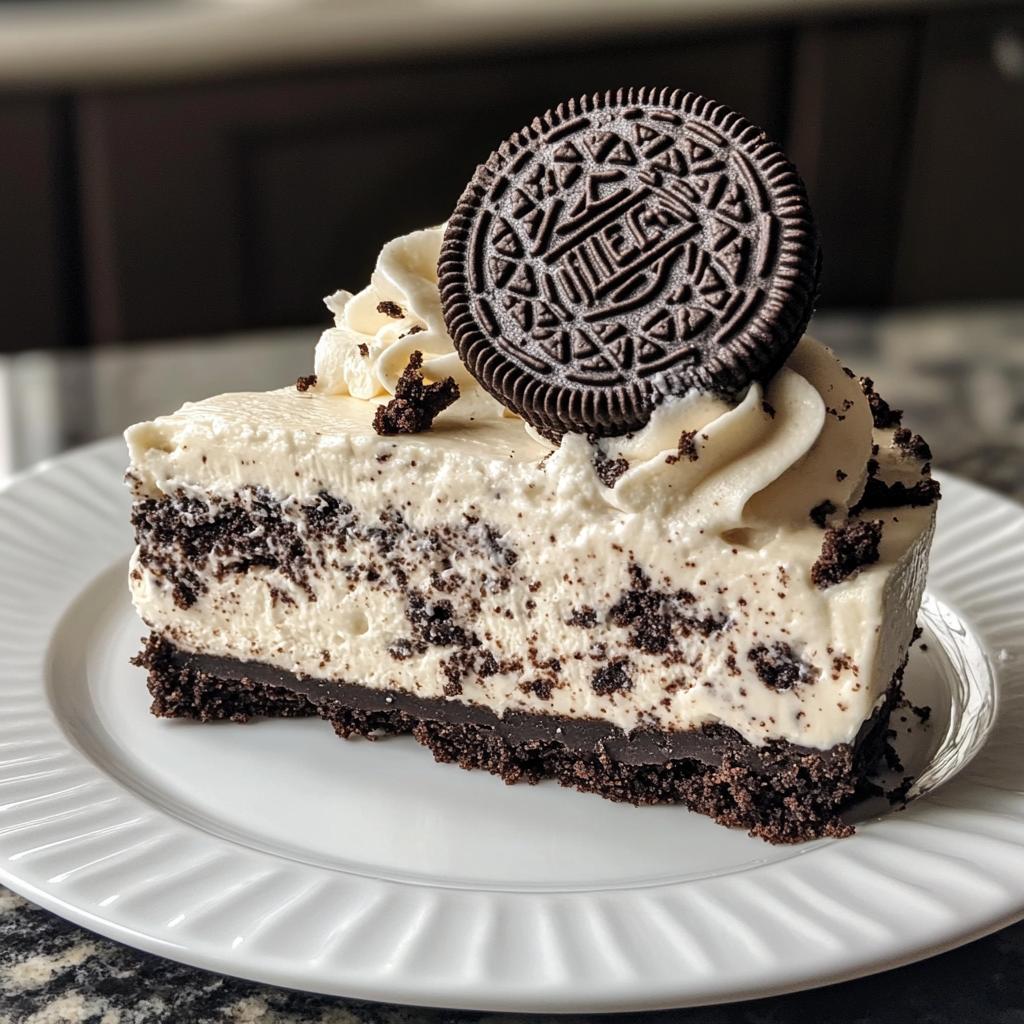
Confession time: I could eat Oreos straight from the package every single day, but when I discovered this no-bake Oreo cheesecake? Game changer. It’s the kind of dessert that makes you look like a baking pro without even turning on the oven. The best part? It comes together with just a few simple ingredients and minimal effort. I first made this for my nephew’s birthday when I was short on time, and now it’s our family’s most requested treat. That rich, creamy filling sandwiched between that chocolatey Oreo crust? Absolute perfection. Trust me, once you try this no-bake wonder, you’ll be making it on repeat!
Ingredients for Creamy No-Bake Oreo Cheesecake
Gather these simple ingredients – you probably have most in your kitchen right now! The magic happens when these humble items come together to create something spectacular.
- 20 Oreo cookies (for the crust, crushed into fine crumbs – I just toss them in a bag and roll with a rolling pin)
- 3 tbsp butter (melted – unsalted works best, but hey, use what you’ve got)
- 16 oz cream cheese (full-fat, softened – I leave mine out for 30 minutes before starting)
- 1/2 cup granulated sugar (regular white sugar works perfectly)
- 1 tsp vanilla extract (the good stuff if you have it!)
- 1 cup heavy whipping cream (chilled – this is what makes it dreamy and light)
- 12 Oreo cookies (for the filling, roughly crushed into chunks – these give that wonderful texture)
- 6 Oreo cookies (for topping – I like to leave some whole and crush others for garnish)
Pro tip from my many trials: measure everything before you start. It makes the process so much smoother when you’re not hunting for ingredients mid-recipe!
How to Make Creamy No-Bake Oreo Cheesecake
Alright, let’s get to the fun part! This recipe comes together so easily, you’ll be amazed. Just follow these simple steps, and you’ll have a showstopper dessert that’ll have everyone begging for the recipe.
Prepare the Oreo Crust
First things first – that irresistible chocolatey base. Mix your crushed Oreos with melted butter until it looks like wet sand (you’ll know it’s right when it holds together when pressed). Now, here’s my trick: press it firmly into your springform pan using the bottom of a glass or measuring cup. Get it nice and even, then pop it in the fridge for about 10 minutes to set. This step is crucial – it keeps your crust from crumbling later!
Make the Cheesecake Filling
Time for the creamy magic! Beat your softened cream cheese with sugar and vanilla until it’s completely smooth – no lumps allowed. In another bowl, whip that heavy cream until it forms stiff peaks (when you lift the beaters, the peaks should stand straight up). Now the key part: gently fold the whipped cream into the cream cheese mixture. I use a rubber spatula and make figure-eight motions to keep it light and fluffy. Last step? Fold in those crushed Oreo pieces for that perfect cookie crunch in every bite.
Assemble and Chill
Spoon your dreamy filling over the chilled crust and smooth the top with your spatula. Get creative with the topping – I like arranging some whole Oreos and sprinkling crushed ones over the top. Now comes the hard part: patience! Let it chill in the fridge for at least 4 hours, but overnight is even better. Trust me, the waiting is worth it – this gives the flavors time to develop and the texture becomes perfectly sliceable.
Tips for the Perfect Creamy No-Bake Oreo Cheesecake
After making this cheesecake more times than I can count, I’ve learned a few tricks that make all the difference. First, always use full-fat cream cheese – the reduced-fat versions just don’t give you that luscious texture we’re after. Second, don’t rush the chilling time – overnight is ideal for that perfect sliceable consistency. Third, fold gently when combining ingredients to keep that airy lightness in your filling. And my secret weapon? Freeze your mixing bowl before whipping the cream – it helps achieve those perfect stiff peaks every time!
Ingredient Substitutions and Variations
Got dietary restrictions or just want to mix things up? No problem! For a vegan version, swap in plant-based cream cheese and coconut whipped cream – it works surprisingly well. Out of heavy cream? Cool Whip makes a decent shortcut (though I prefer the real thing). Want extra decadence? Toss in some mini chocolate chips or drizzle melted chocolate between layers. The possibilities are endless with this versatile recipe!
Serving and Storing Creamy No-Bake Oreo Cheesecake
When it’s finally time to serve your masterpiece, run a warm knife around the edges first for clean slices. I like cutting small wedges – this cheesecake is rich! For extra flair, top with whipped cream or chocolate sauce right before serving. Leftovers? Just cover tightly with plastic wrap and refrigerate for up to 3 days (if it lasts that long!). The texture actually improves overnight as the flavors meld together beautifully.
Creamy No-Bake Oreo Cheesecake FAQs
Can I freeze this cheesecake?
Absolutely! Wrap it tightly in plastic wrap, then aluminum foil, and freeze for up to 1 month. Thaw overnight in the fridge before serving – it comes out perfect every time. I always make two and freeze one for emergencies (or sudden Oreo cravings).
Can I use reduced-fat cream cheese?
I wouldn’t recommend it, friend. That full-fat cream cheese gives our cheesecake its dreamy texture. The low-fat versions tend to make the filling grainy and less stable. If you’re watching calories, just enjoy a smaller slice of the good stuff – it’s worth it!
How do I prevent cracks?
The secret? Patience, my dear! Don’t skimp on the chilling time – at least 4 hours, but overnight is golden. Also, make sure not to overmix the filling after adding the whipped cream. Those gentle folds we talked about? They’re your best defense against cracks.
Nutritional Information
Just a quick note – these numbers are estimates since brands vary (and let’s be honest, who measures Oreo crumbs exactly?). Per slice you’re looking at about 450 calories, 32g fat (18g saturated), 38g carbs, and 5g protein. Worth every delicious bite if you ask me!
Now that you’ve got all my best tips and tricks, it’s your turn to create this irresistible Oreo masterpiece! I can’t wait to hear how your no-bake cheesecake turns out. Did you add any fun twists? Maybe some caramel drizzle or peanut butter swirls? Drop me a comment below with your creations – I love seeing how you make the recipe your own. Happy baking (or should I say, happy no-baking)!
Print
Irresistible 20-Oreo No-Bake Cheesecake Recipe
- Total Time: 4 hours 20 minutes
- Yield: 8 servings 1x
- Diet: Vegetarian
Description
A simple no-bake Oreo cheesecake with a creamy texture and rich chocolate flavor.
Ingredients
- 20 Oreo cookies (crushed)
- 3 tbsp butter (melted)
- 16 oz cream cheese (softened)
- 1/2 cup granulated sugar
- 1 tsp vanilla extract
- 1 cup heavy whipping cream
- 12 Oreo cookies (crushed, for filling)
- 6 Oreo cookies (for topping)
Instructions
- Mix crushed Oreos with melted butter and press into a springform pan to form the crust. Chill for 10 minutes.
- Beat cream cheese, sugar, and vanilla until smooth.
- Whip heavy cream until stiff peaks form, then fold into the cream cheese mixture.
- Add crushed Oreos for the filling and mix gently.
- Spread the filling over the crust and smooth the top.
- Garnish with additional Oreo cookies.
- Chill for at least 4 hours or overnight before serving.
Notes
- Use full-fat cream cheese for best texture.
- For a firmer cheesecake, chill longer.
- Add extra Oreos for more crunch.
- Prep Time: 20 minutes
- Cook Time: 0 minutes
- Category: Dessert
- Method: No-Bake
- Cuisine: American
Nutrition
- Serving Size: 1 slice
- Calories: 450
- Sugar: 30g
- Sodium: 350mg
- Fat: 32g
- Saturated Fat: 18g
- Unsaturated Fat: 10g
- Trans Fat: 0.5g
- Carbohydrates: 38g
- Fiber: 1g
- Protein: 5g
- Cholesterol: 85mg
Keywords: Oreo cheesecake, no-bake dessert, easy cheesecake