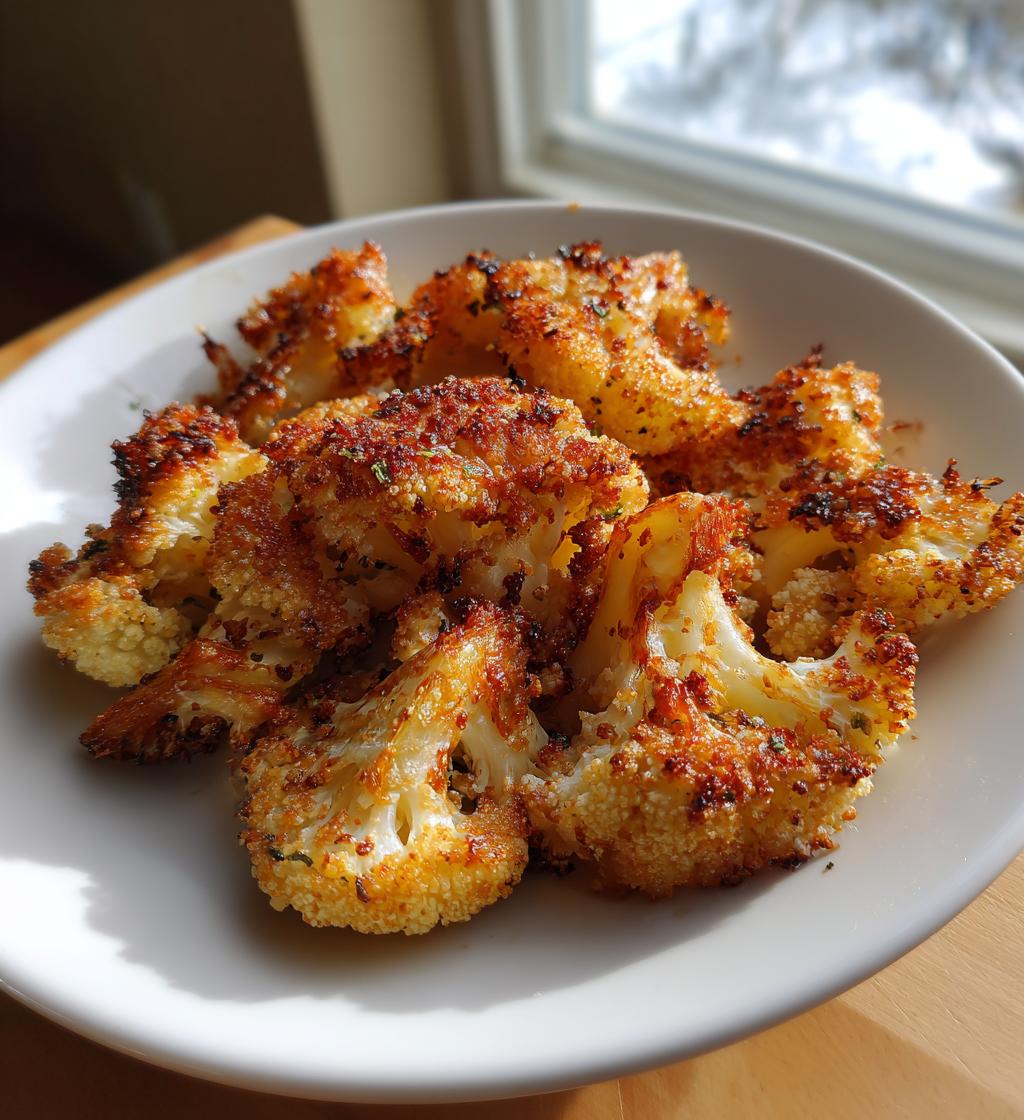
Oh my gosh, you have to try these Crispy Air Fryer Cauliflower Chunks – they’re my new obsession! I stumbled onto this method when I desperately needed a healthy snack that actually satisfies my crunchy cravings. You know those days when you’re eyeballing the potato chips but know you should eat your veggies? That was me last Tuesday. Then I remembered my trusty air fryer and some sad-looking cauliflower in the fridge. Fifteen minutes later? Magic happened. Golden, crispy perfection with just a tablespoon of oil and some basic spices. Now I make these at least twice a week – they disappear faster than I can say “seconds please!”
Why You’ll Love These Crispy Air Fryer Cauliflower Chunks
Listen, I’m not exaggerating when I say these little golden nuggets will change your veggie game forever. Here’s why:
- They’re crazy quick – ready in under 20 minutes from fridge to plate (perfect for my impatient snack attacks)
- You get that addictive crunch with just a tablespoon of oil (my waistline thanks me)
- The seasoning options are endless – I’ve done everything from garlic-parmesan to spicy buffalo (my kids beg for the ranch version)
- They actually stay crispy – no sad, soggy cauliflower here
- They disappear faster than cookies at my house (and that’s saying something!)
Ingredients for Crispy Air Fryer Cauliflower Chunks
Okay, let’s get down to business – these are the simple ingredients that’ll transform your cauliflower from boring to “can’t stop eating” status. I’ve made this so many times I can practically recite the list in my sleep, but here’s exactly what you’ll need:
- 1 medium head cauliflower – about 4 cups when cut into bite-sized chunks (go for fresh, firm heads with tight florets)
- 1 tbsp olive oil – just enough to coat without making them greasy (you can sub avocado oil if you prefer)
- 1/2 tsp garlic powder – my secret weapon for that “what is that amazing flavor?” factor
- 1/2 tsp paprika – adds beautiful color and a subtle smokiness (smoked paprika is fantastic if you have it)
- 1/4 tsp salt – I use kosher salt because it coats better than table salt
- 1/4 tsp black pepper – freshly ground if possible, because it makes all the difference
That’s it! Six simple ingredients you probably already have. Now, here’s my confession – I sometimes get wild and throw in a pinch of cayenne when I want some heat, or a sprinkle of nutritional yeast for a cheesy vibe. But honestly? This basic version is absolute perfection and my go-to. The cauliflower really shines through without being overwhelmed.
How to Make Crispy Air Fryer Cauliflower Chunks
Alright, let’s turn that head of cauliflower into crispy perfection! I’ve made this so many times I could do it blindfolded (though I don’t recommend that – knives are involved). Here’s the foolproof method that gives me perfect results every single time:
- Preheat your air fryer to 375°F – This is crucial! Starting with a hot air fryer means immediate crisping action. I learned this the hard way with some sad, steamed cauliflower my first try.
- Toss those cauliflower chunks with olive oil and all your seasonings in a big bowl. Get in there with your hands – it’s the best way to make sure every nook and cranny gets coated evenly.
- Spread them in a single layer in the air fryer basket. No piling! I’m serious – if they’re crowded, they’ll steam instead of crisp. I usually do two batches if needed (worth the extra few minutes, promise).
- Cook for 12-15 minutes, shaking the basket halfway through. This is when the magic happens – that golden brown transformation that makes my mouth water every time.
- Serve immediately! These babies are at their absolute crispiest right out of the air fryer. Though I won’t judge if you eat them straight from the basket like I sometimes do.
Prepping the Cauliflower
Here’s my golden rule for perfect prep: uniform pieces = even cooking. I cut the head into quarters first, then slice off the core. For the florets, I aim for bite-sized pieces – about 1 to 1½ inches. Too big and the centers stay soft while the edges burn; too small and they can dry out.
Oh! And here’s my secret extra step: pat them dry with a clean kitchen towel after washing. Moisture is the enemy of crispiness, and those little water droplets will steam your cauliflower instead of letting it get that perfect golden crunch we’re after.
Seasoning Tips
The basic seasoning mix is fantastic, but sometimes I like to mix it up! Here are my favorite variations:
- Cheesy Goodness: Add 2 tbsp grated Parmesan with the seasonings (the kind in the green can works surprisingly well here!)
- Spicy Kick: A pinch of cayenne or ½ tsp chili powder takes these to game-day snack territory
- Everything Bagel Vibes: Skip the paprika and use 1 tsp everything bagel seasoning instead
Pro tip: When mixing your seasonings, do it in a big bowl with plenty of room to toss. I drizzle the oil first, then sprinkle the seasonings over top before mixing – this helps everything distribute evenly without clumping. If it looks like there’s not enough oil, resist the urge to add more! Too much oil can make them greasy instead of crispy. Trust the process!
Tips for Perfect Crispy Air Fryer Cauliflower Chunks
After burning more batches than I’d like to admit (we don’t talk about The Great Charcoal Incident of 2021), I’ve learned some foolproof tricks to get these cauliflower chunks crispy every single time. These are my hard-won secrets:
Give them space to breathe! I know it’s tempting to pile all that cauliflower in at once, but resist! Overcrowding is the #1 reason for sad, steamed cauliflower instead of crispy perfection. If pieces are touching, they’re steaming. I do two smaller batches if needed – totally worth the extra few minutes.
The shake test is your friend. About halfway through cooking, give that basket a good shake – you’ll hear the most satisfying crispy rattle when they’re doing well. If pieces stick? Gently nudge them loose with tongs (careful, it’s hot!). This helps all sides get evenly golden.
Timing varies by air fryer. Mine usually takes exactly 13 minutes, but yours might need 12 or 15. Start checking at 10 minutes – look for deep golden edges and no white, raw-looking spots. Want extra crunch? Add 1-2 more minutes, checking every 60 seconds.
They’ll crisp up as they cool. When you first take them out, they might seem slightly soft – don’t panic! Let them sit for 2 minutes on the counter and they’ll develop that perfect crunchy exterior. Learned this the hard way when I kept overcooking my first batches.
The window test never fails. Still unsure if they’re done? Break open the largest chunk. It should be tender but not mushy inside, with no raw taste. If it’s still firm, give it another minute or two.
Serving Suggestions for Crispy Air Fryer Cauliflower Chunks
Oh, the possibilities with these golden nuggets! I’ve served them every which way imaginable, and here are my absolute favorite ways to enjoy them while they’re still piping hot and crispy:
Dippity-do-dah! These chunks were made for dunking. My family goes wild for them with:
- Creamy ranch dressing (the classic pairing – I use the hidden valley powder mixed with Greek yogurt)
- Spicy sriracha mayo (just mix mayo with a squeeze of lime and sriracha to taste)
- Cool tzatziki sauce (perfect when I’m feeling fancy)
- Even plain old ketchup (don’t judge – my 5-year-old insists it’s the best)
Salad game changer: Toss them warm over:
- A big kale Caesar (the warmth slightly wilts the kale – magic!)
- Mediterranean salad with chickpeas and feta
- Simple greens with lemon tahini dressing
They add such amazing texture contrast to any bowl.
Grain bowl superstar: I love building meals around these crispy bites:
- Over quinoa with roasted sweet potatoes and avocado
- With brown rice, black beans, and a fried egg on top (breakfast for dinner!)
- Mixed into farro with roasted red peppers and olives
They make veggies feel indulgent.
Snack attack solution: Honestly? I eat them straight from the basket most times. But when I’m feeling civilized, I’ll:
- Serve them in a paper cone like fancy fries
- Skewer them with cherry tomatoes for fun appetizers
- Toss them in buffalo sauce for “wings” night
One golden rule: serve them immediately! That crispiness is fleeting – though I’ve never actually had leftovers to test this theory. They disappear faster than I can say “dinner’s ready!”
Storage and Reheating
Okay, confession time – I rarely have leftovers of these crispy cauliflower chunks because we gobble them up too fast! But on the rare occasion when I make a double batch (or hide some from my snack-happy family), here’s how I keep them tasting almost as good as fresh:
Fridge storage: Let them cool completely first – no steam allowed in that container! I spread them out on a plate for about 15 minutes before transferring to an airtight container. They’ll keep for 2-3 days in the fridge, though the texture starts to soften after day one. Pro tip: Put a paper towel underneath to absorb any moisture – soggy cauliflower is the worst!
Reheating magic: The air fryer is your best friend here! Just pop them back in at 375°F for 3-5 minutes until they’re hot and crispy again. No need to thaw if they’re cold from the fridge – the air fryer works its magic either way. Give the basket a shake halfway through for even heating.
Microwave warning: I know it’s tempting for speed, but resist! Microwaving turns them into sad, mushy cauliflower – all that beautiful crispiness disappears instantly. Trust me, I learned this the hard way during a late-night snack emergency. The extra few minutes in the air fryer are totally worth it.
Freezer? Honestly, I don’t recommend it. While you technically can freeze them, the texture becomes disappointingly soft when thawed. These are truly best enjoyed fresh – but if you must, freeze in a single layer first, then transfer to a bag. Reheat straight from frozen in the air fryer at 400°F for 5-7 minutes.
My golden rule? Make just enough to enjoy right away! But if you do have leftovers, at least now you know how to bring them back to life. That satisfying crunch is worth the extra effort!
Nutritional Information
Let’s talk numbers, but keep it real – I’m not a nutritionist, just a cauliflower enthusiast who likes to know what I’m eating! These values are estimates based on my standard recipe (you know, that perfect blend we just went through), but they’ll vary depending on your exact ingredients and how generous you are with that olive oil drizzle. Here’s the scoop per serving (about 1 cup of these crispy bites):
- Calories: 70
- Fat: 3.5g (only 0.5g saturated – that good olive oil doing its thing)
- Carbs: 8g (with 3g of filling fiber – score!)
- Protein: 3g (not bad for a veggie snack!)
- Sugar: 2g (all natural from the cauliflower, baby)
- Sodium: 150mg (easy to adjust if you’re watching salt)
Now here’s my two cents: these numbers look great on paper, but what really matters is how these crispy chunks make me feel. Unlike greasy chips that leave me sluggish, these give me energy and that satisfying crunch without the guilt. Plus, one serving gives you about 75% of your daily vitamin C – who knew eating your vegetables could taste this good?
Remember: Nutritional values are estimates and will change if you add parmesan, switch up oils, or go wild with the seasoning blends. But honestly? However you make them, you’re still winning in the healthy snacks department!
Frequently Asked Questions
Can I use frozen cauliflower instead of fresh?
Oh, the frozen cauliflower question! I’ve tried it (during a desperate snack emergency when my fridge was empty). It works, but here’s the truth: fresh is better. Frozen cauliflower tends to release more water, so you’ll want to thaw it completely and pat it extra dry with towels first. Even then, it might not get quite as crispy. If you must use frozen, add 2-3 extra minutes to the cook time and maybe bump the temp to 400°F for the last few minutes. But for that perfect golden crunch? Fresh florets win every time.
How do I prevent my cauliflower from getting soggy?
This was my biggest struggle when I first started! Three golden rules:
- Dry those florets like you’re prepping them for surgery – any extra moisture steams instead of crisps
- Don’t overcrowd the basket (I know I keep saying this, but it’s the #1 mistake!)
- Shake that basket hard at the halfway point – this keeps hot air circulating around every piece
Also, resist opening the fryer too often to peek – every time you do, heat escapes and slows down the crisping process.
What are the best dipping sauces for these?
Oh, let me count the ways! My family has strong opinions (we take our dips very seriously). The classics never fail – ranch or blue cheese for traditionalists. But our current obsession is harissa yogurt (just mix Greek yogurt with a spoonful of harissa paste). Other winners:
- Honey mustard (equal parts mayo, mustard, and honey)
- Spicy ketchup (ketchup + hot sauce + pinch of garlic powder)
- Tahini-lemon (thin tahini with lemon juice and water to drizzle consistency)
Honestly? They’re amazing plain too – the spices give plenty of flavor on their own!
Can I make these in a regular oven instead?
You can, but they won’t get quite as crispy. If you must use an oven:
- Bake at 425°F on a wire rack set over a baking sheet (for airflow)
- Flip halfway through (total time about 25-30 minutes)
- Don’t skip the preheating!
They’ll still taste great, but the air fryer’s intense circulating heat really creates that perfect crunch we’re after.
Why are some pieces cooking faster than others?
Ah, the uneven cooking struggle! Two likely culprits:
- Your florets aren’t uniform in size (big pieces cook slower – aim for 1-1.5 inch chunks)
- Your air fryer has hot spots (mine does too – just rotate the basket 180° halfway through)
Next time, spend an extra minute cutting evenly – it makes all the difference. And don’t stress about a few extra-dark pieces… I call those “chef’s treats!”
I can’t wait to hear how your Crispy Air Fryer Cauliflower Chunks turn out! Seriously, nothing makes me happier than seeing your kitchen successes. Did you stick with the classic seasoning or try one of my wild variations? Snap a pic of your golden beauties and tag me – I’ll be your personal cheerleader! And if you’ve got any brilliant twists on the recipe, spill the beans in the comments below. We’re all in this crispy cauliflower journey together, and your tip might just become someone else’s new favorite trick. Happy air frying, friends – may your florets always be golden and your crunch never falter!
Print
Crispy Air Fryer Cauliflower Chunks: 15-Minute Crunchy Bliss
- Total Time: 20 minutes
- Yield: 4 servings 1x
- Diet: Vegetarian
Description
Make crispy, golden cauliflower chunks in the air fryer with minimal oil. This easy recipe delivers a crunchy texture and savory flavor.
Ingredients
- 1 medium head cauliflower, cut into bite-sized chunks
- 1 tbsp olive oil
- 1/2 tsp garlic powder
- 1/2 tsp paprika
- 1/4 tsp salt
- 1/4 tsp black pepper
Instructions
- Preheat the air fryer to 375°F.
- Toss cauliflower chunks with olive oil, garlic powder, paprika, salt, and pepper.
- Place in a single layer in the air fryer basket.
- Cook for 12-15 minutes, shaking halfway, until crispy and golden.
- Serve immediately.
Notes
- Do not overcrowd the air fryer for best crispiness.
- Adjust seasoning to taste.
- Prep Time: 5 minutes
- Cook Time: 15 minutes
- Category: Appetizer/Side
- Method: Air Fryer
- Cuisine: American
Nutrition
- Serving Size: 1 cup
- Calories: 70
- Sugar: 2g
- Sodium: 150mg
- Fat: 3.5g
- Saturated Fat: 0.5g
- Unsaturated Fat: 3g
- Trans Fat: 0g
- Carbohydrates: 8g
- Fiber: 3g
- Protein: 3g
- Cholesterol: 0mg
Keywords: air fryer cauliflower, crispy cauliflower, easy snack, healthy appetizer