I still remember the first time I made these Crispy Parmesan Garlic Chicken Burritos—it was one of those chaotic Tuesday nights when I needed dinner on the table fast. The moment that golden, garlicky chicken hit the pan, the whole kitchen smelled like heaven. That crispy Parmesan crust? Absolute magic. These burritos became my go-to for busy nights because they’re seriously easy (25 minutes, start to finish!) but taste like you put in way more effort. Trust me, once you try that perfect crunch paired with melty cheese and fresh veggies, you’ll be hooked just like I was. No fancy skills needed—just big flavor and even bigger satisfaction.
Why You’ll Love These Crispy Parmesan Garlic Chicken Burritos
These burritos are my secret weapon for turning an ordinary weeknight into something special. Here’s why they’ve earned a permanent spot in my dinner rotation:
- They’re crazy fast – From fridge to table in 25 minutes flat
- That addictive crunch – A golden Parmesan crust that stays crispy even when wrapped
- Endless customization – Swap in your favorite veggies or cheeses
- Kid-approved magic – My picky eater actually asks for seconds!
Quick and Easy Weeknight Meal
When 5pm hits and everyone’s hangry, these burritos save the day. I can prep the chicken while the pan heats up, and the whole meal comes together before my rice cooker finishes its cycle. The best part? One pan for cooking, minimal cleanup – which means more time to actually enjoy dinner with my family.
Irresistible Crispy Texture
That first bite is everything – the way the Parmesan coating shatters between your teeth, revealing juicy chicken inside. I’ve tried dozens of crispy chicken methods, but the combo of breadcrumbs and real grated Parmesan creates a crust that stays crunchy even after wrapping. Pro tip: Let the chicken sit for a minute after cooking – that’s when the crust gets extra golden and crisp!
Ingredients for Crispy Parmesan Garlic Chicken Burritos
Here’s everything you’ll need to make these flavor-packed burritos – I promise it’s all simple stuff you might already have in your kitchen! The magic happens when these basic ingredients come together:
- 2 boneless, skinless chicken breasts (about 1 lb total) – I like to butterfly them for quicker cooking
- ½ cup grated Parmesan cheese – The real stuff from the refrigerated section, not the shaker can!
- 2 cloves garlic, minced – Fresh is best here, but ½ tsp garlic powder works in a pinch
- ½ teaspoon salt – I use kosher salt for even seasoning
- ¼ teaspoon black pepper – Freshly cracked adds amazing flavor
- ½ teaspoon paprika – Smoked paprika gives a nice depth if you have it
- ¼ cup breadcrumbs – Plain or Italian style both work great
- 1 tablespoon olive oil – For that perfect golden crisp
For assembling:
- 4 large flour tortillas – Burrito-size (10-inch) works best
- 1 cup shredded lettuce – I prefer crisp romaine or iceberg
- ½ cup diced tomatoes – Cherry tomatoes halved work beautifully
- ¼ cup sour cream – Or Greek yogurt if you want it lighter
- ¼ cup shredded cheddar cheese – Monterey Jack is delicious too!
See? Nothing fancy – just good ingredients that turn into something extraordinary. The prep is minimal too – just some quick dicing and grating while your pan heats up!
How to Make Crispy Parmesan Garlic Chicken Burritos
Now for the fun part – let’s turn these simple ingredients into the most addictive crispy chicken burritos you’ve ever had! I’ll walk you through each step, just like I do when teaching my niece how to make them (her favorite cooking lesson!).
Preparing the Chicken Coating
First, grab a shallow bowl – I use my trusty pie plate because it gives me plenty of room to work. Add the Parmesan, breadcrumbs, garlic, salt, pepper, and paprika. Now here’s my secret: use your fingers to mix everything together, really rubbing the garlic into the dry ingredients. This helps distribute the flavors evenly so every bite sings with that garlic-Parmesan goodness.
While your mixture sits (the flavors bloom beautifully after 5 minutes), slice your chicken breasts into ½-inch strips. Don’t go too thin – we want juicy centers with that crispy shell! Dredge each piece thoroughly in the coating, pressing gently to help it adhere. I like to let them rest on a plate for a few minutes while my pan heats up – this helps the coating stick better during cooking.
Cooking the Crispy Chicken
Heat your olive oil in a large skillet over medium heat – you’ll know it’s ready when a breadcrumb sizzles immediately. Carefully add the chicken in a single layer (don’t crowd the pan!) and resist the urge to move them for at least 3 minutes. This is crucial for developing that perfect golden crust.
After about 4 minutes, peek underneath – when you see that beautiful brown color, flip each piece. The second side usually cooks slightly faster, about 3-4 minutes. Listen for that satisfying sizzle! The chicken is done when it reaches 165°F internally, but honestly, I just make a small cut to check – no pink means you’re good to go. Transfer to a paper towel-lined plate to keep crisp while you prep the tortillas.
Assembling the Burritos
Here’s where the magic happens! Warm your tortillas briefly – 10 seconds in the microwave between damp paper towels makes them perfectly pliable without drying out. Lay each one flat and layer the goods: crispy chicken down the center first (that’s your flavor foundation!), then lettuce, tomatoes, a dollop of sour cream, and a sprinkle of cheddar.
Now for the crucial fold: tuck in the sides first, then roll away from you tightly, keeping those ends tucked as you go. If you’ve ever swaddled a baby, the technique is weirdly similar! The tighter the roll, the less likely you’ll have filling explosions on the first bite. I sometimes give mine a quick press in the warm pan seam-side down to seal the deal – plus it adds nice golden spots to the tortilla.
That’s it! You’ve just made restaurant-quality crispy chicken burritos in less time than it takes to get delivery. Now grab some napkins – things are about to get deliciously messy!
Tips for Perfect Crispy Parmesan Garlic Chicken Burritos
After making these burritos more times than I can count, here are my foolproof tricks for crispy success every time:
- Fresh garlic is key – That jarred stuff just doesn’t give the same punch
- Broil for bonus crunch – Pop assembled burritos under the broiler for 2 minutes before serving
- Spice to your mood – Add chili flakes or cayenne if you like heat
- Pat chicken dry first – Helps the coating stick like glue
- Don’t skimp on oil – That golden crust needs a happy sizzle
The best part? Even my “oops” moments (like forgetting the paprika once) still turned out delicious – these burritos are seriously forgiving!
Serving Suggestions for Crispy Parmesan Garlic Chicken Burritos
These crispy burritos are fantastic on their own, but I love rounding out the meal with simple sides that complement all those bold flavors. My go-to pairings?
- Spanish rice – The tomato-y goodness soaks up any escaping sour cream perfectly
- Charred corn salad – That sweet crunch plays so nicely with the garlicky chicken
- Black beans – Seasoned simply with cumin and lime for extra protein
- Chunky guacamole – Because avocado makes everything better
On crazy busy nights? A bagged salad with lime vinaigrette does the trick. The beauty is that everything comes together while your chicken cooks – multitasking at its tastiest!
Storage and Reheating Instructions
Now, I’ll be honest – these crispy Parmesan garlic chicken burritos are so good they rarely last long enough to store! But if you’re lucky enough to have leftovers (or smart enough to make extra), here’s how to keep that perfect crunch:
For refrigeration: Wrap each burrito tightly in aluminum foil or plastic wrap – this helps prevent the tortilla from drying out. They’ll stay delicious in the fridge for up to 2 days. Pro tip from my trial-and-error: Store any extra chicken separately from assembled burritos if you can – the crispy coating stays crunchier that way!
Reheating magic: Whatever you do, resist the microwave! It turns that glorious crispy chicken into sad, soggy mush. Instead, unwrap your burrito and give it new life:
- Oven method: Preheat to 375°F (190°C), place burrito directly on the rack (for maximum crispness!), and heat for 10-12 minutes until piping hot throughout
- Air fryer winner: My personal favorite! 350°F (175°C) for 5-6 minutes makes the tortilla beautifully crisp again
- Skillet revival: A dry skillet over medium heat works too – roll the burrito every minute until heated through
Funny story – my husband once tried microwaving leftovers when I wasn’t looking. That sad, floppy burrito became a cautionary tale in our house! Trust me, those extra few minutes reheating properly make all the difference in recapturing that first-night magic.
Ingredient Substitutions and Variations
One of my favorite things about these crispy Parmesan garlic chicken burritos is how easily you can mix things up based on what you’ve got in the fridge or dietary needs. Here are all the ways I’ve tweaked this recipe over the years – every version has been a winner in my book!
For the Crispy Coating
- Breadcrumb alternatives: Panko gives an extra-crunchy texture, while crushed cornflakes add sweetness. For gluten-free, try almond flour or crushed pork rinds (sounds weird, tastes amazing!)
- Cheese swaps: No Parmesan? Asiago or Pecorino Romano work beautifully. For dairy-free, nutritional yeast adds that umami kick.
- Spice variations: Swap paprika for chili powder or taco seasoning when I want a Tex-Mex twist. Sometimes I add a pinch of cayenne for heat!
Protein Possibilities
- Chicken alternatives: Thinly sliced pork tenderloin or even firm tofu slabs work with the same crispy coating method (just adjust cook time)
- Pre-cooked shortcut: On exhausted nights, I’ve used rotisserie chicken – just crisp it up in the pan with the Parmesan mixture sprinkled on top
Wrap & Fillings Flexibility
- Tortilla options: Gluten-free tortillas or even large lettuce leaves for low-carb (though they won’t be rollable). For extra flavor, try spinach or tomato tortillas!
- Lighter dairy swaps: Greek yogurt instead of sour cream, or skip the cheddar for extra veggies when I want it lighter
- Veggie variations: Sautéed bell peppers, caramelized onions, or even roasted sweet potatoes make delicious additions when I’m cleaning out the fridge
The moral of the story? Don’t stress if you’re missing an ingredient – some of my best versions came from happy accidents. Last week I used crushed tortilla chips instead of breadcrumbs (desperate times!) and my kids declared it the best batch yet. Cooking should be fun, not rigid – make these burritos your own!
Nutritional Information
Okay, let’s talk numbers – but don’t let them scare you! These crispy Parmesan garlic chicken burritos pack serious flavor without going overboard. Remember: These values are estimates based on my exact ingredient list, and yours might vary slightly depending on brands or tweaks you make (like that extra sprinkle of cheese we all sneak in!).
Here’s the breakdown per burrito when made exactly as written:
- Calories: ~450
- Protein: 30g (that crispy chicken is working hard!)
- Carbohydrates: 40g
- Fiber: 3g
- Sugar: 3g (all natural from the tomatoes!)
- Fat: 18g
- Saturated Fat: 7g
- Sodium: 700mg
A little insider tip from my kitchen experiments: Using Greek yogurt instead of sour cream shaves off about 50 calories and 5g fat per burrito – and you’ll barely taste the difference when it’s all wrapped up with that garlicky chicken. The beauty is you can tweak to fit your needs – more veggies, less cheese, whatever makes you happy!
FAQs About Crispy Parmesan Garlic Chicken Burritos
Got questions about making these crispy Parmesan garlic chicken burritos? I’ve got answers! Here are the most common things people ask me when they’re whipping up this recipe for the first time (or the hundredth!).
Can I use pre-cooked chicken?
Absolutely! If you’ve got leftover rotisserie chicken or grilled chicken, you can totally use it here. Just chop it up, toss it in the pan with a little olive oil, and sprinkle the Parmesan mixture over the top. Cook it just until the coating gets crispy and golden. It’s a great shortcut for those nights when you’re *really* short on time!
How do I prevent soggy burritos?
Ah, the eternal burrito struggle! Here’s my trick: Make sure your chicken cools for a couple of minutes before assembling, and don’t overdo the sour cream or other wet ingredients. Also, warm your tortilla just enough to make it pliable but not too hot – that helps it hold up better. And if you’re really worried, a quick press in the pan seam-side down after rolling helps seal everything in place.
Can I make these ahead of time?
You can, but with a caveat! The chicken stays crispy if stored separately from the tortillas and toppings. Assemble just before serving for the best texture. If you *must* make them ahead, wrap them tightly in foil and reheat in the oven or air fryer to bring back that crunch.
What’s the best way to fold a burrito so it doesn’t fall apart?
Think of it like swaddling a baby! Tuck in the sides first, then roll it away from you tightly, keeping those ends tucked as you go. Don’t overstuff it – leave about an inch of space at the edges. And if you’re really struggling, a little practice makes perfect. (Trust me, I’ve had my share of burrito explosions!)
Can I freeze these burritos?
Yes, but with a few tips! Freeze them *before* adding any fresh veggies or sour cream. Wrap each burrito tightly in plastic wrap, then foil, and they’ll keep for up to 2 months. To reheat, unwrap and bake at 375°F (190°C) for 20-25 minutes, or until heated through. Add fresh toppings after reheating for the best texture.
Still have questions? Drop them in the comments – I love helping troubleshoot to make your burrito game as strong as possible!
Rate This Recipe
Alright, fellow crispy chicken burrito lovers – now it’s your turn! Did these Parmesan garlic wonders become your new weeknight MVP like they did for me? I’m dying to hear how your version turned out. Drop me a comment below with:
- Your star rating (be honest – even if it’s less than 5!)
- Any brilliant twists you added
- How your family reacted (my husband still does a little happy dance)
Your feedback helps me create more recipes you’ll love – plus it helps other home cooks know what to expect. Did the chicken get crispy enough? Was the garlic flavor just right? Spill all the delicious details!
Print
25-Minute Crispy Parmesan Garlic Chicken Burritos That Amaze
- Total Time: 25 minutes
- Yield: 4 burritos 1x
- Diet: Low Lactose
Description
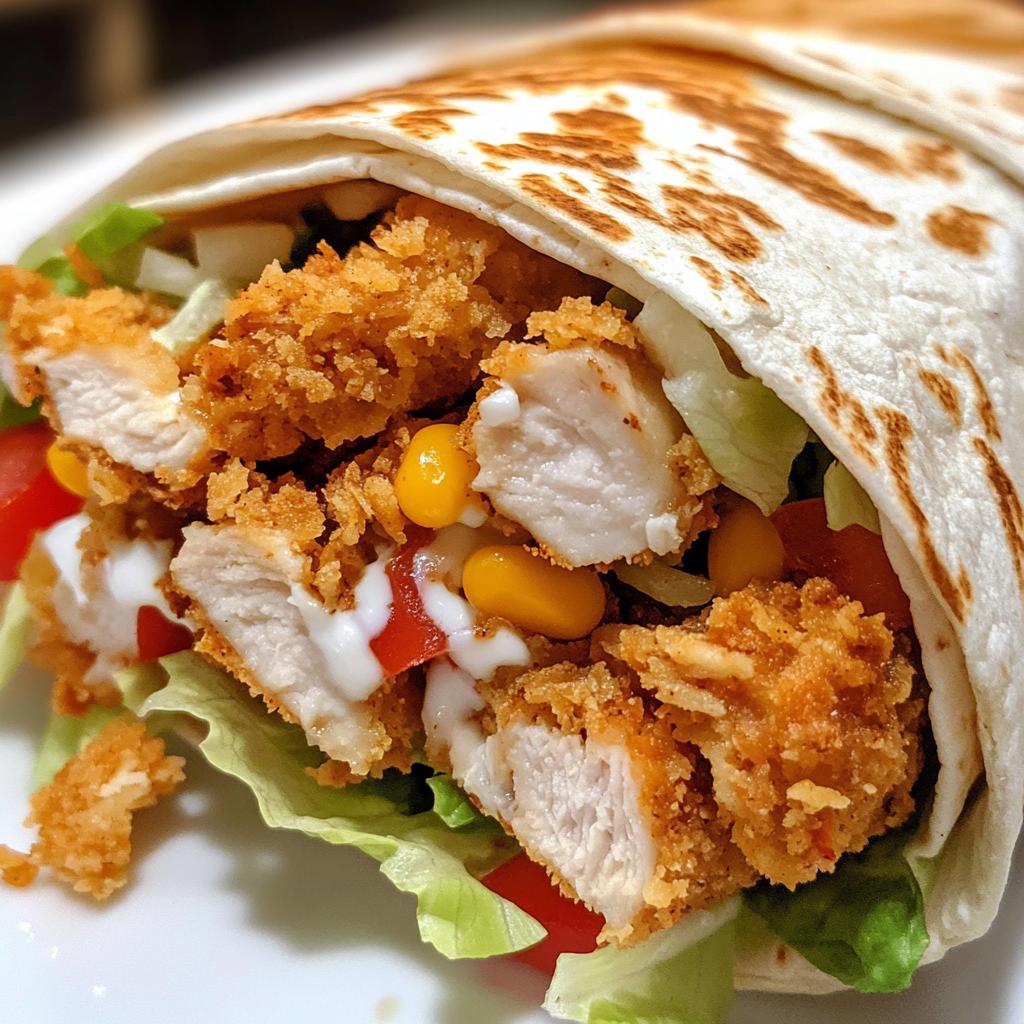
Crispy Parmesan Garlic Chicken Burritos are a delicious and easy-to-make meal. They combine tender chicken with a crispy coating, flavored with Parmesan and garlic, all wrapped in a soft tortilla.
Ingredients
- 2 boneless, skinless chicken breasts
- 1/2 cup grated Parmesan cheese
- 2 cloves garlic, minced
- 1/2 teaspoon salt
- 1/4 teaspoon black pepper
- 1/2 teaspoon paprika
- 1/4 cup breadcrumbs
- 1 tablespoon olive oil
- 4 large flour tortillas
- 1 cup shredded lettuce
- 1/2 cup diced tomatoes
- 1/4 cup sour cream
- 1/4 cup shredded cheddar cheese
Instructions
- Preheat oven to 375°F (190°C).
- Cut chicken breasts into thin strips.
- In a bowl, mix Parmesan cheese, garlic, salt, pepper, paprika, and breadcrumbs.
- Coat chicken strips in the mixture.
- Heat olive oil in a pan over medium heat.
- Cook chicken until golden and crispy, about 4-5 minutes per side.
- Warm tortillas in a dry pan or microwave.
- Place cooked chicken, lettuce, tomatoes, sour cream, and cheddar cheese on each tortilla.
- Fold the sides of the tortilla inward and roll tightly.
- Serve immediately.
Notes
- Use fresh garlic for the best flavor.
- Adjust spices to your taste.
- For extra crispiness, broil the burritos for 1-2 minutes before serving.
- Prep Time: 15 minutes
- Cook Time: 10 minutes
- Category: Main Course
- Method: Pan-frying
- Cuisine: Mexican-American
Nutrition
- Serving Size: 1 burrito
- Calories: 450
- Sugar: 3g
- Sodium: 700mg
- Fat: 18g
- Saturated Fat: 7g
- Unsaturated Fat: 9g
- Trans Fat: 0g
- Carbohydrates: 40g
- Fiber: 3g
- Protein: 30g
- Cholesterol: 75mg
Keywords: crispy, Parmesan, garlic, chicken, burritos, easy, quick