
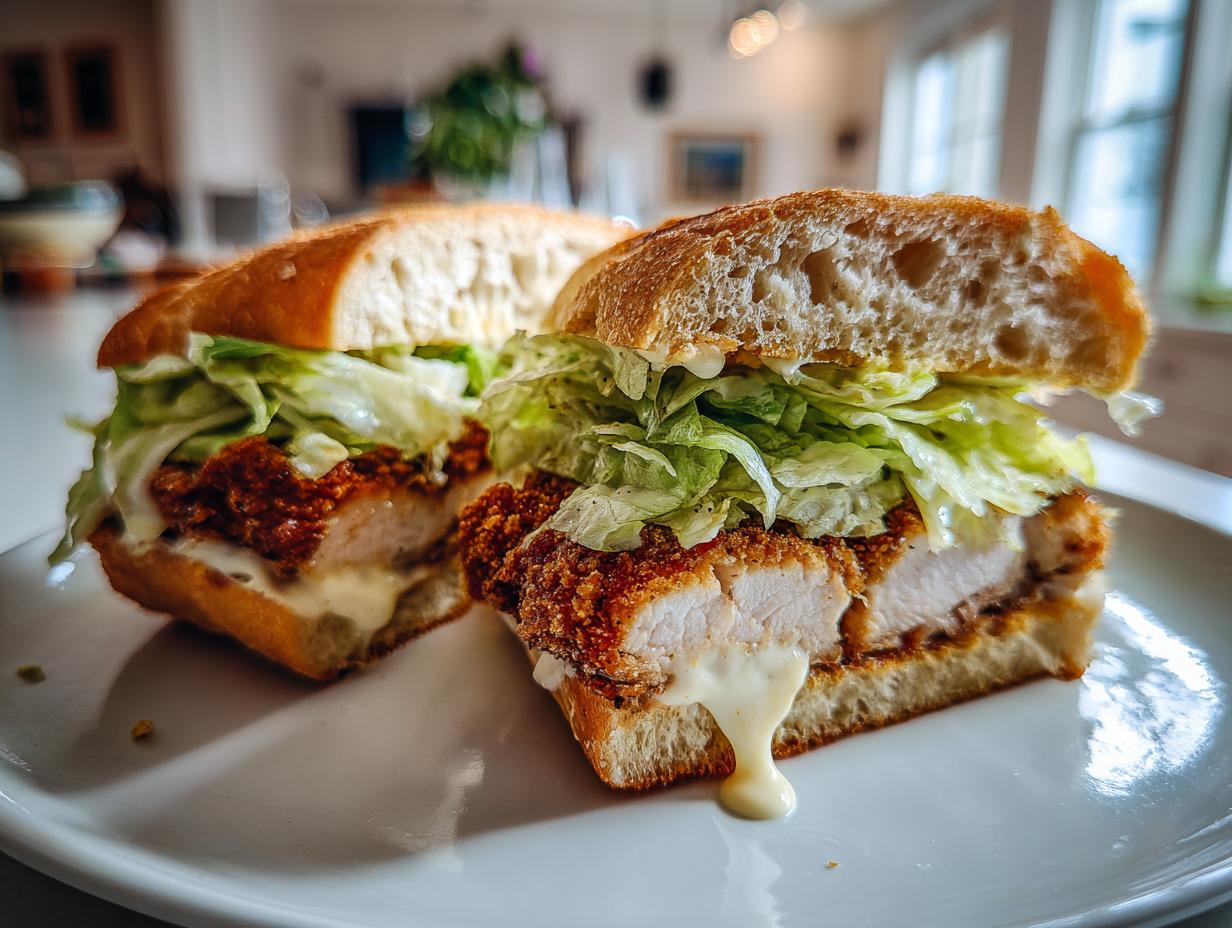
There’s nothing quite like biting into a Crunchy Chicken Caesar Sandwich—that perfect crunch of golden breaded chicken giving way to cool, crisp romaine and creamy dressing. It’s my go-to meal when I want something satisfying but don’t want to spend hours in the kitchen. I’ve been making this exact version for years, ever since I discovered that magical combo of panko breadcrumbs and Parmesan cheese during a desperate “what’s for dinner?” moment. The secret? Pan-frying just long enough to get that gorgeous crust, then finishing in the oven so the chicken stays juicy inside. Trust me, once you try this method, you’ll never go back to sad, soggy chicken sandwiches again.
Why You’ll Love This Crunchy Chicken Caesar Sandwich
This sandwich has everything you crave—here’s why it’s become my absolute favorite:
- That irresistible crunch: The panko-Parmesan coating creates the most satisfying crispy texture that holds up against the creamy dressing
- Weeknight hero: Ready in under 35 minutes, it’s faster than takeout but tastes so much better
- Crowd-pleaser magic: Kids go nuts for the crispy chicken, while adults love the sophisticated Caesar flavors
- Perfectly balanced: The cool lettuce and rich dressing balance out the warm, savory chicken beautifully
Seriously, I’ve lost count of how many times I’ve made this for friends who then demanded the recipe immediately!
Ingredients for the Crunchy Chicken Caesar Sandwich
Here’s everything you’ll need to make my favorite sandwich – and trust me, every ingredient plays an important role! I’ve learned through trial and error that quality matters here, especially with the chicken and breadcrumbs. Let me walk you through what works best:
- 2 boneless, skinless chicken breasts (about 6 oz each) – look for evenly sized ones so they cook at the same rate
- 1 cup panko breadcrumbs – the Japanese-style ones give that extra crunch we love
- 1/2 cup grated Parmesan cheese – freshly grated melts into the coating better than the pre-shredded stuff
- 1 egg, beaten – this is our glue that holds everything together
- 1 teaspoon garlic powder – trust me, it makes all the difference in flavor
- 1 teaspoon salt – I use kosher salt for more even seasoning
- 1/2 teaspoon black pepper – freshly cracked if you have it
- 4 slices ciabatta bread – or your favorite sturdy sandwich bread
- 1 cup chopped romaine lettuce – the crispier, the better!
- 1/4 cup Caesar dressing – homemade or your favorite store-bought brand
- 1 tablespoon olive oil – for getting that perfect golden crust
A quick tip – if your chicken breasts are super thick (more than 1 inch), go ahead and butterfly them first. This helps everything cook evenly and means you won’t end up with dry edges waiting for the center to cook through!
How to Make the Crunchy Chicken Caesar Sandwich
Okay, let’s get to the fun part! I’ve made this sandwich so many times I could probably do it in my sleep, but I’ll walk you through each step carefully so yours turns out just as perfect as mine always does. The key is taking your time with the coating and not rushing the cooking process – that’s how we get that irresistible crunch!
Step 1: Prepare the Chicken Coating
First things first – grab a shallow bowl and mix together all your dry ingredients: the panko breadcrumbs, Parmesan cheese, garlic powder, salt, and pepper. I like to use a fork to really combine everything evenly – you want every bite to have that amazing flavor. In another shallow bowl, beat your egg until it’s completely smooth.
Now for the messy-but-fun part! Take each chicken breast and dip it first in the egg, letting any excess drip off. Then press it firmly into your breadcrumb mixture, making sure to coat all sides evenly. Here’s my trick: gently press the crumbs into the chicken with your hands – this helps them stick better during cooking. I usually do this one breast at a time to keep things organized.
Step 2: Cook the Chicken
Preheat your oven to 375°F (190°C) – we’ll need it in a minute. Heat the olive oil in an oven-safe skillet over medium heat. When the oil shimmers (you can test it by dropping in a breadcrumb – if it sizzles, you’re good), carefully add your coated chicken breasts.
Now here’s where patience pays off! Cook for about 3-4 minutes on the first side until you get that gorgeous golden brown color. Use a thin spatula to flip them gently – if they’re sticking, give them another 30 seconds before trying again. Cook another 3 minutes on the second side.
Then transfer the whole skillet to the oven and bake for 10-12 minutes. This ensures the chicken cooks through without burning the coating. You’ll know it’s done when a meat thermometer reads 165°F (74°C) at the thickest part. Let the chicken rest for 5 minutes before slicing – this keeps all those delicious juices inside!
Step 3: Assemble the Sandwich
While the chicken rests, lightly toast your bread – this prevents sogginess. Here’s how I layer for maximum enjoyment:
Spread Caesar dressing on both slices of bread (yes, both – don’t skimp!). Add a generous handful of crisp romaine lettuce to the bottom slice. Then place your sliced crispy chicken right on top – I like to fan out the slices so every bite gets some. Top with the second slice of bread, press gently, and voila!
Cut it diagonally because… well, everything tastes better when it’s cut diagonally, don’t you think? Serve immediately while that chicken is still crispy and warm. Warning: you might want to make extra – these sandwiches disappear fast!
Tips for the Perfect Crunchy Chicken Caesar Sandwich
After making this sandwich more times than I can count, I’ve picked up some tricks that’ll take yours from good to “oh-my-gosh-where-has-this-been-all-my-life” amazing:
- Double-dip for extra crunch: After the first egg wash and breadcrumb coating, dip the chicken in egg again and add a second layer of crumbs. It creates an incredible crispy armor that stays crunchy even with the dressing!
- Toast your bread just right: 30 seconds in the toaster gives it the perfect structure to hold up to the juicy chicken without getting soggy. Watch it closely though – we want golden, not charcoal!
- Let the chicken rest: I know it’s tempting to dig right in, but giving the cooked chicken 5 minutes to rest makes all the difference. It keeps the juices inside where they belong.
- Season as you go: Sprinkle a tiny pinch of salt on the lettuce and a light dusting of Parmesan on the bread after dressing – little flavor boosts in every layer make a huge difference.
One more thing – if you’re making these for a crowd, keep the components separate until serving time. That way everyone gets that perfect crispiness we worked so hard for!
Ingredient Substitutions & Variations
Look, I’m all about sticking to the original recipe – it’s perfection! But I get that sometimes you need to swap things out, whether it’s what’s in your fridge or dietary needs. Here are my tried-and-true substitutions that still keep the spirit of this amazing sandwich alive:
For the Chicken
Grilled instead of breaded: If you’re watching calories, skip the breading and grill your chicken with just a sprinkle of garlic powder and Parmesan. You’ll lose some crunch but still get great flavor. My trick? Brush the grilled chicken with dressing before assembling – it adds moisture.
Thighs work too: Prefer dark meat? Chicken thighs make an incredibly juicy alternative. Just remove the skin and pound them to an even thickness first.
Breadcrumb Alternatives
Gluten-free friends: Use gluten-free panko or crushed gluten-free crackers. My sister swears by crushed rice Chex cereal – it gives an awesome crisp texture!
Nutty twist: Replace half the breadcrumbs with finely ground almonds or pecans for a richer flavor. Just toast them first to bring out their oils.
Greens & Dressing Swaps
Kale instead of romaine: Massage chopped kale with a teaspoon of dressing first to soften it. Sounds weird, but it works!
Lightened-up dressing: Mix Greek yogurt with a bit of Caesar dressing to cut calories without losing that tangy flavor.
No mayo? No problem: For a dairy-free version, blend silken tofu with lemon juice, garlic, and anchovies (if you’re into that).
Remember – cooking is personal! The first time I made this for my vegetarian niece, we used crispy breaded eggplant slices instead of chicken. Was it the same? Nope. Was it delicious? Absolutely! Don’t be afraid to play around until you find your perfect version.
Serving Suggestions for the Crunchy Chicken Caesar Sandwich
This sandwich is a meal all by itself, but here’s how I love to round it out for different occasions. For a casual lunch, sweet potato fries make the perfect crispy companion – their natural sweetness plays so nicely with the savory chicken. When I’m feeling fancy, a simple arugula salad with lemon dressing keeps things light and bright. And on game days? Oh, you’ve gotta try pairing it with crispy dill pickle chips – the tangy crunch is downright addictive!
Storage & Reheating
Here’s the thing about crispy chicken sandwiches – that amazing crunch we worked so hard for disappears fast if you store them assembled! Through many sad, soggy experiments (and one very disappointed husband), I’ve nailed down the best way to keep leftovers tasting fresh.
Storing Like a Pro
First rule: keep everything separate! Store the chicken, bread, lettuce, and dressing in their own airtight containers in the fridge. The breaded chicken will stay crispy for about 2 days this way. Pro tip – place paper towels under and over the chicken to absorb any moisture.
Reheating Without the Sog
The microwave is the enemy of crunch – trust me, I’ve learned this the hard way! Instead, reheat chicken in a 375°F (190°C) oven for about 10 minutes until warmed through. If you’re in a hurry, an air fryer at 350°F (175°C) for 3-4 minutes works miracles. Just give the bread a quick toast while the chicken reheats.
Funny story – one time I tried reheating a fully assembled leftover sandwich in the oven wrapped in foil. Big mistake! The steam made everything mushy. Now I always reassemble fresh with cold crisp lettuce and dressing after reheating the chicken. Your future self will thank you for the extra two minutes of effort!
Freezing option: The cooked (but undressed) chicken freezes surprisingly well! Let it cool completely, then wrap each piece individually in parchment paper before freezing. Reheat straight from frozen in a 400°F (200°C) oven for 15-20 minutes – no thawing needed.
FAQ About the Crunchy Chicken Caesar Sandwich
After getting so many questions from friends (and even strangers at potlucks!) about this sandwich, I figured I’d share the answers to the most common ones. Trust me, I’ve made every mistake possible with this recipe so you don’t have to!
Can I make the chicken ahead of time?
Absolutely! The breaded, uncooked chicken keeps beautifully in the fridge for up to 24 hours before cooking – just place it on a parchment-lined tray. Actually, I find the coating sticks even better when it’s had time to “set.” Cooked chicken can be refrigerated for 2-3 days (store it separately from other components).
What’s the best bread for this sandwich?
My heart belongs to ciabatta – its sturdy texture and slight chew hold up perfectly against the crispy chicken. But when I’m in a pinch, I’ve used everything from sourdough to brioche buns. Just avoid super soft sandwich bread – it turns to mush instantly! Pro tip: lightly butter and toast any bread you use for extra crunch insurance.
How do I know when the chicken is fully cooked?
I was terrified of undercooking chicken when I first started making this! The magic number is 165°F (74°C) on an instant-read thermometer inserted into the thickest part. No thermometer? Cut into the thickest piece – the juices should run clear, not pink. And remember, the chicken will continue cooking slightly as it rests.
Can I make this gluten-free?
You bet! Swap regular panko for gluten-free breadcrumbs (I like the texture of gluten-free panko best). For the bread, any sturdy gluten-free loaf works – I’m partial to the ones with seeds for extra texture. Just check that your Caesar dressing is GF too – some brands sneak in sneaky wheat!
Why does my coating fall off when cooking?
Oh honey, we’ve all been there! Three tricks: 1) Pat the chicken completely dry before coating, 2) Let the egg-dipped chicken sit for a minute before adding crumbs (helps the egg get tacky), and 3) Don’t move the chicken for the first 2 minutes of cooking – that initial “set” is crucial. If all else fails, try my double-dipping method from the tips section!
Got more questions? Drop them in the comments below – I check every day because I love talking about this sandwich almost as much as I love eating it!
Nutritional Information
Okay, let’s talk numbers – but remember, these are just estimates! When I first calculated the nutrition for this sandwich, I was pleasantly surprised by how balanced it is. Here’s the breakdown per serving (that’s one fully loaded sandwich, folks!):
- Calories: 520
- Protein: 38g (that chicken packs a punch!)
- Fat: 22g (but hey, 15g is the good unsaturated kind from olive oil and Parmesan)
- Carbs: 42g
- Fiber: 2g
- Sugar: 3g
A quick heads-up – these values can change depending on your specific ingredients. I once made this with extra Parmesan (because why not?) and the calories jumped up a bit. If you’re watching sodium, you can reduce the salt in the breading – the dressing usually has enough flavor anyway. And for my gluten-free friends using alternative breadcrumbs, your carb count might be slightly different too.
The way I see it? This sandwich gives you a solid protein boost, keeps you full for hours, and – most importantly – tastes like heaven. Worth every bite if you ask me!
Did You Make This Recipe?
Nothing makes me happier than hearing when someone tries my Crunchy Chicken Caesar Sandwich! Did yours turn out as crispy-perfect as promised? Maybe you put your own spin on it – I’d love to hear about any creative twists you tried. Drop me a comment below and tell me all about it!
And if you snapped a photo (because let’s be honest, this sandwich is downright photogenic), I’d be over the moon if you shared it! Tag me on Instagram so I can see your masterpiece – there’s something magical about seeing how this recipe turns out in different kitchens. Plus, your photo might just inspire someone else to give it a try!
Every time I see someone making this sandwich, it brings back that warm fuzzy feeling I had when I first discovered the recipe. Your feedback helps me create even better recipes in the future, so don’t be shy – tell me everything! The good, the bad, the “oh-my-gosh-this-changed-my-life” moments – I read every single comment with my morning coffee.
Print
Crunchy Chicken Caesar Sandwich – 35 Minutes to Blissful Crunch
- Total Time: 35 minutes
- Yield: 2 sandwiches 1x
- Diet: Low Lactose
Description
A classic chicken Caesar sandwich with crispy chicken, fresh lettuce, and creamy Caesar dressing.
Ingredients
- 2 boneless, skinless chicken
- 1 cup breadcrumbs
- 1 egg, beaten
- 1/2 cup grated Parmesan cheese
- 1 teaspoon garlic powder
- 1 teaspoon salt
- 1/2 teaspoon black pepper
- 4 slices of ciabatta or sandwich bread
- 1 cup romaine lettuce, chopped
- 1/4 cup Caesar dressing
- 1 tablespoon olive oil
Instructions
- Preheat oven to 375°F (190°C).
- Mix breadcrumbs, Parmesan, garlic powder, salt, and pepper in a bowl.
- Dip chicken in beaten egg, then coat with breadcrumb mixture.
- Heat olive oil in a pan over medium heat. Cook chicken for 3-4 minutes per side until golden.
- Transfer chicken to the oven and bake for 10-12 minutes until fully cooked.
- Toast bread slices lightly.
- Spread Caesar dressing on bread, add lettuce, and top with crispy chicken.
- Cut sandwiches in half and serve.
Notes
- Use panko breadcrumbs for extra crispiness.
- Add extra Parmesan on top if desired.
- For a lighter option, grill the chicken instead of frying.
- Prep Time: 15 minutes
- Cook Time: 20 minutes
- Category: Sandwich
- Method: Baking and Pan-Frying
- Cuisine: American
Nutrition
- Serving Size: 1 sandwich
- Calories: 520
- Sugar: 3g
- Sodium: 890mg
- Fat: 22g
- Saturated Fat: 5g
- Unsaturated Fat: 15g
- Trans Fat: 0g
- Carbohydrates: 42g
- Fiber: 2g
- Protein: 38g
- Cholesterol: 125mg
Keywords: chicken, Caesar, sandwich, crispy, easy