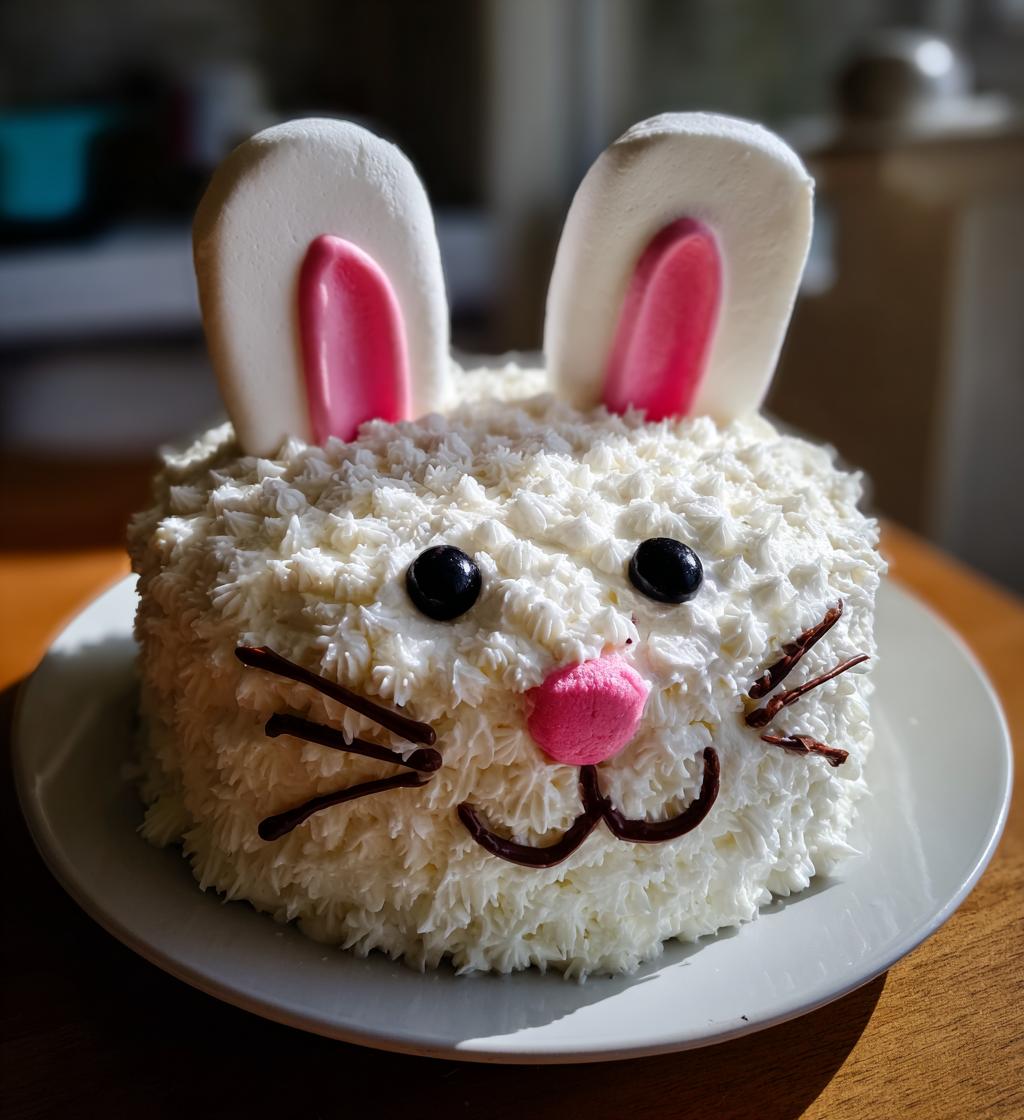
Oh, let me tell you about my absolute favorite cake to whip up for Easter gatherings—the Easter Bunny Cake! It’s not just any cake; it’s a delightful, whimsical centerpiece that brings smiles to everyone’s faces. Imagine a fluffy cake dressed up like the cutest bunny, complete with marshmallow ears and chocolate chip eyes. It’s festive, fun, and perfect for celebrating the season of renewal!
Every year, I look forward to making this cake with my kids. We gather in the kitchen, and they love getting their hands messy with frosting and sprinkles. It’s become a cherished tradition in our home, where laughter fills the air as we create our bunny masterpiece. The best part? It’s surprisingly easy to make, so you can enjoy the process without feeling overwhelmed. Trust me, when you bring this cake to the table, it instantly elevates the mood and creates a joyful atmosphere for family and friends. It’s a sweet reminder of how food can bring us together and create lasting memories!
Ingredients for Easter Bunny Cake
Here’s everything you’ll need to create this adorable Easter Bunny Cake. Gather these ingredients, and you’ll be on your way to baking a masterpiece that’ll delight both kids and adults alike!
- 1 box of cake mix – Choose your favorite flavor, whether it’s classic vanilla or something more adventurous!
- 3 large eggs – These help give your cake that perfect fluffy texture.
- 1 cup water – This moistens the batter and keeps the cake from drying out.
- 1/2 cup vegetable oil – Adds richness to the cake and keeps it tender.
- 1 can of white frosting – This will be the fluffy coat of your bunny!
- Food coloring (pink and black) – For those cute little bunny features; let your creativity shine!
- 2 large marshmallows – They’ll become the floppy ears that make your cake so adorable.
- Chocolate chips for eyes – These are the finishing touch that brings your bunny to life.
- Shredded coconut (optional) – Use this if you want to add a fluffy texture to the bunny’s base!
How to Prepare Easter Bunny Cake
Now that you’ve gathered all your ingredients, it’s time to bring this adorable Easter Bunny Cake to life! Follow these simple, step-by-step instructions, and you’ll have a festive treat that’s sure to impress.
Step-by-Step Instructions
- Preheat the oven: Start by preheating your oven to 350°F (175°C). This is the perfect temperature for baking a fluffy cake, so don’t skip this step!
- Prepare the cake mix: In a large mixing bowl, combine your cake mix, 3 large eggs, 1 cup of water, and 1/2 cup of vegetable oil. Mix everything together according to the package instructions until the batter is smooth and well combined. I like to use a hand mixer for this—it makes it quick and easy!
- Pour the batter: Grease a round cake pan (8 or 9 inches works well) and pour the batter into it. Make sure it’s evenly distributed so it bakes nicely!
- Bake the cake: Pop the pan into your preheated oven and let it bake for about 25-30 minutes. Keep an eye on it, and check for doneness by inserting a toothpick into the center. If it comes out clean or with a few moist crumbs, your cake is ready!
- Cool completely: Once baked, take the cake out and let it cool in the pan for about 10 minutes. After that, transfer it to a wire rack to cool completely. This step is crucial—don’t rush it, or your frosting will melt right off!
- Frost the cake: Once the cake is cool, it’s time to give it a fluffy coat! Use your can of white frosting to cover the top and sides of the cake. Don’t worry about making it perfect; a little rustic charm adds to the fun!
- Shape the ears: Grab your large marshmallows and slice them in half diagonally to create bunny ears. Place these on top of the cake, standing tall—how cute!
- Add the details: Now, get creative! Use food coloring to tint some of the frosting pink for the nose and black for the eyes. Apply these to the marshmallows and use chocolate chips to complete the bunny’s adorable face.
- Optional decoration: If you’re feeling extra festive, sprinkle some shredded coconut around the base of the cake for a fluffy look. It’s totally optional but adds a lovely touch!
- Serve and enjoy: Slice up this whimsical cake and serve it at your Easter gathering. Watch as smiles light up the room—trust me, it’s a showstopper!
Why You’ll Love This Easter Bunny Cake
This Easter Bunny Cake isn’t just a treat; it’s an experience! Here are a few reasons why you’ll adore making and sharing this delightful dessert:
- Fun and Festive: The charming bunny design instantly brings a smile to everyone’s face, making it the perfect centerpiece for your Easter celebration.
- Easy to Make: With just a box of cake mix and a few simple ingredients, this cake is quick to prepare, even for novice bakers!
- Kid-Friendly: Your little ones will love getting involved in the decorating process—trust me, it’s a great way to create wonderful memories together!
- Customizable: Feel free to play with flavors and decorations! Whether you want a chocolate bunny or a coconut-covered base, the options are endless.
- Deliciously Sweet: With a fluffy cake and creamy frosting, each slice is a sweet treat that everyone will crave.
Tips for Success
Now that you’re all set to create your Easter Bunny Cake, here are some pro tips to ensure everything goes off without a hitch! Trust me, a few helpful hints can make a world of difference in the final outcome.
- Check Your Oven Temperature: Ovens can vary quite a bit, so it’s a good idea to use an oven thermometer to ensure it’s truly at 350°F. This will help your cake bake evenly and prevent any surprises!
- Don’t Overmix: When you’re combining your ingredients, be careful not to overmix the batter. Just mix until everything is combined—this keeps the cake light and fluffy. A few lumps are totally fine!
- Cool Completely: Make sure your cake is completely cool before frosting. If it’s even a little warm, the frosting will melt and slide right off. I usually let it cool on a wire rack for at least 30 minutes.
- Frosting Application: For a smooth frosting finish, apply a thin layer of frosting first to lock in crumbs (this is called a crumb coat). After it sets for about 10 minutes, you can add a thicker layer for that fluffy look!
- Marshmallow Ears Tip: If you want the marshmallow ears to stay upright, you can use a toothpick to secure them to the cake. Just make sure to remove the toothpicks before serving!
- Get Creative with Decorations: Feel free to add your personal touch! Use colored sprinkles, edible glitter, or even mini candy eggs around the base to make it even more festive!
- Store Properly: If you have leftovers (which I doubt will happen!), store the cake in an airtight container at room temperature. It’ll stay fresh and delicious for a few days!
With these tips in your back pocket, you’re all set to create a stunning Easter Bunny Cake that will wow your friends and family. Happy baking!
Variations of Easter Bunny Cake
One of the best things about the Easter Bunny Cake is how easily you can customize it to fit your tastes and the preferences of your guests! Here are some fun variations and ideas to get those creative juices flowing:
- Flavor Swaps: While a classic vanilla cake is delightful, why not try a chocolate cake mix for a rich, decadent twist? Or go for a lemon-flavored cake mix for a refreshing spring vibe! You can even use a funfetti mix for a colorful surprise in every bite!
- Frosting Fun: Instead of using a can of white frosting, you could make your own buttercream frosting for an extra touch of homemade goodness. Add in some lemon or almond extract for a delightful flavor boost!
- Themed Decorations: Get creative with the bunny theme! How about using pastel-colored frosting to create a rainbow bunny? You could even use edible flowers or candy to turn your cake into a beautiful spring garden!
- Layered Bunny Cake: For an impressive presentation, bake two cakes and stack them for a layered look. You can add frosting between the layers and even fill them with fruit preserves or whipped cream for an extra treat!
- Alternative Toppings: Instead of marshmallow ears, consider using chocolate-covered strawberries for fancy bunny ears or even candies like Peeps for a fun, colorful look. You can also swap out the coconut for crushed graham crackers for a sandy texture!
- Mini Bunny Cakes: If you’re short on time or want to create individual servings, try making mini bunny cakes using a muffin tin! Just adjust your baking time accordingly—these little cuties will be perfect for kids’ tables!
- Gluten-Free or Vegan Options: Looking for an alternative to fit specific dietary needs? Use a gluten-free cake mix or a vegan cake mix, and replace eggs with applesauce or flaxseed meal for a delicious, inclusive dessert!
With these variations, you can easily put your personal spin on the Easter Bunny Cake, making it a unique treat that everyone will love. So, let your imagination run wild and have fun with the process!
Storage & Reheating Instructions
Let’s talk about how to keep your delightful Easter Bunny Cake fresh and tasty! If you happen to have any leftovers (which is a big “if” in my house!), proper storage is key to enjoying it for days to come.
First things first, make sure the cake is completely cooled before you store it. If it’s even slightly warm, it can create moisture in the container, leading to sogginess—yikes! Once it’s cool, grab an airtight container or a cake keeper. This will help keep your bunny cake soft and delicious.
If you don’t have a specific cake container, you can cover it with plastic wrap or aluminum foil, making sure it’s tightly sealed. This will help prevent any air from getting in and drying out your cake.
Now, if you do have leftovers, they can stay at room temperature for about 2-3 days. Just remember to keep it away from direct sunlight or heat sources, as that can dry it out. If you want to keep it longer, you can pop it in the fridge—it’ll last for about a week that way.
When it comes to reheating, I recommend slicing your cake into pieces for easier warming. You can use a microwave for quick reheating—just pop a slice in for about 10-15 seconds. You want it warm but not hot enough to melt the frosting! If you prefer a slightly crispy outer layer, you could also warm it in an oven set to 300°F (150°C) for about 5-10 minutes. Just keep an eye on it!
And if you’re feeling adventurous, serving it with a scoop of vanilla ice cream or a dollop of whipped cream can take your bunny cake to the next level of deliciousness!
With these storage and reheating tips, you’ll be able to savor every bite of your Easter Bunny Cake, keeping the festive spirit alive long after the holiday has passed. Happy eating!
Nutritional Information
Now, let’s take a peek at the estimated nutritional values for each slice of this delightful Easter Bunny Cake. Keep in mind that these are just estimates, but they can help you keep track of what you’re enjoying!
- Calories: 250
- Fat: 10g
- Saturated Fat: 2g
- Unsaturated Fat: 8g
- Trans Fat: 0g
- Sodium: 200mg
- Carbohydrates: 35g
- Fiber: 1g
- Sugar: 20g
- Protein: 3g
- Cholesterol: 30mg
These values can vary based on the specific ingredients and brands you use, so feel free to adjust based on your preferences. Enjoy this festive treat guilt-free, knowing it’s all about balance and enjoyment during the holiday!
FAQ About Easter Bunny Cake
Got questions about making this adorable Easter Bunny Cake? Don’t worry, I’ve got you covered! Here are some of the most common queries I receive, along with my best tips and tricks to help you create the perfect festive dessert.
- Q: Can I make the cake ahead of time?
Absolutely! You can bake the cake a day or two in advance. Just make sure to store it properly so it stays fresh. Frosting it on the day you plan to serve it is the best way to keep that fluffy, delicious look! - Q: What if I want to use a different cake flavor?
No problem at all! Feel free to swap out the cake mix for any flavor you love. Chocolate, lemon, or even funfetti would all work beautifully. Just keep in mind that the frosting and decorations can be adjusted to match the flavor! - Q: How can I make the decorations stand out more?
Great question! Adding colorful sprinkles or edible glitter can really enhance the festive look of your bunny cake. You can also use pastel-colored frosting for a more vibrant appearance. Get creative—this is your chance to shine! - Q: Can I make this cake gluten-free or vegan?
Yes! There are plenty of gluten-free cake mixes available, and for a vegan option, look for a plant-based cake mix. You can replace eggs with applesauce or flaxseed meal. Just check the other ingredients in the frosting for any non-vegan items! - Q: How do I transport the cake if I’m bringing it to a gathering?
Transporting a cake can be tricky! I recommend using a cake carrier if you have one. If not, place the cake in the fridge to set the frosting, then cover it with plastic wrap or aluminum foil while it’s in a sturdy box. Just be careful not to press down on the frosting! - Q: What should I do if the cake sinks in the middle?
Oh no! This can happen if the oven temperature is too low or if the cake was underbaked. Make sure to check your oven temperature with an oven thermometer and always test for doneness with a toothpick. If it sinks, you can still decorate it and call it a “bunny dip!” - Q: How do I store leftovers?
Store any leftover cake in an airtight container at room temperature for up to 2-3 days. If you want it to last longer, pop it in the fridge for about a week. Just be sure to let it come back to room temperature before serving again for the best taste!
With these FAQs in your back pocket, you’re well-equipped to tackle any challenges that come your way while making this delightful Easter Bunny Cake. Remember, the best part is having fun and creating something special for your loved ones to enjoy!
Print
Easter Bunny Cake: 7 Easy Steps for a Joyful Treat
- Total Time: 45 minutes
- Yield: 8 servings 1x
- Diet: Vegetarian
Description
A fun and festive cake designed to resemble the Easter Bunny.
Ingredients
- 1 box of cake mix
- 3 large eggs
- 1 cup water
- 1/2 cup vegetable oil
- 1 can of white frosting
- Food coloring (pink and black)
- 2 large marshmallows
- Chocolate chips for eyes
- Shredded coconut (optional)
Instructions
- Preheat the oven to 350°F (175°C).
- Prepare cake mix according to package instructions.
- Pour batter into a round cake pan.
- Bake for 25-30 minutes or until a toothpick comes out clean.
- Allow cake to cool completely.
- Frost the top and sides of the cake with white frosting.
- Shape the ears with marshmallows and place on top of the cake.
- Add food coloring to frosting for the nose and eyes.
- Decorate with chocolate chips and shredded coconut if desired.
- Serve and enjoy!
Notes
- Use a different cake flavor if preferred.
- Customize decorations to your liking.
- Store leftovers in an airtight container.
- Prep Time: 15 minutes
- Cook Time: 30 minutes
- Category: Dessert
- Method: Baking
- Cuisine: American
Nutrition
- Serving Size: 1 slice
- Calories: 250
- Sugar: 20g
- Sodium: 200mg
- Fat: 10g
- Saturated Fat: 2g
- Unsaturated Fat: 8g
- Trans Fat: 0g
- Carbohydrates: 35g
- Fiber: 1g
- Protein: 3g
- Cholesterol: 30mg
Keywords: Easter Bunny Cake, Easter dessert, festive cake