Spring is such an exciting time, isn’t it? With flowers blooming and the sun shining just a little brighter, it feels like the perfect moment to gather loved ones around the dinner table. When I think of Easy April Dinner Ideas, I can’t help but smile at the thought of vibrant dishes that not only taste amazing but also bring joy to our family celebrations. Whether it’s a casual weeknight meal or a festive gathering for a holiday, these recipes are designed to uplift spirits and create wonderful memories.
Last year, we hosted a little spring soirée, and it was the laughter and stories shared over delicious food that truly made it special. I remember whipping up colorful salads and hearty main dishes that delighted everyone. The best part? Each recipe was easy to prepare, allowing me to enjoy the company of my family without being glued to the stove. That’s what Easy April Dinner Ideas are all about—bringing people together over food that’s simple yet absolutely delightful! Trust me, you’ll want to try these recipes to brighten up your dinner table this season.
Ingredients List
Here’s everything you’ll need to whip up this delightful dessert that’s perfect for any spring gathering! Gather these ingredients for a tasty treat everyone will love:
- 1 cup all-purpose flour
- 1/2 cup sugar
- 1/4 cup unsweetened cocoa powder
- 1/2 cup butter, softened
- 2 large eggs
- 1 tsp vanilla extract
- 1/2 cup milk
- 1/4 tsp salt
Make sure your butter is softened; it helps create that fluffy texture we’re after! And those large eggs? They’re going to bring everything together beautifully. Happy baking!
How to Prepare Easy April Dinner Ideas
Alright, let’s dive into making this festive dessert that’s sure to steal the spotlight at your spring gatherings! I’ll guide you through each step, so don’t worry; you’ll be a pro in no time. First things first, let’s get that oven preheating!
- Preheat your oven: Set your oven to 350°F (175°C) to get it nice and warm while you prepare the batter. This is a crucial step—trust me, it makes all the difference in getting that perfect bake!
- Mix your dry ingredients: In a medium bowl, combine 1 cup of all-purpose flour, 1/2 cup of sugar, 1/4 cup of unsweetened cocoa powder, and 1/4 tsp of salt. Give it a good whisk to ensure everything is well blended. This step is important because it helps distribute the cocoa evenly throughout the batter.
- Cream your butter and sugar: In a separate large bowl, take 1/2 cup of softened butter and 1/2 cup of sugar and beat them together until it’s light and fluffy. This usually takes about 2-3 minutes with an electric mixer. You want it to look pale and airy—this is where the magic happens!
- Add the eggs: Now, crack in 2 large eggs, one at a time, and mix well after each addition. This helps incorporate the eggs properly, which is essential for that lovely texture. Then stir in 1 tsp of vanilla extract and 1/2 cup of milk. Make sure to mix until everything is smooth and combined. Don’t be alarmed if it looks a bit runny; that’s just fine!
- Combine the mixtures: Gradually add your dry ingredients to the wet mixture, stirring gently until just combined. Be careful not to overmix— a few lumps are perfectly okay! We want to keep that batter light and fluffy.
- Prepare your cake pan: Grease your cake pan with butter and a sprinkle of flour, or use a non-stick spray. This will help the cake come out easily once it’s done baking. You can also line the bottom with parchment paper for extra insurance against sticking!
- Pour and bake: Pour your batter into the prepared cake pan, spreading it out evenly. Now, slide it into the preheated oven and set your timer for 25-30 minutes. You’ll know it’s ready when a toothpick inserted in the center comes out clean. If it comes out with wet batter, give it a few more minutes, but don’t forget to check!
- Cool before serving: Once baked, remove the cake from the oven and let it cool in the pan for about 10 minutes. After that, transfer it to a wire rack to cool completely. It’s tempting to dig in right away, but letting it cool really helps enhance the flavors!
And there you have it! Follow these steps, and you’ll have a delightful dessert that’s perfect for your Easy April Dinner Ideas. Enjoy the process and the delicious results!
Nutritional Information
Here’s a quick look at the estimated nutritional values for this delightful dessert, based on a serving size of one slice. Keep in mind that these numbers are estimates and can vary depending on specific ingredients used:
- Calories: 250
- Fat: 10g
- Saturated Fat: 5g
- Unsaturated Fat: 3g
- Trans Fat: 0g
- Cholesterol: 40mg
- Sodium: 150mg
- Carbohydrates: 35g
- Fiber: 2g
- Sugar: 20g
- Protein: 3g
This cake is a delightful treat that balances flavors and indulgence, making it a great addition to your Easy April Dinner Ideas. Enjoy every bite, knowing it’s a sweet way to celebrate the season!
Why You’ll Love This Recipe
- Quick to Prepare: With just 15 minutes of prep time, you can have this dessert ready to bake, making it perfect for those busy spring evenings.
- Easy to Make: The straightforward steps mean anyone can whip this up, whether you’re an experienced baker or just starting out!
- Flavorful: The delightful combination of cocoa and vanilla creates a rich taste that’s sure to impress your family and friends.
- Perfect for Gatherings: This dessert is a hit at any family gathering or festive occasion, bringing a touch of sweetness to your table.
- Customizable: You can easily add your favorite toppings or decorations to make it uniquely yours, whether it’s a sprinkle of powdered sugar or a drizzle of chocolate!
Tips for Success
Want to make sure your dessert is a showstopper? I’ve got some pro tips that’ll help you achieve that perfect bake every time. Trust me, these little tricks can make a big difference!
Testing for Doneness
When it comes to knowing if your cake is done, you’ll want to keep an eye on a few key signs. The toothpick test is my go-to; just insert a toothpick into the center of the cake. If it comes out clean or with just a few moist crumbs, you’re good to go! If it’s still wet, give it a couple more minutes and check again. Also, look for a slight pulling away from the edges of the pan—this is a great indicator that your cake is ready.
Cooling Properly
Once you take that beautiful cake out of the oven, resist the urge to dive right in! Let it cool in the pan for about 10 minutes. This step is crucial because it allows the cake to set up a bit, making it easier to transfer without breaking apart. After that, move it to a wire rack to cool completely. Cooling it properly helps enhance those flavors and ensures a wonderful texture!
Festive Decoration Ideas
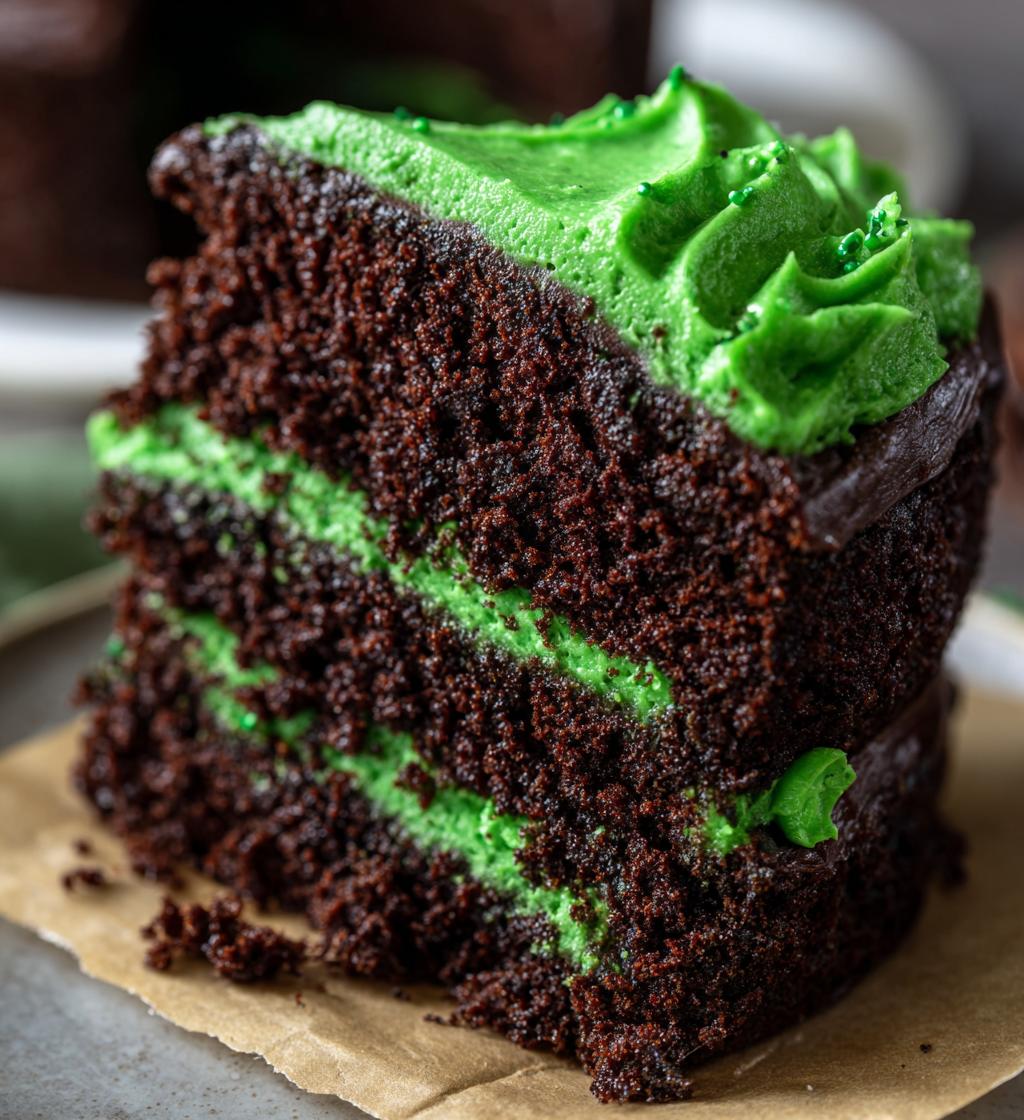
Now, let’s talk about making your cake look as fabulous as it tastes! For a festive touch, you can decorate with green frosting to celebrate St. Patrick’s Day or sprinkle some powdered sugar on top for a simple yet elegant look. If you’re feeling adventurous, a drizzle of chocolate ganache or a sprinkle of festive sprinkles can really elevate the presentation! You could even top each slice with a dollop of whipped cream and a few fresh berries for that extra pop of color. The options are endless!
With these tips in mind, you’re all set to impress your family and friends with a delightful dessert that’s not only delicious but also beautifully presented. Happy baking!
Variations of Easy April Dinner Ideas
Now that you’ve got the basics down, let’s have some fun and explore a few variations to make this dessert even more exciting! It’s always a joy to play around with flavors and decorations, especially when celebrating the vibrant spirit of spring.
Add Some Chocolate Chips
For all the chocolate lovers out there, why not toss in some chocolate chips? Just fold in about 1/2 cup of semi-sweet or dark chocolate chips into the batter before pouring it into the pan. They’ll melt beautifully while baking, adding pockets of delicious chocolatey goodness in every bite!
Try Different Frostings
If you want to switch up the frosting, consider making a cream cheese frosting instead. Just beat together 8 oz of cream cheese, 1/4 cup of butter, and enough powdered sugar to reach your desired sweetness. A splash of vanilla extract and a hint of lemon juice can add a refreshing twist!
Festive Decorations
Let your creativity shine! You can decorate with bright green frosting or even use edible glitter for a magical touch. Try adding some chocolate shavings or sprinkles on top for an eye-catching presentation. Or, if you prefer a more natural look, fresh berries or mint leaves can add a lovely pop of color and flavor!
Experiment with Flavors
Feeling adventurous? Consider adding a hint of flavor by mixing in some spices like cinnamon or coconut flakes. You could also swap out the cocoa powder for carob powder for a different taste profile. The possibilities are endless, and each variation can bring a new twist to your Easy April Dinner Ideas!
With these fun variations, you’ll keep your dessert fresh and exciting for every gathering. So go ahead, mix things up, and enjoy creating your own signature version of this delightful cake!
Serving Suggestions
Now that you’ve baked this delightful dessert, it’s time to think about what to serve alongside it to elevate the dining experience! Pairing your cake with the right dishes and beverages can truly enhance the flavors and create a memorable meal.
Light Spring Salads: A refreshing salad is a fantastic way to balance out the richness of the cake. Consider a mixed greens salad with a zesty lemon vinaigrette or a classic spinach salad topped with strawberries and pecans. These vibrant salads bring a touch of spring to your table while complementing the dessert perfectly.
Decadent Ice Cream: Who doesn’t love a warm slice of cake with a scoop of ice cream? Vanilla bean is a classic choice that pairs beautifully with the chocolatey richness of the cake. If you’re feeling adventurous, try a mint chocolate chip or even a green tea ice cream for a unique twist that ties in with your festive theme!
Hot Beverages: To warm up those chilly spring evenings, serve your dessert with a steaming cup of coffee or tea. A rich coffee, possibly with a hint of hazelnut or vanilla, can enhance the chocolate flavors. Alternatively, a soothing herbal tea like peppermint or chamomile would be a lovely, calming addition to your dessert spread.
Refreshing Lemonade or Sparkling Water: For a lighter option, consider serving a homemade lemonade or sparkling water with a splash of fruit juice. The citrusy notes will brighten up your meal and cleanse the palate after enjoying the cake. You could even garnish the drinks with fresh mint or lemon slices for a beautiful presentation.
By thoughtfully pairing your dessert with these delightful options, you’ll create a well-rounded dining experience that everyone will remember. Enjoy the flavors of spring while celebrating with family and friends!
Storage & Reheating Instructions
Now that you’ve enjoyed your delicious cake, let’s talk about how to store those tempting leftovers properly. You’ll want to keep them fresh and tasty for as long as possible!
Storing Leftovers: Once your cake has completely cooled, wrap it securely in plastic wrap or aluminum foil. This helps prevent it from drying out and keeps it moist. If you have a cake dome or a large airtight container, that works great too! Just make sure it’s stored in a cool, dry place away from direct sunlight. If you want to keep it for a longer period, you can also freeze it!
Freezing: To freeze your cake, slice it into individual portions first, then wrap each piece tightly in plastic wrap and place them in a freezer-safe container or a zip-top bag. This way, you can pull out just what you need without thawing the whole cake. It’s good for about 1-2 months in the freezer. Just remember to label it with the date so you know when it was baked!
Reheating: When you’re ready to enjoy your cake again, the best way to reheat it is in the oven. Preheat your oven to 350°F (175°C), then place the wrapped cake directly on the oven rack or on a baking sheet. Heat it for about 10-15 minutes, or until warmed through. This method helps maintain that lovely texture without drying it out.
If you’re in a hurry, you can also reheat individual slices in the microwave. Just pop a slice on a microwave-safe plate, cover it with a damp paper towel to retain moisture, and heat it for about 15-20 seconds. Check to make sure it’s warmed to your liking, but be careful not to overdo it, or you’ll end up with a rubbery texture!
With these simple storage and reheating tips, you can savor your delicious dessert even after the big gathering has ended. Enjoy every last bite!
FAQ Section
Got questions about this delightful dessert? Don’t worry, I’ve got you covered! Here are some common queries that might pop up while you’re whipping up this treat:
Can I make this dessert gluten-free?
Absolutely! To make this cake gluten-free, simply substitute the all-purpose flour with a gluten-free all-purpose blend. Just ensure it contains xanthan gum for the best texture. It should work beautifully, and your cake will still be delicious!
What can I use instead of eggs for a vegan version?
If you’re looking to make a vegan version, you can replace each egg with 1/4 cup of unsweetened applesauce or 1/4 cup of mashed banana. Another great option is using flax eggs—mix 1 tablespoon of ground flaxseed with 2.5 tablespoons of water and let it sit for a few minutes until it thickens. These swaps will keep your cake moist and yummy!
How far in advance can I make this cake?
You can make this cake a day or two ahead of your gathering! Just store it tightly wrapped at room temperature. If you’d like to bake it even earlier, feel free to freeze it. Just make sure to wrap it well, and it can last in the freezer for up to two months. Thaw it in the fridge overnight when you’re ready to enjoy!
Can I use a different type of frosting?
Of course! While green frosting is festive, you can get creative with your toppings. A simple glaze made with powdered sugar and milk can be delightful, or you could try whipped cream for a lighter option. Cream cheese frosting adds a nice tang, and chocolate ganache is always a winner for chocolate lovers. Go wild with your imagination!
What’s the best way to store leftovers?
To keep your cake fresh, let it cool completely, then wrap it tightly in plastic wrap or foil. You can also store it in an airtight container. If you want to keep it for longer, slice it and freeze individual pieces. Just remember to label them with the date so you can enjoy your tasty leftovers later!
Hopefully, these answers help you feel more confident in making this scrumptious dessert. Happy baking, and enjoy every delicious bite!
Print
Easy April Dinner Ideas to Brighten Your Spring Evenings
- Total Time: 45 minutes
- Yield: 8 servings 1x
- Diet: Vegetarian
Description
A festive dessert perfect for St. Patrick’s Day celebrations.
Ingredients
- 1 cup all-purpose flour
- 1/2 cup sugar
- 1/4 cup unsweetened cocoa powder
- 1/2 cup butter, softened
- 2 large eggs
- 1 tsp vanilla extract
- 1/2 cup milk
- 1/4 tsp salt
Instructions
- Preheat oven to 350°F (175°C).
- In a bowl, mix flour, sugar, cocoa powder, and salt.
- In another bowl, cream butter and sugar until fluffy.
- Add eggs one at a time, mixing well.
- Stir in vanilla extract and milk.
- Combine both mixtures and stir until smooth.
- Pour batter into a greased cake pan.
- Bake for 25-30 minutes or until a toothpick comes out clean.
- Let cool before serving.
Notes
- Decorate with green frosting for a festive look.
- Optional: add chocolate chips for extra flavor.
- Prep Time: 15 minutes
- Cook Time: 30 minutes
- Category: Dessert
- Method: Baking
- Cuisine: Irish
Nutrition
- Serving Size: 1 slice
- Calories: 250
- Sugar: 20g
- Sodium: 150mg
- Fat: 10g
- Saturated Fat: 5g
- Unsaturated Fat: 3g
- Trans Fat: 0g
- Carbohydrates: 35g
- Fiber: 2g
- Protein: 3g
- Cholesterol: 40mg
Keywords: st patricks day dessert, green dessert, festive dessert