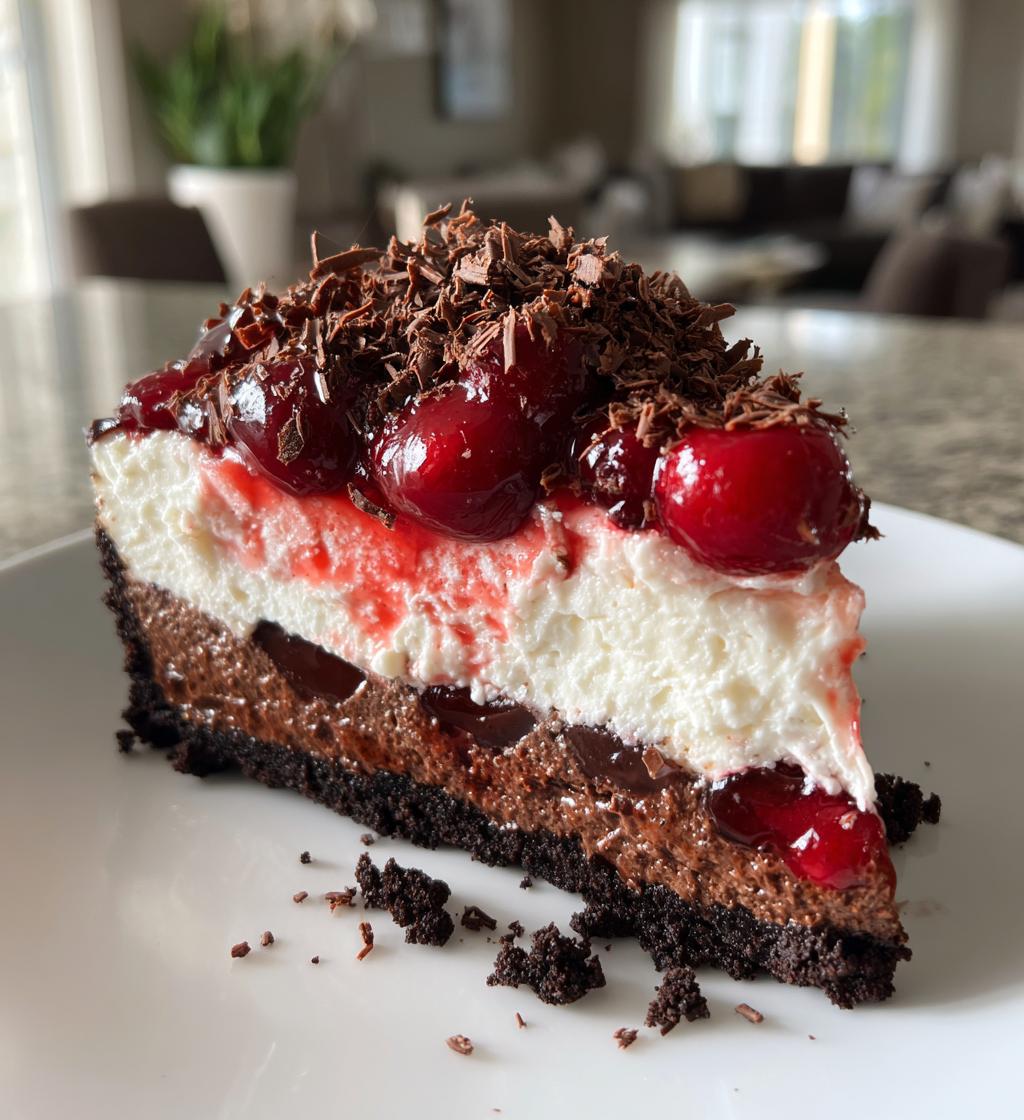
Oh, the magic of a no-bake dessert—especially when it tastes like you fussed for hours! My love affair with Black Forest flavors started at a tiny café in Berlin years ago, where I had my first bite of that perfect chocolate-cherry combo. I’ve been obsessed ever since. This Black Forest Cheesecake – Easy No Bake version is my go-to when I need something impressive but don’t want to turn on the oven. It’s all the decadence of the classic, with layers of creamy filling, tart cherries, and a chocolate crust that comes together in minutes. Trust me, your fork will be diving in before the fridge door closes.
Why You’ll Love This Black Forest Cheesecake
This dessert is basically cheating—in the best way possible. Here’s why:
- No oven needed: Seriously, just mix, layer, and chill. Perfect for summer when baking feels like a punishment.
- Creamy dreamy texture: The whipped cream folded into the filling makes it lighter than traditional cheesecake, but still luxuriously rich.
- Quick prep time: 20 minutes of active work means more time for eating (or napping while it chills).
- Showstopper looks: Those chocolate shavings and ruby-red cherries? Instant wow factor with zero effort.
- Make-ahead magic: Tastes even better the next day—if it lasts that long.
Ingredients for Black Forest Cheesecake – Easy No Bake
Gather these simple ingredients—each one plays a starring role in creating that perfect chocolate-cherry harmony:
- For the crust: 2 cups chocolate cookie crumbs (I use Oreo middles and all!), 1/2 cup melted butter (not just softened—it needs to hold those crumbs together like edible glue)
- For the filling: 16 oz cream cheese (full-fat only, softened to room temperature—no shortcuts here), 1 1/2 cups heavy cream (chilled is crucial), 1/2 cup powdered sugar (sifted to avoid lumps), 1 tsp vanilla extract (the real stuff, please)
- For the magic: 1 can cherry pie filling (the syrupy kind—about 21 oz), 1/2 cup chocolate shavings (I cheat with a vegetable peeler on a chocolate bar)
Ingredient Substitutions & Notes
No chocolate cookies? Graham crackers work (use 2 tbsp extra butter). Fresh cherries? Pit and simmer 2 cups with 1/4 cup sugar until jammy. That “chill the bowl” step for whipping cream isn’t just fussy—a cold bowl helps the cream hold stiff peaks. And if your kitchen’s hot, pop the mixing bowl in the freezer for 10 minutes first. Pro tip: If using block cream cheese, let it soften on the counter—microwaving creates weird hot spots that’ll make your filling lumpy.
Equipment You’ll Need
Here’s what you’ll need to whip up this beauty:
- Springform pan: Essential for that clean cheesecake reveal—I use a 9-inch one.
- Electric mixer: A hand mixer works, but a stand mixer makes whipping cream a breeze.
- Food processor: For turning cookies into fine crumbs (or a ziplock bag and rolling pin if you’re feeling old-school).
- Mixing bowls: One for the crust, one for the filling, and one to chill for the cream.
- Spatula: A trusty sidekick for spreading and smoothing everything just right.
How to Make Black Forest Cheesecake – Easy No Bake
Okay, let’s get to the fun part—making this beauty! The steps are simple, but I’ll walk you through each one so you nail it on the first try. The secret? Patience during chilling time. (I know, I know—waiting is the hardest part.)
Step 1: Prepare the Crust
First, grab your springform pan—no need to grease it, since the butter in the crust will handle that. Dump your chocolate cookie crumbs into a bowl and pour in the melted butter. Mix until it looks like wet sand (you shouldn’t see any dry spots). Now, here’s the trick: press it firmly into the pan with your fingers, then use a flat-bottomed cup to really pack it down. This keeps the crust from crumbling when you slice it later. Pop it in the fridge while you make the filling—this helps it set faster.
Step 2: Make the Cream Cheese Filling
Whip that chilled heavy cream first—beat it just until stiff peaks form (overdo it, and you’ll get butter—trust me, I’ve been there). Set it aside. Now, in another bowl, beat the softened cream cheese until it’s completely smooth—no lumps allowed! Add the powdered sugar and vanilla, and beat again until fluffy. Here’s where you fold in the whipped cream: gently, with a spatula, in two batches. Think of it like tucking clouds into the cream cheese. The mixture should be light but hold its shape when you scoop it.
Step 3: Layer and Chill
Time to assemble! Spread half the filling over your chilled crust—an offset spatula helps here, but a butter knife works too. Next, spoon the cherry pie filling over the cream cheese layer, leaving a little border so the cherries don’t bleed into the sides. Dollop the rest of the filling on top and smooth it carefully. Now, the hardest part: cover it and chill for at least 4 hours (overnight is even better). The wait is worth it—this lets the flavors meld and the filling firm up so every slice is perfect. Right before serving, shower it with chocolate shavings and maybe a few extra cherries if you’re feeling fancy.
Tips for the Perfect Black Forest Cheesecake
After making this cheesecake more times than I can count, here are my hard-won secrets:
- Chill everything: Bowl, beaters, even the cream—cold tools make whipped cream fluffier.
- Room-temp cream cheese is non-negotiable: Take it out 2 hours early—lumpy filling is heartbreaking.
- Press that crust: Really pack it down so slices hold their shape.
- Cherry barrier: Leave a half-inch border when adding cherries to keep layers pretty.
- Patience pays: That 4-hour chill isn’t optional—it transforms the texture from good to “wow.”
Serving and Storage Suggestions
When it’s finally time to serve (I know, the anticipation is killer!), slide a knife under hot water, dry it, and make your first slice—this keeps the edges clean. Top each piece with extra cherries and a dusting of cocoa powder if you’re feeling fancy. Leftovers? Ha, good one! But if you somehow have any, cover tightly and store in the fridge for up to 3 days. The crust might soften a tad, but the flavors just get better. Pro tip: Freeze individual slices for up to a month—just thaw overnight in the fridge before your next cheesecake emergency.
Black Forest Cheesecake – Easy No Bake FAQs
Got questions? I’ve got answers—here are the ones I get asked most about this beauty:
Can I use frozen cherries instead of pie filling?
Absolutely! Thaw 2 cups of cherries, then simmer with 1/4 cup sugar and a splash of lemon juice until syrupy. Let it cool completely before layering—hot fruit turns your filling into soup.
How do I prevent a soggy crust?
Two tricks: 1) Press the crumbs really firmly (I use a measuring cup to compact them). 2) Chill the crust for 15 minutes before adding filling—it creates a moisture barrier.
Can I make this gluten-free?
Easy swap! Use gluten-free chocolate cookies for the crust (I like the ones from Trader Joe’s). Everything else is naturally gluten-free—just check labels on pie filling.
Why did my whipped cream deflate?
Overbeating is usually the culprit. Stop when stiff peaks form—the second the cream looks grainy, you’ve gone too far. Also, make sure your bowl and beaters are ice-cold.
How far ahead can I prepare this?
It’s actually better made 1-2 days ahead! The flavors deepen, and the texture sets perfectly. Just add chocolate shavings right before serving so they stay crisp.
Nutritional Information
Just so you know what you’re diving into (not that it’ll stop you—I never let numbers get between me and dessert!):
- Calories: 420 per slice
- Fat: 30g (18g saturated—worth every bite)
- Sugar: 28g (mostly from those glorious cherries)
- Protein: 5g (hey, cheesecake has protein—that counts, right?)
Values are estimates—your exact nutrition will vary based on ingredients. But honestly? Some things are too delicious to measure. Life’s short—eat the cheesecake.
Share Your Creation!
I’d love to see your masterpiece! Tag me on social media so I can admire your Black Forest Cheesecake – Easy No Bake and cheer you on. You’ve got this!
Print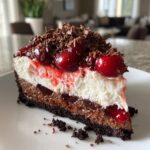
Delectable No-Bake Black Forest Cheesecake in 20 Minutes
- Total Time: 4 hours 20 minutes
- Yield: 10 servings 1x
- Diet: Vegetarian
Description
A simple no-bake Black Forest cheesecake with layers of chocolate, cherries, and creamy filling.
Ingredients
- 2 cups chocolate cookie crumbs
- 1/2 cup melted butter
- 1 1/2 cups heavy cream
- 16 oz cream cheese, softened
- 1/2 cup powdered sugar
- 1 tsp vanilla extract
- 1 can cherry pie filling
- 1/2 cup chocolate shavings
Instructions
- Mix cookie crumbs with melted butter and press into a springform pan.
- Whip the heavy cream until stiff peaks form.
- Beat cream cheese, powdered sugar, and vanilla until smooth.
- Fold whipped cream into the cream cheese mixture.
- Spread half the filling over the crust.
- Add a layer of cherry pie filling.
- Top with remaining cream cheese mixture.
- Chill for at least 4 hours.
- Garnish with chocolate shavings before serving.
Notes
- Use a food processor for fine cookie crumbs.
- Chill the mixing bowl before whipping cream.
- Let the cheesecake set in the fridge overnight for best results.
- Prep Time: 20 minutes
- Cook Time: 0 minutes
- Category: Dessert
- Method: No Bake
- Cuisine: German
Nutrition
- Serving Size: 1 slice
- Calories: 420
- Sugar: 28g
- Sodium: 310mg
- Fat: 30g
- Saturated Fat: 18g
- Unsaturated Fat: 9g
- Trans Fat: 0g
- Carbohydrates: 35g
- Fiber: 2g
- Protein: 5g
- Cholesterol: 85mg
Keywords: Black Forest, cheesecake, no bake, easy dessert