You know those summer afternoons when the strawberries at the farmer’s market just smell too good to resist? That’s exactly how this easy strawberry cake was born—out of pure berry temptation! I wanted something simple that would really let those fresh strawberries shine, not some fussy dessert that hides their flavor. My easy strawberry cake bursts with real berry flavor in every bite, thanks to a generous cup and a half of juicy chopped strawberries folded right into the batter. No artificial extracts or fancy techniques here—just honest-to-goodness strawberry goodness in a cake that comes together in about an hour. Trust me, your kitchen will smell incredible, and your family will be hovering by the oven waiting for that first slice!
Why You’ll Love My Easy Strawberry Cake Bursts With Real Berry Flavor
This isn’t just any strawberry cake—it’s the one you’ll make again and again because:
- Quick prep: You’re just 15 minutes away from oven-ready batter (yes, really!)
- Real berry magic: Fresh strawberries bake right into the cake, no artificial flavorings needed
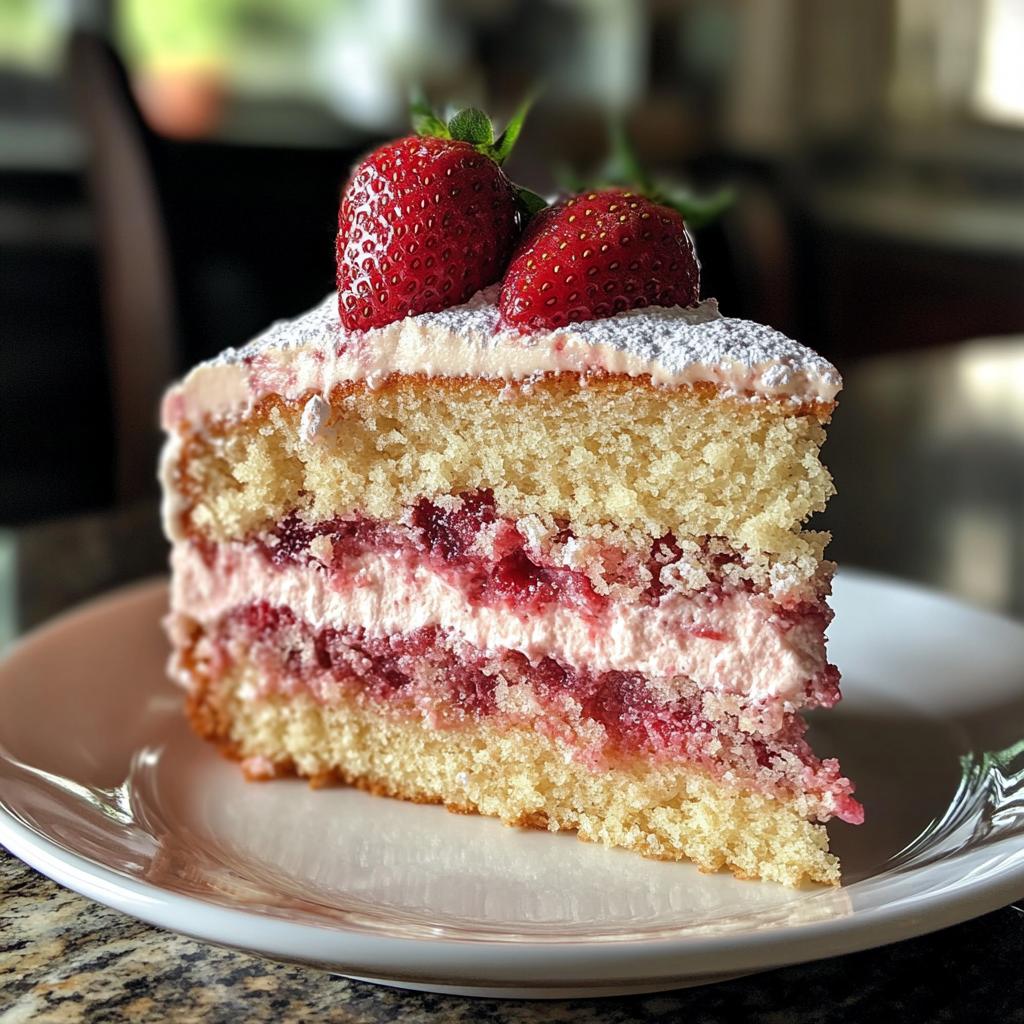
- Perfect texture: Tender crumb with juicy berry pockets in every slice
- Crowd-pleaser: Kids and adults go wild for that sweet-tart strawberry punch
I’ve served this at everything from backyard BBQs to fancy brunches—it never fails to disappear fast!
Ingredients for My Easy Strawberry Cake Bursts With Real Berry Flavor
Grab these simple ingredients—you probably have most in your pantry already! The magic happens when they all come together:
- 2 cups all-purpose flour (spooned and leveled, please—no packing!)
- 1 1/2 cups granulated sugar (yes, it seems like a lot, but trust me—those berries need the balance)
- 1 teaspoon baking powder (check that expiration date!)
- 1/2 teaspoon salt (just enough to make the flavors pop)
- 1/2 cup unsalted butter, softened (leave it out for 30 minutes—it should dent slightly when pressed)
- 2 large eggs (room temperature blends smoother)
- 1 teaspoon pure vanilla extract (the good stuff—no imitation!)
- 1 cup whole milk (2% works in a pinch, but whole gives richer texture)
- 1 1/2 cups fresh strawberries, chopped into 1/4-inch pieces (measure AFTER chopping)
Ingredient Notes & Substitutions
Baking is science, but I’ve learned some flexible swaps over the years:
- Strawberries: Frozen work if thawed and patted VERY dry first (they’ll bleed more color though)
- Milk: Almond or oat milk substitute fine, but the cake might be slightly less tender
- Butter: If you only have salted, reduce added salt to 1/4 teaspoon
- Flour: For a lighter cake, swap 1/2 cup flour for 1/2 cup cornstarch (sift together first)
Pro tip: Those strawberry juices that collect while chopping? Drizzle them over the baked cake for extra berry punch!
Equipment Needed for My Easy Strawberry Cake Bursts With Real Berry Flavor
Here’s the short list of tools you’ll need—nothing fancy, just the basics every baker should have:
- 9-inch round cake pan (the classic metal kind works perfectly—no need for springform)
- Mixing bowls (one large, one medium—I like glass so I can see when everything’s fully mixed)
- Electric hand mixer (stand mixer works too, but honestly, I usually just use my trusty handheld)
- Rubber spatula (for scraping every last bit of that delicious batter into the pan)
- Measuring cups and spoons (dry for flour, wet for liquids—you know the drill)
- Knife and cutting board (for those gorgeous strawberry chunks)
That’s it! No special gadgets required—just good old-fashioned baking tools. Though I will say, a silicone spatula makes folding in those strawberries a breeze without crushing them. But hey, a regular spoon works just fine too!
How to Make My Easy Strawberry Cake Bursts With Real Berry Flavor
Ready to fill your kitchen with the most amazing strawberry aroma? Let’s bake! Follow these simple steps for a cake that’ll have everyone asking for seconds:
Step 1: Prep the Oven and Pan
First things first – get that oven humming! Preheat to 350°F (175°C) – this gives it time to reach the perfect even temperature. While that’s warming up, grab your 9-inch pan. I like to grease mine with softened butter, getting into every nook, then dust lightly with flour. That satisfying “plop” when your cake releases later? Worth this extra 30 seconds of prep!
Step 2: Mix Dry Ingredients
Now, let’s build our dry mix. In your medium bowl, whisk together the flour, sugar, baking powder, and salt. And I mean REALLY whisk – for about 30 seconds to get everything ultra-combined and fluffy. See those little clouds of flour? That’s what we want! This ensures our cake rises evenly without any bitter baking powder pockets.
Step 3: Cream Butter and Wet Ingredients
Here’s where the magic starts! In your large bowl, beat the softened butter with an electric mixer until it’s creamy and pale – about 1 minute. Now add the eggs one at a time, mixing well after each (that yolk should disappear completely). Splash in the vanilla and mix another 30 seconds until silky smooth. Pro tip: Scrape down the sides halfway through – those sneaky unmixed bits love to hide there!
Step 4: Combine Batter and Fold in Strawberries
Time to bring it all together! With your mixer on low, alternate adding the dry ingredients and milk (dry-wet-dry-wet-dry is my rhythm). Mix JUST until combined – a few small lumps are fine! Now the fun part: gently fold in those gorgeous chopped strawberries with a spatula. I use a folding motion from the bottom up – think “turning pages” rather than stirring – to keep those berries intact. The batter will turn the prettiest pink hue!
Step 5: Bake and Cool
Pour that beautiful batter into your prepared pan (it’ll be thick!) and smooth the top. Bake for 35-40 minutes until golden at the edges and a toothpick comes out with just a few moist crumbs. Your kitchen will smell AMAZING! Let it cool in the pan 10 minutes (no cheating – this prevents crumbling!), then transfer to a rack. The hardest part? Waiting until it’s fully cooled to slice – but trust me, those clean slices are worth it!
Tips for Perfect My Easy Strawberry Cake Bursts With Real Berry Flavor
After making this cake more times than I can count (okay, maybe I can count—but who’s keeping track?), I’ve picked up some foolproof tricks to make it absolutely perfect every single time:
- Room temp is your friend: Take those eggs and butter out at least 30 minutes before baking. Cold butter won’t cream properly, and chilly eggs can make your batter curdle. If you forget (we’ve all been there!), place eggs in warm water for 5 minutes to take the chill off.
- Chop, don’t crush: When prepping strawberries, use a sharp knife and quick chopping motions—no sawing! You want neat 1/4-inch pieces that hold their shape, not mushy pulp. Bonus: the juices that collect while chopping make an amazing natural syrup to drizzle over slices later!
- The toothpick lie: Don’t trust a clean toothpick—it means overbaked cake! Pull it out when a few moist crumbs cling to the tester. The cake keeps cooking as it cools, so this ensures that signature moist texture.
- Powdered sugar magic: Wait until the cake is completely cool before dusting with powdered sugar. I place a fine-mesh strainer over the cake and tap it gently—it creates that beautiful snow-like coating that makes everyone go “ooh!”
One last secret? If you can resist eating it immediately (big if!), wrap the cooled cake and let it sit overnight. The strawberry flavor intensifies beautifully—but I won’t judge if you dive in right away!
Serving Suggestions for My Easy Strawberry Cake Bursts With Real Berry Flavor
Oh, the possibilities with this cake! While it’s absolutely delicious all on its own (I may or may not have eaten slices straight from the pan), here are my favorite ways to make it extra special:
Classic à la mode: A scoop of vanilla bean ice cream melting over warm cake is pure heaven. The cold creaminess against the tender cake? Perfection. My trick? Microwave individual slices for 10 seconds before adding ice cream—it’s like having fresh-from-the-oven cake all over again!
Whipped cream cloud: I whip heavy cream with just a touch of powdered sugar and vanilla until soft peaks form. Dollop generously on each slice and top with a single perfect strawberry—so simple, so stunning. For parties, I’ll pipe little rosettes around the whole cake before serving.
Berry bonanza: When strawberries are in season, I macerate extra berries with a sprinkle of sugar to create a quick sauce. Spoon this over slices along with some fresh mint leaves—the colors pop against the golden cake! Blueberries or raspberries work beautifully too for a mixed berry twist.
Breakfast treat: Okay, hear me out—this cake makes an amazing brunch dish! I’ll serve slightly thicker slices with a side of Greek yogurt and honey drizzle. The tangy yogurt balances the sweetness, and suddenly it’s totally acceptable to have cake for breakfast (my kind of logic!).
Pro tip: For picnics, I’ll bake the cake in a rectangular pan and cut it into squares—easier to transport and serve. Just don’t forget the napkins—those juicy strawberry bits can get messy (in the best possible way)!
Storage & Reheating Instructions
This strawberry cake stays fresh and delicious for days—if it lasts that long! Here’s how to keep it tasting like it just came out of the oven:
Storing at room temperature: If you’re planning to enjoy it within 24 hours, just cover it loosely with plastic wrap or a clean kitchen towel. The cake stays perfectly moist, and that powdered sugar topping stays intact. Keep it away from direct sunlight or heat sources—no one wants a melty cake!
Refrigerator storage: For longer freshness, pop it in the fridge. Wrap the cake tightly in plastic wrap or store it in an airtight container. It’ll keep beautifully for up to 3 days. Pro tip: Let it come to room temperature for 15-20 minutes before serving—it tastes so much better that way!
Freezing for later: Yes, you can freeze this cake! Wrap individual slices in plastic wrap, then place them in a freezer-safe bag. It’ll keep for up to 2 months. When you’re ready to enjoy, just thaw it at room temperature for about an hour. No microwave needed—it’ll taste just as fresh as the day you baked it.
Reheating tips: If you prefer your cake warm, microwave individual slices for 10-15 seconds. It’s like having a fresh-from-the-oven treat all over again! Just be careful not to overdo it—you want it warm, not hot. For a larger piece, wrap it in foil and heat in a 300°F oven for about 5 minutes.
One last thing: If you’ve added whipped cream or ice cream, store those separately to avoid a soggy cake. Trust me, a little extra effort keeps this strawberry cake at its absolute best!
Nutritional Information for My Easy Strawberry Cake Bursts With Real Berry Flavor
Now, I’ll be honest—this cake is a treat, not a health food! But if you’re curious about what’s in each delicious slice, here’s the breakdown. Remember, nutrition varies based on ingredients you use—these are estimates per serving (that’s 1/8 of the cake, if you can stop at just one slice!):
- Calories: 280 (perfect little indulgence)
- Total fat: 10g (that butter gives it such richness)
- Saturated fat: 6g (worth every creamy bite)
- Carbohydrates: 45g (mostly from that natural berry sweetness)
- Fiber: 1g (thank you, fresh strawberries!)
- Sugar: 25g (it’s dessert, after all)
- Protein: 4g (eggs and milk do their part)
- Sodium: 150mg (just a pinch of salt balances flavors)
Pro tip: If you’re watching sugar, try reducing it to 1 cup and using riper strawberries—they’ll naturally sweeten the cake more. But hey, some days call for full-sugar joy—life’s about balance, right?
FAQ About My Easy Strawberry Cake Bursts With Real Berry Flavor
I’ve gotten so many questions about this strawberry cake over the years—here are the ones that pop up most often with my tried-and-true answers!
Can I use frozen strawberries instead of fresh?
Absolutely! Just thaw them completely first and pat them super dry with paper towels—I mean, really press out that excess moisture. Frozen berries tend to bleed more color into the batter (your cake will look pinker), but the flavor still shines through beautifully. Pro tip: Chop them while still slightly frozen—it’s way less messy!
Why does my cake sometimes turn out soggy?
Ah, the dreaded soggy cake! Usually it’s one of three things: 1) Overmixing the batter after adding strawberries (gentle folds only!), 2) Not patting berries dry enough if using frozen, or 3) Cutting the cake while it’s still warm—that 10-minute cooling period in the pan is crucial! If all else fails, try tossing your chopped strawberries with a tablespoon of flour before folding them in—it helps absorb extra juices.
Can I make this strawberry cake gluten-free?
You bet! I’ve had great success using a 1:1 gluten-free flour blend (like Bob’s Red Mill). The texture comes out slightly denser but still delicious. Just be sure to let the batter rest for 5 minutes before baking—GF flours need that extra hydration time. And maybe add an extra 1/4 cup strawberries—GF cakes can dry out faster.
How do I know when the cake is perfectly baked?
Besides the toothpick test (a few moist crumbs are good!), look for these signs: The edges will pull slightly away from the pan, the top springs back when gently pressed, and the most heavenly strawberry scent fills your kitchen. If you’re unsure, err on the side of underbaking—you can always pop it back in, but you can’t undo dryness!
Can I double this recipe for a larger crowd?
Of course! Double all ingredients exactly and use a 9×13-inch pan. Baking time might increase to 45-50 minutes—just keep an eye on it. For layer cakes, I actually prefer making two separate batches rather than doubling—the strawberries distribute more evenly that way. Either way, you’ll have one happy crowd!
Still have questions? Drop them in the comments—I love helping troubleshoot baking adventures! Nothing makes me happier than seeing your strawberry cake successes.
Share Your Experience
Nothing makes me happier than hearing how this strawberry cake turns out in your kitchen! Did your family go crazy for it? Did you add your own special twist? I want to know all the details—the good, the messy, and the delicious!
Leave a comment below telling me how it went—did those fresh strawberries make your cake burst with flavor like I promised? Snap a photo of your masterpiece (or that first glorious slice disappearing) and tag me—I live for those berry-filled baking victories!
And hey, if you loved this recipe as much as I do, give it a 5-star rating to help other strawberry lovers find it. Your reviews help me create more of the recipes you want to bake. Now go enjoy that cake—you’ve earned every sweet, juicy bite!
Print
1 Perfect Strawberry Cake Bursting With Fresh Berry Flavor
- Total Time: 55 minutes
- Yield: 1 cake (8 servings) 1x
- Diet: Vegetarian
Description
A simple strawberry cake packed with real berry flavor. Perfect for any occasion.
Ingredients
- 2 cups all-purpose flour
- 1 1/2 cups sugar
- 1 tsp baking powder
- 1/2 tsp salt
- 1/2 cup unsalted butter, softened
- 2 eggs
- 1 tsp vanilla extract
- 1 cup milk
- 1 1/2 cups fresh strawberries, chopped
Instructions
- Preheat oven to 350°F (175°C). Grease a 9-inch cake pan.
- Mix flour, sugar, baking powder, and salt in a bowl.
- Cream butter in another bowl. Add eggs and vanilla, beat until smooth.
- Alternately add dry ingredients and milk, mixing well.
- Fold in chopped strawberries.
- Pour batter into pan and bake for 35-40 minutes.
- Let cool before serving.
Notes
- Use fresh strawberries for best flavor.
- Dust with powdered sugar for decoration.
- Store leftovers covered in the fridge.
- Prep Time: 15 minutes
- Cook Time: 40 minutes
- Category: Dessert
- Method: Baking
- Cuisine: American
Nutrition
- Serving Size: 1 slice
- Calories: 280
- Sugar: 25g
- Sodium: 150mg
- Fat: 10g
- Saturated Fat: 6g
- Unsaturated Fat: 3g
- Trans Fat: 0g
- Carbohydrates: 45g
- Fiber: 1g
- Protein: 4g
- Cholesterol: 55mg
Keywords: strawberry cake, easy dessert, berry cake, homemade cake