There’s something magical about making jam, isn’t there? The whole process transforms fresh fruit into a delightful spread that can brighten your mornings and elevate any dessert. My favorite way to capture that summertime sweetness is with this *easy strawberry freezer jam recipe*. It’s not just simple; it’s a joyful experience that fills your kitchen with the irresistible aroma of fresh strawberries. I remember the first time I made this jam with my kids. We picked strawberries from a local farm, and their little hands were covered in juice as they helped crush the fruit. It turned into a fun, messy adventure that we still laugh about!
This recipe is unique because it doesn’t require any complicated canning techniques or special equipment. Instead, you get to enjoy the fresh taste of strawberries straight from your freezer, ready to slather on toast or mix into yogurt any time you like. Trust me, once you taste this jam, you’ll never go back to store-bought. It’s a burst of summer in every bite, and the best part? It’s so quick and easy to make! You’ll be hooked, just like I was, and you won’t want to miss out on this delightful treat.
Ingredients List
Gathering the right ingredients is key to making this *easy strawberry freezer jam recipe* a success. Here’s what you’ll need:
- 4 cups fresh strawberries, crushed: Look for ripe, juicy strawberries for the best flavor. Make sure to wash them thoroughly and remove the green tops, or as we call it, hulling!
- 1 1/2 cups granulated sugar: This sugar helps balance the tartness of the strawberries while also acting as a natural preservative. Don’t skimp on this; it’s crucial for that sweet jam flavor!
- 1/4 cup lemon juice: Fresh lemon juice adds a lovely brightness and helps with the setting of the jam. If you can, squeeze it fresh for the best taste!
- 1 package (1.75 oz) fruit pectin: This is what helps your jam to thicken and set properly. You can find it in the baking aisle of most grocery stores. Just make sure to check the package instructions, as different brands might have slight variations.
Once you’ve gathered these ingredients, you’re all set to create something delicious! Trust me, having everything prepared and measured out makes the process so much smoother and more enjoyable.
How to Prepare the Easy Strawberry Freezer Jam Recipe
Now that you’ve got your ingredients ready, let’s dive into the steps for making this delightful *easy strawberry freezer jam recipe*! I promise, it’s as easy as pie—well, easier actually! Just follow these steps, and you’ll be savoring that fresh strawberry flavor in no time.
Step 1: Prepare the Strawberries
First things first, let’s get those strawberries ready! Start by washing them under cool running water to remove any dirt or little critters. I always like to give them a good scrub with my hands, just to make sure they’re squeaky clean. Once they’re rinsed, it’s time to hull them. Hulling means removing the green tops and the white core. You can use a small paring knife or even a sturdy straw to push through the center. Just be careful not to cut too deep! You want those juicy, red bits for your jam.
Step 2: Crush the Strawberries
Now comes the fun part—crushing the strawberries! You can use a potato masher, a fork, or even a food processor if you want to save some elbow grease. I personally love using a potato masher; it gives me that rustic, chunky texture that I adore in jam. Just mash away until you have about 4 cups of crushed strawberries. You want some pieces to remain, as they add a lovely texture to the jam.
Step 3: Mix Strawberries and Sugar
In a large bowl, combine your crushed strawberries with the granulated sugar. Mix it well and let it sit for about 10 minutes. This step is crucial! While the mixture rests, the sugar draws out the juices from the strawberries, creating a delicious syrup that helps flavor the jam and makes it easier to set later. You’ll notice the strawberries getting all glistening—trust me, it’s a beautiful sight!
Step 4: Prepare the Pectin Mixture
While the strawberries are mingling with the sugar, it’s time to prepare the pectin. In a separate saucepan, mix the fruit pectin with 1/4 cup of lemon juice. Then, bring this mixture to a boil over medium heat, stirring constantly. This is super important; if you don’t stir, the pectin can clump up and ruin your jam’s texture. You want it to dissolve completely, so keep your eyes on it!
Step 5: Combine Mixtures
Once the pectin mixture is boiling nicely, pour it into the strawberry and sugar mixture. Now, stir it all together vigorously for about 2 minutes. This is where the magic happens! You want to ensure everything is well combined so that the pectin can work its thickening magic. After this, you should see that your mixture has taken on a lovely, glossy appearance.
Step 6: Store the Jam
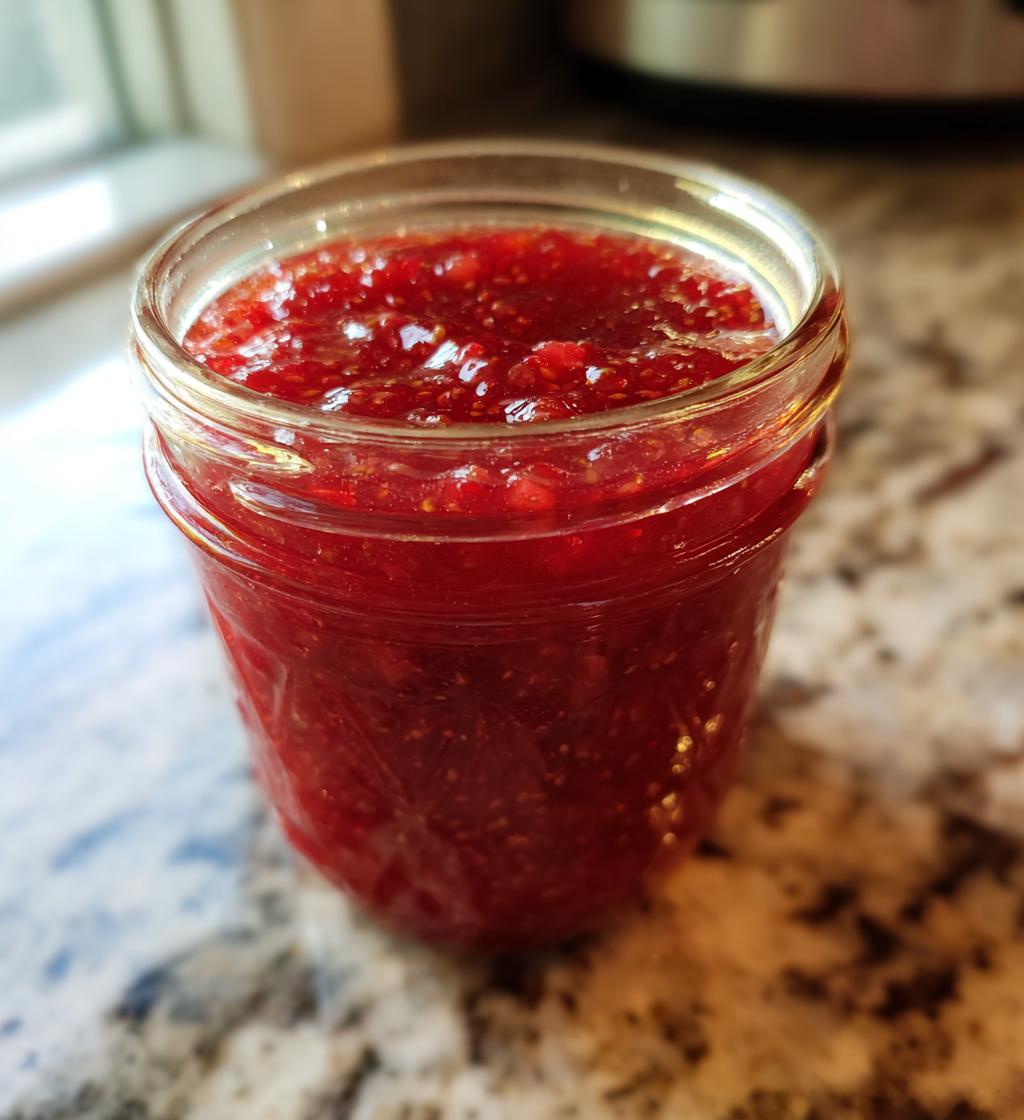
Finally, let’s get that jam into jars! Pour the mixture into clean jars, leaving about 1/2 inch of space at the top to allow for expansion in the freezer. I recommend using a funnel for less mess—trust me, it makes a difference! Once your jars are filled, seal them up tightly. Let them sit at room temperature for 24 hours to set properly, then pop them in the freezer for long-term storage. Don’t forget to label them with the date, so you know when you made your delicious creation!
Nutritional Information
When it comes to enjoying your homemade *easy strawberry freezer jam*, it’s nice to know what you’re putting on your toast or mixing into your yogurt! Here’s a breakdown of the typical nutritional values for a serving size of 1 tablespoon:
- Calories: 50
- Sugar: 12g
- Carbohydrates: 13g
- Fat: 0g
- Protein: 0g
- Sodium: 0mg
These values may vary slightly based on the specific ingredients you use, but this should give you a good idea of what to expect. Remember, this jam is a delightful treat, and enjoying it in moderation is key to keeping it a part of your healthy lifestyle!
Why You’ll Love This Recipe
- Super Easy: This *easy strawberry freezer jam recipe* requires no complicated canning skills. You’ll whip it up in no time!
- Fresh Flavor: Using ripe strawberries means you get that vibrant, sweet taste that store-bought jams just can’t match.
- Quick Prep: With just 15 minutes of prep time, you can have delicious homemade jam ready to freeze!
- Versatile: Spread it on toast, swirl it into yogurt, or use it as a topping for desserts. It’s perfect for so many occasions!
- Kid-Friendly: Involve your little ones in the process for a fun kitchen activity that creates tasty memories.
Once you experience the joy of making this jam, I promise you’ll be coming back for more! It’s a wonderful way to savor those summer strawberries all year round.
Tips for Success
To make sure your *easy strawberry freezer jam recipe* turns out perfectly every time, I’ve gathered some tried-and-true tips that I swear by. Let’s dive in!
Choose the Right Strawberries
Start with the freshest, ripest strawberries you can find. Look for vibrant red berries that are firm to the touch. If you can, visit a local farmers market or pick your own for the sweetest results. Trust me, the flavor difference is incredible! And don’t forget to check if they smell fragrant—this is a good sign of freshness.
Measure Ingredients Accurately
When it comes to jam-making, precise measurements are key. Use a dry measuring cup for the sugar and a liquid measuring cup for the lemon juice. Trust me, this will help maintain the right balance of sweetness and acidity, ensuring your jam sets perfectly!
Use Fresh Lemon Juice
If you can, squeeze fresh lemons instead of using bottled juice. The brightness from fresh lemon juice enhances the flavor of the strawberries and helps with setting the jam. Plus, it’s just a nice little touch that elevates the whole recipe!
Don’t Skip the Resting Time
When mixing your strawberries and sugar, let them sit for those 10 minutes. This isn’t just a suggestion; it’s a game-changer! This resting time allows the sugar to draw out the juices, creating that delicious syrup that’s essential for flavor and helps the pectin do its job.
Label Your Jars
Once you’ve filled your jars, be sure to label them with the date before popping them in the freezer. It’s easy to forget when you made the jam, and you want to enjoy it at its best! Plus, this little step keeps your freezer organized.
Check Your Freezer Temperature
Make sure your freezer is at the right temperature, ideally 0°F (-18°C) or lower. This ensures your jam freezes properly and stays safe for longer. If it’s too warm, your jam might not set up correctly or could spoil faster.
Enjoy Within a Year
While your freezer jam can last for up to a year, I recommend enjoying it within six months for the best flavor. Over time, the taste can diminish, and you’ll want to savor that fresh strawberry goodness while it lasts!
By keeping these tips in mind, you’ll be well on your way to creating the most delicious strawberry freezer jam that you and your family will love. Happy jam-making!
FAQ Section
Got questions about this *easy strawberry freezer jam recipe*? No worries! I’ve got you covered with some common queries I often hear:
How long does homemade strawberry freezer jam last in the freezer?
Your homemade strawberry freezer jam can last up to a year in the freezer. However, for the best flavor, I recommend using it within six months. Trust me, you’ll want to enjoy that fresh taste while it’s at its peak!
Can I use frozen strawberries instead of fresh?
You can definitely use frozen strawberries if fresh ones aren’t available. Just make sure to thaw them completely and drain any excess liquid before crushing. The flavor might not be as vibrant as fresh strawberries, but it’ll still make for delicious jam!
What if my jam doesn’t set properly?
Oh no! If your jam doesn’t set, it might be because the pectin didn’t activate properly or there wasn’t enough sugar. Don’t worry; you can reheat the jam and add a little more pectin to help it thicken. Just follow the package instructions for reprocessing, and you should be good to go!
Can I use a sugar substitute in this recipe?
While I love the traditional sweetness of granulated sugar, you can experiment with sugar substitutes if you prefer. Just make sure to choose one that’s designed for canning or preserving, as not all substitutes will give the same results when it comes to setting.
Do I need to sterilize the jars for freezer jam?
For freezer jam, you don’t need to sterilize the jars like you would for canned jam. Just make sure they’re clean and dry before filling them with your delicious jam. This keeps things simple and ensures your jam is ready to go straight to the freezer!
Storage & Reheating Instructions
Storing your *easy strawberry freezer jam* properly is key to keeping that fresh, vibrant flavor intact! Here’s how to do it right:
Once you’ve filled your clean jars with the jam, make sure to seal them tightly. I usually recommend leaving about 1/2 inch of space at the top of each jar. This gives the jam room to expand as it freezes, which helps prevent any mess or broken jars. After sealing, label each jar with the date to keep track of when you made it.
Now, pop those jars straight into your freezer! Your freezer should ideally be set at 0°F (-18°C) or lower to ensure the jam stays fresh and safe for months to come. You can store your jam in the freezer for up to a year, but for the best flavor, aim to enjoy it within six months.
When you’re ready to indulge in your homemade jam, simply take a jar out of the freezer and let it thaw in the refrigerator for about 24 hours. If you’re in a hurry, you can also leave it out on the counter for a few hours, but I find that the fridge method helps maintain the best texture and taste.
Once thawed, give the jam a good stir before using it. This helps to reintegrate any separated juices and ensures you get that delicious, smooth spread you love. And remember, once it’s been thawed, you should consume the jam within three weeks if kept in the fridge. Trust me, it’s hard to resist, so it won’t last long anyway!
So, there you have it! With these simple storage and reheating instructions, you’ll be enjoying your delightful strawberry freezer jam any time you like. Happy spreading!
Print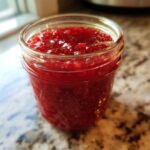
easy strawberry freezer jam recipe: 5 Simple Steps to Joyful Flavor
- Total Time: 24 hours and 20 minutes
- Yield: Approximately 5 cups 1x
- Diet: Vegetarian
Description
This is an easy recipe for making strawberry freezer jam.
Ingredients
- 4 cups fresh strawberries, crushed
- 1 1/2 cups granulated sugar
- 1/4 cup lemon juice
- 1 package (1.75 oz) fruit pectin
Instructions
- Prepare strawberries by washing and hulling them.
- Crush the strawberries in a bowl.
- Add sugar to the crushed strawberries and mix well. Let it sit for 10 minutes.
- In a separate saucepan, mix pectin and lemon juice. Bring to a boil while stirring constantly.
- Pour the pectin mixture into the strawberry mixture and stir for 2 minutes.
- Pour the jam into clean jars, leaving some space at the top.
- Seal the jars and let them sit at room temperature for 24 hours.
- Freeze the jam for long-term storage.
Notes
- Use ripe strawberries for the best flavor.
- Label jars with the date before freezing.
- Prep Time: 15 minutes
- Cook Time: 5 minutes
- Category: Dessert
- Method: Freezing
- Cuisine: American
Nutrition
- Serving Size: 1 tablespoon
- Calories: 50
- Sugar: 12g
- Sodium: 0mg
- Fat: 0g
- Saturated Fat: 0g
- Unsaturated Fat: 0g
- Trans Fat: 0g
- Carbohydrates: 13g
- Fiber: 0g
- Protein: 0g
- Cholesterol: 0mg
Keywords: easy strawberry freezer jam recipe