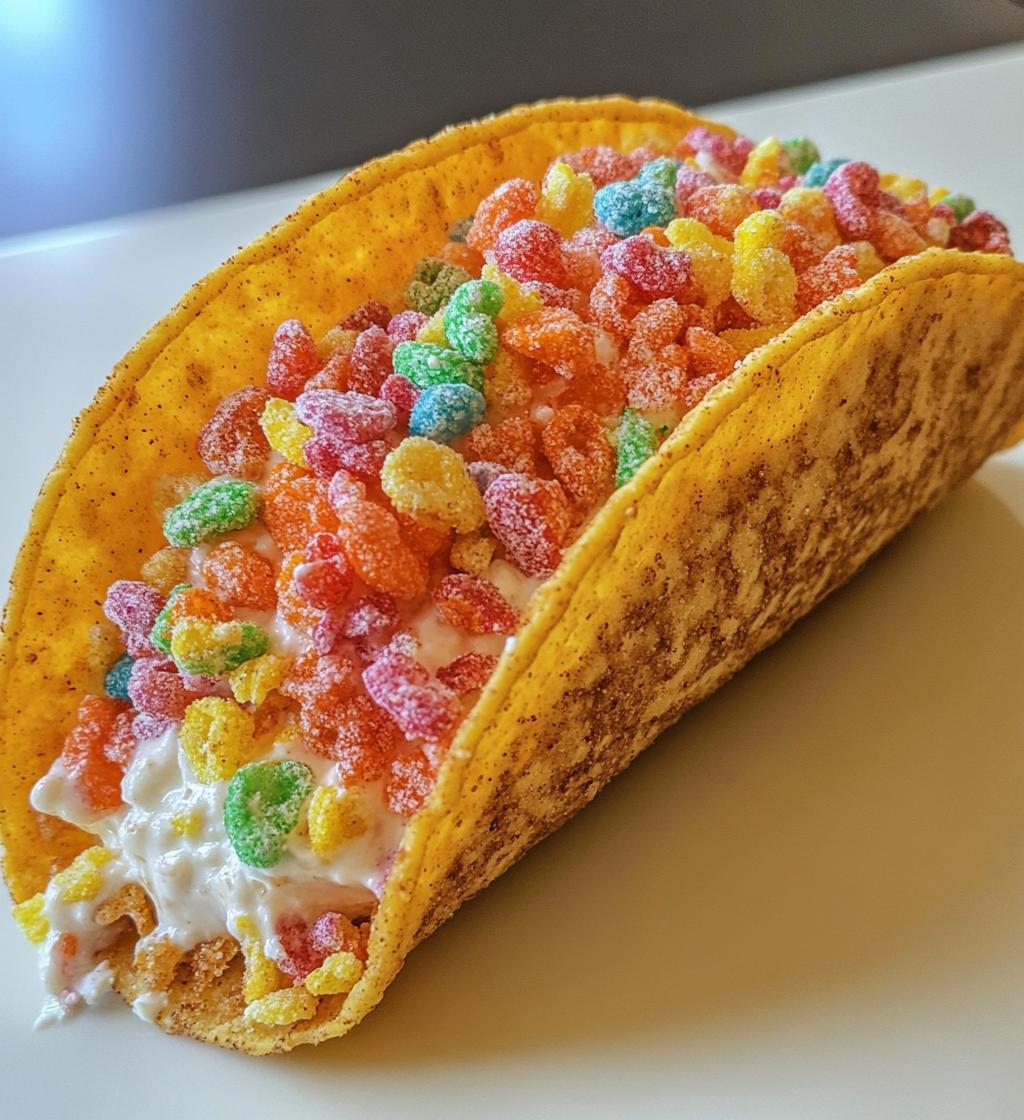
Okay, let me tell you about the most ridiculously fun dessert I’ve ever made – Fruity Pebbles Cheesecake Tacos! I was experimenting with playful sweets for my niece’s birthday party when this crazy idea hit me. Why not take all that creamy cheesecake goodness we love and stuff it into crispy cinnamon-sugar taco shells? And then – here’s the genius part – top it with rainbow-bright Fruity Pebbles for that nostalgic crunch? One bite and I knew I’d struck gold. These tacos disappeared faster than cereal milk at breakfast!
Ingredients for Fruity Pebbles Cheesecake Tacos
Gathering the right ingredients makes all the difference with this recipe! I’ve learned through trial and error that precise measurements and prepped ingredients ensure your cheesecake tacos turn out perfect every time. Let’s break it down into three simple parts so you can tackle this recipe like a pro.
Taco Shell Ingredients
These crispy, cinnamon-sugar shells are the foundation of our dessert tacos. You’ll need:
- 6 small flour tortillas (the 6-inch size works perfectly)
- 1/4 cup melted butter (I always use unsalted)
- 1/4 cup granulated sugar
- 1 teaspoon cinnamon (trust me, don’t skip this – it makes the shells magic!)
Cheesecake Filling Ingredients
The creamy filling is what makes these tacos irresistible. Here’s what to grab:
- 8 oz cream cheese (must be softened – leave it out for at least 30 minutes)
- 1/4 cup powdered sugar (sifted if it’s lumpy)
- 1/2 cup heavy cream (chilled is best for whipping)
Topping Ingredients
Now for the fun part – the toppings that make these tacos pop!
- 1 cup Fruity Pebbles cereal (the star of the show!)
- Optional: fresh fruit like sliced strawberries or bananas
- Extra powdered sugar for dusting if you’re feeling fancy
How to Make Fruity Pebbles Cheesecake Tacos
Now for the fun part – let’s turn these ingredients into the most magical dessert tacos you’ve ever tasted! I’ll walk you through each step, from creating those crispy shells to whipping up the dreamiest cheesecake filling. Just follow along and you’ll be amazed at how easy (and fun!) this process is.
Preparing the Taco Shells
First things first – preheat your oven to 350°F (175°C). While it’s heating up, grab a small bowl and mix together your melted butter, granulated sugar, and cinnamon. This is going to give your taco shells that irresistible sweet crunch!
Now take your flour tortillas and brush both sides generously with the butter mixture. Don’t be shy – this is what makes them crisp up beautifully. Here’s my trick: drape them over the edges of a baking dish or between the rungs of your oven rack to create that perfect taco shape. Bake for 10-12 minutes until they’re golden and firm to the touch. Let them cool completely – I know it’s hard to wait, but trust me, this prevents soggy shells!
Making the Cheesecake Filling
While your shells are cooling, let’s make the creamy filling. In a large bowl, beat the softened cream cheese and powdered sugar together until it’s completely smooth – no lumps allowed! I like to use my hand mixer on medium speed for about 2 minutes.
In another bowl, whip the heavy cream until stiff peaks form. This is crucial – you want it thick enough to hold its shape when you lift the beaters. Now gently fold the whipped cream into the cream cheese mixture. Go slow and easy here to keep all that airy lightness we just created. The result should be fluffy, dreamy, and absolutely spoon-lickable!
Assembling the Tacos
Here comes the best part! Take your cooled taco shells and fill each one with a generous scoop of the cheesecake mixture. Don’t overfill them – you want to leave room for the star of the show. Immediately top each taco with a handful of colorful Fruity Pebbles. The cereal stays crunchiest if you add it right before serving.
Pro tip: If you’re making these for a party, you can prep the shells and filling ahead of time, then assemble just before your guests arrive. That way, everyone gets that perfect combination of crispy shell, creamy filling, and crunchy cereal that makes these tacos so special!
Why You’ll Love These Fruity Pebbles Cheesecake Tacos
Let me count the ways these magical dessert tacos will steal your heart (and probably become your new party trick)!
- Fun presentation that wows everyone: The first time I brought these to a potluck, people actually clapped. The colorful Fruity Pebbles peeking out of crispy taco shells make them look like they came from a fancy dessert truck!
- Quick prep with minimal fuss: Unlike traditional cheesecake that takes hours, these come together in about 30 minutes. Most of that time is hands-off while the shells bake – perfect for last-minute dessert emergencies.
- Endlessly customizable toppings: My niece loves rainbow sprinkles instead of cereal, while my brother-in-law swears by crushed Oreos. The basic recipe is your blank canvas – get creative!
- Kid-friendly (and kid-at-heart approved): The moment I set these down at my nephew’s birthday party, the kids went nuts. But don’t be fooled – adults sneak seconds just as fast. That sweet-crunchy-creamy combo is irresistible at any age.
- Perfect portion control: Each taco is just the right size to satisfy your sweet tooth without leaving you in a sugar coma. Though let’s be real – you’ll probably eat two. I always do!
Tips for Perfect Fruity Pebbles Cheesecake Tacos
Alright, let me share a few hard-earned secrets that’ll take your dessert tacos from good to “can I have the recipe?!” status. I’ve made these more times than I can count, and these little tricks make all the difference between a tasty treat and an absolute showstopper.
Chill your filling for ultimate firmness – I know, I know, waiting is the worst part! But if you’ve got even 15 extra minutes, pop that cheesecake filling in the fridge before assembling. It firms up just enough to hold its shape beautifully when you pipe or spoon it into the shells, and it won’t make your crispy taco shells go soft too quickly. Honestly, it’s my number one pro tip!
Always use fresh, flexible tortillas – That bag of tortillas that’s been sitting in your fridge for two weeks? Not today! Fresh tortillas are more pliable and won’t crack when you drape them over the baking dish to form those perfect taco shapes. If yours feel a bit stiff, just microwave them between damp paper towels for 10 seconds before brushing with the butter mixture – total game changer!
Add cereal JUST before serving – This might be the most important tip! Fruity Pebbles lose their magical crunch if they sit on the creamy filling for too long. I assemble the shells with filling first, then right as I’m about to serve (like, literally carrying them to the table), I shower them with that colorful cereal. That way every bite has that satisfying snap-crunch that makes these tacos so fun to eat!
One bonus tip from my last kitchen experiment: if you’re making these for a party, keep the components separate and let guests assemble their own. It becomes this fun interactive dessert station, and everyone gets their cereal topping at the perfect moment. Trust me – your future self will thank me for these little hacks!
Variations for Fruity Pebbles Cheesecake Tacos
One of my favorite things about this recipe is how easily you can mix it up! The basic cheesecake taco concept is like a blank canvas waiting for your creative touches. Here are some of my favorite twists that have been huge hits at my house – feel free to steal them or use them as inspiration for your own creations!
Cereal Swaps That Totally Work
While Fruity Pebbles will always have my heart, sometimes I like to switch things up:
- Cocoa Pebbles: For chocolate lovers, these create a delicious cookies-and-cream vibe when paired with the cheesecake filling.
- Cinnamon Toast Crunch: Adds extra warmth that complements the cinnamon in the taco shells beautifully.
- Captain Crunch: Gives an awesome texture contrast with those crunchy little berry-flavored balls.
- Lucky Charms: Because who doesn’t want extra marshmallows in their dessert? The kids go nuts for this version.
Drizzles That Take It Next Level
Sometimes I feel fancy and add a drizzle – these combos never disappoint:
- Chocolate sauce: A classic! I melt semi-sweet chocolate chips with a splash of cream for a silky ganache.
- Caramel: The salted kind is my weakness – it cuts through the sweetness perfectly.
- Strawberry sauce: Just blend fresh strawberries with a bit of sugar for a fruity twist.
- White chocolate: Melt it with a teaspoon of coconut oil to make it drizzle smoothly.
Fruit Additions That Feel Fancy
Fresh fruit adds brightness and makes these feel almost… healthy? Okay, not really, but it’s a nice balance!
- Sliced strawberries: My go-to – they pair amazingly with the creamy filling.
- Banana coins: Toss them in lemon juice first to prevent browning.
- Blueberries: Little bursts of freshness in every bite.
- Mango cubes: For a tropical vibe that’s surprisingly delicious.
The possibilities are endless – I’ve even done crushed cookies, mini chocolate chips, or chopped nuts as toppings. The key is to keep the basic cheesecake filling and crispy shells the same, then let your imagination run wild with the toppings. What combo will you try first?
Serving and Storing Fruity Pebbles Cheesecake Tacos
Okay, let’s talk about the best way to enjoy these magical dessert tacos and what to do if – gasp! – you actually have any leftovers. And believe me, that’s a big ‘if’ in my house. These are honestly best the moment you make them, when that contrast between the crispy shell, cool creamy filling, and crunchy cereal is absolutely perfect.
I always serve them immediately after assembling. Pile them on a big platter and watch them disappear! If I’m having people over, I’ll sometimes set up a little DIY station with the baked shells, the bowl of filling, and small bowls of different toppings (Fruity Pebbles, of course, plus maybe some sprinkles or fresh fruit). That way, everyone can build their own taco right before they eat it. It keeps everything perfectly crisp and makes for such a fun experience.
Now, if you do find yourself with leftovers (maybe you got a little too excited and made a double batch like I sometimes do), here’s what you do: carefully place any uneaten tacos in a single layer in an airtight container and pop them in the fridge. They’ll keep for up to 2 days, but honestly, they’re best within the first 24 hours. The shells will soften a bit from the filling, but they’re still totally delicious in a different, more cheesecake-bar kind of way.
One crucial thing: do not try to reheat them. I learned this the hard way! The filling will melt and separate, and it just turns into a sad, soggy mess. Enjoy them cold straight from the fridge if you’ve got leftovers. And a little pro tip: if the shells have gotten too soft, you can always crumble them over the filling like a sweet crunch topping – waste not, want not!
Nutritional Information for Fruity Pebbles Cheesecake Tacos
Okay, let’s be real – we’re not eating these tacos because they’re health food! But I know some folks like to keep track of what they’re enjoying, so here’s the nutritional breakdown per taco. Just remember – these numbers are estimates based on standard ingredients, and your exact values might vary depending on the brands you use or if you tweak the recipe.
Each delicious taco (and yes, I’ve done the math so you don’t have to!) contains approximately:
- Calories: 320
- Total Fat: 18g (10g saturated, 6g unsaturated)
- Cholesterol: 50mg
- Sodium: 280mg
- Total Carbohydrates: 33g
- Dietary Fiber: 1g
- Sugars: 22g
- Protein: 4g
A quick heads-up – if you’re watching your sugar intake, you might want to share one taco with a friend (though good luck stopping at half!). The cereal and sugar in the shells do add up. But hey, life’s about balance, right? Sometimes you just need that rainbow-colored crunch and creamy cheesecake goodness!
Remember, these numbers can change if you use different brands or make substitutions. For example, swapping in low-fat cream cheese or sugar alternatives will adjust the counts. But personally? I say enjoy the full-fat, full-flavor version as an occasional treat – that’s what makes these tacos so special!
FAQs About Fruity Pebbles Cheesecake Tacos
I get so many questions about these fun dessert tacos whenever I make them! Here are the answers to the most common ones that pop up – consider this your cheat sheet for taco success.
Can I use corn tortillas instead of flour?
You can, but I don’t recommend it! Corn tortillas tend to crack when you try to shape them into taco forms, and they don’t get that perfect crispy-sweet texture we love in this recipe. Stick with small flour tortillas – their flexibility makes all the difference. If you’re really set on corn, try brushing them with extra butter and baking them flat as crispy dessert chips instead!
How do I prevent soggy taco shells?
Oh man, soggy shells are the worst! Here’s my foolproof method: 1) Make sure your baked shells are completely cooled before filling, 2) Don’t assemble until right before serving, and 3) If prepping ahead, store shells and filling separately. The cereal topping should always be added at the very last second – like, as you’re walking to the table last second!
Are there vegan substitutes that work?
Absolutely! I’ve made these for my vegan friends with great results. Use plant-based cream cheese (the kind that comes in blocks, not tubs), coconut whipped cream, and vegan butter. For the tortillas, just check that they’re dairy-free (most basic flour tortillas are). The Fruity Pebbles are already vegan – who knew? The texture comes out nearly identical to the original!
What are the best cereal alternatives to Fruity Pebbles?
While nothing beats that nostalgic Fruity Pebbles crunch, my top alternatives are: Cocoa Pebbles for chocolate lovers, Cinnamon Toast Crunch for extra warmth, or even crushed graham crackers for a s’mores vibe. For birthday parties, I sometimes use rainbow sprinkles instead – the kids go wild for the color explosion!
Can I make these gluten-free?
You bet! Just swap in gluten-free flour tortillas (most major brands make them now) and double-check that your cereal is GF (many store-brand fruity cereals are). The filling is naturally gluten-free as long as you use GF powdered sugar. I’ve served these to my gluten-sensitive friends, and they couldn’t tell the difference!
Got more questions? Drop them in the comments below – I love helping troubleshoot dessert adventures! Now go make some magic with those cereal-topped tacos.
Try This Recipe and Share Your Twist!
Alright, my fellow dessert adventurers – it’s your turn to take these Fruity Pebbles Cheesecake Tacos for a spin! I’ve shared all my secrets, but now I want to hear about your kitchen experiments. Did you try Cocoa Pebbles instead? Add a drizzle of caramel? Maybe throw some fresh berries on top? Every time I make these, someone comes up with an amazing new variation I never would’ve thought of.
So go ahead – grab those tortillas and that cereal box, and let’s see what magic you create! Snap a pic of your masterpiece and tell me all about your custom twist in the comments below. Who knows? Your idea might just become my new favorite way to make these crazy-delicious dessert tacos!
Print
6 Epic Fruity Pebbles Cheesecake Tacos You’ll Obsess Over
- Total Time: 32 minutes
- Yield: 6 tacos 1x
- Diet: Vegetarian
Description
A fun and creative dessert that combines the creamy richness of cheesecake with the crunchy sweetness of Fruity Pebbles, all wrapped in a taco shell.
Ingredients
- 1 cup Fruity Pebbles cereal
- 8 oz cream cheese, softened
- 1/4 cup powdered sugar
- 1/2 cup heavy cream
- 6 small flour tortillas
- 1/4 cup melted butter
- 1/4 cup granulated sugar
- 1 tsp cinnamon
Instructions
- Preheat your oven to 350°F (175°C).
- Mix the melted butter, granulated sugar, and cinnamon in a bowl.
- Brush the mixture onto both sides of the tortillas.
- Drape the tortillas over the edges of a baking dish to form taco shapes.
- Bake for 10-12 minutes or until crisp. Let them cool.
- Beat the cream cheese and powdered sugar until smooth.
- Whip the heavy cream until stiff peaks form, then fold it into the cream cheese mixture.
- Fill the taco shells with the cheesecake mixture.
- Top with Fruity Pebbles cereal and serve immediately.
Notes
- Store any leftovers in the refrigerator for up to 2 days.
- You can use other cereals for variety.
- Add fresh fruit for extra flavor and texture.
- Prep Time: 20 minutes
- Cook Time: 12 minutes
- Category: Dessert
- Method: Baking
- Cuisine: American
Nutrition
- Serving Size: 1 taco
- Calories: 320
- Sugar: 22g
- Sodium: 280mg
- Fat: 18g
- Saturated Fat: 10g
- Unsaturated Fat: 6g
- Trans Fat: 0g
- Carbohydrates: 33g
- Fiber: 1g
- Protein: 4g
- Cholesterol: 50mg
Keywords: Fruity Pebbles, cheesecake, tacos, dessert, easy recipe