Oh my goodness, let me tell you about these Garlic Parmesan Chicken Roll Ups – they’re the kind of dish that makes you feel like a kitchen superstar without any of the stress! I’ve been making this recipe for years, ever since my neighbor Gina (who’s basically Italian royalty) showed me her secret for stuffing chicken breasts with garlicky, cheesy goodness. What I love most is how something so simple – just chicken, garlic, parmesan, and herbs – transforms into this elegant, flavorful main course that works for both Tuesday night dinners and fancy dinner parties.
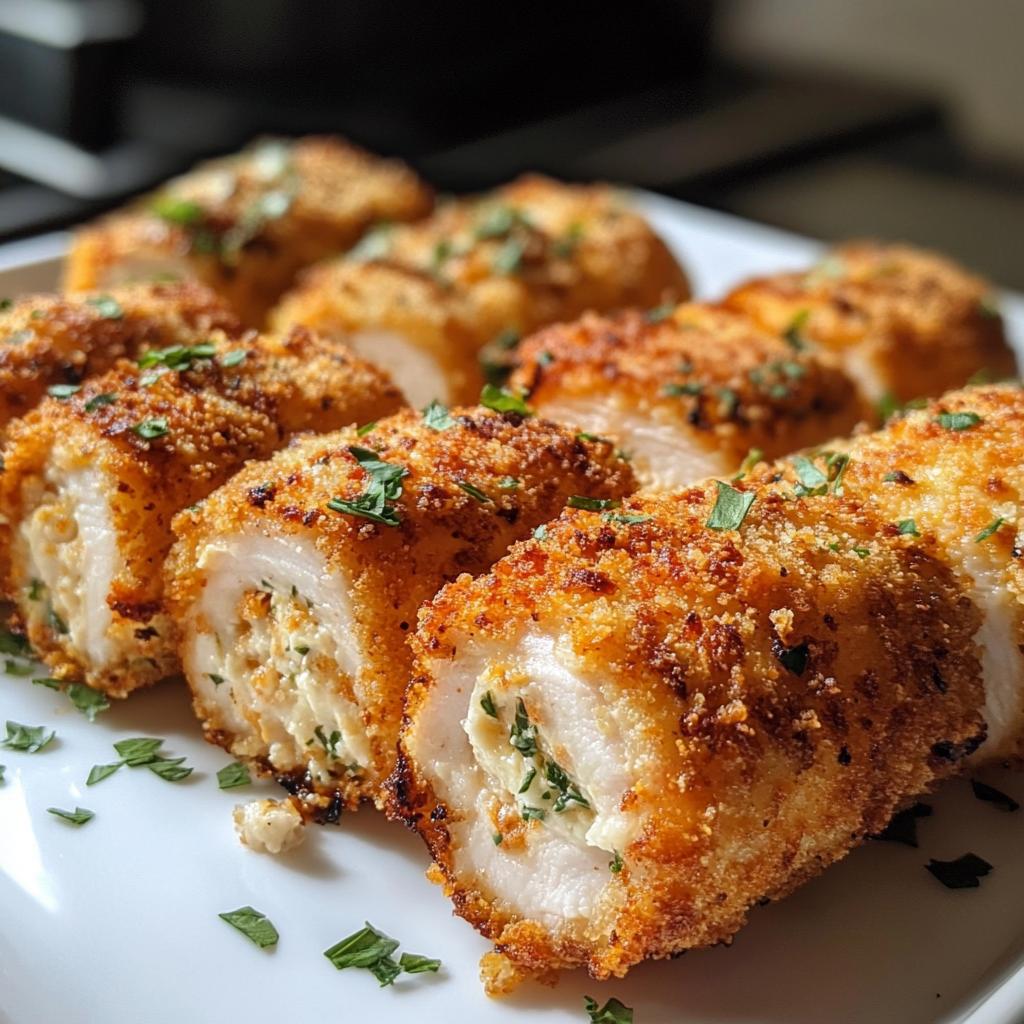
The magic happens when you roll up all those incredible flavors inside tender chicken breasts. That first golden-brown bite with the crispy breadcrumb coating gives way to the melty parmesan-garlic filling… trust me, it’s absolute heaven. And here’s the best part – it comes together in about 40 minutes start to finish. I’ve served these roll ups to everyone from my picky nephew to my foodie friends, and they always disappear fast!
Why You’ll Love These Garlic Parmesan Chicken Roll Ups
Let me count the ways these roll ups will become your new weeknight hero:
- Flavor explosion: That garlic-parmesan combo? Absolute perfection – savory, rich, and just garlicky enough without being overwhelming
- Fancy-looking, easy-making: They look like you spent hours, but honestly? 15 minutes of prep and the oven does the rest
- Low-carb friendly: With just a light breadcrumb coating, these are totally doable if you’re watching carbs (my sister-in-law on keto approves!)
- Versatile as can be: I’ve served these with everything from spaghetti to roasted veggies – they work with whatever you’ve got
- Leftovers that don’t quit: They reheat like a dream and somehow taste even better the next day (if they last that long!)
Ingredients for Garlic Parmesan Chicken Roll Ups
Gather these simple ingredients – I promise you probably have most of them already! The secret is in the quality and prep, so let’s break it down:
The Chicken Base
- 4 boneless, skinless chicken breasts (about 6 oz each – I always look for plump, even-sized ones)
- 1 tablespoon olive oil (the good stuff – it makes a difference for that golden crust!)
The Dreamy Filling
- 1/2 cup freshly grated parmesan (none of that pre-shredded stuff – it’s worth grating your own)
- 3 cloves garlic, minced (trust me, fresh is non-negotiable here)
- 1/4 cup chopped fresh parsley (or about 1 tablespoon dried if you must)
- 1 teaspoon dried oregano (rub it between your fingers to wake up the oils)
- 1/2 teaspoon salt (I use kosher for even seasoning)
- 1/4 teaspoon black pepper (freshly cracked please!)
The Crispy Coating
- 1/2 cup breadcrumbs (I use panko for extra crunch, but regular works too)
See? Nothing crazy – just good, honest ingredients that work together like magic. Now let’s get rolling!
How to Make Garlic Parmesan Chicken Roll Ups
Okay, let’s get down to business – I’ll walk you through each step so your chicken roll ups turn out perfectly juicy and bursting with flavor every single time. Don’t let the rolling intimidate you – once you do one, you’ll be a pro!
Preparing the Chicken
First things first: butterfly those chicken breasts like you’re giving them a little hug! I lay each breast flat on my cutting board and make a horizontal cut almost all the way through, then open it like a book. Now here’s my secret – instead of a meat mallet (which always disappears in my kitchen), I use a heavy glass or rolling pin to pound them to an even 1/4-inch thickness. Go slow and gentle – you want them thin enough to roll but not so thin they tear. If you do get a small hole? No panic – we’ll roll it anyway!
Mixing the Filling
While your oven preheats to 375°F (190°C), let’s make that irresistible garlic-parm filling. In a bowl, combine your freshly grated parmesan (seriously, the pre-shredded stuff has anti-caking agents that mess with the texture), minced garlic, parsley, oregano, salt and pepper. I like to mix it with my fingers to really distribute all those flavors evenly. Pro tip: If the mixture seems dry, add just a teaspoon of olive oil to help it stick together. This is when your kitchen starts smelling amazing!
Rolling and Baking
Now for the fun part! Spread about 2 tablespoons of filling evenly over each butterflied chicken breast, leaving a small border at the edges. Starting from the short end, roll it up as tightly as you can (like a burrito!) and secure with 2-3 toothpicks – I go diagonally to really hold everything together. Brush each roll lightly with olive oil, then roll them in breadcrumbs until nicely coated. Place them seam-side down in your baking dish – this keeps them from unrolling. Pop them in the oven for 25-30 minutes until golden and the internal temp hits 165°F (74°C). Here’s the hardest part: Let them rest for 5 minutes before slicing – it keeps all those juicy flavors locked in!
Tips for Perfect Garlic Parmesan Chicken Roll Ups
After making these roll ups more times than I can count (and yes, learning from a few mishaps along the way!), here are my foolproof tips to guarantee garlic parmesan perfection every single time:
Toothpick Safety 101
Those little wooden toothpicks are lifesavers for keeping your rolls intact, but don’t forget to count them! I always use exactly 2 per roll and make a mental note (or better yet, write it down). After baking, I remove them with tongs – much easier than fishing around with fingers. And here’s my grandma’s trick: soak toothpicks in water for 10 minutes first to prevent them from burning in the oven.
Temperature is Everything
I can’t stress this enough – invest in an instant-read thermometer! That 165°F (74°C) internal temp is non-negotiable for juicy, safe chicken. I check at the 25-minute mark, inserting the thermometer diagonally through the side into the thickest part. If it needs more time, I give it 3-5 minute increments – overcooked chicken rolls break my heart!
Breadcrumb Breakdown
Ran out of breadcrumbs? No problem! Here are my favorite swaps that work like a charm:
- Crushed pork rinds for a keto version (surprisingly delicious!)
- Crushed crackers (Ritz or saltines add great flavor)
- Grated parmesan only for extra cheesy goodness
- Panko-almond mixture when I want extra crunch
One last golden rule: let the rolls rest before slicing! Those 5 minutes make all the difference in keeping the filling inside where it belongs. Now go forth and roll with confidence!
Serving Suggestions
Now that you’ve got these gorgeous Garlic Parmesan Chicken Roll Ups ready to shine, let me tell you how I love to serve them – because honestly, they’re like the friendly neighbor that gets along with everyone at the party!
My go-to sides: Roasted asparagus or green beans tossed with olive oil and lemon zest is my absolute favorite pairing – the brightness cuts through that rich parmesan perfectly. On busy nights, I’ll do a simple arugula salad with shaved parmesan and balsamic glaze. For heartier meals (like when my teenage nephews visit), garlic mashed potatoes or buttered noodles make everyone happy.
Wine pairing made easy: A crisp Pinot Grigio is my top pick – its citrus notes dance beautifully with the garlic. If you prefer red, go for a light-bodied Chianti. And for non-alcoholic options, sparkling water with lemon or a ginger-mint lemonade both work wonders.
Presentation pro-tip: Slice one roll diagonally to show off that beautiful swirl and arrange the rest whole on a platter. I always sprinkle extra parsley and maybe some lemon wedges for color – it makes even a weeknight dinner feel special!
Storing and Reheating Garlic Parmesan Chicken Roll Ups
Listen, I know these roll ups are so delicious you’ll want to eat them all at once – but if you somehow end up with leftovers (lucky you!), here’s exactly how to keep them tasting amazing. I’ve tested every storage method imaginable, so trust me on these tricks!
Fridge Storage Done Right
First things first: let the rolls cool completely before storing – about 30 minutes on the counter. Hot food in the fridge creates condensation that leads to soggy breadcrumbs (no thank you!). I wrap each roll individually in foil, then pop them in an airtight container. They’ll keep beautifully for 3-4 days this way. Pro tip: Label the container with the date – it’s easy to forget when you made them once the garlic aroma takes over your fridge!
The Magic of Reheating
Here’s where most people go wrong – the microwave is NOT your friend here. That steamy box turns crispy breadcrumbs into sad, soggy mush. Instead, I reheat mine in a 350°F (175°C) oven for about 10-15 minutes until warmed through. If the breadcrumbs need refreshing, I’ll give them a quick broil for the last minute. For extra insurance against dryness, I’ll sometimes place a small oven-safe dish of water on the lower rack to create steam.
Single-serving solution: When I’m just reheating one or two for lunch, I’ll use my toaster oven instead of heating the big oven. Same temperature, just less waiting time!
Freezing for Future You
Yes! You can absolutely freeze these roll ups. Here’s my method:
- Cool completely after baking
- Wrap individually in plastic wrap, then foil
- Place in a freezer bag with all the air squeezed out
- Label with date (they’ll keep for 2-3 months)
To reheat from frozen: Thaw overnight in the fridge, then bake at 350°F (175°C) for 15-20 minutes. No thawing? Add 10 extra minutes to the bake time. The breadcrumbs won’t be quite as crisp, but the flavor will still be fantastic – I promise!
One last note: The filling stays perfect, but the breadcrumbs will never be quite as crisp as day one. If that bothers you, just scrape them off before reheating and add fresh breadcrumbs for the last few minutes. But honestly? I never bother – they’re still delicious either way!
Nutritional Information
Okay, let’s talk numbers – but don’t worry, I’ll keep it simple and real! These estimates are for one delicious chicken roll up, but remember: values can vary slightly based on your exact ingredients (like how much olive oil you use or the brand of parmesan). I always say focus on the quality first – good food is about more than just numbers!
- Calories: Around 320 per serving
- Protein: A whopping 42g (chicken for the win!)
- Carbs: Just 8g total (with 1g fiber)
- Fat: 12g total (4g saturated)
- Sodium: About 580mg
Now here’s what I love – this dish packs serious flavor without loading up on empty carbs. That protein count keeps you full for hours, and the fats are mostly the good kinds from olive oil and cheese. My nutritionist friend always reminds me: “It’s not just about the calories – it’s about nourishing your body with real, wholesome ingredients.” And that’s exactly what you’re getting here!
Remember: These are estimates based on standard ingredients. For exact counts, plug your specific brands into a nutrition calculator.
FAQs About Garlic Parmesan Chicken Roll Ups
I’ve gotten so many questions about these roll ups over the years – and rightfully so! They’re too good not to ask about. Here are the most common ones I hear, along with the tried-and-true answers from my kitchen:
Can I use chicken thighs instead of breasts?
Absolutely! I’ve done this many times when breasts weren’t on sale. Use boneless, skinless thighs and follow the same method – just know they’ll be a bit juicier (which is never a bad thing!). You’ll need to adjust cooking time slightly since thighs are thicker – usually about 5 extra minutes. The flavor? Pure magic!
How can I make this recipe gluten-free?
So easy! Just swap the breadcrumbs for gluten-free panko or crushed gluten-free crackers. I’ve even used finely ground almonds in a pinch. All my gluten-free friends rave about this version – you honestly can’t tell the difference with that delicious garlic-parm filling stealing the show!
My rolls keep unrolling! What am I doing wrong?
Ah, the great unrolling mystery! First, make sure you’re rolling tightly – like you’re rolling up a yoga mat. Second, place them seam-side down in the baking dish (gravity is your friend). And third – don’t skimp on the toothpicks! I use at least two per roll at angles. If you’re still having trouble, try chilling the rolled chicken for 15 minutes before baking to help them set.
Can I prep these ahead of time?
You bet! I often assemble them in the morning, cover tightly with plastic wrap, and refrigerate until baking time. Just add 5 minutes to the cooking time since they’ll be cold. The filling actually gets more flavorful as it sits – bonus! For even longer prep, freeze them raw (wrapped well) for up to a month.
What’s the best way to reheat leftovers without drying out the chicken?
My secret? A splash of chicken broth in the baking dish! Just pour about 1/4 cup around (not over) the rolls before reheating at 325°F (160°C) for 10-12 minutes. The steam keeps them juicy while the breadcrumbs stay crisp. Works like a charm every time!
Got more questions? Drop them in the comments – I love hearing how everyone makes these roll ups their own!
Alright, my fellow chicken roll-up enthusiasts, we’ve reached the best part – your turn to shine in the kitchen! I can’t wait to hear how your Garlic Parmesan Chicken Roll Ups turn out. Did you add your own twist with some sun-dried tomatoes or a sprinkle of red pepper flakes? Maybe you found the perfect wine pairing? Drop me a comment below – I read every single one and love seeing your creations!
And hey, if this recipe becomes a regular in your rotation like it is in mine (I swear my family would eat these weekly if I let them), do me a favor – leave a star rating to let others know how delicious they are. There’s nothing like that moment when you pull these golden beauties out of the oven, slice into that cheesy center, and watch your dinner guests’ eyes light up. That’s the magic of home cooking, and I’m so happy to share this recipe with you.
Tag me on Instagram with your roll-up masterpieces – use #GarlicParmRollUps so I can find them! Nothing makes my day more than seeing your kitchen wins. Now go forth and roll with confidence, my friends. Happy cooking!
Print
Irresistible Garlic Parmesan Chicken Roll Ups in 40 Minutes
- Total Time: 40 mins
- Yield: 4 servings 1x
- Diet: Low Carb
Description
Delicious chicken breasts stuffed with garlic, parmesan, and herbs, rolled up and baked to perfection. A simple yet flavorful dish perfect for any occasion.
Ingredients
- 4 boneless, skinless chicken breasts
- 1/2 cup grated parmesan cheese
- 3 cloves garlic, minced
- 1/4 cup chopped fresh parsley
- 1 tsp dried oregano
- 1/2 tsp salt
- 1/4 tsp black pepper
- 1 tbsp olive oil
- 1/2 cup breadcrumbs
Instructions
- Preheat oven to 375°F (190°C).
- Butterfly each chicken breast and pound to 1/4-inch thickness.
- Mix parmesan, garlic, parsley, oregano, salt, and pepper in a bowl.
- Spread the mixture evenly over each chicken breast.
- Roll up each breast tightly and secure with toothpicks.
- Brush with olive oil and coat with breadcrumbs.
- Place seam-side down in a baking dish.
- Bake for 25-30 minutes until golden and cooked through.
- Let rest for 5 minutes before serving.
Notes
- Use fresh garlic for best flavor.
- Substitute parsley with basil if preferred.
- Check internal temperature reaches 165°F (74°C).
- Remove toothpicks before serving.
- Prep Time: 15 mins
- Cook Time: 25 mins
- Category: Main Course
- Method: Baking
- Cuisine: Italian
Nutrition
- Serving Size: 1 roll
- Calories: 320
- Sugar: 1g
- Sodium: 580mg
- Fat: 12g
- Saturated Fat: 4g
- Unsaturated Fat: 6g
- Trans Fat: 0g
- Carbohydrates: 8g
- Fiber: 1g
- Protein: 42g
- Cholesterol: 115mg
Keywords: garlic parmesan chicken, stuffed chicken, easy chicken recipe, baked chicken rolls