Gluten free snacks have become my go-to solution for those moments when I need a quick bite without compromising on flavor or my dietary needs. Whether it’s an afternoon pick-me-up or a late-night craving, these tasty little gems are incredibly versatile and satisfying. I’ve discovered that just because something is gluten-free, it doesn’t mean it lacks excitement! In fact, I often find myself experimenting with different flavors and textures, turning simple ingredients into delightful treats that everyone can enjoy.
What I love most about gluten free snacks is how they cater to a variety of dietary needs. They’re perfect for busy days when you need something portable, and they also make a great addition to any party spread. I remember hosting a game night with friends, and everyone was thrilled to dig into my gluten free creations – they disappeared faster than I could bake them! These snacks are not just for those avoiding gluten; they’re for anyone who appreciates delicious, wholesome food. Trust me, once you try these, you’ll be hooked!
Why You’ll Love These Gluten Free Snacks
These gluten free snacks are not just a treat for those with dietary restrictions; they’re a delicious option for everyone! Here are a few reasons why you’ll absolutely adore them:
- Quick Preparation: With just a few minutes of prep time and a quick bake, you can whip these snacks up in no time. Perfect for those busy days!
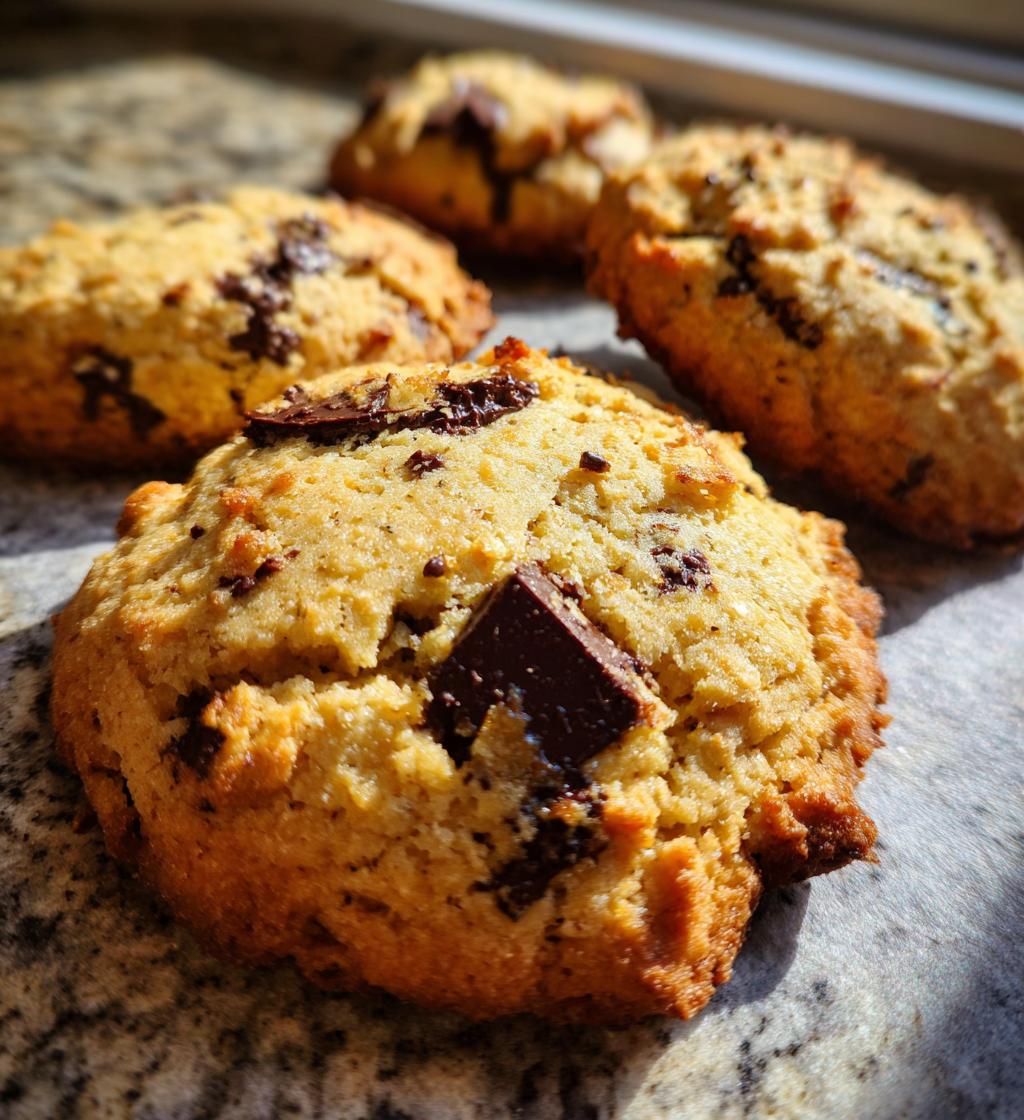
- Delicious Flavors: The combination of almond flour, honey, and dark chocolate chips creates a rich, satisfying flavor that will keep you coming back for more.
- Healthy Ingredients: Packed with wholesome ingredients, these snacks are not only gluten free but also provide a great source of healthy fats and protein.
- Customizable: Feel free to mix in your favorite nuts or dried fruits for added texture and flavor. The possibilities are endless!
- Perfect for Any Occasion: Whether you’re looking for a midday snack, a party treat, or something to satisfy your sweet tooth, these snacks fit the bill beautifully.
Trust me, once you try these gluten free snacks, you’ll be impressed by how tasty and satisfying they are! Your taste buds will thank you.
Ingredients for Gluten Free Snacks
Gathering the right ingredients is key to whipping up these delightful gluten free snacks. Here’s what you’ll need:
- 1 cup almond flour
- 1/4 cup honey
- 1/4 cup coconut oil, melted
- 1/2 teaspoon vanilla extract
- 1/4 teaspoon salt
- 1/2 cup dark chocolate chips
Make sure all your ingredients are certified gluten-free to keep these snacks safe for everyone to enjoy! Trust me, the combination of almond flour and honey gives them a wonderful texture and sweetness that’s just irresistible.
How to Prepare Gluten Free Snacks
Getting these gluten free snacks ready is super simple and oh-so-rewarding! Follow these easy steps, and you’ll have delicious treats in no time. Let’s dive right in!
Step-by-Step Instructions
- Preheat your oven: Start by preheating your oven to 350°F (175°C). This is crucial because you want those snacks to bake evenly and develop that lovely golden color.
- Mix the base: In a medium-sized bowl, combine the almond flour, honey, melted coconut oil, vanilla extract, and salt. Use a spatula or a wooden spoon to mix everything together until it forms a cohesive, dough-like consistency. It should look smooth and slightly sticky!
- Add the chocolate chips: Now, it’s time to fold in the dark chocolate chips. Stir them in gently, ensuring they’re evenly distributed throughout the dough. This is the part where I get a little excited – those melty chocolate bits are going to make these snacks absolutely divine!
- Form the snacks: With your hands, scoop out small amounts of the dough and roll them into balls, about the size of a tablespoon. You can place them on a baking sheet lined with parchment paper, spacing them about an inch apart. They won’t spread too much, so feel free to get cozy with them!
- Bake to perfection: Pop the baking sheet in the preheated oven and bake for 10-12 minutes. Keep an eye on them; you’re looking for a beautiful golden color on the edges while the centers remain soft. Ooh, that smell as they bake is just heavenly!
- Cool before serving: Once they’re done baking, take the sheet out and let the snacks cool for a few minutes before transferring them to a wire rack. This cooling time is key; it allows them to firm up and become even more delicious.
And voilà! You’ve just made a batch of scrumptious gluten free snacks that everyone will love. They’re perfect for snacking anytime, and trust me, they won’t last long in your kitchen!
Tips for Success
To make sure your gluten free snacks turn out just as delicious as you hope, I’ve got a few tried-and-true tips to share. These little nuggets of wisdom will help you achieve the best results every time!
- Use Fresh Ingredients: Always opt for fresh almond flour and quality honey. Stale ingredients can affect the flavor and texture. Trust me, you’ll notice the difference!
- Experiment with Sweetness: If you like your snacks a bit sweeter, feel free to add an extra tablespoon of honey. Just keep in mind that it might make the dough a bit stickier, so adjust the almond flour accordingly!
- Butter Over Coconut Oil: If you’re not a fan of coconut oil, you can substitute it with unsalted butter. Just melt it the same way you would the coconut oil, and you’ll still get that lovely richness.
- Add Some Crunch: Want to mix things up? Toss in some chopped nuts or seeds for added crunch and nutrition. Pecans, walnuts, or even pumpkin seeds work wonderfully with this recipe!
- Watch the Baking Time: Every oven is different, so keep an eye on your snacks as they bake. If they’re browning too quickly, you can lower the temperature to 325°F (160°C) and extend the baking time by a couple of minutes.
- Storage Secrets: To keep these snacks fresh, store them in an airtight container at room temperature for up to a week. You can also freeze them for longer storage – just make sure to separate layers with parchment paper!
With these tips in your back pocket, you’ll be well on your way to creating the tastiest gluten free snacks that everyone will rave about. Happy baking!
Nutritional Information
Before we dive into the numbers, it’s important to note that nutritional values can vary based on the specific brands and ingredients you use. So while I can give you a general idea, keep in mind that your results may differ slightly. Here’s a typical breakdown for one serving (or one snack) of these delicious gluten free treats:
- Calories: 120
- Fat: 8g
- Saturated Fat: 4g
- Unsaturated Fat: 3g
- Trans Fat: 0g
- Cholesterol: 0mg
- Sodium: 50mg
- Carbohydrates: 10g
- Fiber: 2g
- Sugar: 5g
- Protein: 3g
These snacks not only taste great but also provide a nice balance of healthy fats and protein, making them a smart choice for any time of the day. Enjoy guilt-free snacking!
Storage & Reheating Instructions
Storing your gluten free snacks properly is key to keeping them fresh and delicious! Here’s how I like to do it:
- Cool Completely: Before storing, make sure your snacks have completely cooled down. This helps prevent any moisture buildup inside the container, which can make them soggy.
- Airtight Containers: Place your snacks in an airtight container to keep them fresh. I usually opt for glass or BPA-free plastic containers. They do a great job of preserving that delightful texture and flavor!
- Room Temperature Storage: If you plan to eat them within a week, you can keep the snacks at room temperature. Just make sure they’re stored away from direct sunlight and heat sources.
- Freezing for Longer Life: If you want to save some for later, these snacks freeze beautifully! Layer them in a freezer-safe container with parchment paper between each layer to prevent sticking. They can last up to three months in the freezer!
- Thawing Tips: When you’re ready to enjoy your frozen snacks, simply take out the desired amount and let them thaw at room temperature for about 15-20 minutes. If you’re in a hurry, you can microwave them for about 10-15 seconds to warm them up a bit!
By following these simple storage and reheating tips, you’ll ensure that your gluten free snacks stay as tasty as the day you made them. Happy snacking!
FAQ Section
Got questions about these gluten free snacks? Don’t worry, I’ve got you covered! Here are some common queries I often hear, along with my trusty answers.
Can I use a different type of flour?
Absolutely! While almond flour is my go-to for these snacks, you can experiment with other gluten-free flours like coconut flour or oat flour. Just keep in mind that different flours absorb moisture differently, so you may need to tweak the amounts of liquids in the recipe. But hey, that’s all part of the fun, right?
Are these snacks suitable for kids?
Yes, these gluten free snacks are perfect for kids! They’re not only delicious but also packed with healthy ingredients. Plus, the dark chocolate chips add a sweet touch that kids absolutely love. Just be sure to check for any nut allergies if you choose to add nuts!
How do I know if my ingredients are gluten-free?
Great question! Always look for products labeled as “certified gluten-free.” This label ensures that the ingredients have been tested and meet strict gluten-free standards. It’s always better to be safe than sorry, especially if you’re cooking for someone with celiac disease or gluten sensitivity.
Can I make these snacks vegan?
Yes, you can! To make these gluten free snacks vegan, simply replace the honey with maple syrup or agave nectar. Both options will add a lovely sweetness while keeping everything plant-based. Just remember, the texture might vary slightly, but it will still be delicious!
What’s the best way to enjoy these snacks?
These snacks are delightful on their own, but they can also be paired with your favorite dips like almond butter or yogurt for a tasty twist! I love enjoying them with a cup of tea or coffee for an afternoon treat. They’re super versatile, so feel free to get creative!
With these answers, I hope you feel even more excited to whip up your own batch of gluten free snacks. Happy baking!
Serving Suggestions
Now that you’ve made these delicious gluten free snacks, it’s time to think about how to enjoy them! Trust me, there are so many fun ways to serve them that will elevate your snacking experience.
- With Dips: These snacks pair beautifully with a variety of dips. Try serving them with almond butter or peanut butter for a protein-packed treat. You can also whip up a simple yogurt dip by mixing Greek yogurt with a touch of honey and a sprinkle of cinnamon. It’s a match made in heaven!
- As a Dessert: Want to turn your snacks into a dessert? Drizzle a little melted dark chocolate over them or sprinkle with powdered sugar for a sweet finishing touch. They’ll feel like a gourmet treat without any extra effort!
- On a Cheese Board: If you’re hosting a gathering, include these snacks on a cheese board alongside some fresh fruit, nuts, and a selection of cheeses. They add a delightful crunch and sweetness that balances out savory flavors.
- With a Beverage: Enjoy your gluten free snacks with a warm cup of herbal tea or a rich coffee. The combination of flavors makes for a cozy afternoon break. You can even pair them with a glass of almond milk for a delightful twist!
- In Lunch Boxes: These snacks are perfect for packing in lunch boxes. They’re portable, healthy, and a great way to add a little sweetness to your day. Just toss a few in with some fresh fruit or veggie sticks for a balanced meal.
With these serving suggestions, you can really make the most of your gluten free snacks. They’re not just tasty on their own; they can complement a variety of foods and drinks, making them a versatile addition to any occasion. Enjoy experimenting and finding your favorite pairings!
Print
Gluten Free Snacks: 5 Delicious Treats You Can’t Resist
- Total Time: 22 minutes
- Yield: 12 snacks 1x
- Diet: Gluten Free
Description
A collection of easy gluten-free snacks that you can enjoy anytime.
Ingredients
- 1 cup almond flour
- 1/4 cup honey
- 1/4 cup coconut oil
- 1/2 teaspoon vanilla extract
- 1/4 teaspoon salt
- 1/2 cup dark chocolate chips
Instructions
- Preheat your oven to 350°F (175°C).
- In a bowl, mix almond flour, honey, coconut oil, vanilla extract, and salt.
- Add dark chocolate chips and stir until combined.
- Form small balls of dough and place them on a baking sheet.
- Bake for 10-12 minutes until golden.
- Let them cool before serving.
Notes
- Store in an airtight container.
- Can add nuts or dried fruit for variety.
- Make sure all ingredients are certified gluten-free.
- Prep Time: 10 minutes
- Cook Time: 12 minutes
- Category: Snacks
- Method: Baking
- Cuisine: American
Nutrition
- Serving Size: 1 snack
- Calories: 120
- Sugar: 5g
- Sodium: 50mg
- Fat: 8g
- Saturated Fat: 4g
- Unsaturated Fat: 3g
- Trans Fat: 0g
- Carbohydrates: 10g
- Fiber: 2g
- Protein: 3g
- Cholesterol: 0mg
Keywords: gluten free snacks, healthy snacks, quick bites