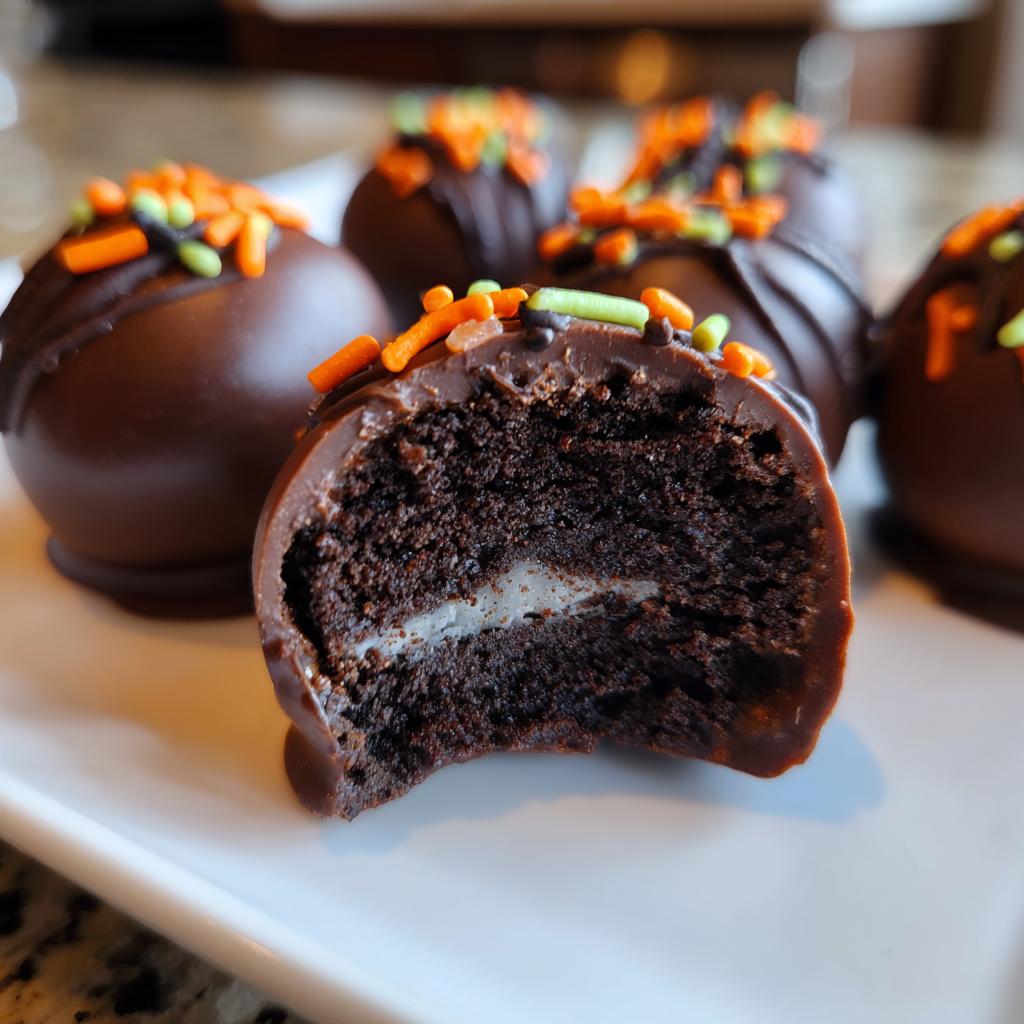
You know those last-minute Halloween party panics when you realize you forgot to make treats? That’s exactly how my love affair with Halloween-Oreo-Bälle began! These no-bake goodies are my go-to lifesaver—just crushed Oreos, cream cheese, and melted chocolate, transformed into spooky little masterpieces with some sprinkles. Kids go wild decorating them (I may or may not have stolen a few zombie eyeball sprinkles for myself last year). The best part? They’re foolproof. Even when my niece dumped orange glitter instead of sprinkles on a batch, we just called them “haunted dust” and they were a hit!
Ingredients for Halloween-Oreo-Bälle
Here’s what you’ll need to whip up these spooky treats. Trust me, it’s a short list, but every ingredient is key to making these Halloween-Oreo-Bälle irresistible:
- 36 Oreo cookies (crushed finely – trust me, no big chunks!)
- 8 oz cream cheese (softened – leave it out for about 30 minutes before you start)
- 12 oz chocolate chips or candy melts (candy melts are my secret weapon for smoother dipping)
- Sprinkles or edible decorations (optional, but let’s be honest, they make all the Halloween magic happen!)
That’s it! Simple, right? Now let’s get to the fun part—making them!
How to Make Halloween-Oreo-Bälle
Alright, let’s turn those simple ingredients into spooky magic! Halloween-Oreo-Bälle come together in just a few easy steps—perfect for little helpers (or impatient snackers like me). Follow these tips, and you’ll have a batch of treats that disappear faster than a ghost in the night!
Crush and Mix the Oreos
First, grab those Oreos and let’s get crushing! I throw them in my food processor and pulse until they’re as fine as witch’s dust—no big chunks allowed. (If you don’t have a processor, a zip-top bag and a rolling pin work great—just channel your inner Frankenstein and smash away!) Then, in a big bowl, mix the crumbs with your softened cream cheese. Use a spatula or your hands (my grandma’s method—messy but effective) until it’s all combined. Pro tip: Don’t overmix! You want it just blended, or the balls might get dense.
Shape and Freeze the Balls
Next, roll the mixture into little spooky orbs—about 1-inch balls. I use a cookie scoop to keep them even, but eyeballing is fine (they’re Halloween treats, not lab specimens!). Line them up on a parchment-covered tray, then pop them in the freezer for 30 minutes. This step is crucial—it firms them up so they don’t fall apart when you dip them later. (Learned that the hard way when I got impatient one year. Melted Oreo puddles aren’t as festive.)
Coat and Decorate
Time for the fun part! Melt your chocolate or candy melts in 30-second bursts in the microwave, stirring between each. Candy melts are my go-to—they’re smoother and set faster. Use a fork to dunk each frozen ball, let the excess drip off, then slide it onto clean parchment. Now, move fast! Sprinkle on ghosts, bats, or orange sparkles before the chocolate sets. (Hot tip: Keep a toothpick handy to nudge sprinkles into place or draw wispy cobwebs.) Let them harden completely—about 15 minutes—then watch them vanish!
Tips for Perfect Halloween-Oreo-Bälle
Okay, I’ve made enough batches of these to know what works (and what ends up as a Pinterest fail). Here are my hard-earned tricks for Halloween-Oreo-Bälle that look and taste amazing:
- Candy melts are your BFF – They melt smoother than chocolate chips and set faster too. No tempering, no fuss. If you must use chocolate chips, add a teaspoon of coconut oil to help thin them.
- Color it spooky – Stir orange or purple food coloring into white candy melts for creepy-cute coated balls. Gel colors work best—they won’t water down your chocolate!
- Freeze like your treats depend on it – Those 30 minutes in the freezer aren’t a suggestion! Cold balls = no crumbly disasters when dipping. (Ask me how I know.)
- Double-dip for drama – After the first coat sets, drizzle contrasting melted chocolate in zigzags for spiderweb effects. Kids love helping with this part!
- Keep ‘em chilled – Store finished balls in the fridge until party time. The cream cheese means they’ll get too soft at room temp. Bonus: They taste even better cold!
There you go—now go make some haunted magic!
Halloween-Oreo-Bälle Variations
One of my favorite things about Halloween-Oreo-Bälle is how easy it is to tweak them for different themes or tastes. Once you’ve mastered the basics, the variations are endless! Here are some of my go-to twists to keep things spooky—or just deliciously different:
- Themed Colors – Swap the classic chocolate coating for colored candy melts. Orange and purple are Halloween staples, but black makes for some seriously eerie treats. (Pro tip: Add a bit of white chocolate drizzle for a “cobweb” effect!)
- Peppermint Oreos – If you’re feeling festive, use peppermint Oreos instead of the original. The cool mint pairs surprisingly well with the chocolate coating, and it’s a fun way to sneak in a holiday twist.
- Darker Balls – Add a tablespoon of cocoa powder to the Oreo-cream cheese mixture for a richer, deeper flavor. Perfect for a “midnight” vibe or if you just love extra chocolatey goodness.
- Matcha Madness – For a unique twist, mix a teaspoon of matcha powder into the cream cheese. Pair it with white chocolate coating and green sprinkles for a witchy, “potion” look.
- Nutty Additions – Stir in a handful of finely chopped nuts (like pecans or almonds) for a little crunch. It’s a grown-up twist that still feels festive.
Don’t be afraid to experiment! Halloween-Oreo-Bälle are so forgiving, and every batch feels like a new adventure. Whether you’re sticking to tradition or trying something wild, these treats are always a hit.
Serving and Storing Halloween-Oreo-Bälle
Now that you’ve made these adorable (and slightly spooky) Halloween-Oreo-Bälle, let’s talk about keeping them fresh and fabulous! The cream cheese in these means they’re happiest when chilled – leave them out too long and they’ll start sweating like a ghost in a haunted house. Here’s my tried-and-true method:
For serving, I arrange them on a spooky platter straight from the fridge. If your party lasts more than an hour, keep them nestled on a bed of ice (black crushed ice looks especially Halloween-y). Those chocolate coatings stay perfectly crisp this way. And here’s a secret – the cold actually makes the texture even better, with that wonderful fudgy bite.
Storage is a breeze! Just tuck them into an airtight container with parchment between layers. They’ll keep beautifully in the fridge for up to a week (if they last that long). For longer storage, freeze them undecorated – the chocolate-coated balls hold up great for a month. When the Halloween sugar cravings hit, just thaw in the fridge overnight and add your sprinkles fresh. Pro tip: Label the container unless you want mysterious “what are these?” texts from family members!
One last thing – these make fantastic edible gifts! Stack them in clear treat bags tied with orange ribbon. I’ve won serious brownie points (or should I say Oreo-ball points?) with teachers and neighbors this way. Just be warned – you might start getting requests every October!
Halloween-Oreo-Bälle FAQs
Over the years, I’ve gotten so many questions about these irresistible no-bake treats—usually while people are stuffing their faces with them! Here are the answers to the ones I hear most:
Can I use other cookies besides Oreos?
Absolutely! Golden Oreos make gorgeous “ghost” balls when dipped in white chocolate. For gluten-free versions, any similar sandwich cookie works (I’ve had great luck with gluten-free JoJos). Just make sure whatever cookie you use has that same creamy center—it helps bind everything together.
How long do Halloween-Oreo-Bälle last?
In our house? About 37 minutes! But realistically, they’ll stay fresh in the fridge for up to a week (store them in an airtight container). The chocolate coating keeps the cream cheese mixture protected. Pro tip: If you’re gifting them, add a “best by” note—though I’ve never known anyone to complain about eating them “past” their prime!
Can I freeze them?
You bet! These no-bake treats freeze like dream—just hold off on the sprinkles. Coat the balls in chocolate, let them set completely, then freeze in a single layer before transferring to freezer bags. They’ll keep for a month! Thaw overnight in the fridge, then decorate right before serving. The texture stays perfectly creamy—no one will guess they were made ahead!
Bonus tip: If your chocolate cracks after freezing (it happens!), just drizzle on more melted chocolate to disguise it. Call it “cobweb detailing”—problem solved!
Nutritional Information
Okay, let’s be real—Halloween-Oreo-Bälle aren’t health food, but everything in moderation, right? (Says the woman who ate three while writing this.) These numbers are estimates per ball—your exact counts might vary based on sprinkles or chocolate type. But since I know some of you like the details (or need them for portion control—no judgment!), here’s the breakdown:
- Calories: 120 per ball (but totally worth it)
- Sugar: 10g (blame the Oreos and chocolate—deliciously guilty parties)
- Fat: 7g (3g saturated—cream cheese and chocolate are the culprits here)
- Carbs: 13g (with 1g fiber—the Oreo crumbs pull through!)
- Protein: 1g (hey, cream cheese counts!)
Remember, these are treats—meant to be enjoyed! I like balancing them with savory snacks at parties so guests don’t go full sugar-crash zombie. And if you’re counting macros, maybe save your daily allotment for these little guys… just saying.
Tag Us in Your Halloween-Oreo-Bälle Photos!
I live for seeing your spooky creations! Snap a pic of your Halloween-Oreo-Bälle masterpiece (or the hilarious “nailed it” fails—we’ve all been there) and tag me @SpookyTreatsQueen. Nothing makes me happier than spotting your ghostly white chocolate drips, perfect sprinkle placement, or creative variations. Bonus points if your kids’ tiny hands are covered in chocolate—those are my favorite kitchen memories! Let’s flood Instagram with Oreo-ball magic this Halloween. Who knows—your photo might inspire next year’s viral trend!
Print
36 Spooky Halloween-Oreo-Bälle That Disappear Instantly
- Total Time: 1 hour
- Yield: 36 balls 1x
- Diet: Vegetarian
Description
Easy-to-make Halloween Oreo balls coated in chocolate and decorated with spooky designs.
Ingredients
- 36 Oreo cookies
- 8 oz cream cheese, softened
- 12 oz chocolate chips or candy melts
- Sprinkles or edible decorations (optional)
Instructions
- Crush Oreos finely in a food processor or blender.
- Mix crushed Oreos with softened cream cheese until fully combined.
- Roll the mixture into small balls and place them on a baking sheet lined with parchment paper.
- Freeze the balls for 30 minutes.
- Melt chocolate chips or candy melts in a microwave-safe bowl.
- Dip each frozen Oreo ball into melted chocolate, coating completely.
- Decorate with sprinkles or edible designs before chocolate sets.
- Let chocolate harden before serving.
Notes
- Use candy melts for easier dipping.
- Add food coloring to white chocolate for themed colors.
- Store in the refrigerator.
- Prep Time: 20 minutes
- Cook Time: 10 minutes
- Category: Dessert
- Method: No-Bake
- Cuisine: American
Nutrition
- Serving Size: 1 ball
- Calories: 120
- Sugar: 10g
- Sodium: 85mg
- Fat: 7g
- Saturated Fat: 3g
- Unsaturated Fat: 3g
- Trans Fat: 0g
- Carbohydrates: 13g
- Fiber: 1g
- Protein: 1g
- Cholesterol: 5mg
Keywords: Halloween Oreo balls, no-bake dessert, Halloween treats