When it comes to keeping our kids happy and healthy, I truly believe that finding the right snacks is essential. Healthy kid snacks should be both nutritious and tasty, and that’s where this recipe shines! I can’t tell you how many times my little ones have come home from school, starving and ready to devour anything in sight. Having these delicious, no-bake bars on hand not only saves me from the frantic snack scramble but also ensures they’re munching on something wholesome. Trust me, they won’t even notice they’re eating something packed with goodness!
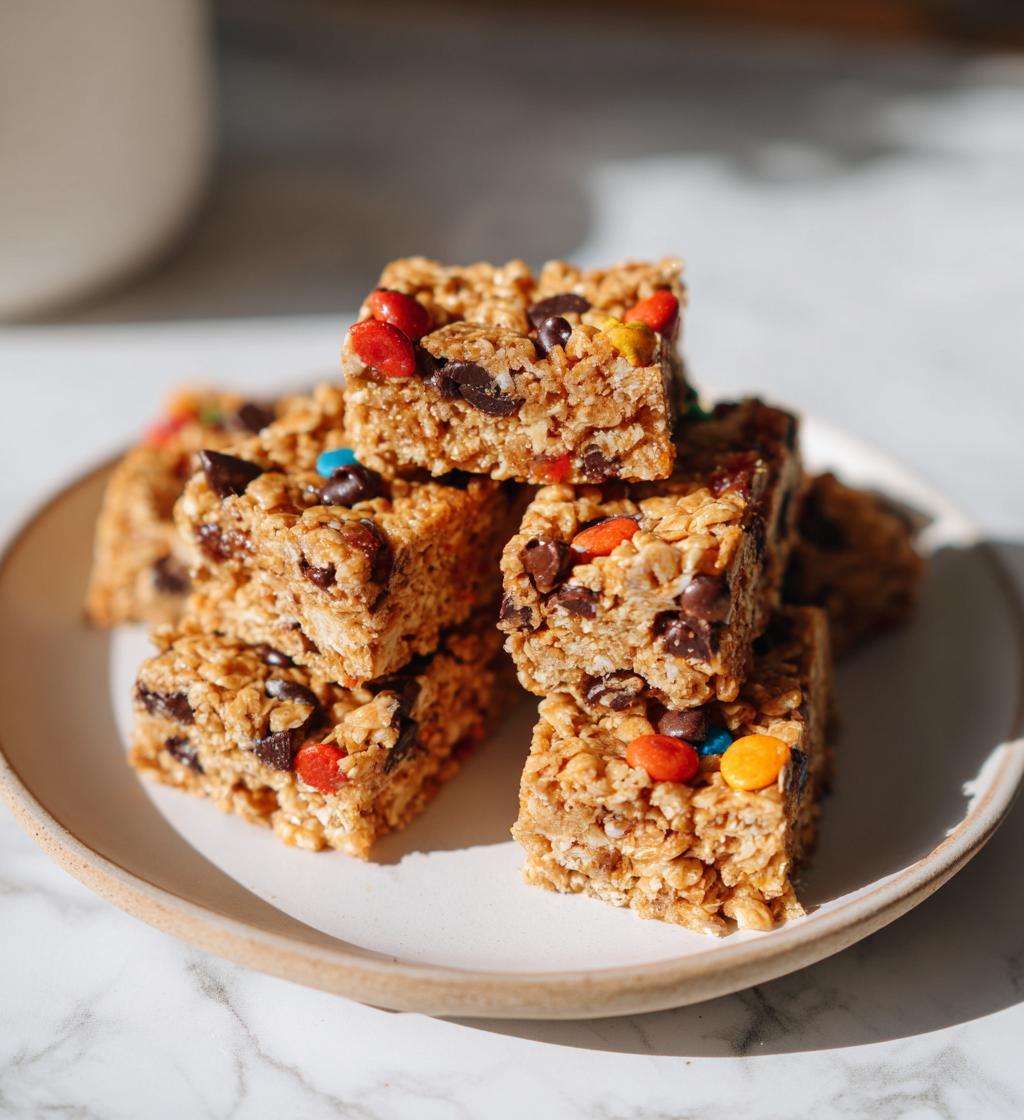
This recipe combines rolled oats, creamy peanut butter, and a touch of honey to create a delightful treat that’s perfect for after school or even as a lunchbox surprise. Plus, you can easily customize these bars to include your kid’s favorite add-ins—think dried fruits or even a sprinkle of seeds! It’s a win-win situation: you get to feel good about what they’re eating, and they get a sweet snack that keeps their energy up. So let’s dive into how to whip up these scrumptious healthy kid snacks!
Ingredients List
To create these delicious and nutritious healthy kid snacks, you’ll need the following simple ingredients:
- 1 cup rolled oats – These provide a fantastic base, offering fiber and energy for your little ones.
- 1/2 cup peanut butter – Creamy and tasty, peanut butter adds healthy fats and protein to keep those tummies full.
- 1/4 cup honey – A natural sweetener that binds everything together while adding a touch of sweetness.
- 1/2 cup mini chocolate chips – Because who can resist a little chocolate? These make the bars extra special and appealing to kids.
- 1/2 cup dried fruit – You can use cranberries, raisins, or apricots; they add natural sweetness and a chewy texture.
Gather these ingredients and get ready to whip up some tasty treats that your kids will love!
How to Prepare Healthy Kid Snacks
Making these healthy kid snacks is super simple and fun! You won’t need any baking skills—just a few mixing bowls and a little patience. Let’s break it down step-by-step so you can whip these up in no time!
Step-by-Step Instructions
- Mix the base ingredients: Start by grabbing a large mixing bowl. Add 1 cup of rolled oats, 1/2 cup of peanut butter, and 1/4 cup of honey. Use a sturdy spoon or spatula to mix everything together. It’ll take a little elbow grease, but you want a thick, sticky mixture that holds together well. Don’t worry if it seems a bit tough to mix at first; just keep stirring until it’s all combined!
- Add the fun stuff: Now it’s time to make these bars even more exciting! Stir in 1/2 cup of mini chocolate chips and 1/2 cup of your favorite dried fruit. You can choose from cranberries, raisins, or even apricots—whatever your kids enjoy! This is where you can get creative, so feel free to toss in some sunflower seeds or coconut flakes if that’s your jam!
- Press the mixture into a dish: Once everything is thoroughly combined, grab a lined baking dish (an 8×8 inch one works great). Transfer the mixture into the dish and spread it out evenly. Use your hands or a flat spatula to press it down firmly. This step is crucial! The denser you pack it, the better your bars will hold together later.
- Chill for the magic to happen: Cover the dish with plastic wrap or foil and pop it in the fridge. You’ll want to let it chill for at least 1 hour. This helps the bars set up nicely and makes them easier to cut!
- Slice and serve: After an hour, take the dish out and uncover it. Use a sharp knife to cut the mixture into bars or squares, depending on how big you want them. I usually get about 12 bars from this recipe, but you can make them smaller or larger based on your kids’ appetites!
And there you have it—simple, no-bake healthy kid snacks that are ready to fuel your little ones for playtime or homework! Store any leftovers in an airtight container in the fridge, and don’t be surprised when they’re gone in a flash!
Nutritional Information
Let’s talk numbers! These healthy kid snacks are not only tasty but also packed with nutrition. Each bar offers about 150 calories, making them a satisfying treat without going overboard. You’ll find 7g of fat, which comes primarily from the peanut butter, giving your kids those essential healthy fats. With 4g of protein, they’ll feel full and energized, perfect for after school or before activities!
When it comes to carbohydrates, each bar contains around 20g, including 2g of fiber to support digestion. The sugar content is about 8g, primarily from the honey and chocolate chips, keeping the sweetness balanced without overdoing it. Plus, there’s no cholesterol, making these a heart-healthy option. Keep in mind that these values are estimates, but they give you a good idea of what your kids are munching on!
Why You’ll Love This Recipe
- Quick to make: With just 10 minutes of prep time, you can have these healthy kid snacks ready to chill in the fridge!
- No baking required: This no-bake recipe means no fussing with ovens or complicated techniques—just mix, press, and chill!
- Nutritious & satisfying: Packed with wholesome ingredients, these bars provide energy and nutrients to keep your kids fueled throughout the day.
- Customizable: You can easily swap out ingredients based on your kids’ tastes—try different nut butters, seeds, or dried fruits!
- Kid-friendly: With a delicious mix of flavors and textures, these bars are sure to be a hit with your little ones, making snack time fun!
Trust me, once you try these bars, they’ll become a staple in your household!
Tips for Success
To ensure your healthy kid snacks turn out perfectly every time, I’ve got some simple yet effective tips that will make the process even smoother!
Mixing is key: When combining the oats, peanut butter, and honey, don’t be afraid to get in there with some muscle! The mixture should be thick and sticky. If it’s too dry, you can add a splash of milk or a bit more honey to help it come together.
Pressing firmly matters: Make sure you really press the mixture down into the baking dish. I like to use a flat spatula or even my hands to pack it in tightly. This helps the bars hold their shape when you cut them later. The denser, the better!
Chill for success: Don’t skip the chilling step! It’s crucial for setting the bars. If you can, let them chill a bit longer than an hour—up to two hours works great if you can wait. This extra time will help them firm up nicely.
Cut with care: When it’s time to slice, use a sharp knife and cut straight down rather than dragging it across the bars. This helps keep the edges neat and prevents crumbling. And remember, if they seem a little soft, just give them a few more minutes in the fridge before cutting!
With these tips, you’ll be on your way to creating the perfect batch of delicious, healthy kid snacks that your family will adore!
Ingredient Notes/Substitutions
Let’s chat about the ingredients in these healthy kid snacks and how you can customize them to fit your family’s tastes! First up, peanut butter—it’s a fantastic source of protein and healthy fats. If your kids have allergies or just prefer something different, you can easily swap it out for almond butter, sunflower seed butter, or even cashew butter. Just keep in mind that the flavor will vary slightly; almond butter offers a nuttier taste, while sunflower seed butter has a milder profile.
As for the dried fruit, feel free to experiment! While cranberries and raisins are classic choices, don’t hesitate to try apricots, dates, or even figs. Just remember, the sweetness and chewiness of the fruit will change the overall flavor and texture of the bars. So, get creative and make these snacks your own!
Storage & Reheating Instructions
Storing your delicious healthy kid snacks is super easy! Once you’ve cut the bars, place them in an airtight container. I usually separate layers with parchment paper to keep them from sticking together. They’ll last in the fridge for about a week—perfect for grabbing on busy mornings or after school!
If you want to keep them longer, you can freeze the bars. Just wrap each one in plastic wrap and then place them in a freezer-safe bag. They’ll stay fresh for up to three months! When you’re ready to enjoy, simply take out a bar and let it thaw in the fridge or at room temperature. Reheating isn’t necessary, as they taste great straight from the fridge or after thawing. This way, you’ve got a tasty, nutritious snack ready whenever you need it!
FAQ Section
Q1: Can I use other nut butters instead of peanut butter?
Absolutely! This recipe is super flexible. You can substitute peanut butter with almond butter, sunflower seed butter, or even cashew butter. Just keep in mind that the flavor and texture may change slightly, but it’ll still be delicious!
Q2: How long do these healthy kid snacks last?
When stored in an airtight container in the fridge, these snacks will stay fresh for about a week. If you want to keep them longer, you can freeze them for up to three months. Just wrap each bar in plastic wrap before placing them in a freezer-safe bag.
Q3: Can I add protein powder to these bars?
Yes! Adding a scoop of your favorite protein powder is a great way to boost the nutritional value of these healthy kid snacks. Just make sure to adjust the wet ingredients slightly if the mixture feels too dry!
Q4: Are these bars suitable for school lunches?
Definitely! These bars make an excellent school lunch addition. They’re nutritious, easy to pack, and kids love the taste. Just be sure to check your school’s guidelines regarding nut allergies.
Q5: What’s the best way to cut the bars without them falling apart?
To get clean edges, use a sharp knife and cut straight down rather than dragging it across the bars. If they seem a bit soft, let them chill for a little longer before slicing. This will help them hold their shape better!
Healthy Kid Snacks: 5 Delightful Recipes Your Kids Will Love
- Total Time: 1 hour 10 minutes
- Yield: 12 bars 1x
- Diet: Vegetarian
Description
Nutritious and tasty snacks for kids.
Ingredients
- 1 cup rolled oats
- 1/2 cup peanut butter
- 1/4 cup honey
- 1/2 cup mini chocolate chips
- 1/2 cup dried fruit
Instructions
- In a bowl, mix oats, peanut butter, and honey.
- Add chocolate chips and dried fruit.
- Stir until combined.
- Press mixture into a lined baking dish.
- Chill in the fridge for 1 hour.
- Cut into bars and serve.
Notes
- Store in an airtight container.
- Can be customized with different nut butters.
- Prep Time: 10 minutes
- Cook Time: 0 minutes
- Category: Snacks
- Method: No-bake
- Cuisine: American
Nutrition
- Serving Size: 1 bar
- Calories: 150
- Sugar: 8g
- Sodium: 50mg
- Fat: 7g
- Saturated Fat: 1g
- Unsaturated Fat: 5g
- Trans Fat: 0g
- Carbohydrates: 20g
- Fiber: 2g
- Protein: 4g
- Cholesterol: 0mg
Keywords: healthy kid snacks