Ah, the magic of snow days! There’s nothing quite like waking up to a world transformed into a winter wonderland, is there? When I was a kid, my siblings and I would rush outside, bundled up in our warmest coats, ready to embrace the fluffy white stuff. One of our favorite traditions was making snow ice cream. It’s a simple yet delightful treat that captures the essence of those playful winter afternoons. Honestly, how to make snow ice cream is so easy, you’ll wonder why you haven’t done it sooner!
All you need is four cups of fresh snow, some milk, sugar, and a splash of vanilla. The best part? You don’t even need to turn on the stove! Just gather some clean snow, mix your ingredients, and voilà! You have a delicious dessert that’s as fun to make as it is to eat. I can still hear my kids squealing with joy as we scoop the creamy mixture into bowls, topped with chocolate syrup or sprinkles. It’s the perfect way to celebrate those chilly days, turning a simple moment into a sweet memory. Trust me, once you try it, you’ll be making snow ice cream every time it snows!
Ingredients List
To whip up this delightful snow ice cream, you’ll need just a few simple ingredients that come together beautifully:
- 4 cups fresh snow: Make sure to gather clean, fluffy snow. It’s the star of this recipe, so avoid any yellow snow (yikes!). Fresh snow gives the ice cream its light, airy texture.
- 1 cup milk: You can use whole milk for a creamier texture or any milk of your choice. This adds richness and helps bind everything together.
- 1/2 cup sugar: This sweetens the mix perfectly! Feel free to adjust the amount to suit your taste; some days call for a little extra sweetness!
- 1 teaspoon vanilla extract: This is my secret ingredient! It adds a lovely depth of flavor that complements the snow and makes every bite feel special.
Gather these ingredients, and you’ll be ready to dive into the fun of making snow ice cream! Remember, the fresher the snow, the better your treat will be.
How to Make Snow Ice Cream
Making snow ice cream is as easy as it gets! Follow these simple steps, and you’ll have a delightful treat ready in no time. I promise, it’s a fun process that will have everyone gathered around, excited to dig in!
Step-by-Step Instructions
First things first, you’ll want to gather your fresh snow. Head outside and fill a clean bowl with about four cups of that pristine, fluffy snow. Make sure you’re using fresh snow—nothing yellow, okay? Once you’ve got your snow, it’s time to mix the other ingredients!
In a separate bowl, combine one cup of milk, half a cup of sugar, and a teaspoon of vanilla extract. I usually whisk it together until the sugar is dissolved. This step is crucial because it ensures that your ice cream will be sweet and flavorful throughout. You’ll want to stir this mixture thoroughly so every spoonful has that delicious vanilla goodness.
Now comes the fun part! Pour that sweet milk mixture over your bowl of snow. And here’s a tip: do this gradually! You don’t want to drown your snow all at once. Gently fold the mixture into the snow with a spatula or spoon. You’re aiming for a soft, fluffy consistency, so be careful not to overmix. Just combine until everything is well mixed, and you have a lovely creamy texture.
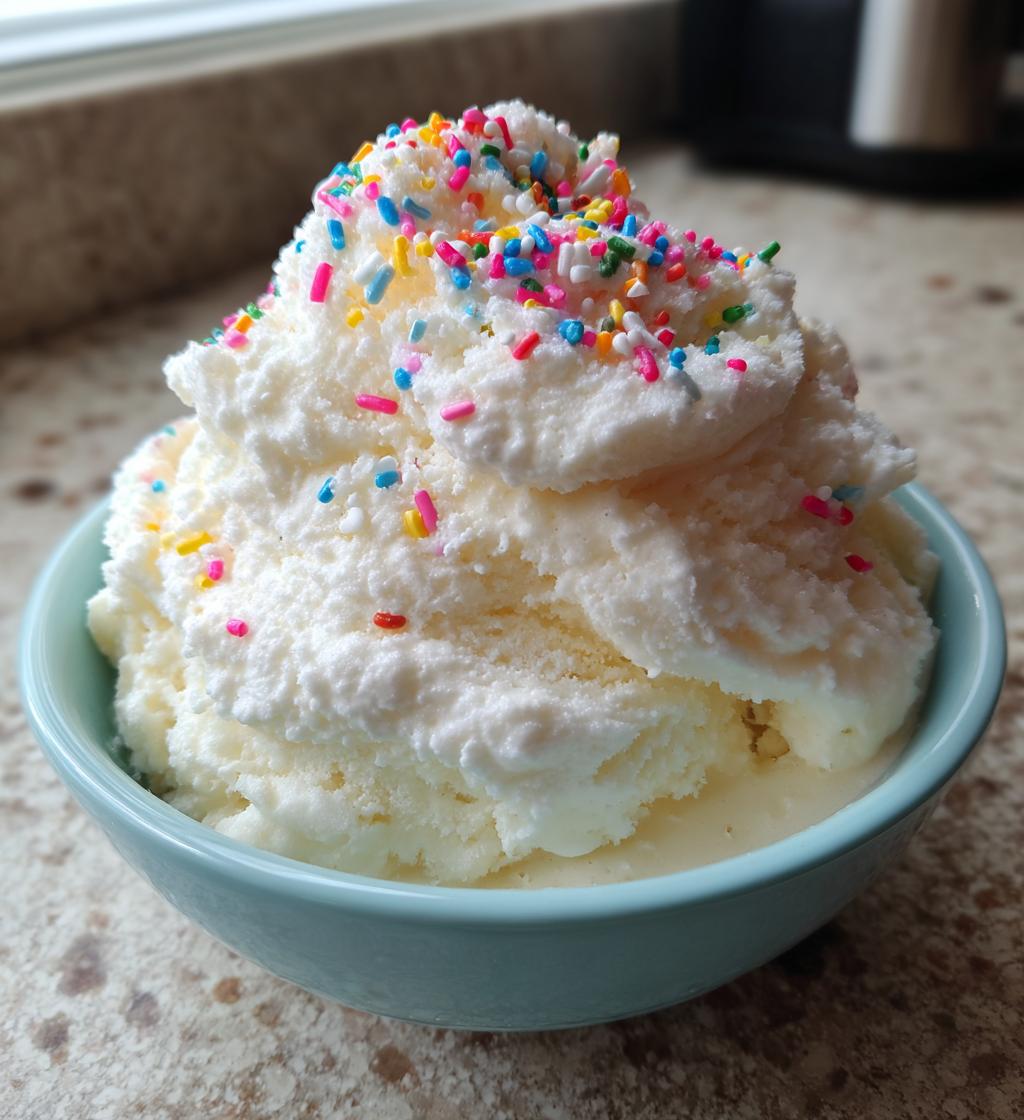
Once you’ve achieved that perfect mix, it’s time to serve! Scoop the snow ice cream into bowls immediately to enjoy it at its best. It’s best fresh, and trust me, you won’t be able to resist the urge to dive right in. If you like, add some fun toppings like chocolate syrup or sprinkles for an extra treat!
Why You’ll Love This Recipe
- Quick and Easy: This snow ice cream comes together in just 10 minutes! You can whip it up in no time, making it perfect for spontaneous snow days.
- No Cooking Required: That’s right! No stove, no fuss. Just mix and enjoy this delightfully simple dessert.
- Fun for Everyone: Making snow ice cream is a blast! It’s a great way to get the kids involved in the kitchen and create sweet memories together.
- Fresh and Fluffy: Using freshly fallen snow gives this treat a unique, light texture that store-bought ice creams just can’t replicate.
- Customizable: Feel free to add your favorite toppings! Whether it’s chocolate syrup, sprinkles, or fresh fruit, you can make it your own.
Trust me, once you try it, you’ll be hooked on this delightful winter treat! It’s a great reminder of the joy that comes with snowy days.
Nutritional Information
When it comes to enjoying snow ice cream, it’s nice to have an idea of what you’re indulging in! Here’s a general breakdown of the nutritional values for one serving (about 1 cup) of this delightful treat. Keep in mind that these values are estimates and can vary based on the specific ingredients you use:
- Calories: 150
- Fat: 4g
- Saturated Fat: 2.5g
- Unsaturated Fat: 1.5g
- Trans Fat: 0g
- Cholesterol: 10mg
- Sodium: 100mg
- Carbohydrates: 24g
- Fiber: 0g
- Sugar: 20g
- Protein: 3g
This snow ice cream is a sweet treat that’s sure to bring smiles, and it’s nice to know you’re enjoying something simple and fun! Just remember, the joy of making it together far outweighs any numbers on a list!
Tips for Success
To make your snow ice cream truly irresistible, here are some of my favorite tips! First, always use the freshest snow you can find. The fluffier, the better—this keeps your ice cream light and airy. If you want a richer flavor, try swapping out regular milk for half-and-half or even coconut milk for a delicious twist!
Don’t hesitate to get creative with toppings! In addition to classic chocolate syrup, consider crushed cookies, fresh fruit, or even a drizzle of caramel sauce. I love adding a sprinkle of cinnamon for a warm touch! If you’re feeling adventurous, try mixing in some cocoa powder or matcha for unique flavors.
Lastly, serve your snow ice cream immediately. It’s best enjoyed fresh, but if you have leftovers, store them in the freezer in an airtight container. Just know they might lose some fluffiness over time. Enjoy your snow day treat!
FAQ Section
Got questions about how to make snow ice cream? I’ve got you covered! Here are some common queries I hear, along with my answers to help you get the most out of this delightful treat.
Can I use any type of snow for this recipe?
It’s important to use clean, fresh snow. Avoid any snow that’s yellow or contaminated. The fluffier and whiter, the better! Freshly fallen snow is typically the best choice.
What if I don’t have vanilla extract?
No worries! If you’re out of vanilla, you can substitute with almond extract or even a splash of maple syrup for a different flavor profile. Just adjust the amount to your taste!
Can I make snow ice cream ahead of time?
It’s best to enjoy snow ice cream fresh, as it can lose its fluffy texture if stored. If you have leftovers, place them in an airtight container in the freezer, but keep in mind they might not be as delightful the next day.
What are some fun toppings I can add?
Get creative! I love topping my snow ice cream with chocolate syrup, sprinkles, or even crushed cookies. Fresh fruit like berries or bananas can add a nice touch too. The possibilities are endless!
Is snow ice cream safe to eat?
As long as you’re using clean snow, snow ice cream is safe to enjoy. Just make sure to avoid any snow that may have been contaminated by animals or other sources. Happy snow day!
Storage & Reheating Instructions
Honestly, snow ice cream is best enjoyed fresh right after you make it. The fluffy texture and delightful taste really shine that way! But if you happen to have leftovers (which is rare, trust me!), you can store them. Just scoop the extra snow ice cream into an airtight container and pop it in the freezer. Make sure to seal it tightly to keep out any unwanted freezer flavors.
Now, a little heads up: while you can freeze it, know that the texture might change. It could become a bit icy or less fluffy, but it’ll still be tasty! If you want to enjoy it later, just let it sit at room temperature for a few minutes before scooping it again. You might need to give it a little stir to revive that creamy consistency. Happy snow day snacking!
Serving Suggestions
When it comes to serving your delightful snow ice cream, the sky’s the limit! I love to dress it up with a variety of toppings that add flavor and fun. For a classic touch, drizzle some rich chocolate syrup or caramel sauce over the top. It adds a sweet, gooey element that perfectly complements the creamy texture of the ice cream.
Want to add some crunch? Sprinkle on crushed cookies or chocolate chips for a delightful contrast. Fresh fruit like strawberries, blueberries, or sliced bananas can bring a burst of freshness and color to your bowl. If you’re feeling adventurous, try adding a dollop of whipped cream on top for an indulgent treat!
Don’t forget to serve it alongside warm desserts like brownies or pie. The combination of hot and cold is simply irresistible! No matter how you choose to serve it, your snow ice cream is sure to be a hit. Enjoy every scoop!
Print
how to make snow ice cream: 4 easy steps for joy
- Total Time: 10 minutes
- Yield: 4 servings 1x
- Diet: Vegetarian
Description
A simple recipe to make snow ice cream using fresh snow.
Ingredients
- 4 cups fresh snow
- 1 cup milk
- 1/2 cup sugar
- 1 teaspoon vanilla extract
Instructions
- Gather fresh snow in a bowl.
- In another bowl, mix milk, sugar, and vanilla.
- Pour the milk mixture over the snow.
- Stir gently until combined.
- Scoop and serve immediately.
Notes
- Use clean, fresh snow.
- Adjust sugar to taste.
- Add toppings like chocolate syrup if desired.
- Prep Time: 10 minutes
- Cook Time: 0 minutes
- Category: Dessert
- Method: Mixing
- Cuisine: American
Nutrition
- Serving Size: 1 cup
- Calories: 150
- Sugar: 20g
- Sodium: 100mg
- Fat: 4g
- Saturated Fat: 2.5g
- Unsaturated Fat: 1.5g
- Trans Fat: 0g
- Carbohydrates: 24g
- Fiber: 0g
- Protein: 3g
- Cholesterol: 10mg
Keywords: how to make snow ice cream, snow ice cream recipe, homemade snow ice cream