Ah, *Irish desserts*! There’s something so heartwarming about whipping up these traditional treats in my kitchen. As soon as I start mixing the ingredients, I can almost hear the laughter and chatter of family gatherings in Ireland. These desserts are rich and flavorful, each bite a sweet reminder of cozy evenings spent with loved ones. I love how they combine simple ingredients to create something truly magical. The blend of butter, sugar, and fluffy eggs transforms into a treat that feels like a warm hug, especially when the aroma fills the air while baking!
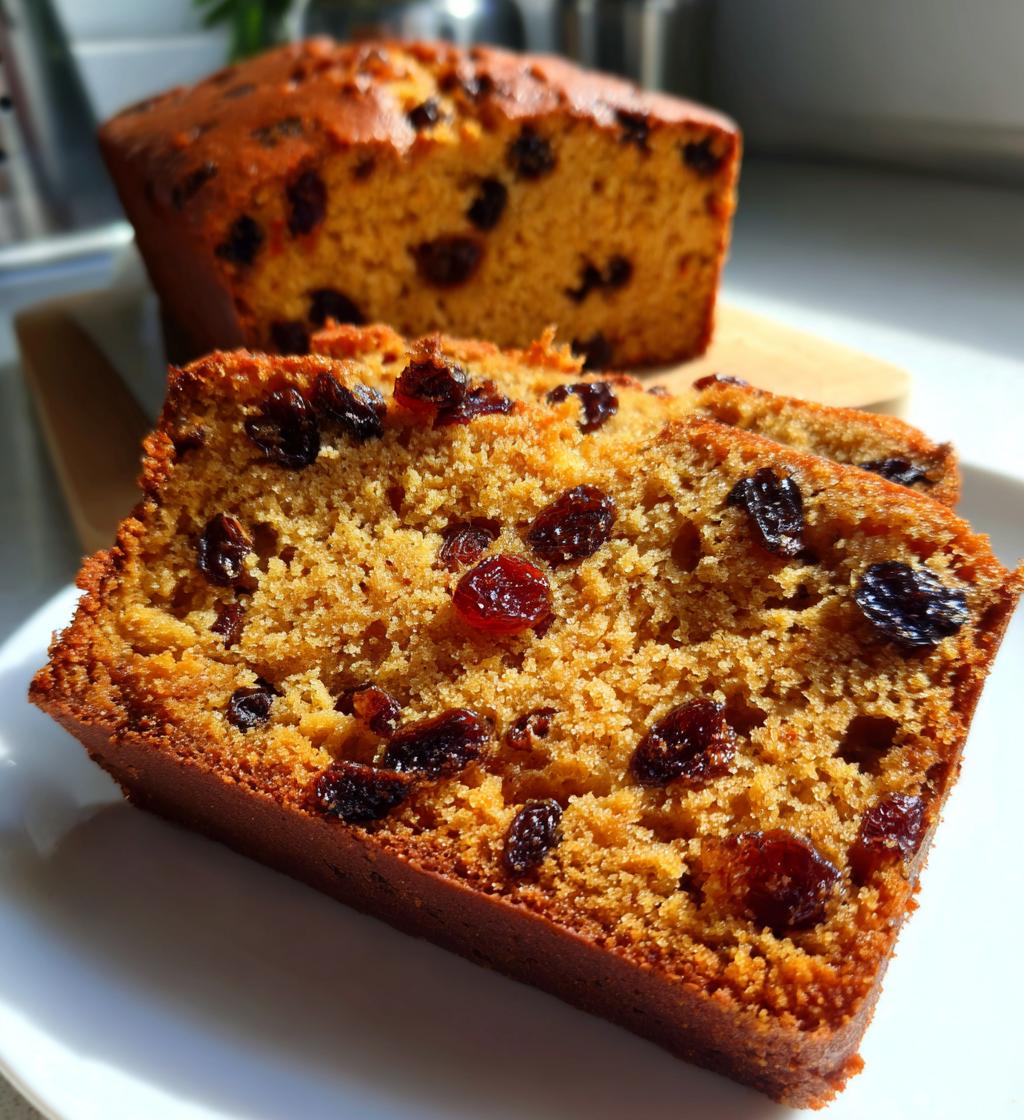
Whether it’s a classic bread pudding or a moist cake dotted with raisins and currants, every recipe has its own story. These desserts often carry the weight of tradition, passed down through generations. They’re perfect for festive occasions or just a delightful way to end a family meal. Trust me, once you dive into making these desserts, you’ll find yourself making them again and again, feeling that connection to a rich culinary heritage. Let’s get started on creating something delicious together!
Ingredients List
Here’s what you’ll need to whip up these delightful *Irish desserts*. Gather these ingredients, and let’s get baking!
- 4 cups all-purpose flour
- 2 cups granulated sugar
- 1 cup unsalted butter, softened
- 4 large eggs, at room temperature
- 1 cup whole milk
- 1 tablespoon baking powder
- 1 teaspoon pure vanilla extract
- 1/2 cup raisins, plumped in warm water
- 1/2 cup currants, plumped in warm water
- 1/4 teaspoon salt
Make sure your butter is softened—trust me, it makes a difference in the creaming process! The eggs also do best at room temperature, so take them out ahead of time. And when it comes to the raisins and currants, a quick soak in warm water helps them stay juicy and flavorful in the final bake. Now you’re ready to dive into the preparation!
How to Prepare Irish Desserts
Now that you’ve gathered all your ingredients, it’s time to bring this *Irish dessert* to life! Follow these simple steps, and I promise you’ll have a delightful treat that’s bursting with flavor. Make sure to preheat your oven before you start mixing to ensure it’s nice and ready for that batter!
Step-by-Step Instructions
- Preheat the oven: First things first, preheat your oven to 350°F (175°C). This ensures your dessert bakes evenly and gets that lovely golden brown color.
- Cream the butter and sugar: In a large mixing bowl, cream the softened butter and sugar together until it’s light and fluffy. You’ll want to beat it for about 3-5 minutes. This step is crucial because it incorporates air into the mixture, helping your dessert rise beautifully!
- Add the eggs: Next, add the eggs one at a time, mixing well after each addition. This helps to fully incorporate them into the mixture, ensuring a smooth batter. Don’t rush this step; take your time to get it right!
- Mix in the milk and vanilla: Stir in the milk and vanilla extract until well combined. The mixture should now look creamy and inviting!
- Combine dry ingredients: In another bowl, whisk together the flour, baking powder, and salt. This helps to evenly distribute the dry ingredients and avoid any clumps.
- Combine wet and dry mixtures: Gradually add the dry ingredients to the wet mixture. I like to do this in three parts—starting and ending with the dry mixture. This helps to avoid overmixing, which can make your dessert dense. Just mix until you see no flour streaks; it’s okay if it’s a bit lumpy!
- Fold in the raisins and currants: Gently fold in the plumped raisins and currants until they’re evenly distributed. This step adds delightful bursts of flavor throughout your dessert.
- Transfer to baking dish: Pour the batter into a greased baking dish. Make sure to spread it evenly so it bakes uniformly. I often use a spatula to smooth the top!
- Bake it: Place the baking dish in the preheated oven and bake for about 45-50 minutes. You’ll know it’s ready when it’s golden brown on top and a toothpick inserted into the center comes out clean.
- Cool before serving: Once baked, let it cool in the dish for about 10-15 minutes before transferring it to a wire rack. This cooling time helps it firm up a bit, making it easier to slice. Trust me, the aroma wafting through your kitchen during this time will be irresistible!
And there you have it! Your *Irish dessert* is ready to be enjoyed. The anticipation is half the fun, so take a moment to relish the delightful scents filling your kitchen. I can’t wait for you to taste it!
Why You’ll Love This Recipe
- Easy to Make: This recipe is straightforward, making it perfect for both novice bakers and seasoned pros. With just a few steps, you’ll have a delicious dessert that feels fancy without all the fuss!
- Rich, Flavorful Ingredients: The combination of butter, sugar, and plumped fruits creates a decadent flavor profile that’s truly irresistible. Each bite is a burst of sweetness that makes your taste buds dance!
- Perfect for Celebrations: Whether it’s a family gathering, holiday feast, or just a cozy night in, this *Irish dessert* is sure to impress. It’s a wonderful way to bring a touch of tradition to your table.
- Versatile Serving Options: You can serve this dessert warm or at room temperature, and it pairs beautifully with a scoop of vanilla ice cream or a drizzle of cream. Trust me, a little extra cream makes everything better!
- Great for Leftovers: This dessert stores well, so you can enjoy it for days. It stays moist and flavorful, making it a delightful treat to look forward to even after the initial baking!
Tips for Success
Getting your *Irish desserts* just right can be a breeze with a few handy tips! Here’s what I’ve learned along the way to help you achieve the best results every time:
- Measure Accurately: Baking is a science, so precise measurements are crucial. Use a kitchen scale if you have one for the most accurate results, especially for flour. Scoop it lightly into your measuring cup and level it off with a knife for the best texture.
- Room Temperature Ingredients: Make sure your butter and eggs are at room temperature before you start. This helps everything mix more smoothly and creates that fluffy texture we all love. If you forget, you can warm the eggs gently in a bowl of warm water for a few minutes!
- Don’t Overmix: When combining your wet and dry ingredients, mix just until everything is incorporated. Overmixing can lead to a dense dessert, and nobody wants that! A few lumps in the batter are perfectly fine.
- Substitutions with Care: If you need to make substitutions, go for it! You can swap out currants for more raisins or even try dried cranberries for a twist. Just be mindful of the moisture content; if you use a drier fruit, consider adding a splash more milk.
- Watch the Baking Time: Every oven is different! Start checking for doneness a few minutes before the suggested baking time. You want that lovely golden top, and a toothpick should come out clean. If it’s browning too quickly, cover it loosely with foil.
- Cool Properly: Letting your dessert cool in the pan for a bit before transferring it helps it set nicely. If you try to take it out too soon, it might crumble. Patience is key here!
- Use Quality Ingredients: Since this recipe features simple ingredients, using high-quality butter and fresh eggs really makes a difference in flavor. Don’t skimp on these, as they contribute to the overall richness of your dessert!
With these tips, you’ll be well on your way to baking up some amazing *Irish desserts*. Enjoy the process, and don’t forget to have fun in the kitchen!
Serving Suggestions
Now that your *Irish dessert* is freshly baked and ready to impress, let’s talk about how to serve it up! The right accompaniments can elevate your dessert to a whole new level. Here are some of my favorite ways to enjoy this delightful treat:
- Whipped Cream: A dollop of freshly whipped cream adds a light, airy touch that complements the rich flavors of the dessert beautifully. You can sweeten it just a touch with powdered sugar and a splash of vanilla for that extra pop!
- Vanilla Ice Cream: Nothing beats the classic pairing of warm dessert with a scoop of cold vanilla ice cream. The creaminess of the ice cream melts into the cake, creating a heavenly combination that’s simply irresistible.
- Custard Sauce: A warm custard sauce drizzled over the top is a traditional choice that feels indulgent. It adds a velvety texture that pairs perfectly with the sweetness of the dessert.
- Irish Coffee: For a delightful after-dinner treat, serve your *Irish desserts* with a steaming cup of Irish coffee. The rich coffee, blended with a splash of Irish whiskey and topped with whipped cream, creates a warming experience that complements the flavors beautifully.
- Tea: A nice cup of strong Irish black tea is the perfect accompaniment, especially for a cozy afternoon treat. It balances the sweetness of the dessert and adds a touch of tradition to your serving.
Feel free to mix and match these suggestions based on your mood or the occasion! No matter how you choose to serve it, I can guarantee that your *Irish dessert* will be the star of the show. Enjoy every bite!
Storage & Reheating Instructions
Once you’ve savored your delightful *Irish dessert*, you might find yourself with some leftovers. No worries! Storing and reheating this tasty treat is super easy, and I’m here to guide you through it!
To store your dessert, let it cool completely at room temperature. Once it’s cooled, cover it tightly with plastic wrap or transfer it to an airtight container. This will keep it fresh and prevent it from drying out. You can store it at room temperature for up to three days, or if you want to keep it longer, pop it in the fridge for up to a week. Just be sure to let it come to room temperature before serving again.
When it’s time to enjoy those leftovers, reheating is key to bringing back that cozy, just-baked goodness. You can warm individual slices in the microwave for about 15-20 seconds, just until they’re warm but not hot. If you prefer to reheat the entire dessert, preheat your oven to 350°F (175°C) and cover the dish with foil to prevent it from browning too much. Bake for about 10-15 minutes or until warmed through.
And if you want to add a little extra flair, consider serving it warm with a drizzle of cream or a scoop of ice cream on the side—it’ll feel just like when it came out of the oven! Enjoy your delicious *Irish dessert* anytime, and relish those wonderful flavors all over again!
Nutritional Information Section
When it comes to enjoying your *Irish desserts*, it’s always good to have a sense of the nutritional values, but keep in mind that these can vary based on the specific ingredients and brands you use. The values provided here are approximate and meant to give you a general idea of what to expect:
- Calories: About 350 per slice
- Total Fat: 15g
- Saturated Fat: 9g
- Trans Fat: 0g
- Cholesterol: 60mg
- Sodium: 200mg
- Total Carbohydrates: 50g
- Dietary Fiber: 2g
- Sugars: 25g
- Protein: 5g
These figures can shift based on your choices—like using different types of sugar or butter substitutes—so feel free to experiment while keeping the essence of this delightful dessert intact. No matter the nutritional breakdown, what’s most important is the joy and satisfaction that comes from sharing these lovely *Irish desserts* with friends and family!
FAQ Section
Curious about *Irish desserts*? You’re not alone! Here are some common questions I get, along with my personal insights to help you out:
- What makes *Irish desserts* different from other desserts?
Irish desserts often feature rich, simple ingredients like butter, sugar, and dried fruits, giving them a distinct hearty flavor. They’re traditionally comforting and are perfect for family gatherings or festive occasions! - Can I make *Irish desserts* ahead of time?
Absolutely! Many *Irish desserts* actually taste better the next day as the flavors meld together. Just make sure to store them properly, and you can enjoy them for a few days after baking! - Are there any gluten-free options for *Irish desserts*?
Yes! You can use gluten-free flour blends to create a delicious gluten-free version of traditional *Irish desserts*. Just make sure to look for a blend that includes xanthan gum to help with texture! - How can I add a twist to classic *Irish desserts*?
Get creative! You can incorporate different dried fruits, like cranberries or apricots, or add spices like cardamom or orange zest for a fresh take. Just remember to keep the balance of wet and dry ingredients in mind! - What drinks pair well with *Irish desserts*?
You can’t go wrong with a warm cup of Irish coffee or a robust black tea. Both complement the rich flavors of *Irish desserts* beautifully. If you’re feeling adventurous, a splash of Irish whiskey in your coffee can elevate your dessert experience!
These are just a few of the questions I get about *Irish desserts*. If you have any more, don’t hesitate to ask! Happy baking!
Print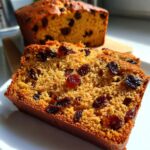
Irish Desserts: 7 Heartwarming Treats to Savor
- Total Time: 70 minutes
- Yield: 8 servings 1x
- Diet: Vegetarian
Description
Traditional Irish desserts that are rich and flavorful.
Ingredients
- 4 cups of flour
- 2 cups of sugar
- 1 cup of butter
- 4 eggs
- 1 cup of milk
- 1 tablespoon of baking powder
- 1 teaspoon of vanilla extract
- 1/2 cup of raisins
- 1/2 cup of currants
- 1/4 teaspoon of salt
Instructions
- Preheat the oven to 350°F (175°C).
- In a bowl, cream the butter and sugar until light and fluffy.
- Add eggs one at a time, mixing well after each addition.
- Stir in milk and vanilla extract.
- In another bowl, mix flour, baking powder, and salt.
- Gradually add dry ingredients to the wet mixture.
- Fold in raisins and currants.
- Pour batter into a greased baking dish.
- Bake for 45-50 minutes or until golden brown.
- Let cool before serving.
Notes
- Serve warm with cream.
- This dessert can be stored for up to a week.
- Perfect for festive occasions.
- Prep Time: 20 minutes
- Cook Time: 50 minutes
- Category: Dessert
- Method: Baking
- Cuisine: Irish
Nutrition
- Serving Size: 1 slice
- Calories: 350
- Sugar: 25g
- Sodium: 200mg
- Fat: 15g
- Saturated Fat: 9g
- Unsaturated Fat: 6g
- Trans Fat: 0g
- Carbohydrates: 50g
- Fiber: 2g
- Protein: 5g
- Cholesterol: 60mg
Keywords: Irish desserts, traditional desserts, baking