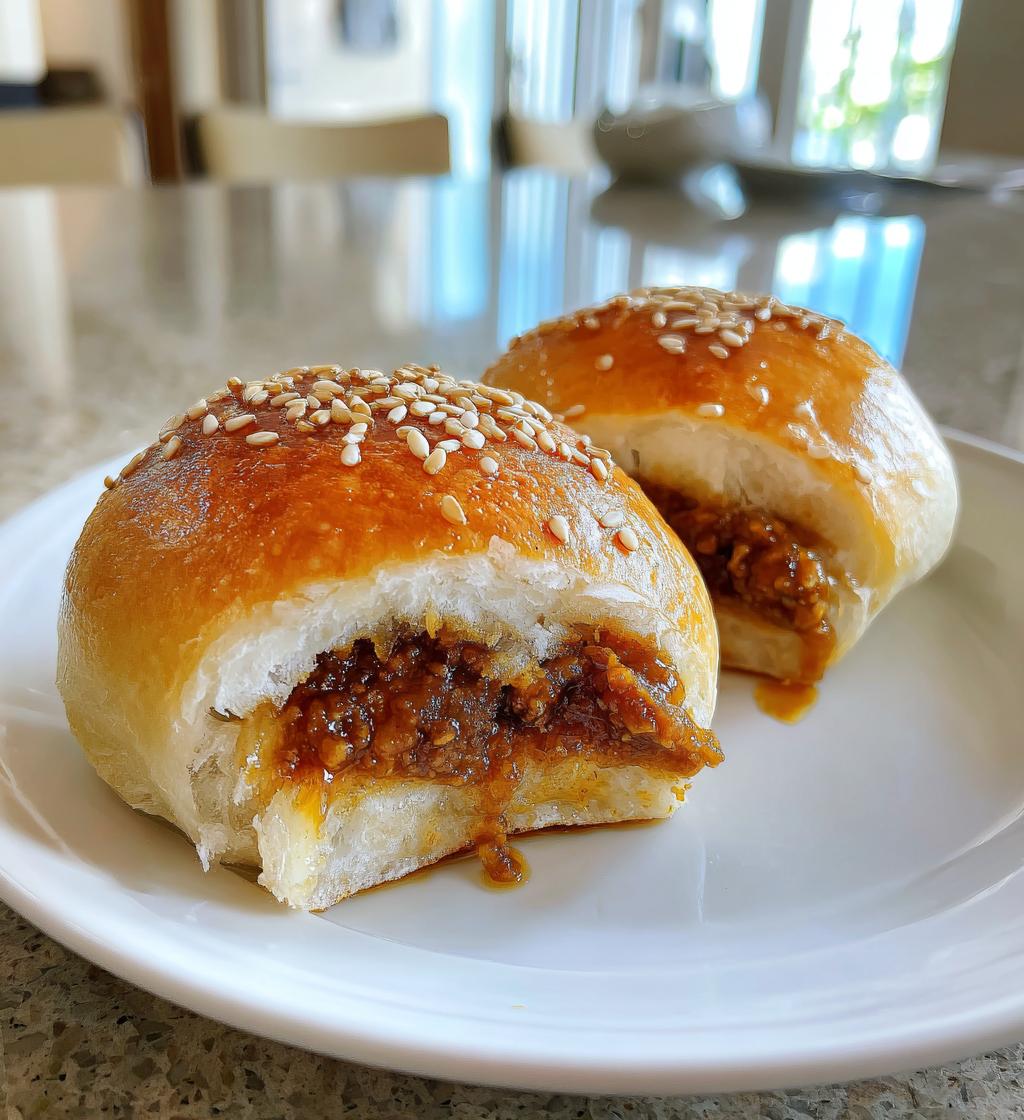
I still remember the first time I bit into a warm Japanese curry bun at a tiny bakery in Tokyo. The golden, slightly crisp exterior gave way to a fluffy dough wrapped around a rich, savory curry filling – it was pure magic in snack form! That moment sparked my love affair with these irresistible treats that work equally well as a quick lunch or afternoon pick-me-up.
What I love most about Japanese curry buns (or “kare pan” as they’re called there) is their perfect balance. The soft bread hugs a flavorful curry center that’s just thick enough to stay put when you take a bite. You can bake them for a lighter version or go all out with deep-fried indulgence – both methods deliver that satisfying contrast of textures. These buns have become my go-to when I want something hearty but not too heavy, and trust me, once you try them, you’ll understand why they’re so popular in Japan!
Why You’ll Love This Japanese Curry Bun Recipe
Once you try these golden pockets of joy, you’ll wonder how you ever lived without them. Here’s what makes this recipe a total winner:
- That perfect crunch-to-fluff ratio: Baked just right, the exterior gets this gorgeous golden crispness that gives way to the softest, pillowy dough – it’s texture heaven in every bite.
- Flavor bombs inside: The rich, savory Japanese curry filling (I use my favorite store-bought block for convenience) packs such an umami punch, you’ll catch yourself sneaking extra spoonfuls before sealing the buns.
- Endlessly adaptable: Not feeling curry? Swap in leftover stew, cheesy potatoes, or even a sweet red bean paste if you’re feeling adventurous – the dough works with everything.
- Guaranteed crowd-pleaser: I’ve yet to meet anyone who doesn’t go wild for these. They disappear faster than I can plate them at parties, and kids especially love the handheld format.
Seriously, whether you bake or fry them, these buns hit all the right notes – comfort food at its absolute best.
Ingredients for Japanese Curry Buns
Gathering your ingredients is half the fun – and don’t worry, everything here is easy to find! I like to separate mine into little bowls like they do on cooking shows (makes me feel fancy), but you do you. Here’s what you’ll need:
For the dough:
- 2 cups all-purpose flour (spoon it in, don’t scoop!)
- 1 tsp sugar (just enough to wake up the yeast)
- 1 tsp salt (trust me, it makes all the difference)
- 1 tsp instant yeast (the little miracle worker)
- 3/4 cup warm water (think baby bottle temperature – about 110°F)
- 2 tbsp vegetable oil (any neutral oil works)
For the filling:
- 1 1/2 cups prepared Japanese curry (go with your favorite brand – I’m partial to the Golden Curry medium hot)
For finishing:
- 1 egg, beaten (for that gorgeous golden shine)
- 1 tbsp sesame seeds (optional, but they add such nice crunch)
Pro tip from my Tokyo bakery adventures: let your curry filling cool completely before using – warm filling makes the dough sticky and harder to work with. I usually make mine the night before and stash it in the fridge.
Equipment You’ll Need
Don’t stress about fancy gadgets – you probably have most of what you need already in your kitchen! Here’s my go-to lineup for making these curry buns, whether you’re baking or frying:
- Large mixing bowl: My trusty ceramic one gets the job done, but any big bowl works
- Wooden spoon or spatula: For mixing that dough until it comes together
- Clean work surface: I just wipe down my counter, but a silicone mat works too
- Rolling pin: To flatten those dough balls – if you don’t have one, a wine bottle works in a pinch!
- Baking sheet: Line it with parchment if you’re baking (no sticking worries)
- Pastry brush: For that beautiful egg wash – a folded paper towel works too
If you’re feeling indulgent and going the fried route (oh yes!), you’ll also want:
- Deep fryer or heavy pot: My grandma’s cast iron Dutch oven is perfect
- Slotted spoon: For safely flipping and removing those golden beauties
- Thermometer: Crucial for maintaining that perfect 350°F oil temp
See? Nothing too crazy. The beauty of this recipe is how approachable it is – no special equipment required to make something that tastes like it came straight from a Tokyo bakery!
How to Make Japanese Curry Buns
Alright, let’s get to the fun part – turning these simple ingredients into golden pockets of curry goodness! I’ll walk you through each step just like my Tokyo bakery friend taught me. Don’t worry if you’re new to bread-making – this dough is super forgiving.
Prepare the Dough
First, whisk together your flour, sugar, salt, and that magical instant yeast in your big mixing bowl. Make a little well in the center – that’s where we’ll pour our warm water and oil. Now here’s my secret: mix it with a wooden spoon until it just comes together, then ditch the spoon and get your hands in there!
Knead for about 5 minutes right in the bowl (less cleanup!) until it forms a smooth ball that springs back when poked. The dough should feel slightly tacky but not sticky – if it’s sticking to your fingers, add a dusting more flour. Too dry? A teaspoon of water at a time does the trick.
First Rise
Shape your dough into a neat ball and plop it back in the bowl. Cover with a damp kitchen towel (I use a clean shower cap – works perfectly!) and let it rest in a warm spot. No fancy proofing box needed – I just turn my oven light on and pop the bowl in there.
Now the hard part: waiting! In about an hour, your dough should double in size. How to tell? Poke it gently – if the indentation stays, it’s ready. If it springs back, give it 15 more minutes. This slow rise develops amazing flavor, so don’t rush it!
Shape and Fill the Buns
Punch down that puffy dough (so satisfying!) and turn it out onto a lightly floured surface. Divide into 8 equal pieces – I use my kitchen scale for precision, but eyeballing works too. Roll each into a ball, then flatten into a 4-inch circle with slightly thicker center.
Now for the star: place 2 tablespoons of cooled curry in the center. Here’s the crucial part: pinch the edges together tightly like you’re making a little money pouch! Roll gently between your palms to smooth out any seams. Any leaks, and you’ll have curry lava erupting in your oven – not cute.
Second Rise and Bake
Arrange your sealed buns seam-side down on a parchment-lined baking sheet, giving them space to grow. Cover again and let them puff up for 30 minutes – they won’t quite double this time, but should look noticeably plumper.
Preheat your oven to 375°F (190°C) during the last 10 minutes. Brush each bun with beaten egg (this gives that gorgeous golden shine) and sprinkle with sesame seeds if using. Bake for 15-20 minutes until they’re deeply golden and sound hollow when tapped underneath. That heavenly smell will have everyone crowding your kitchen!
Optional Fried Method
Want that authentic kara-age pan experience? Heat 2 inches of neutral oil to 350°F (175°C) in a heavy pot. Carefully lower in a few buns at a time – don’t crowd them! Fry for about 2 minutes per side until they’re that perfect golden-brown. Drain on a wire rack lined with paper towels.
Pro tip: keep an eye on the oil temp – too hot and they’ll burn, too cool and they’ll soak up oil. I use a candy thermometer clipped to the pot. The result? Crispy, crackly exterior giving way to fluffy dough and molten curry center – absolute perfection!
Tips for Perfect Japanese Curry Buns
After making countless batches (and eating even more!), I’ve picked up some game-changing tricks that’ll take your curry buns from good to bakery-level amazing. These are the little details that make all the difference:
Get your curry thickness just right: Too runny and it’ll burst through the dough, too thick and it turns pasty. The perfect consistency? When you can mound it on a spoon and it holds its shape briefly before slowly collapsing. If your curry’s too thin, simmer it longer or add a cornstarch slurry (1 tsp cornstarch + 1 tbsp water).
Seal those edges like a pro: My first few attempts looked like curry volcanoes! Now I use the “pinch and twist” method – gather the dough edges like a pouch, pinch firmly, then twist and tuck the excess underneath. A dab of water on the edges helps create a tight seal. Still nervous? Chill the filled buns for 15 minutes before baking – the firm dough holds better.
Don’t let them overproof: That second rise is sneaky! 30 minutes is usually perfect, but in warm kitchens they can puff too fast. Overproofed dough collapses in the oven. Watch for them to look slightly swollen, not balloon-like. If you poke gently and the indent stays, they’re ready. If it springs back immediately, wait 5 more minutes.
Egg wash magic: For that gorgeous golden sheen, beat your egg with a teaspoon of water – it thins it just enough to brush smoothly. Apply two thin coats (after the second rise and right before baking) rather than one thick one. And don’t skip the underside edges – that’s where buns often look pale!
The steam trick for extra fluff: For bakery-style softness, I throw a few ice cubes into the oven’s bottom tray when I preheat. The initial burst of steam gives the buns an extra lift. Just be quick when opening the oven door to prevent heat loss. Works like a charm every time!
Serving Suggestions
Oh, the joy of deciding how to enjoy these golden beauties! While they’re absolutely perfect all on their own (I’ve been known to eat three in one sitting, no shame), here are my favorite ways to serve them that’ll make you feel like you’re at a Tokyo café:
Classic Japanese combo: Serve with a small bowl of miso soup and some crisp pickled vegetables (my local market carries these amazing takuan yellow daikon pickles that cut through the richness perfectly). The salty-sour crunch balances the curry’s warmth so nicely.
Tea time treat: A pot of green tea – especially genmaicha with its toasty rice notes – makes these feel extra special in the afternoon. The slight bitterness cleanses your palate between bites. My grandma always said tea makes any snack feel like an occasion!
Lunchbox favorite: Pack them slightly warm in a bento box with some edamame and a little side salad. They travel surprisingly well and stay delicious at room temp – my kids go nuts when these appear in their lunch bags.
Honestly though? My favorite way is straight off the baking sheet while they’re still almost too hot to handle. That first bite when the steam escapes and the curry aroma hits you? Pure bliss. Just don’t burn your tongue like I always do!
Storing and Reheating
Let’s talk about keeping these curry buns tasting amazing even days later – because let’s be real, you might want to save some for later (or maybe that’s just me being overly optimistic). Here’s how I keep them fresh:
Room temp storage: If you can resist eating them all immediately (no judgment if you can’t!), they’ll stay delicious in an airtight container at room temperature for about a day. I like to tuck a paper towel underneath to absorb any moisture – keeps the bottoms from getting soggy.
Freezing for later: This is my secret weapon! Once completely cooled, wrap each bun individually in foil, then pop them in a freezer bag. They’ll keep for up to 2 months this way. When the craving hits, no need to thaw – just unwrap and reheat straight from frozen.
Reheating magic: To bring back that fresh-baked magic, skip the microwave (it makes them rubbery – trust me, I learned the hard way). Instead, warm them in a 350°F (175°C) oven for 5-7 minutes if thawed, or 10-12 minutes from frozen. The oven revives that wonderful crispness on the outside while keeping the inside fluffy.
Pro tip: For fried buns, revive them by quickly refrying at 375°F (190°C) for just 30-60 seconds. It crisps them right back up like they’re fresh out of the oil! Just keep an eye on them – they go from golden to dark real fast.
Japanese Curry Bun FAQs
Over the years, I’ve gotten so many great questions about these buns from friends and readers – here are the ones that come up most often with the solutions I’ve discovered through (sometimes messy!) trial and error:
Can I use homemade Japanese curry instead of store-bought?
Absolutely! I make mine from scratch about half the time. The key is making sure it’s thick enough – I simmer mine until it mounds on a spoon without dripping. Pro tip: add a tablespoon of panko breadcrumbs to soak up extra moisture if needed. Let it cool completely before filling – warm curry turns your dough into a sticky nightmare!
How can I make vegan Japanese curry buns?
Easy peasy! For the dough, just use warm plant-based milk instead of water. The filling’s already vegan if you use vegetable-based curry. Instead of egg wash, brush with olive oil or melted vegan butter for shine. For binding power, a flax egg (1 tbsp ground flax + 3 tbsp water) works great in the dough. My vegan friends say they taste just as amazing!
Help! My buns burst open in the oven – what went wrong?
Oh no – we’ve all been there! Usually this means either: 1) You overfilled them (stick to 2 tbsp max!), 2) Didn’t seal the edges tightly enough (really pinch hard!), or 3) Your curry was too wet. Next time, try chilling the filled buns for 15 minutes before baking – the firm dough holds its shape better. And if a few still split? Call them “rustic” and eat them anyway!
Can I prepare these ahead of time?
Yes! I often shape them the night before, cover tightly, and refrigerate. In the morning, I let them sit at room temp for 30 minutes before the second rise. You can also freeze before the second rise – thaw overnight in the fridge, then proceed with the recipe. Game changer for easy entertaining!
Why are my buns pale instead of golden?
Three likely culprits: 1) Old baking powder (check the date!), 2) Oven runs cool (get an oven thermometer – they’re cheap!), or 3) Skipped the egg wash. For extra color, I sometimes add 1/4 tsp turmeric to the dough – gives a beautiful golden hue naturally!
Nutrition Information
Okay, let’s talk nutrition – but remember, I’m a home cook, not a dietitian! These numbers are estimates since ingredients vary (especially depending on which curry brand you use). Here’s the breakdown per bun if you’re curious:
- Calories: About 220 (perfect little energy boost!)
- Carbs: 32g (mostly from that fluffy dough we worked so hard on)
- Protein: 6g (thanks to the eggs and flour)
- Fat: 8g (but hey, it’s the good kind of fat from vegetable oil)
- Sugar: 3g (just enough to balance the savory filling)
- Fiber: 2g (those carrots count for something!)
If you’re watching sodium, know that Japanese curry can be salty – I sometimes use low-sodium versions. And of course, frying instead of baking will bump up the fat content, but… worth it sometimes, right? As my grandma used to say, “Everything in moderation – including moderation!”
Remember, these are happy little treats meant to be enjoyed – I don’t count calories when I’m savoring that first glorious bite of warm curry goodness!
Print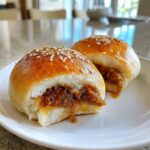
Irresistible Japanese Curry Buns with Perfect Golden Crust
- Total Time: 1 hour 50 minutes
- Yield: 8 buns 1x
- Diet: Vegetarian
Description
A delicious baked or fried bun filled with savory Japanese curry, perfect for a snack or light meal.
Ingredients
- 2 cups all-purpose flour
- 1 tsp sugar
- 1 tsp salt
- 1 tsp instant yeast
- 3/4 cup warm water
- 2 tbsp vegetable oil
- 1 1/2 cups Japanese curry (prepared)
- 1 egg (for egg wash)
- 1 tbsp sesame seeds (optional)
Instructions
- Mix flour, sugar, salt, and yeast in a bowl.
- Add warm water and vegetable oil, knead until smooth.
- Let the dough rise for 1 hour or until doubled in size.
- Divide the dough into 8 equal portions and roll into balls.
- Flatten each ball, add 2 tbsp of curry filling, and seal.
- Place on a baking sheet, cover, and let rise for 30 minutes.
- Brush with egg wash and sprinkle sesame seeds if desired.
- Bake at 375°F (190°C) for 15-20 minutes until golden brown.
Notes
- Use store-bought Japanese curry for convenience.
- Adjust sugar and salt to taste.
- For fried curry buns, deep-fry at 350°F (175°C) until golden.
- Prep Time: 1 hour 30 minutes
- Cook Time: 20 minutes
- Category: Snack
- Method: Baking or Frying
- Cuisine: Japanese
Nutrition
- Serving Size: 1 bun
- Calories: 220
- Sugar: 3g
- Sodium: 350mg
- Fat: 8g
- Saturated Fat: 2g
- Unsaturated Fat: 5g
- Trans Fat: 0g
- Carbohydrates: 32g
- Fiber: 2g
- Protein: 6g
- Cholesterol: 25mg
Keywords: Japanese curry bun, curry pan, baked bun, savory snack